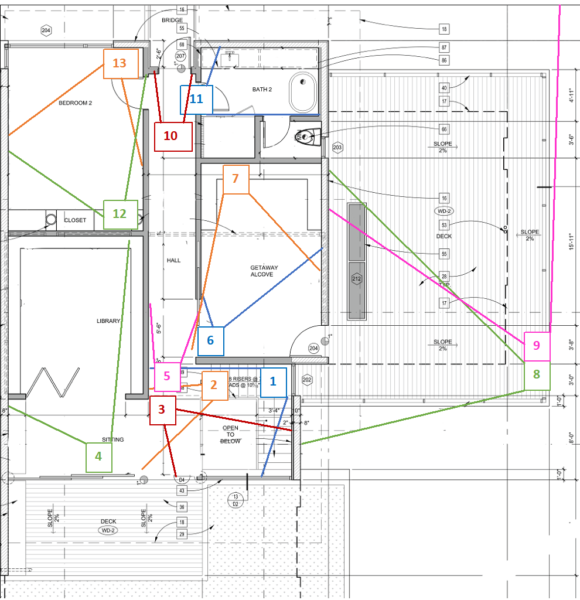
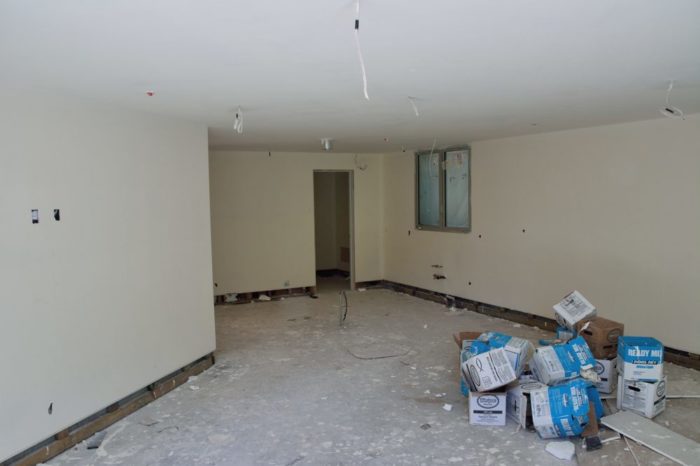
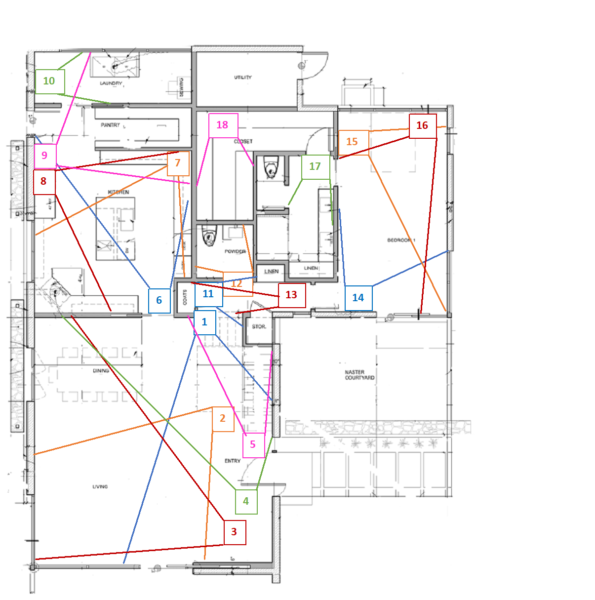
Below is a floor-plan of the second floor. Each numbered box represents one of the following 13 photographs showing the interior of the second floor. The lines extending from each box extend to the locations on the wall that are at the edges of each image. The second floor consists of three main rooms: our office, a guest bedroom, and a general purpose room, labelled “Getaway Alcove,” that we will use for watching TV, storage, a place with a hide-a-bed where some can sleep, if necessary. In addition, there is a sitting area outside of the office and a guest bathroom.
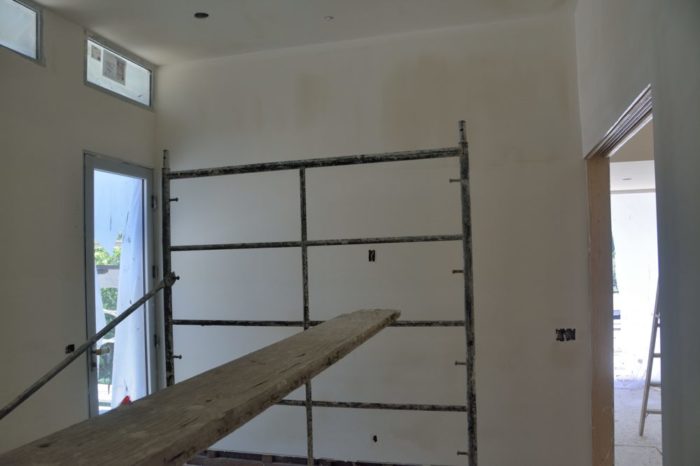
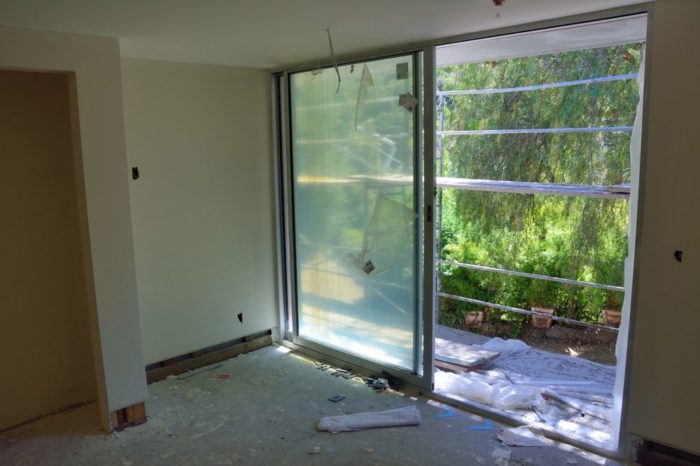
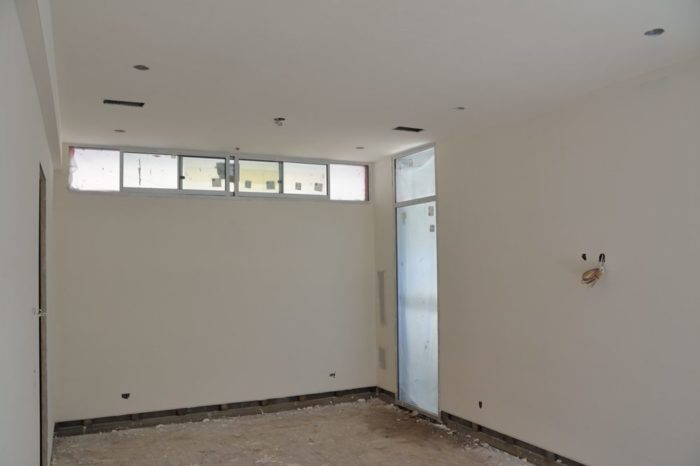
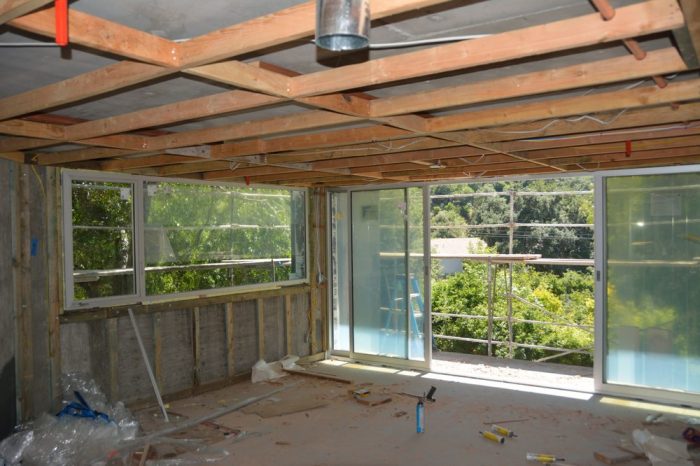
Second floor map – Each numbered box represents one of the following 13 photographs. Use this to orient yourself as you move through the picture. 2nd floor – 1: View from the stairway landing to the sitting area outside of the office. 2nd floor – 2: This shows the sitting area outside the office. To the left is a sliding door that opens to a small deck surrounded by a green roof. The back wall of this space and the adjacent deck is another board-formed wall. The office is to the right.2nd floor – 3: This will be our office where we will keep our computers and files. The ceilings in this and part of the getaway alcove are 11 feet high with clerestory windows providing indirect light.
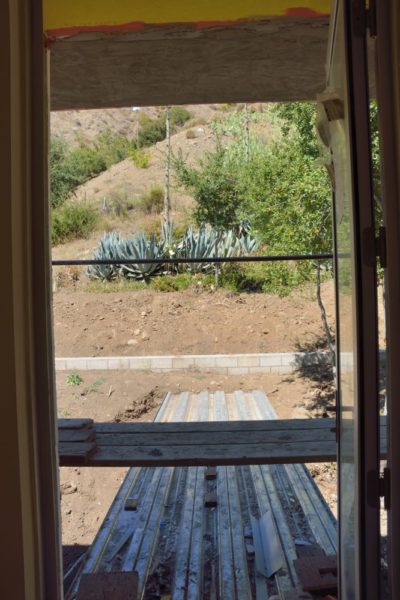
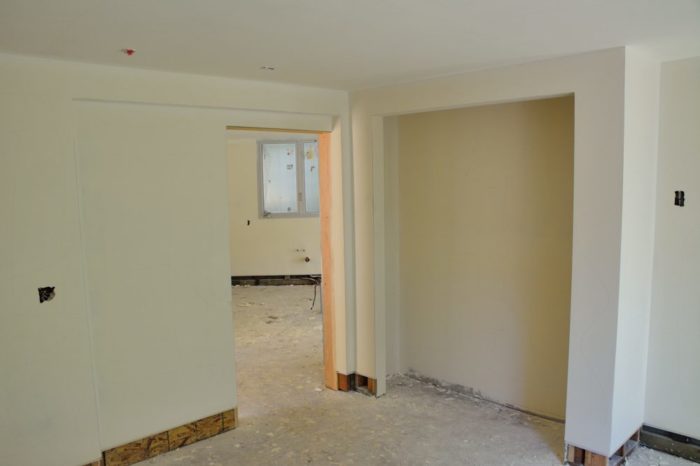
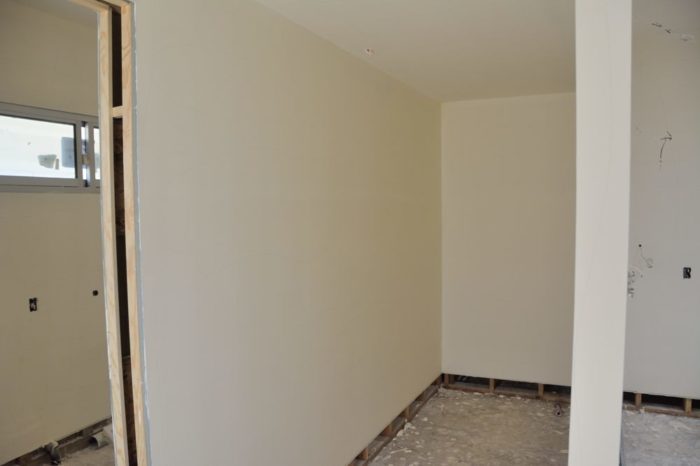
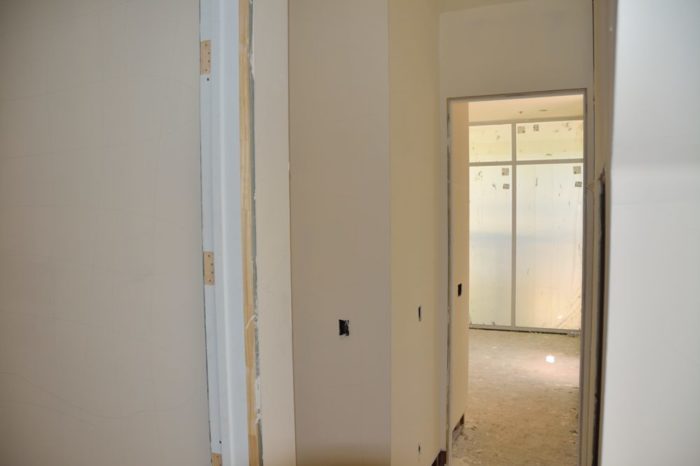
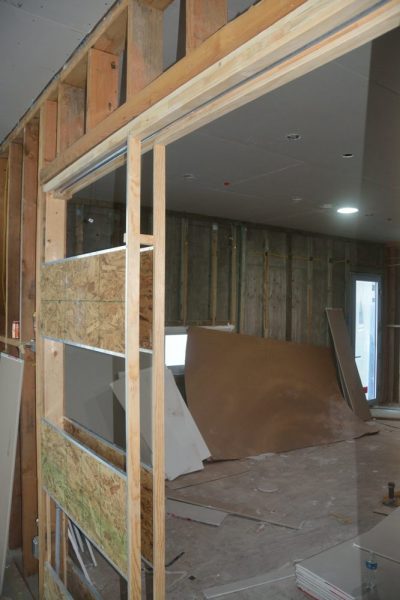
2nd floor – 5: The view down the 2nd floor hallway from the stairway to the door at the back. The getaway alcove is on the right with the guest bathroom at the rear. The guest bedroom is at the back on the left.
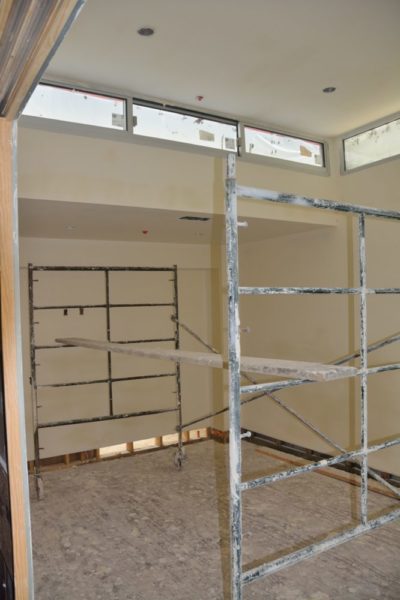
2nd floor – 6: View of the getaway alcove from the hallway. We plan to mount a TV on the wall on the left.
2nd floor – 7: A second view of the getaway alcove from the other end. The opening on the right opens into the hallway. The door on the left opens to the deck.2nd floor – 8: View of the house from the edge of the deck off of the getaway alcove. The opening on the left is a window onto the stairway. The one to the right of it is a door back into the house. The small, high, horizontal windows are the clerestory windows under the overhang of the high roof. The black, horizontal structure on the deck under the scaffolding is the top of the skylight that illuminates the master bathroom.2nd floor – 9: A second view from the same spot looking north to the backyard and the hillside above it. The way that the high roof sits above the main second-floor roof is clearly visible here. The opening toward the back is a window into the guest bathroom.
2nd floor – 10: Moving back into the house, this is the view out of the door at the back of the hallway. The door opens onto what will be the bridge to the backyard.
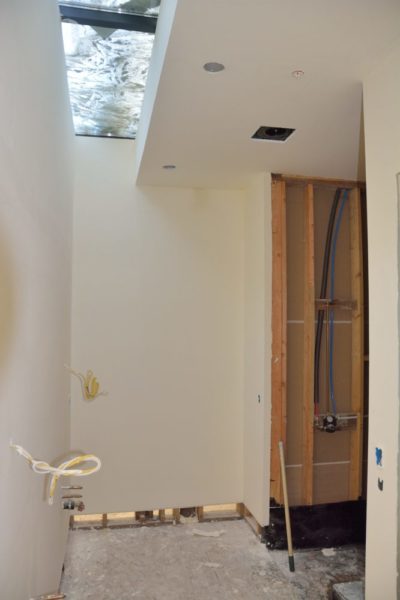
2nd floor – 11: Guest bathroom. The bright light in the upper left is from the skylight that runs across that side of the room over the vanity. The shower and a room with the toilet open to the right.
2nd floor – 12: View of the guest room from the hallway door. Twin poster beds will go on the wall on the right. The space in the corner, next to the closet, will be a small desk or dressing table. 2nd floor – 13: North (with the large window) and west (with the small window) walls of the guest bedroom. The door to the hallway is to the right.
Apartment
To complete the tour here are a few pictures of the apartment. This is a simple space, but remarkably spacious. It has two main rooms: a combination entrance / kitchen / living room and a bedroom. In addition, there is a nice bathroom with a shower and a pantry/storage area. Below is plan for the apartment that shows the location of six photographs.
Apartment map – Each numbered box represents one of the following 6 photographs. Use this to orient yourself as you move through the pictures. Apartment 1: View from the entrance. The doorway, just visible on the left, is to the bathroom. The doorway, just visible on the right, goes to the bedroom. The kitchen is directly across the room. The wire rising up in the middle of the floor is for the island. The window will be directly behind the sink providing a great view out to the orchard.Apartment 2: This shows the living room looking past the kitchen that will be in the foreground. The sliding door opens onto a small deck that the living room shares with the bedroom. Apartment 3: Looking back from the kitchen. The living room will be on the left. The wall corner straight ahead is the bedroom, with its door in the middle of the wall. On the right side of the frame is the outside door.Apartment 4: Looking from the sliding doors in the living room back into the kitchen. The visible door is into the pantry.Apartment 5: One view of the bedroom showing the sliding door onto the deck, a spot for a dresser, and part of the closet. One side of the head of the bed will be next to where his photo was taken. Apartment 6: A second view of the bedroom from the other the other side of the head of the bed showing the full closet and the pocket door into the main space.
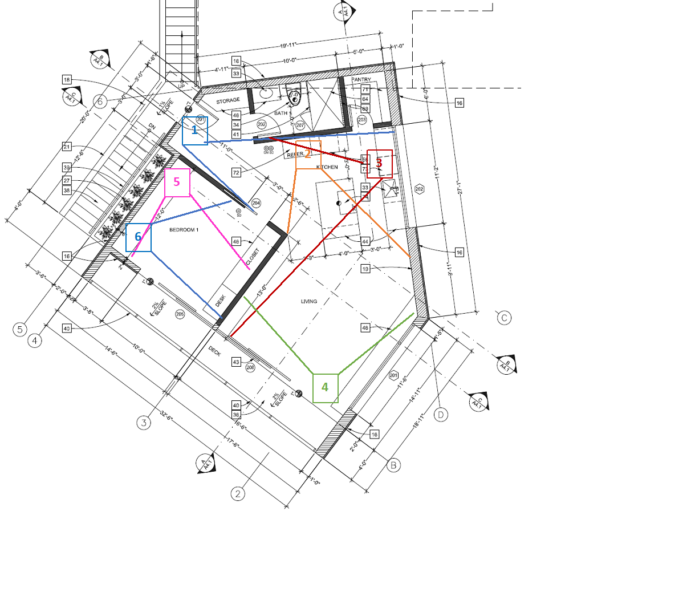
Below is a floor-plan of the first floor. Each numbered box represents one of the following 18 photographs showing the interior of the first floor. The lines extending from each box extend to the locations on the wall that are at the edges of each image. The ground floor consists of four main rooms: the great room, which is a combination living room and dining room, the kitchen, the laundry room, and the master bedroom. In addition, there is a pantry off the kitchen, a powder room, and a bathroom and closet/dressing room attached to the master bedroom.
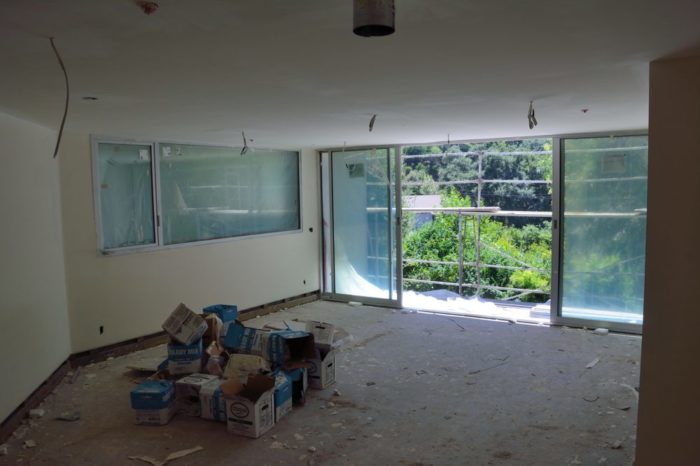
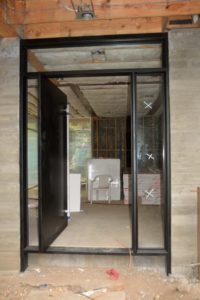
First floor plan – Each numbered box represents one of the following 18 photographs. Use this to orient yourself as you move through the picture.1st Floor – 1: The front door opened to the interior. This is a steel door that swings on a pivot rather than hinges. The ceilings are ten feet high.1st Floor – 2: These are the windows at the front of the great room. The panel on the left is a door that slides into the pocket on the left along with a screen door. Unfortunately, with the plastic sheeting protecting the outside window, the view is obscured. 1st Floor – 3: West wall of the great room. The window on the right will be in the dining room and will get filtered light through the gabion wall. The small circular opening in the opposite wall will be the flue for a high-efficiency wood stove.1st Floor – 4: North wall of the great room. The opening on the left goes into the kitchen. The one on the right leads to a hallway with the guest bath and the master bedroom.
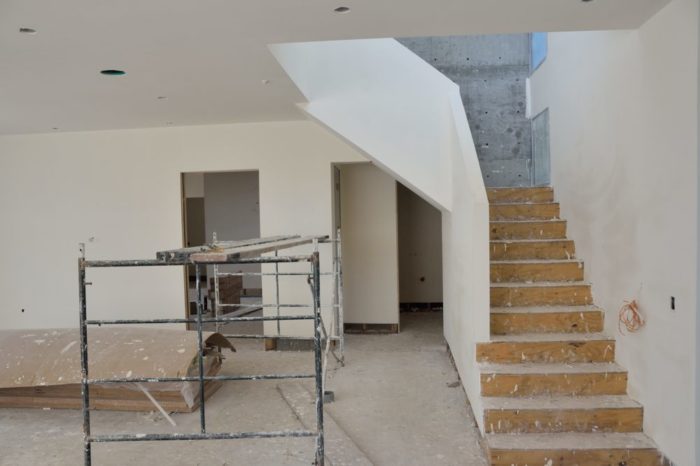
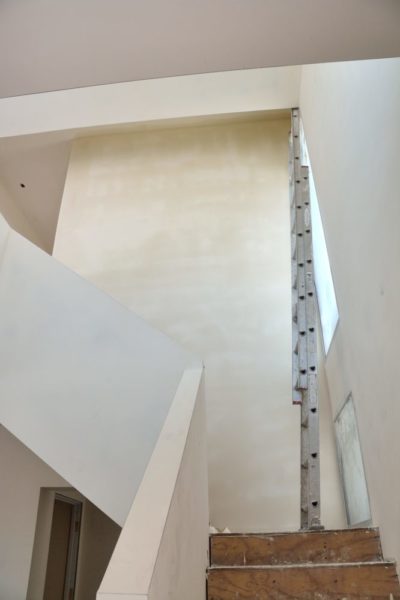
1st Floor – 5: View up the stairway from the second floor. The wall directly ahead is 16 feet high from the landing to ceiling. We are looking for some sufficiently dramatic (but affordable!) treatment for it. The metal on the right is a ladder.
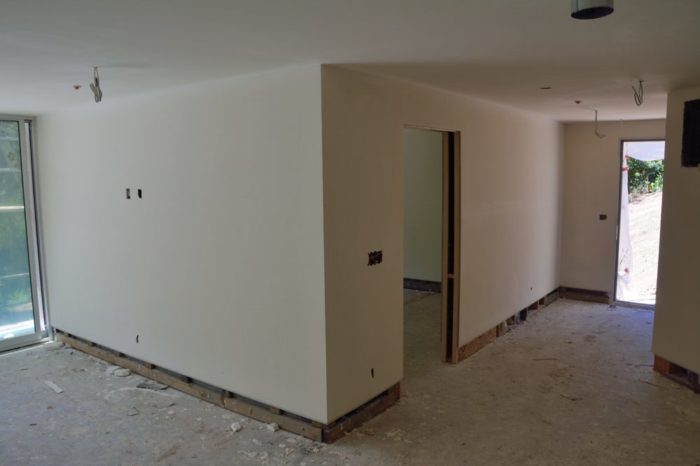
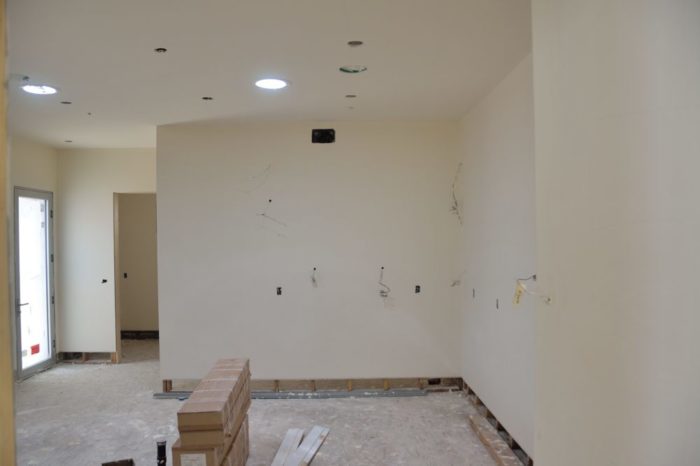
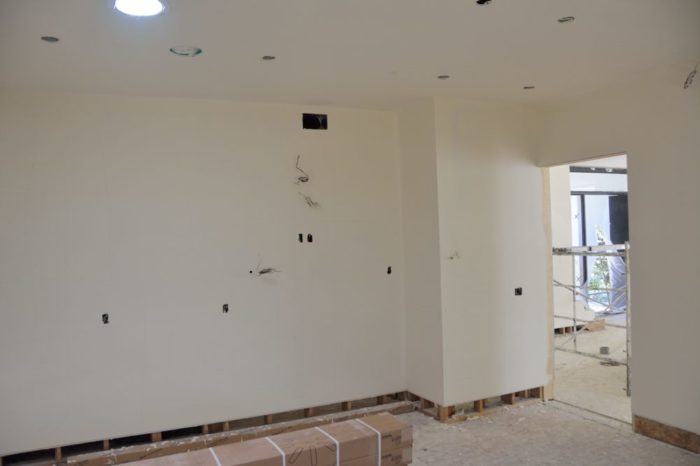
1st Floor – 6: Looking into the kitchen from the great room doorway. Eventually, there will be an island, with two sinks, the dishwasher, and the primary prep space, in the center, roughly where the boxes are now, and many cabinets on the walls. To the back, on the left, are the back door and the entrance to the laundry room. The two bright lights in the ceiling are SolaTubes.1st Floor – 7: The doorway on the left looks back into the great room. The induction cooktop (no natural gas at Modjeska) and oven will be in the opposite corner, on the other side of the island, with cabinets on the walls to either side.1st Floor – 8: The door to the great room is now on the right. To the left of that will be a second oven and the microwave mounted on the wall. To the left of that will be a built in desk and more cabinets. 1st Floor – 9: Swinging the camera further to the left from the picture above, the north edge of the kitchen is now just on the right side of the frame. Straight ahead is the space that will be a large, walk-in pantry. On the very left you can just see into the laundry room.1st Floor – 10: This will be the combination laundry room – plant shed. There will be a large sink located about where the picture was taken. On the left wall will be a washer and dryer. On the right wall will be a stand with multiple plant lights for starting seedlings.1st Floor – 11: Leaving the kitchen area, this is picture looking down the back hall from the entrance to the great room. This is taken from inside the space that will be the coat closet. On the left is part of the door frame and one of the walls for the powder room.
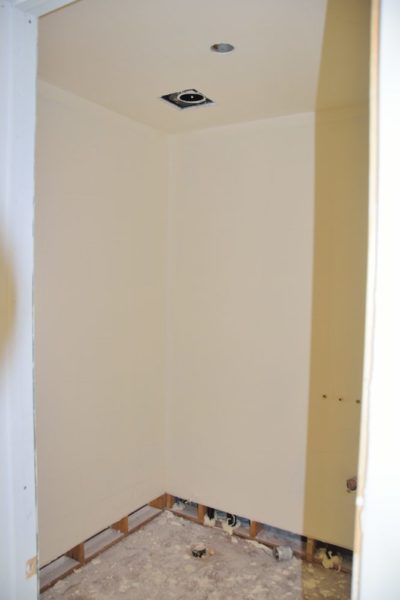
1st Floor – 12: This is looking into what will be the powder room; there is not much to see now. The black pipe sticking out of the floor in the opposite corner will be the toilet connection. Just to the right are the connections for the vanity sink.
1st Floor – 13: Looking back up the hallway, the opening to the great room is is on the left. The coat closet is straight ahead. (The powder room is now off to the right.)
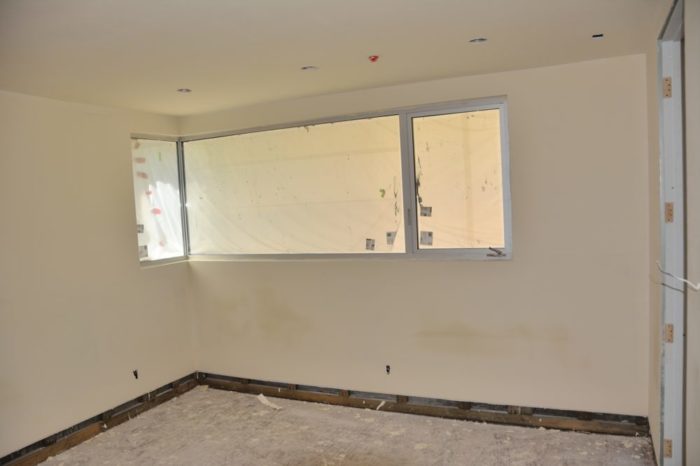
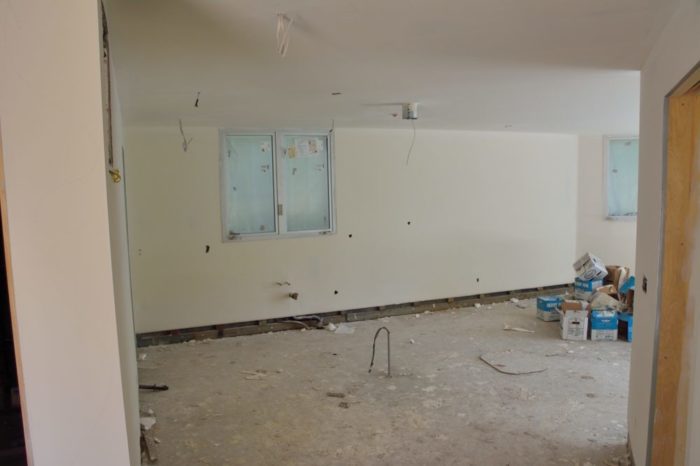
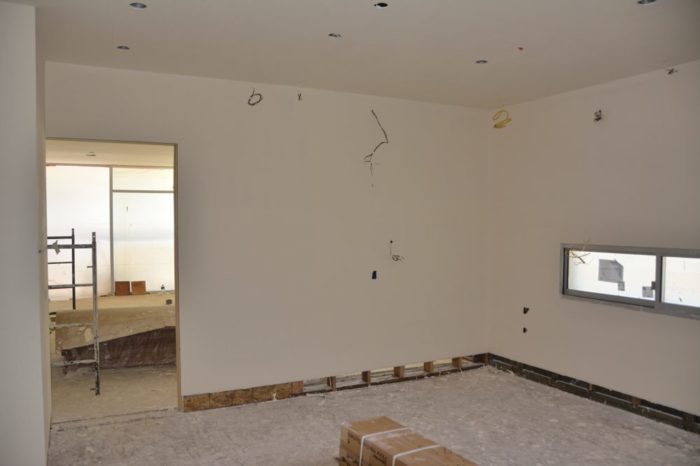
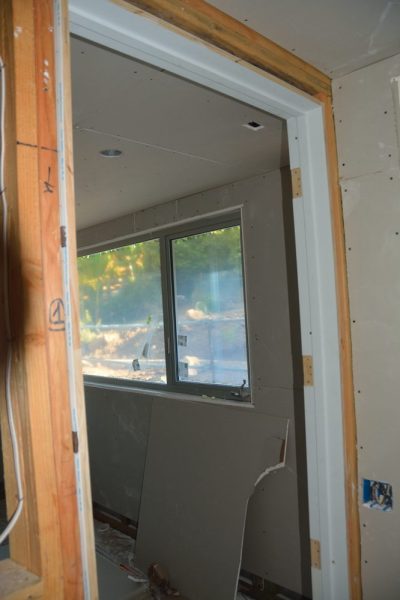
1st Floor – 14: The master bedroom as seen from the hallway door. We plan to put the head of the bed under the high windows across the room. The bottoms of the windows are roughly eight and a half feet above the floor.1st Floor – 15: This picture was taken from the other end of the room beside one end of the bed and shows the west wall of the master bedroom. Because of the plastic protecting the outside of the windows, you cannot really see through them.1st Floor – 16: This was taken from the other side of the head of the bed. On the left is a sliding door that open to a small patio area near the front door. In the middle is the entrance to the hall to the great room. On the right is the opening to the bathroom.
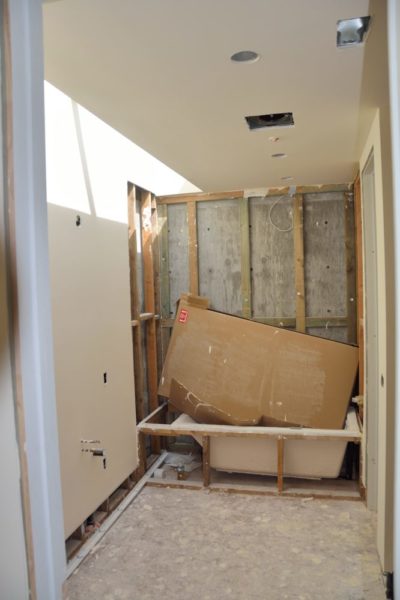
1st Floor – 17: This shows part of the master bathroom. The skylight will be above the vanity running along the wall on the left. The space on the right will be a walk-in shower.
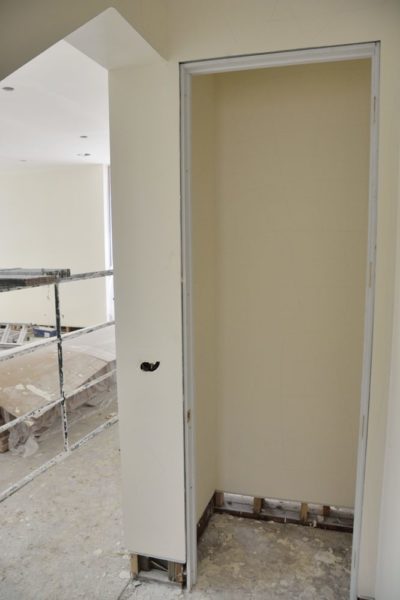
1st Floor – 18: This shows part of the large, L-shaped walk-in closet. This space is large enough to serve multiple purposes, one of which will be as the hub of the audio-visual and home control features of the house as well, as, of course, storage.
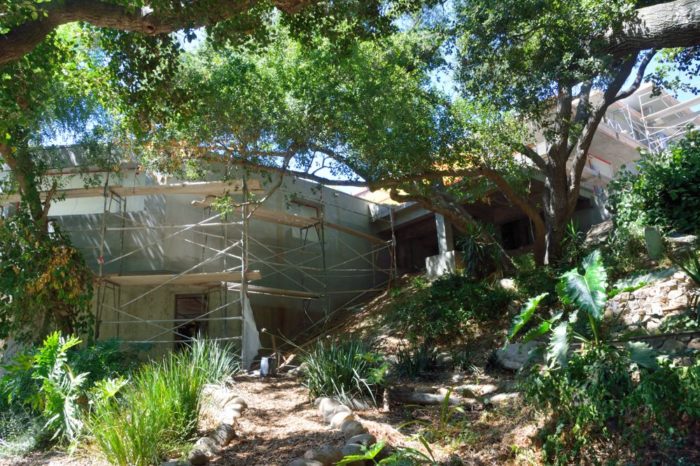
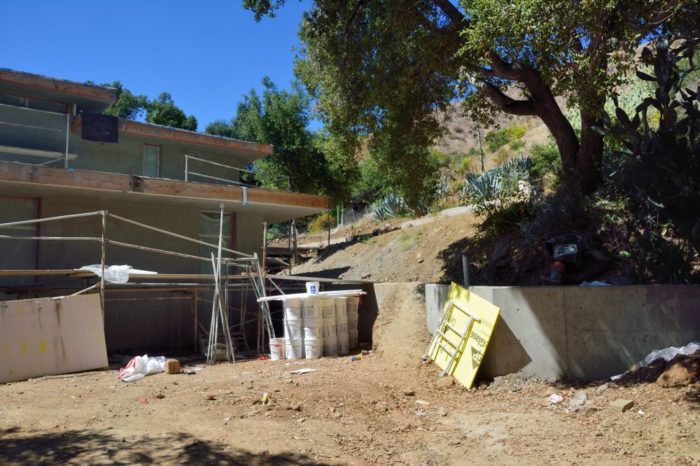
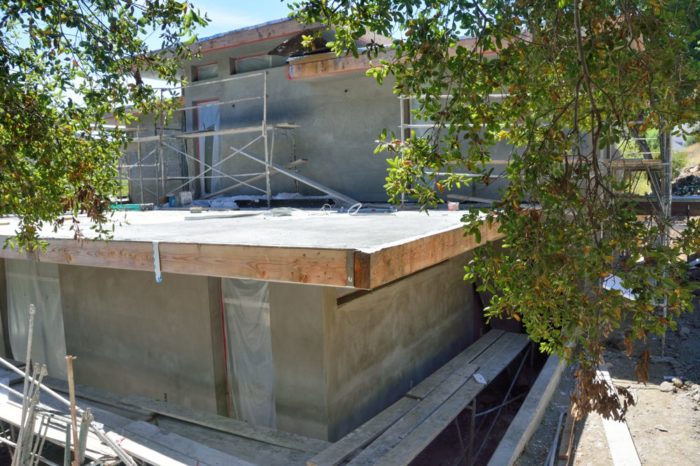
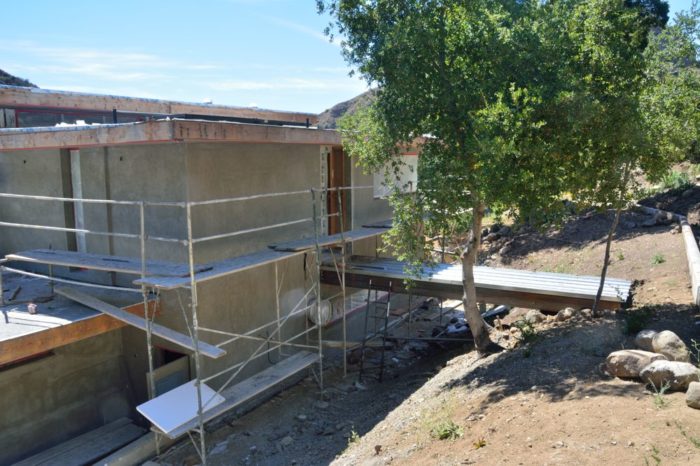
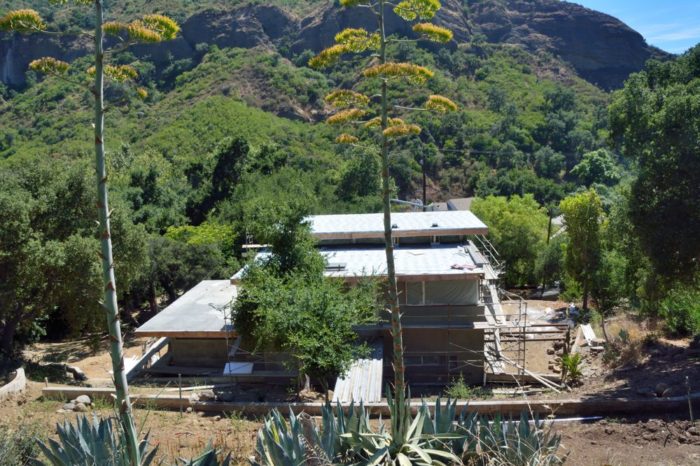
We had hoped to have this photo tour done 2 weeks ago, but reality intervened. Same for the house; things have been going slowly as only a father and son team having been working on it. They have done a great, if glacial job finishing the base coat of the stucco. (The subcontractor had promised a bigger crew and much speedier completion — it seems hard to believe promises from contractors.)
So this will be an entry consisting of photos, all taken on August 3rd, showing the house on the inside and out as of that day. There will be minimal commentary and, for one of my sisters, no discussion of construction details.
To orient yourself, look at the image of the model made by the architect. What you should notice in the model is that the house and the garage/apartment are two completely separate structures, connected by a patio. These two structures are on the lower part of the hillside that comprises our property, with the house completely above the garage/apartment.
The apartment and garage are each five-sided: a rectangle with one of its long sides abutting the hypotenuse of a right triangle. The apartment (its walls are white in this rendition) sits on top of the garage (its walls are rendered in gray). The apartment walls are cantilevered past those of the garage on three sides.
Model produced three and a half years ago by the architect.
The patio, between the apartment and the house, sits on top of a hidden, 10,000 water bag that will be filled with water from the roof of the house that can be used for irrigation or fire control. Because the patio is at the height of the apartment roof if you are on the patio, one of the primary views will be across the apartment roof, part of which (that shown in green) will be a green roof consisting of a mixture of growing sedums. The house itself, has a partial second story; two decks and another green roof cover the rest of the first floor.
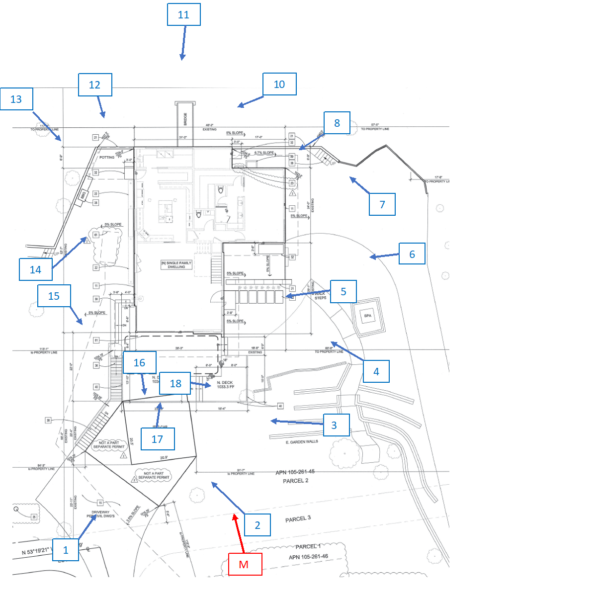
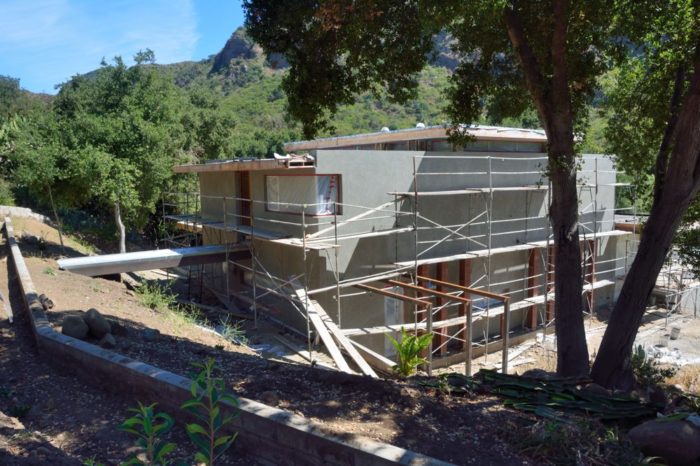
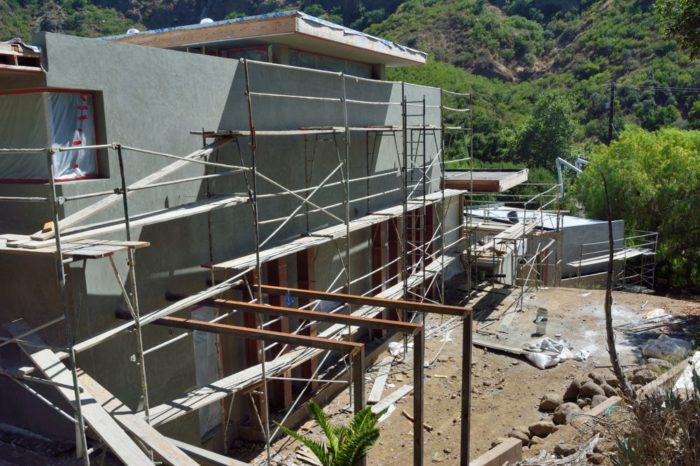
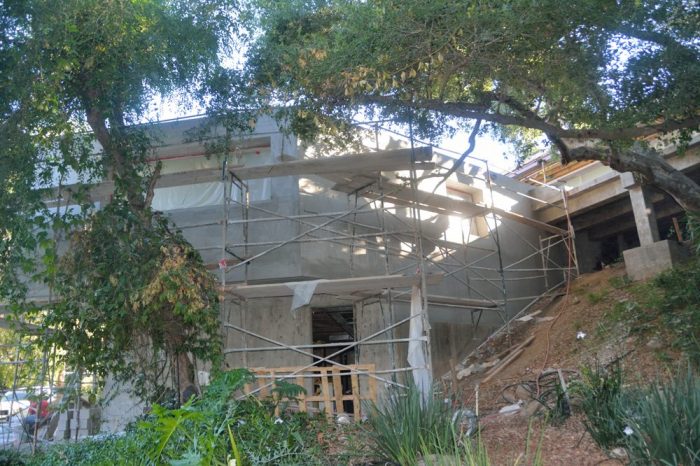
The diagram below shows the layout of the garage/apartment and the house. The red M and the associated line, roughly show the point of view used in the model above. Each of the 15 numbered labels and their associated lines indicate the point of view for the next 15 photos. The number here will be that used to identify the photo. This part of the tour starts in the driveway looking up at the garage. The subsequent photos will then move around the house in a counterclockwise direction. Use this diagram, as necessary, to orient yourself as you view the next 15 photos.
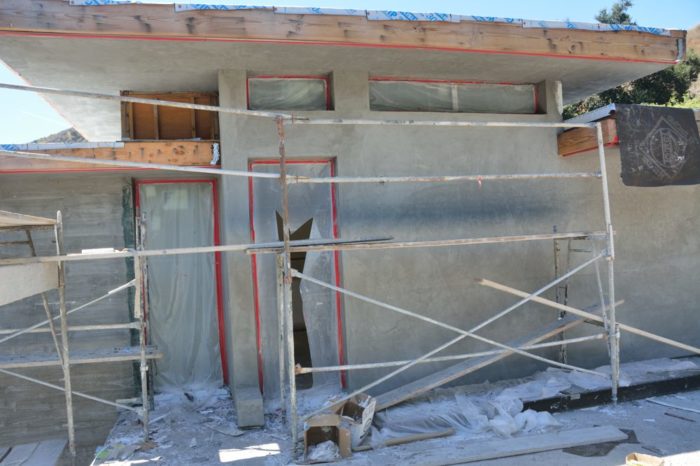
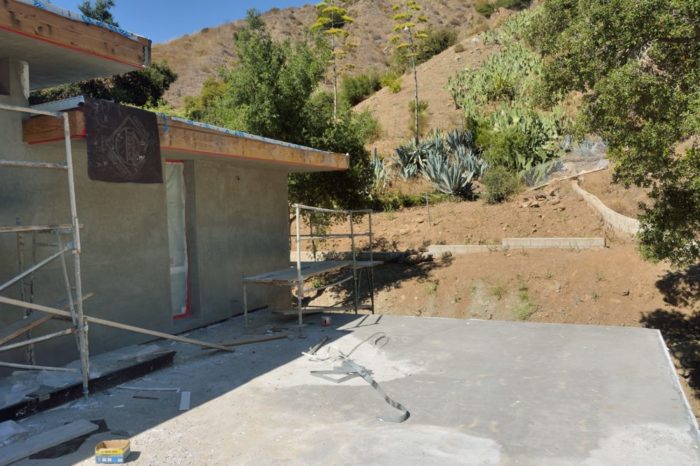
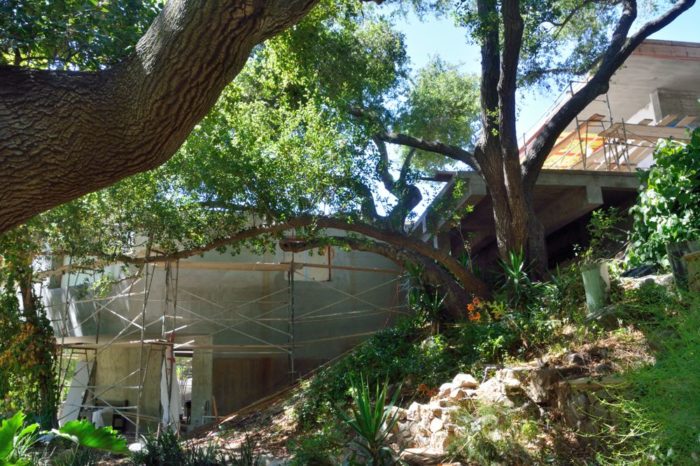
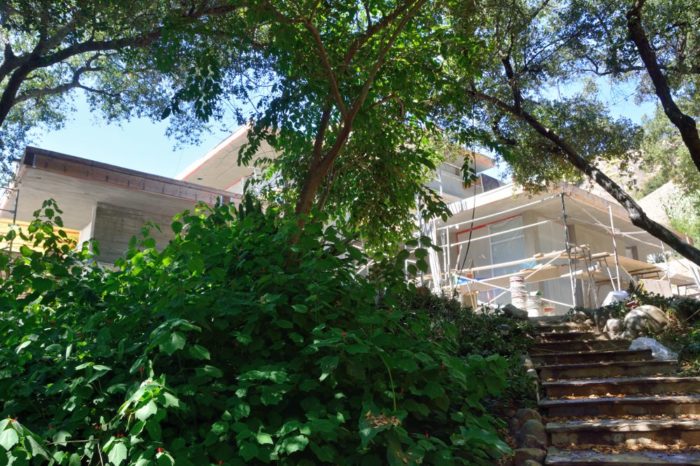
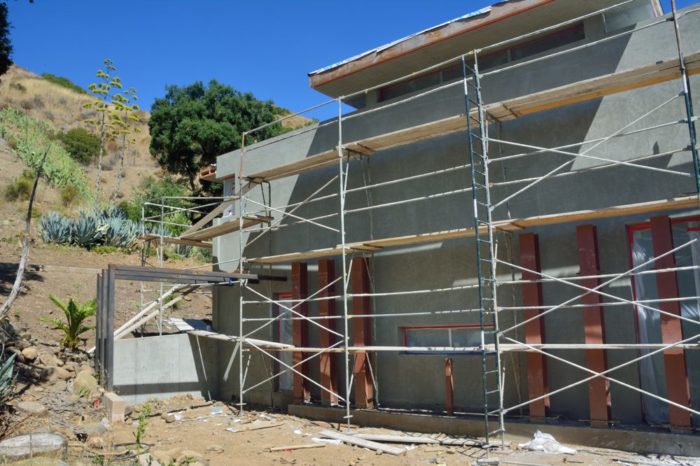
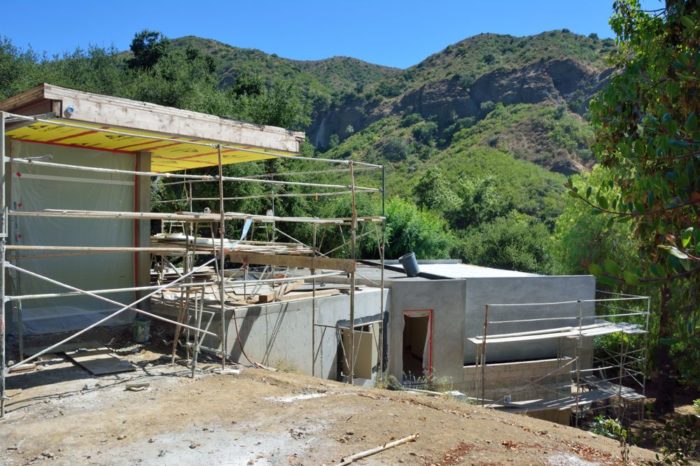
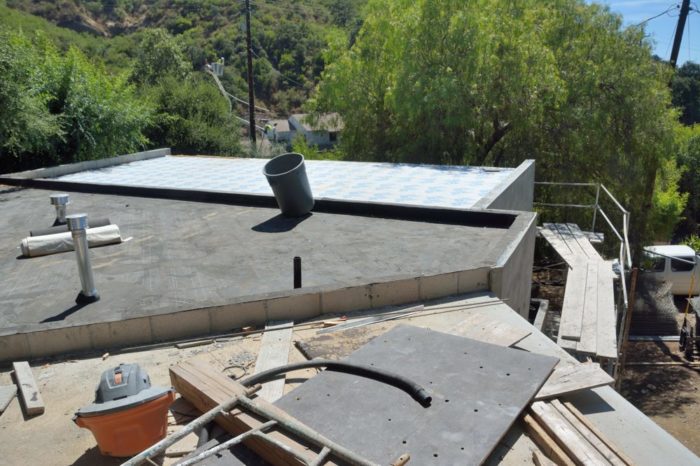
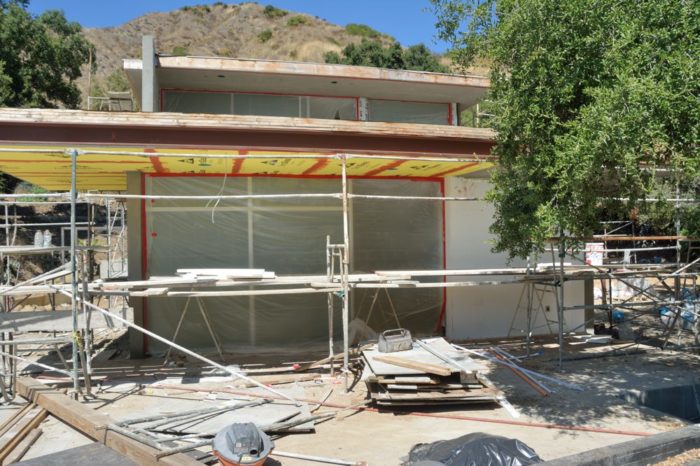
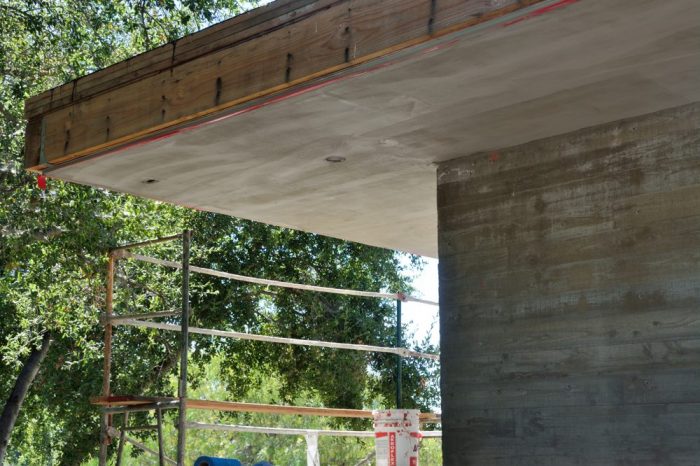
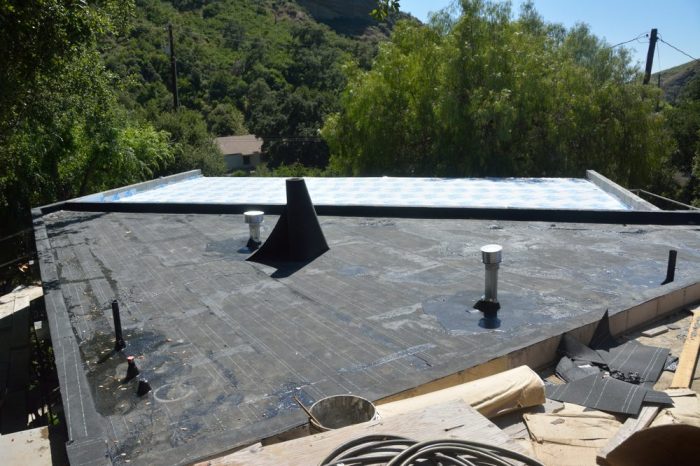
Map of the photos of the outside of the house. Each numbered box shows the point of view of one of the following 17 photos (Note: #9 is intentionally missing.)Outside 1 – The apartment above the garage. The opening of the garage will be the garage door. The apartment has sliding doors from the living room and bedroom onto a small porch.Outside 2 – Garage, with a people door, below, and the apartment, with a window into the living room on the left and above the kitchen sink on the right.Outside 3 – Center left is the apartment above the garage. Moving right is part of the deck, cantilevered so that it sits in the middle of a clump of oaks. Further right you can see the roof overhang for the windows opening onto the deck.Outside 4 – Steps up to the main entrance (which is hidden behind the tree in the middle of the frame. To the left, is the roof overhang for the windows opening onto the deck. To the right, are the windows and walls of the master bedroom. In the middle, you can glimpse the roof of the second floor.Picture 5 – The front door, which is not visible, since it is open and covered in plastic sheeting. The walls on either side were “board formed” and will not be stuccoed. Picture 6 – View of the house from the east driveway. The front door is on the left. The walls and windows of the master are straight ahead below. Above it is a deck. Behind that are the walls of the second floor. Notice that there is a second, high roof, making space for a row of clerestory windows.Outside 7 – Northeast corner of the house with a glimpse of the hillside rising up behind the house. The house continues the visible retaining wall. The dirt ramp in the center of the frame will become a concrete stairway to the backyard.Picture 8 – Northeast corner of the house from above. The walls and windows of the master bedroom are below the patio in the middle and then, setback, the walls of the second floor.Picture 10 – Looking across the back of the house. The bridge will run from a door at the end of the second-floor hallway to the backyard.Outside 11 – View from part way up the hillside looking down on the back of the house.Outside 12 – Northwest corner of the house from up by the chicken coop. The windows visible on the second floor are for the guest room.Outside 13 – The west wall of the house viewed from the northwest. The steel posts and girders will support a cover over the backdoor that opens into the kitchen and laundry room.Outside 13 – West wall of the house from the southeast. Because the western sun is so hot and not shaded by mature trees, we minimized the widows in this wall. The vertical steel posts will support gabbions — rock filled wire cages — that will line most of the first floor of the western wall. In the center is a low, horizontal window that will open into a gap in the gabbions. On the right, is a full-height window into the dining room that that will get light and air filtered through the gabbions.Outside 15 – On the left is a large window at the front of the great room. The yellow is sheathing on the bottom of the 8-foot, roof overhang for this window. In the center is the deck, with the opening to the space that will have the 10,000 gallon water bag. Continuing further to the right is the apartment — the hillside largely blocks any view of the apartment underneath it. The opening outline in red tape is the door to the apartment.Outside 16 – Looking out from the house at the deck in front of the great room. The deck ends at the 8″ high wall. The black area beyond that will be the green room. The white-sheathed area beyond that will be a standard, raised seam, metal roof. Both roofs are above the apartment.Outside 17 – Looking back from the green roof above the apartment to the house. The windows below open into the great room. Those above open into a sitting area outside of the office and to the stairway between floors.Outside 18 – To finish the outside tour, this promises to be one of our favorite elements: a part of the deck that has been cantilevered out so that it sits within and under a cluster of oak trees.
This post has gotten quite long. We will continue with the inside picture tomorrow. Stay tuned.
This entry will be an update on the work that was completed while we were gone. We realize that some folks are less interested in the details of the building process (who knew?!) and so we are also working on something we should have done before, a tour that shows the status of the entire house now. Perhaps we will post that tomorrow.
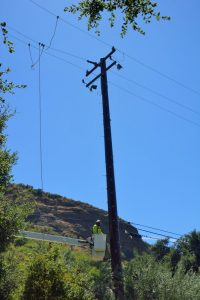
Picture 1 – Replacing the pole at the end of our driveway.
Friday, the day we got back from our trip, we went out to Modjeska in the afternoon but could not actually drive all the way to the house because SCE was replacing two of their utility poles: one at the base of one of our two driveways and the other about 100 yards away near the Tucker wildlife sanctuary. This is part of an effort by SCE to replace most, if not all of the poles in the canyon — good for us but very hard on the red-headed woodpeckers who use the poles as acorn storage facilities. There is meant to be another outage on Monday. Perhaps this will be the pole at the end of our second driveway. Picture 1 shows the work on the pole by our driveway.
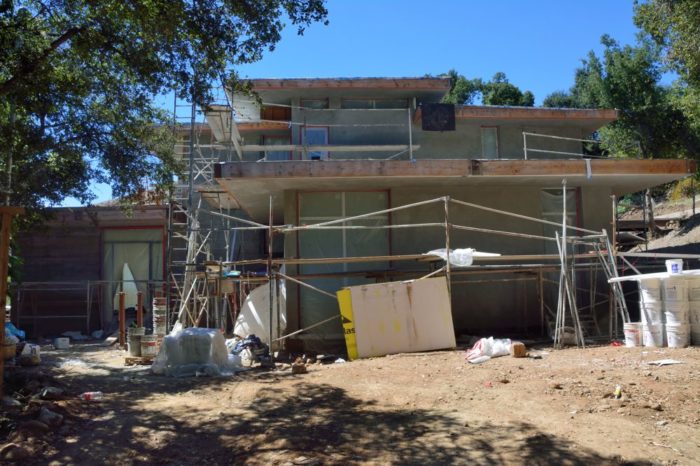
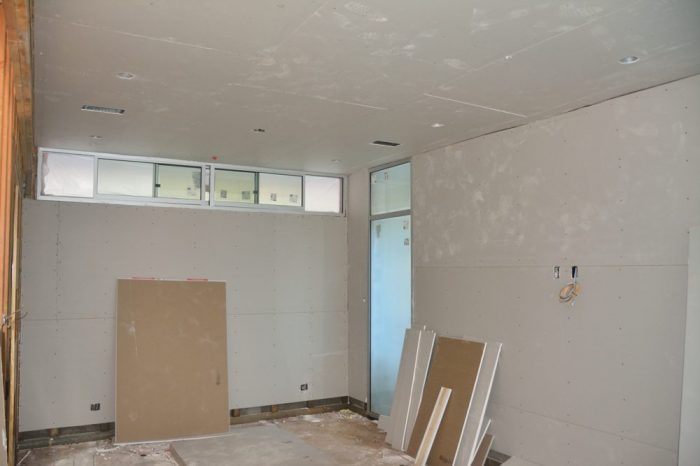
The dry wall installers have completed all the joint taping and spackling in the house and the apartment. It looks very good, but there is nothing really to show in a photo. The stucco folks did not get as much done as we had hoped. We thought that we would see at least some of the final coat of stucco up, but they are still working on the base coat. As Picture 2 shows, they did get the sheathing installed underneath the eaves and the base coat on that. However, as shown in Picture 3, there is still one small piece of the wall that needs sheathing before this part of the process will be done.
Picture 2 – An example of the sheathing and stucco base coat under the eaves. This is near the front door. There will be metal sheathing over the vertical wood framing.
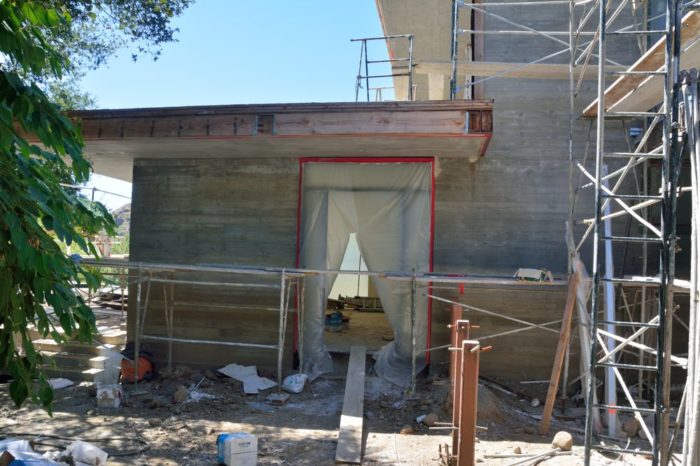
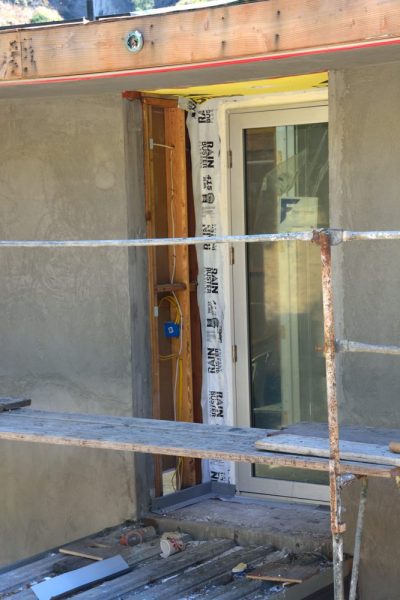
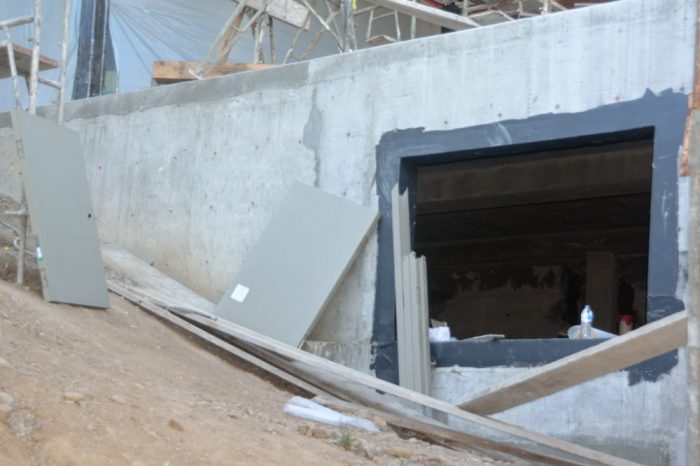
Picture 3 – The door to the bridge on the second floor of the house is inset from the wall and so the wall next to it was not poured concrete. Unfortunately it has not be sheathed yet. Once this is done, it can be stuccoed.
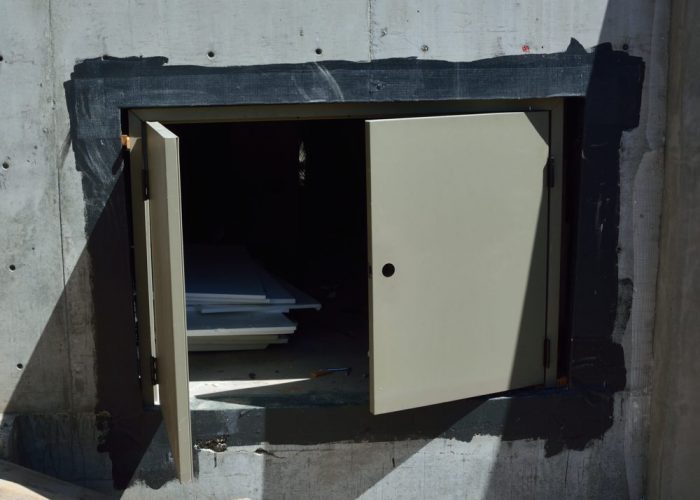
There are two other small things that were done while we were away by the door installers. Picture 4 shows that they installed the door for the area under the deck where the water storage bag will go. Picture 5 shows the door frame for one of the two “people” doors into the garage.
Picture 4 – The door for the area under the deck where the water storage bag will go.
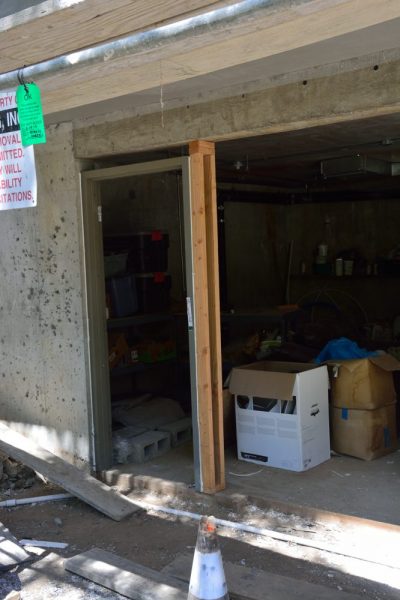
Picture 5 – Frame for the “people” door next to the main garage door.
Finally some pretty pictures. Picture 6 shows flowers of Humboldt’s Lily in our terrace beds. This is a species of lily endemic to California named after naturalist and explorer Alexander von Humboldt. It is native to the South High Cascade Range, High Sierra Nevada, south Outer South Coast Ranges, and Southwestern California, growing at elevations from 2,000 feet to 3,900 feet (so usually higher than our property which is at 1020 feet). Pictures 7-9 show that we did not miss our crops of apricots and plums while we were gone, and that one the peaches is ready to bear fruit!
Picture 6 – Humboldt’s Lily in our terrace beds
Picture 7 – This tree full of plums waited to ripen until we got back.
Picture 8 – And so did these apricots.
Picture 9 – The peaches on this tree are almost ripe.
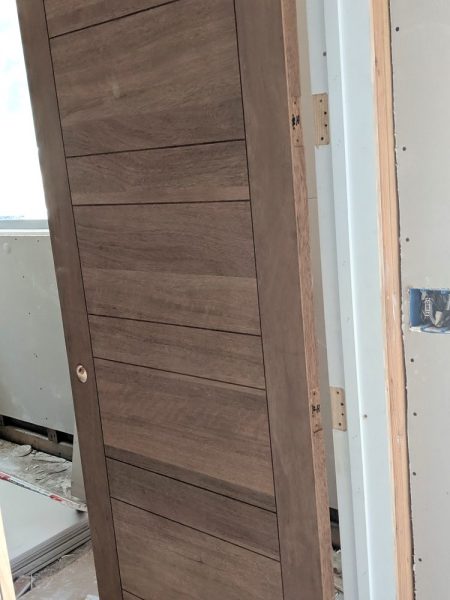
The time between these posts seems to be increasing, and everything in this post is at least a week old, since we are in the middle of a two-week vacation. After the last post the rest of the interior door frames were installed. Picture 1 shows the frame for one of the pocket (sliding) doors — this one will be between the great room and the kitchen. Picture 2 shows the frame for one of the hinged doors. As they put these door frames up, they also hang the door; they then take the doors down to keep them from getting dirty or damaged. Picture 3 shows one of the mahogany, panel doors that we will use in most places.
Picture 1 – Frame for the pocket door between the great room and the kitchen.
Picture 2 – Framing for the swinging door into the guest room.
Picture 3 – One of the mahogany, panel doors temporarily installed.
Picture 4 – Drywall in the master bedroom.
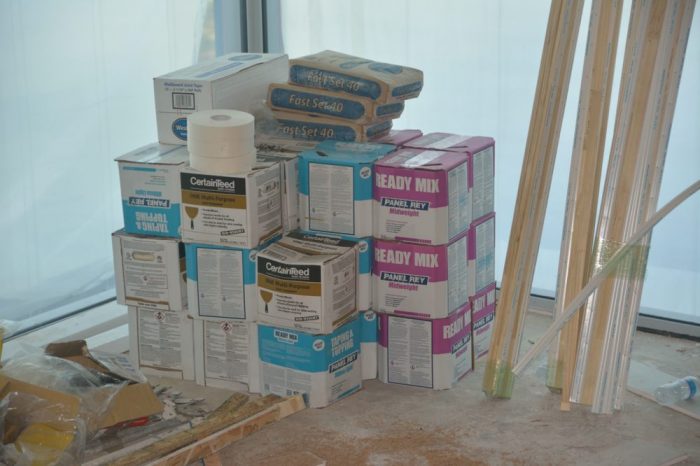
Picture 5 – Boxes of joint compound needed to finish all of the drywall joints.
With the door frames in place, the drywall installers were able to continue putting up the drywall on the walls. Picture 4 shows the completed walls in the master bedroom. They had almost completed the drywall before we left for vacation. Picture 5 shows the boxes of the joint-taping compound (often called “mud”) that they will use to finish the drywall installation.
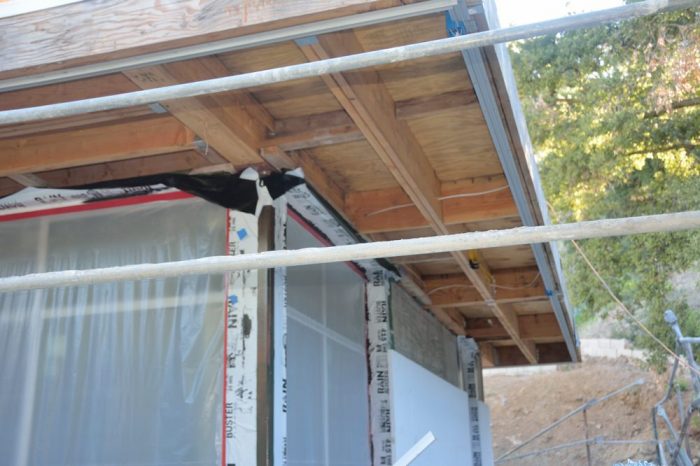
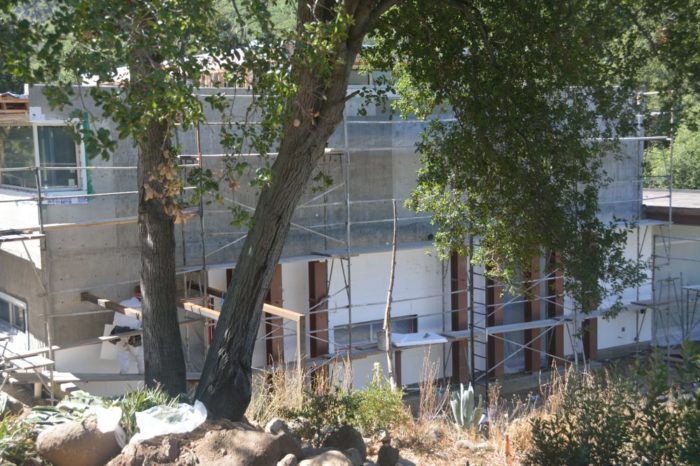
There has also been progress on the outside of the house. Picture 6 shows that the insulation is now almost completely installed on the house. They have not completed this because they are waiting for the sheathing, called Densglass, that goes under the roof overhangs, shown in Picture 7; unfortunately, until this is in, they cannot install the top row of the insulation panels.
Picture 6 – Almost complete installation of the insulation panels on the back and upper-east sides of the house.Picture 7 – Roof eves waiting for densglass sheathing on the bottoms. Notice how, past the window, the top line of insulation panels are still missing.
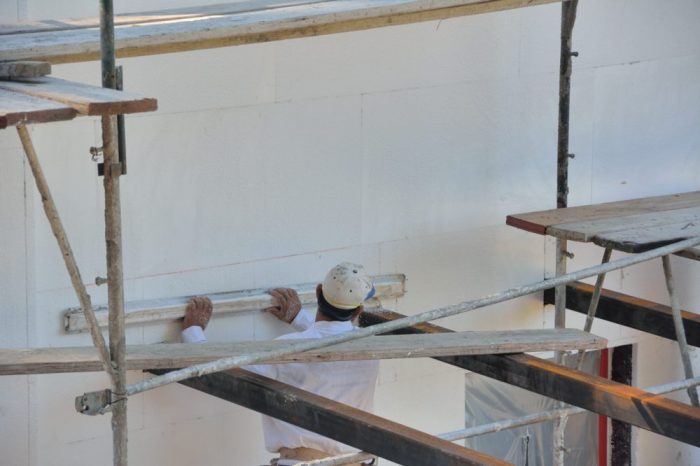
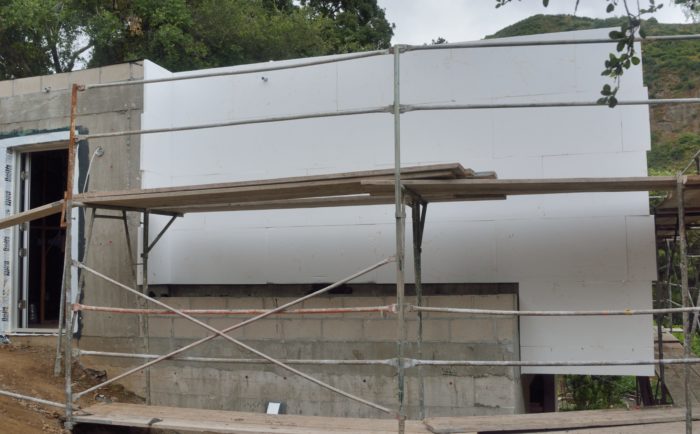
Picture 8 shows one of the installers using a very long sandpaper-covered block to smooth the joints between the insulation. Once the joints have been smoothed they can put up the base coat of the stucco. Because the garage apartment does not have any framed eves, there were able to do the base stucco coat there as shown in Picture 9.
Picture 8 – Sanding the joints between then insulation panels so that they will be smooth for the base coat of the stucco.Picture 9 – Back of the apartment with the base coat of the stucco applied. For the garage walls, because they do not need to be insulated, the finish coat of the stucco will be applied directly to the concrete.
Picture 10 shows the metal door that will be installed in the opening under the deck where the 10,000 gal water bag will go.
Our neighbor tells us that, in the week that we have been gone, they have almost finished all of the joint compound work. Also, the densglass sheathing for under the eaves is installed, and they are close to done with the base coat of the stucco on the house.
Picture 10 – Metal door and frame ready to be installed in the opening into the space under the deck.
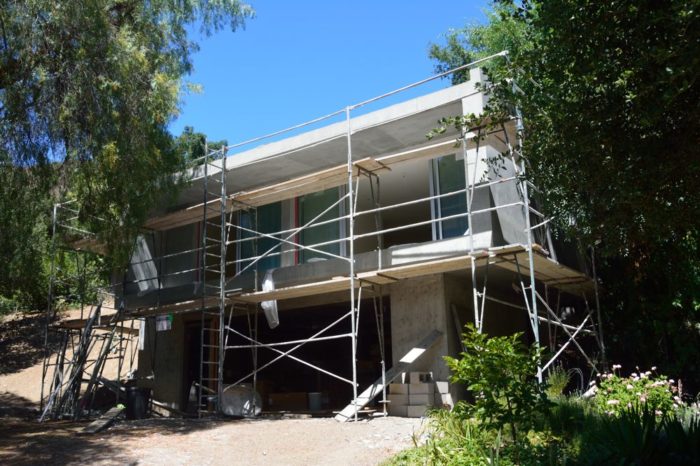
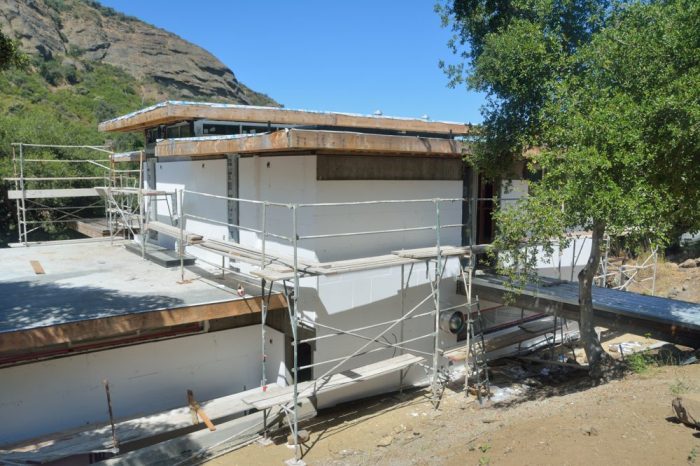
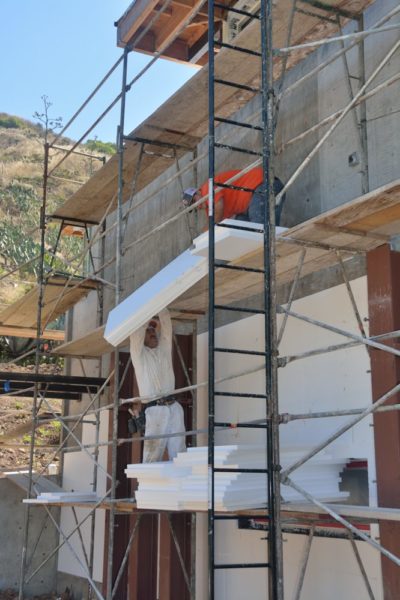
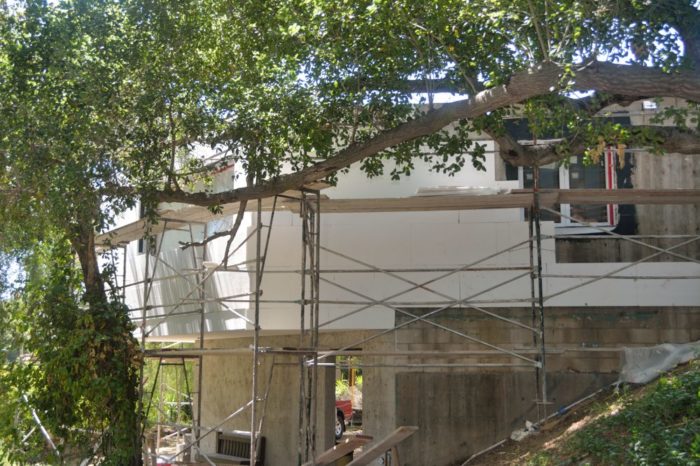
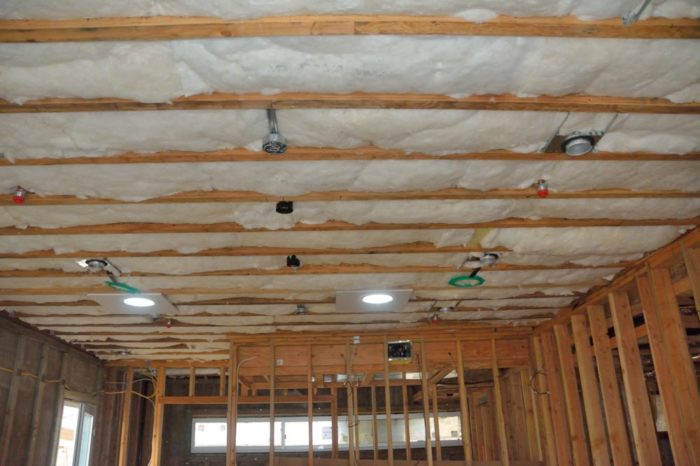
This post could/should have been done last Saturday, but somehow, like so many of the deadlines of this project, that slipped. As Picture 1 shows, the stucco people continued the process of putting up the insulation on the outside concrete walls. Picture 2 shows that they were making good progress on the west wall last Friday. By today that work should be done.
Picture 1 – Work continued putting up the rigid foam insulation on the outside of the concrete walls.
Picture 2 – By mid-day last Friday they had made good progress on the large, west wall of the house.
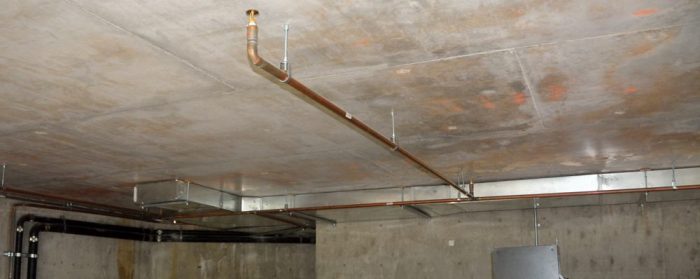
Picture 3 shows the large fan unit that the HVAC people installed on the back of the house. Fortunately, it will not be too visible there. This fan will draw air through the crawl space to keep it dry. That air will, in turn, be drawn from inside of the house. Apparently with a house as solidly built as this one, it is necessary to have a fan that continuously draws air out of the house so that fresh air can enter the house. Although the unit is large and will run continuously, it does not actually draw that much air — the size is for efficiency and noise reduction.
Picture 3 – Whole house exhaust fan.
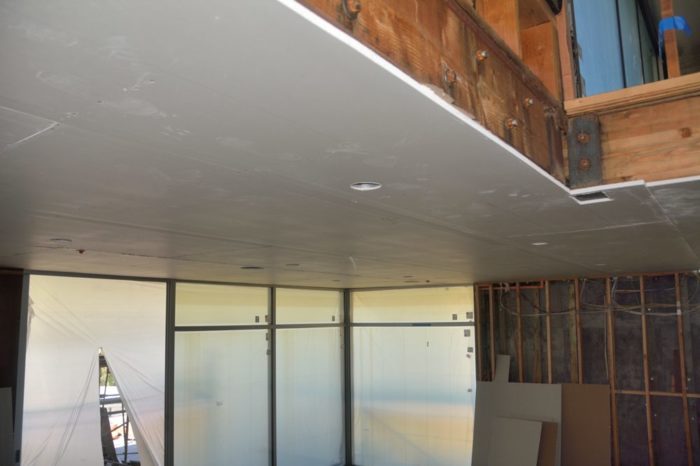
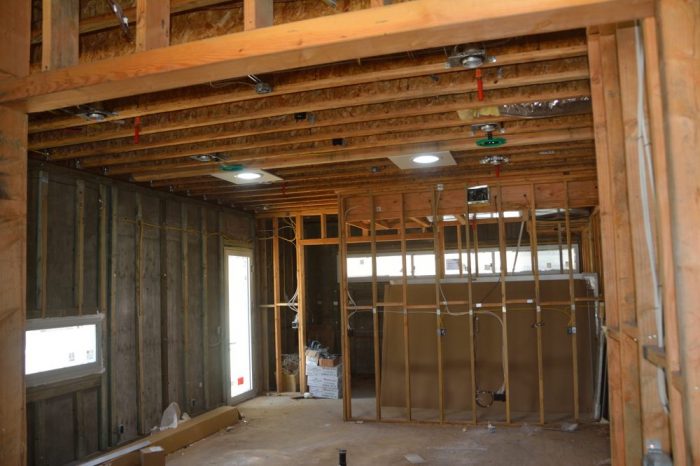
They also continued putting up drywall on the ceilings. With the pocket for the sliding door in the great room in place, they were able to do that room (Picture 4). They also did the low-roof, but not the high-roof ceilings upstairs (Picture 5). Unfortunately, they cannot do the walls until the door frames are in place. Those door frames were originally to be delivered last Friday; then they were going to come today; the word today is that they will be delivered NEXT Wednesday — very frustrating since all the interior work has ground to a halt waiting for this.
Picture 4 – Drywall on the ceiling in the great room.Picture 5 – Dry wall on the low-roof ceilings of the second floor.
Progress again — a quick update. Picture 1 shows the continuing work attaching the insulation panels to the outside of the apartment. Probably no work tomorrow because the electric company will be turning off the electricity and closing part of Modjeska Canyon Road to replace some poles.
Picture 1 – Southeast corner of the apartment.
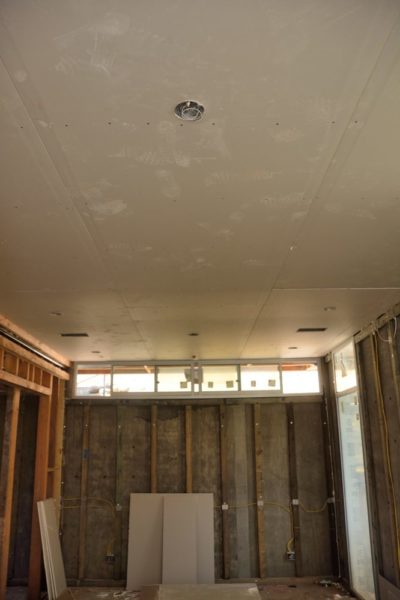
Pictures 2 and 3 show the newest development: drywall panels on the ceiling of the kitchen and the master bedroom. They have completed all of the first floor ceiling except in the great room.
Picture 2 – Drywall on the ceiling of the master bedroom.
Picture 3 – Drywall in the kitchen.
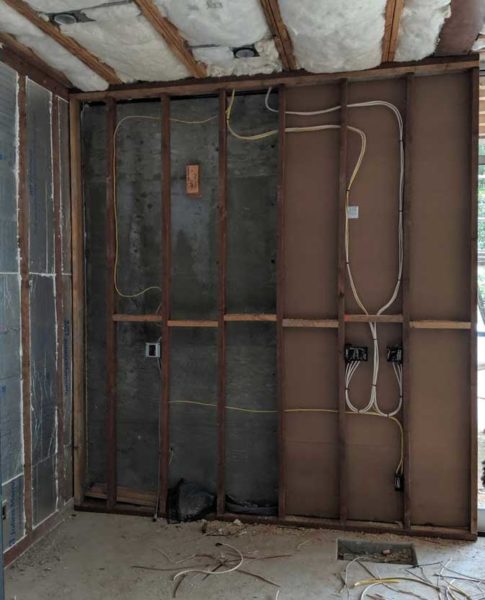
I believe that the reason that they left the great room for last is that they still need to build the wall that encloses the pocket that the sliding door and sliding screen panel will slide into. Picture 4, which was taken on Monday, shows the framing for the interior part of this wall (the exterior part is one of the concrete walls) being constructed on the Great Room floor. In Picture 5, taken late Tuesday, the wall is up and the electrical wiring needed in it has been completed.
This pocket door arrangement will be nice. We love to have the doors and windows open during the day and evening, but there are many small flying insects in Modjeska (oddly this is not true in Irvine), so there need to be screens. However, it seems a shame to distort the view through the large south windows with screens — even ones designed to be “almost invisible” — when they are not in use. The door pocket provides a place where the sliding screen door can be out of sight when the door is closed, and a place to slide the the door when it is open and the screen is in use.
Picture 4 – The framing for the wall that will form the pocket for the glass door visible on the left side of the picture on Monday.
Picture 5 – This is the pocket wall on Tuesday evening installed with the electricity run to the switches on it.
Picture 6 – First fruits from the orchard this summer. On top are Flavor Grenade pluots — the ones that are green or purply red — and Goldkist apricots — the ones that are yellow-orange. These are the first of what promises to be a bountiful harvest from the orchard this summer.
It has been almost two calendar weeks (and fully two work weeks) since the last post. For much of this time, not much was happening. Then, this week there was a problem on the WordPress site that Nina uses to host the blog and we could not log in to create a new entry. But now that has been fixed and things are happening!
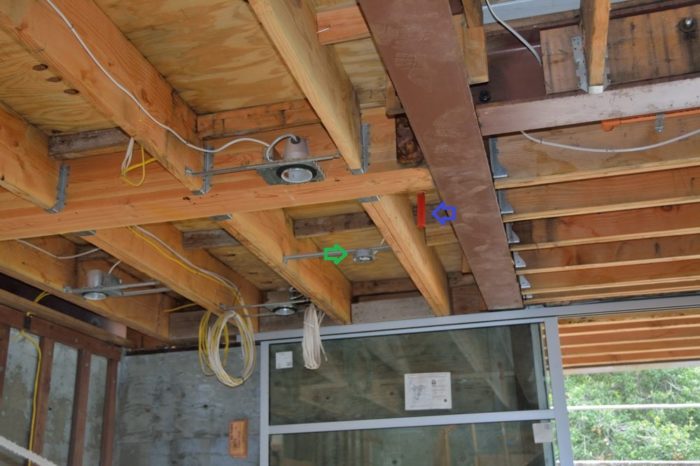
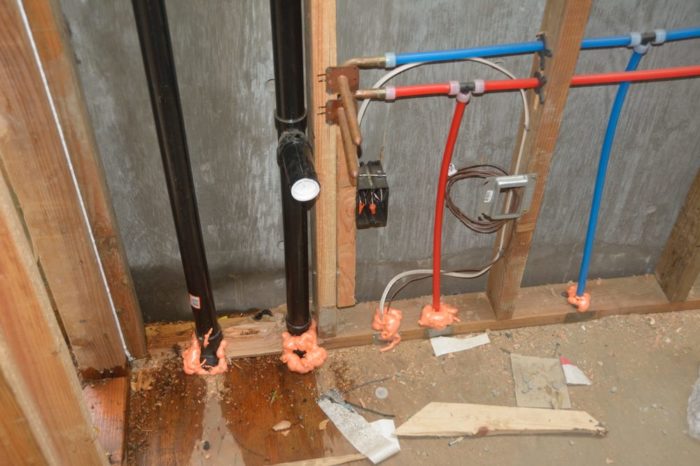
Apparently the main reason that nothing happened for the first of the two weeks is that we were waiting for the fire authority to approve revised plans for the fire-sprinkler system in the house. Given that the system has been in place for a month or two, one might ask why only now did the need to get the revisions approved become salient. Once the plans were approved, the fire inspector came out early this week and did not like a few of the things he saw and required some additional, minor changes. Picture 1 shows one of the issues.
The blue arrow in this picture points to the down pipe for a sprinkler system head. Apparently it needs to be close to where it is, because it must be within 8 feet of each of the adjacent walls. However, the green arrow shows the mount for one of the two ceiling fans in the great room. If that fan were to have three-foot long blades, then they could block the flow of the sprinkler. Solution, move the fan 18″ to the right. This means it is no long in line with the lines of lights, but you cannot have everything.
Picture 1- Whoops, the sprinkler head and the ceiling fan are too close.
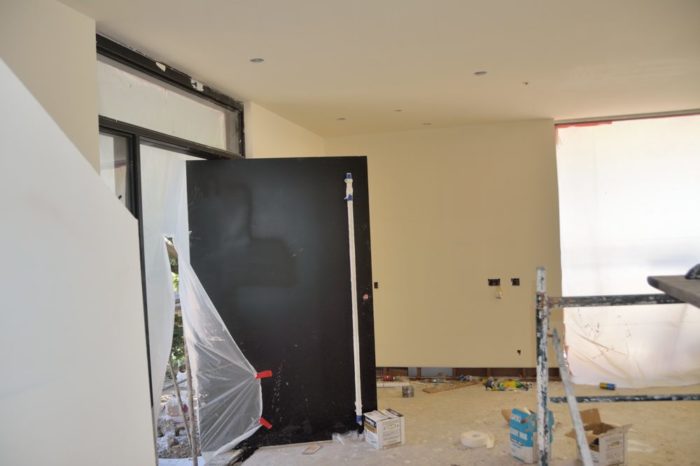
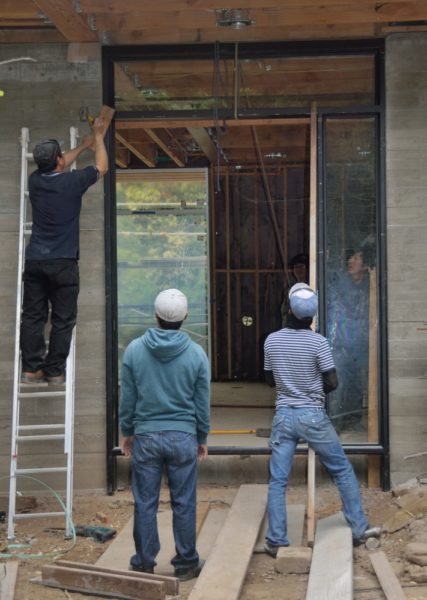
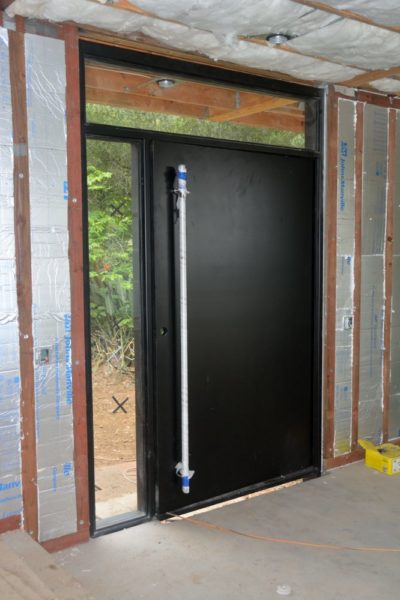
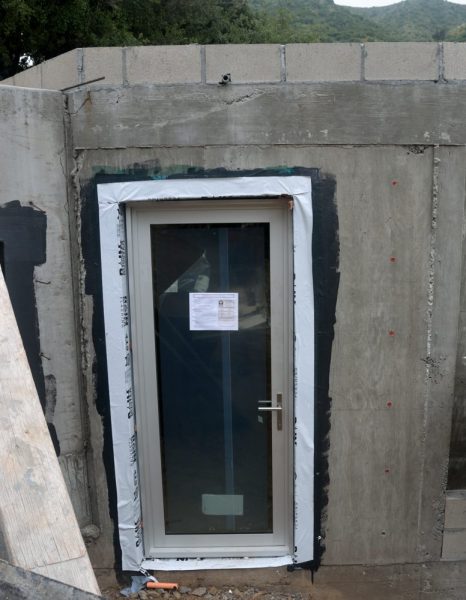
Last Tuesday, when Ted was at the house to consult on the sprinkler system issues, they were installing the steel front door. Picture 2 shows that process in progress. Pictures 3 and 4 were taken today and show the installed door from the inside and the outside, respectively. It is a large, heavy, steel door, so instead of swinging on hinges, it swings on a pivot that is about a foot from the left side of the door looking from the outside.
Picture 2 – Installation of the front door frame.
Picture 3 – The fully installed door from the inside.
Picture 4 – And the outside.
Picture 5 – Insulation on the wall with the front door.
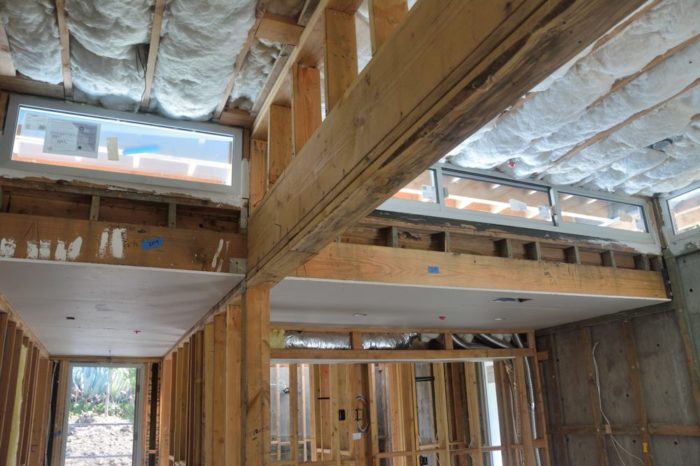
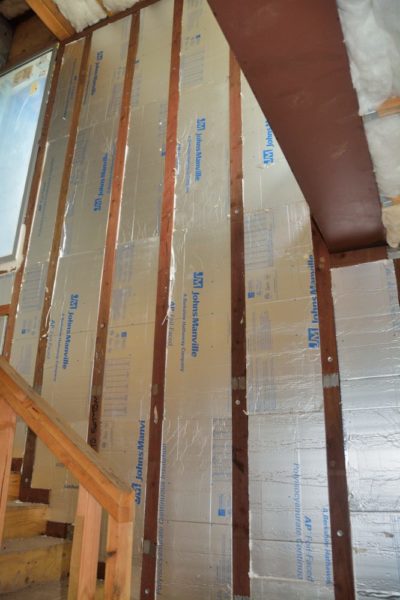
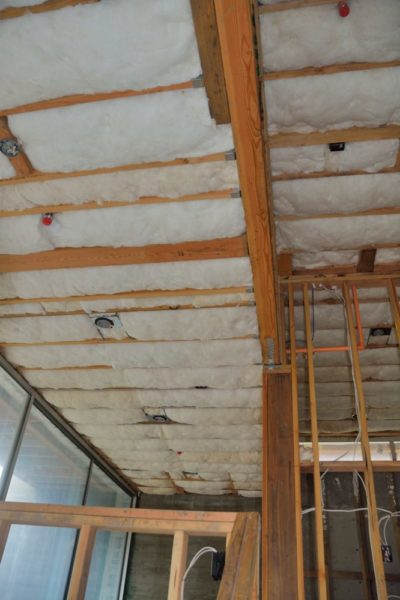
Another thing that they have been doing this week is installing insulation. As you may recall, most of the insulation for the walls is on the outside, under the stucco, so that we can benefit from the heat mass of the concrete walls (see the long entry about this in the blog post from March 9th). The one exception is the wall that contains the front door, because the outside of this wall was “board-formed,” and we wanted that detail to show. However, this meant the insulation for this wall needs to be on the inside and that is what is shown in Picture 5, above. Picture 6 shows that they also have installed the insulation in the ceilings under the roof and, as shown in Picture 7, in the ceilings between the first and second floors where it will mostly serve to deaden sound.
Picture 6 – Insulation in the ceiling under the roof. This is taken looking up from the stairway,
Picture 7 – Insulation in the ceilings between the floors. This is in the kitchen.
As part of installing this insulation, they have also been sealing all of the penetrations from the ceiling to the roof and between the floors. Picture 8 shows an example of this. Picture 9 shows the first of the insulation being applied to the outside of the house. This is on the apartment.
Picture 8 – An example of the foam sealant around the penetrations between the floors.Picture 9 – The first insulation going up on the outside of a wall. This is the apartment.
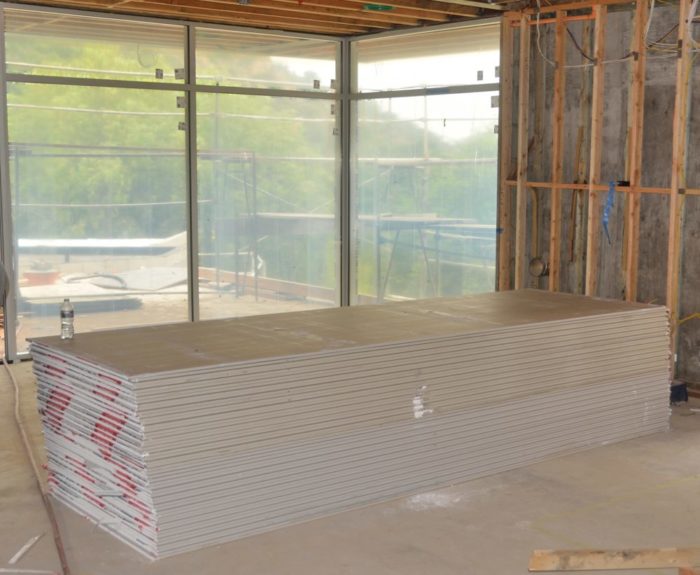
The insulation inside the house was inspected today. That means that they can begin installing the drywall on Monday. In preparation for this there are large stacks of drywall around the house and in the apartment. Picture 10 shows one stack in the great room.
Picture 10 – A stack of drywall in the great room. Ted is really glad that he did not have to carry any of those sheets from the truck into the house — they are heavy and ungainly.
At some time in the last two weeks, they cut the outlets to drain the green roof on top of the apartment, as shown in Picture 11.
Picture 11 – Drains for the green roof on top of the apartment. The window is the one over the sink in the kitchen of the apartment.
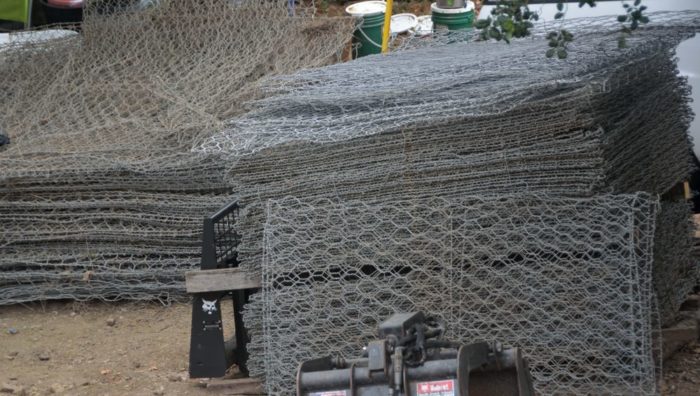
Pete left this week to go to New Mexico. Unfortunately, he will not be back for 6 weeks or so because he needs to have and recover from knee meniscus surgery. Before he left, he found and purchased for a great price a stash of 30 year old gabions. These are shown in Picture 12. We will use some of these on the property as we uncover rocks terracing the backyard when Pete returns; but basically, what canyon dweller doesn’t need a hundred or so gabions?
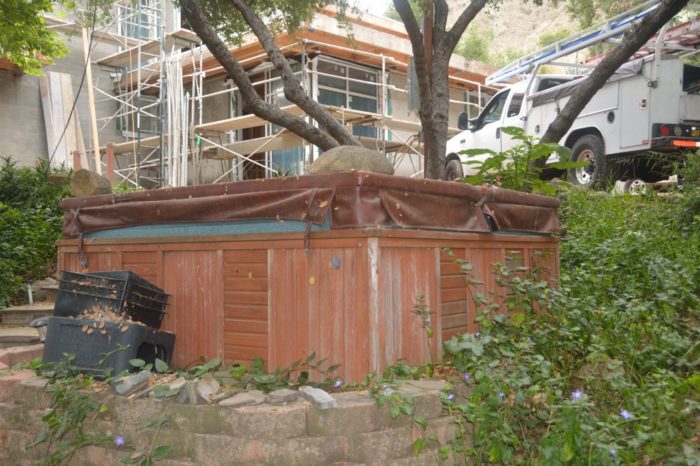
Picture 13 shows the hot tub that has been sitting by the front driveway. Nina has always sort of wanted to move and keep it; Ted less so. However, it is not in great shape and we have decided to get rid of it.
We leave you for this week with Picture 14, a spectacular gladiolus growing on the slope between the garage and the orchard.
Picture 12 – Most of the gabions that Pete was able to find an purchase for a great price.Picture 13 – Looking for a use hot tub? Free to good owner.
Last week the process of installing the windows got close to completion. The plan is to do the last steps Monday, and then on Tuesday the house will be ready both to install the drywall inside and the insulation and stucco outside.
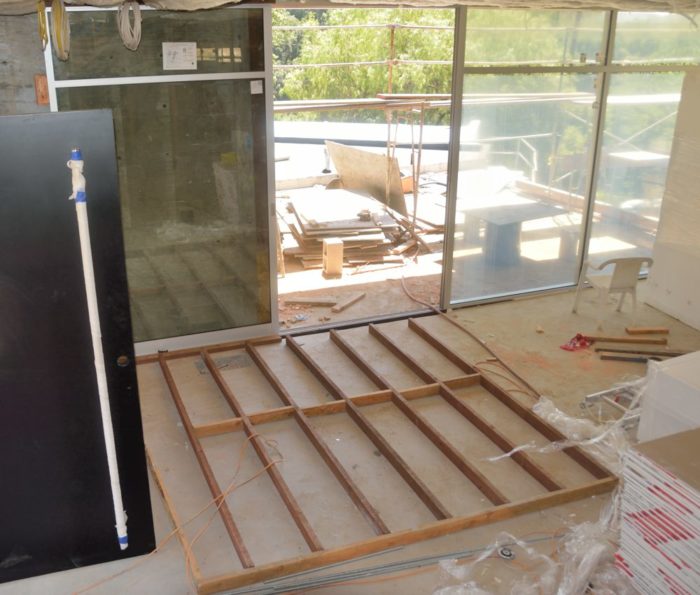
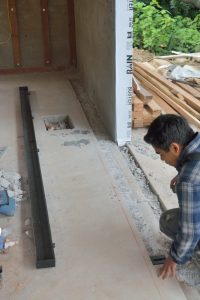
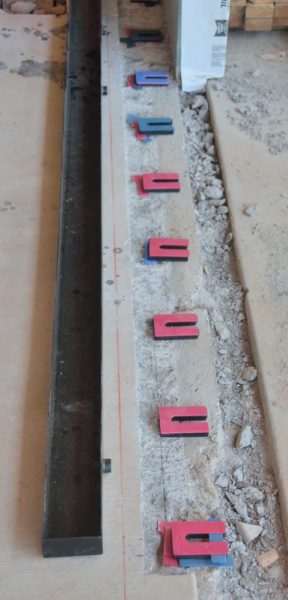
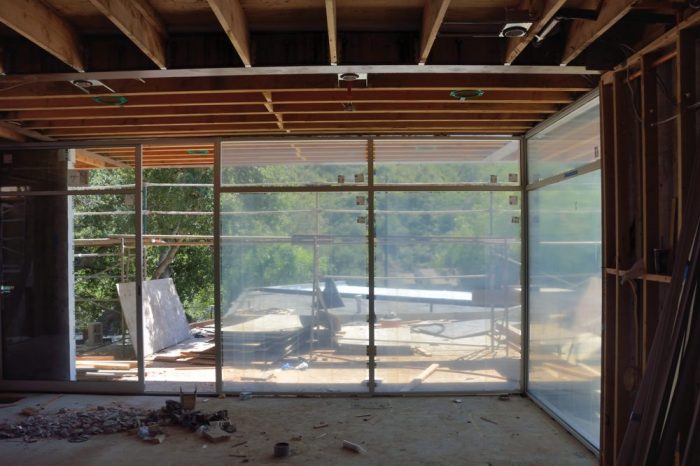
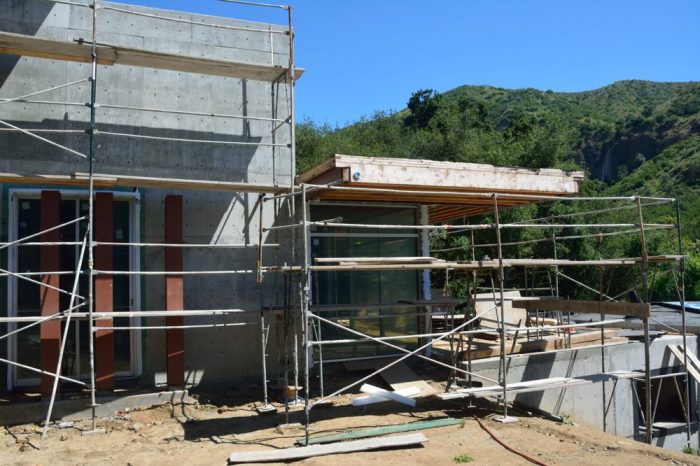
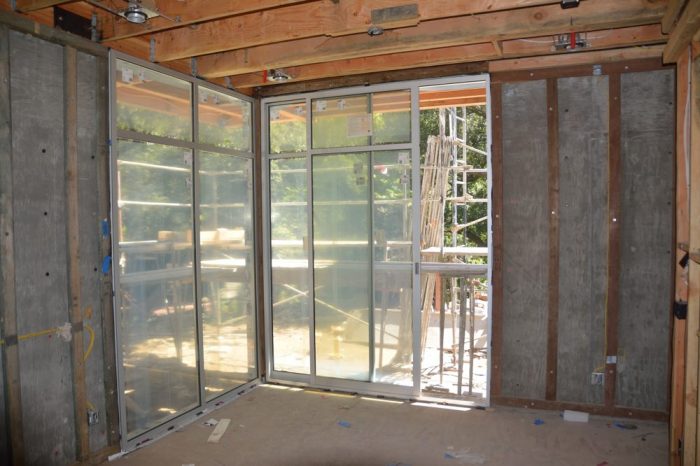
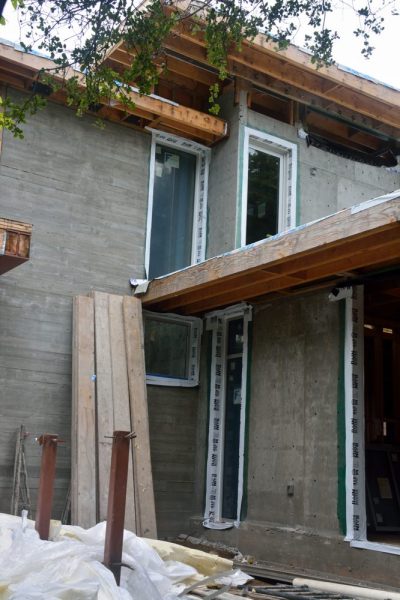
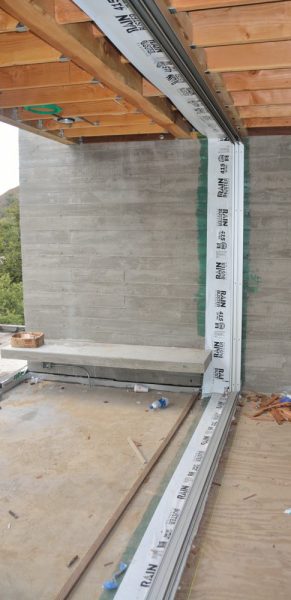
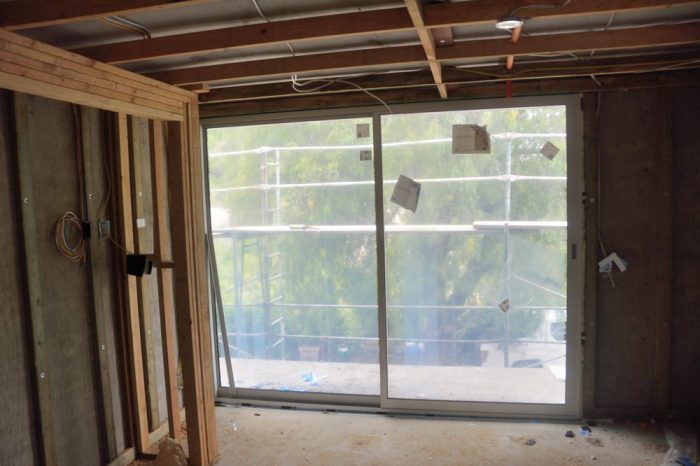
The largest of the windows is the combination of fixed windows and sliding door/screen going from the great room out onto the deck. Before they could install this window system, they had to cut out a concrete channel for where the sliding door and screen can go back into a pocket behind the wall. That happened on Monday of last week. Picture 1 shows that channel and the fabricated metal drain that goes into it. This drain needs the channel to be leveled precisely. The worker in Picture1 is starting that process. Picture 2 shows the completed set of levelers and Picture 3 shows in detail how these levelers are stacked. Picture 4 shows the finished system from the inside. Picture 5 shows the outside, west wall of the house, with the great room window on the right.
Picture 1 – The channel for the sliding door in the great room.
Picture 2 – The set of levelers in this channel.
Picture 3 – A closeup of the stack of plastic shims that makes up one of the levelers.
Picture 4 – The installed window/door going from the great room to the deck.Picture 5 – Part of the outside of the west wall of the house. Part of the great room window is visible under the overhang in the center of the photo. The windows into the dining room are on the left.
Picture 6 shows the other large window in the great room. This one is in the dining room and will eventually look out through the gabion wall. It is actually a sliding door so that we will be able to get to the outside to clean it. Picture 7 shows one of the floor to ceiling window/door combinations in our bedroom. Picture 8 shows the window/door outside of the office on the second floor and the windows on the stairway. Picture 9 shows the window that wraps around the corner in the guest room.
Picture 7 – Dining room window that will let in light filtered through the gabion wall.
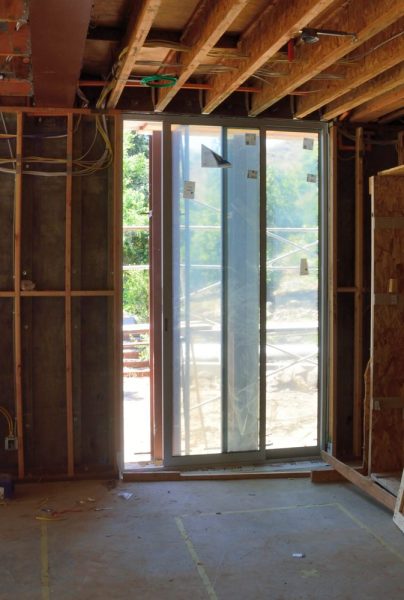
Picture 7 – Window/door combination in our bedroom.Picture 8 – This is taken from the sitting area outside of the office. On the right is the window and sliding door to a small deck enclosed by a green roof. Straight ahead is the stairway to the ground floor, with a large window above the stairwell (on the right) and thin, vertical windows at the landing where the stairs turn. In the open space in the middle of the stairwell, we will hang a large pendant light that we purchased years ago from Ted’s sister Henny.Picture 9 – Guest bedroom window
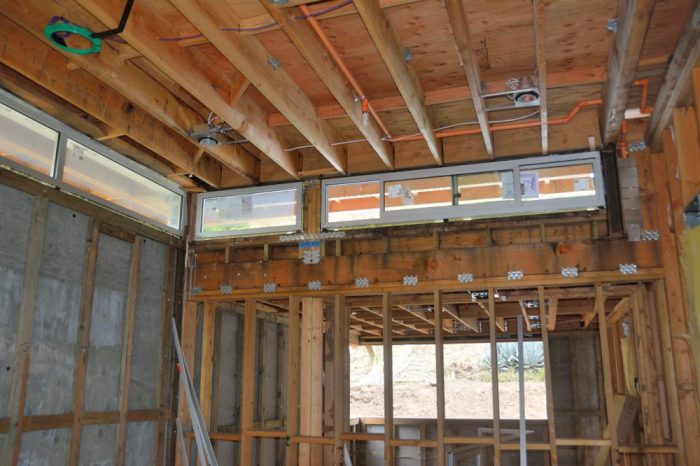
The two bright lights in the ceiling of kitchen, shown in Picture 10, are not lights at all, but Solatubes (https://www.solatube.com/residential). As shown in Picture 11, these run up through the closet in the Guest Room to the roof. They will add a lot of daylight to the kitchen that otherwise might be somewhat dark.
Kitchen showing the light from the 2 Solatubes that were just installed.
Picture 11- The tubes for the kitchen Solatubes running through the guest room closet.
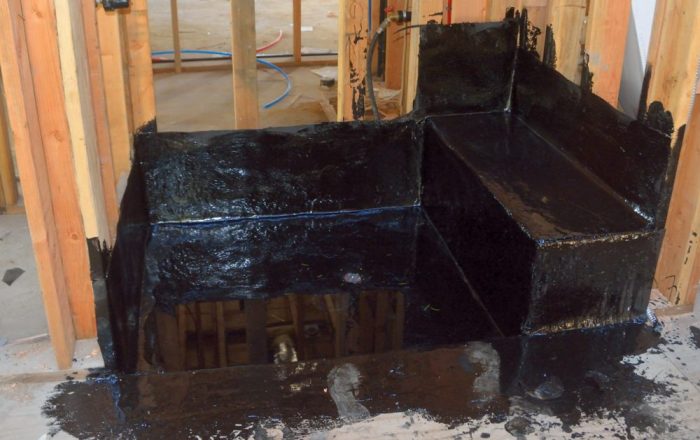
They use hot tar for waterproofing and some of that was done last week. Picture 12 shows one of the showers. They leave water in it to check for leaks. Picture 13 shows the apartment roof.
Picture 12 – The base of one of the showers that has been covered with hot tar.Picture 13 – The room of the apartment. The part that has been covered with builder’s paper will eventually be a green roof.
They also have done the windows in the apartment. Picture 14 shows he living room. This seems like a glorious space with the sliding door to its small balcony on the right and the window on the left that will look through the trees to the orchard below. Maybe we should call this the apartment Treehouse.
Picture 14 – Living room of the apartment above the garage.
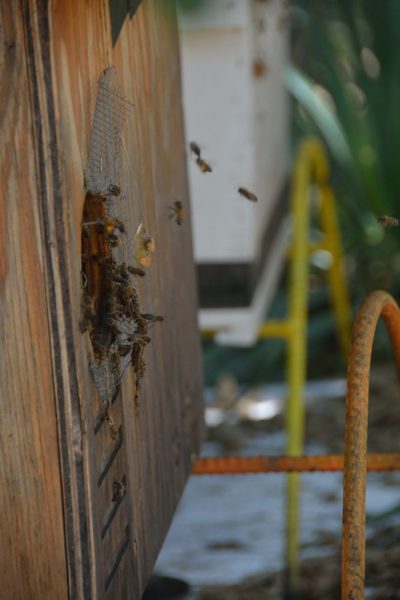
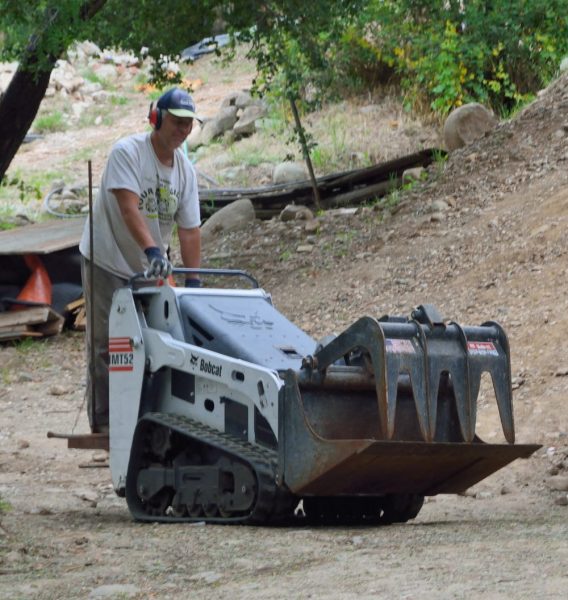
The last two pictures are just for fun. Pete was complaining that, in the picture of him and the Bobcat in last week’s post, they were not doing anything. Picture 15 shows them taming some of the larger boulders in the backyard that we plan to terrace. Last year one of our friends, who rescues bees, installed several bee hives on part of our property. Unfortunately we lost them both. However, several weeks ago there was a bee swarm flying through the canyon and, as Picture 16 shows, they chose one of our hives for their new home and are now busy pollinating everything. If only we could get a barn owl tenant for the owl box that is on the hillside above the house.
Picture 15 – Pete and the Bobcat clearing out some of the larger boulders in the backyard,
Picture 16 – A swarm of bees have taken residence in one of our empty hives.
On Saturday, our friends from New Jersey Chris and Claudia Van Wyk arrived to spend the day. We took them to the Farmers ‘ Market in Irvine, and then after lunch we drove out to Modjeska. Unlike many recent Saturdays, there were no workmen other than Pete. He had planned to go to his dentist in Tijuana, but the Bobcat dealer said they could deliver the Bobcat he bought, so he switched his dentist appointment. While we were there, he was happily driving it around moving mulch and stones from one place to another. He paid for it but it will stay at our house. As you can see, it is second hand and has treds instead of tires so that it can go up our slopes easier. It is also quite narrow for a Bobcat and can get between the raised beds in the front yard.
Picture 1 – Pete has a new toy.
The window people came back this week and more seriously started putting in windows. It seemed that they started with the small/easy ones, but they have finished one of the sliding doors.
Picture 2 – There was some serious work at the end of the week installing windows.
Picture 3 – Clerestory windows in the study.Picture 4 – The windows are being installed set somewhat inside the plane of the concrete walls, so that the sheetrock, when it is installed, will butt into the window casing, creating a modern look with no window trim or window sills.
Picture 5 – So far, they have focused mostly on the smaller windows. However, here they have installed the casing for the large window/sliding-door combination on the second floor outside the office.
Picture 6- The one exception is the window and sliding door for the bedroom in the apartment.Picture 7 – They also installed the main door for the apartment.
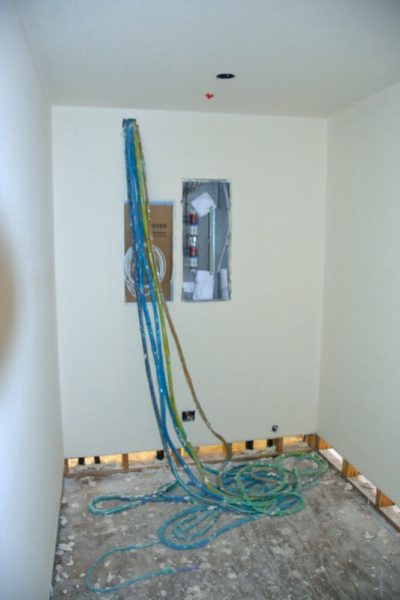
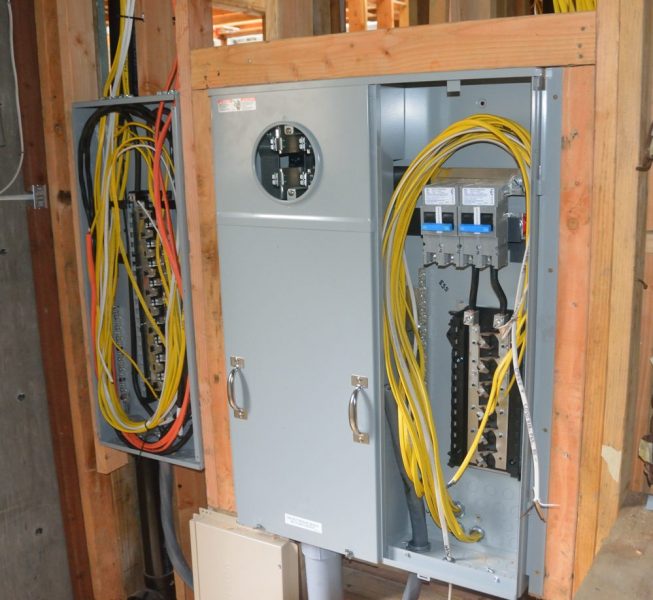
The electricians and the HVAC people have been busy finishing up. The contractor tells us that they hope to have the inspector out for all of the rough electrical, plumbing, and mechanical (HVAC) work on Tuesday. The photo below shows the electrical boxes in the utility room, which is only accessed from outside. It will have a lock that the electrical utility can open.
Picture 8 – The electricians have installed the main service panel for the house. The electric meter will actually be inside the utility room.
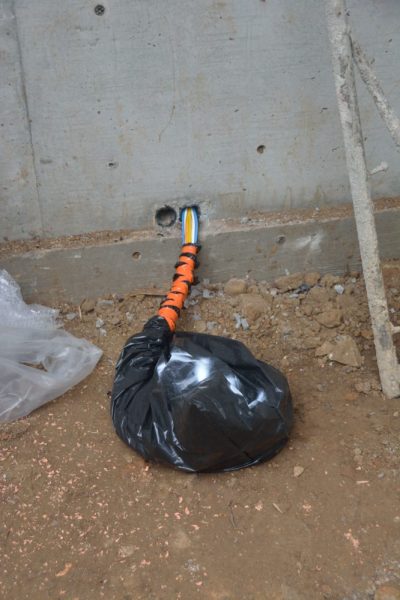
Picture 9 – This odd-looking bundle contains the AV/control wires waiting for a trench to be dug so that they can be run from the house to the garage/apartment.
Picture 10 – The HVAC people also were installing ducts in the garage ceiling for the apartment above.
Nina is really regretting sending her dehydrator into long-term storage which we did since, of course, the house would be finished before we had fruit or tomatoes that needed preserving. The orchard is just full of fruit. The picture below shows a couple of Anna apples. Last summer there was one Anna apple; this year there are at least 20. The apricot and peach trees are covered with small fruit. The rain all winter, which kept delaying the house, was good for the trees.
Picture 11 – Nature has also been hard at work. We will have a good crop of Anna apples this year. Probably by the beginning of July.