We had hoped to have this photo tour done 2 weeks ago, but reality intervened. Same for the house; things have been going slowly as only a father and son team having been working on it. They have done a great, if glacial job finishing the base coat of the stucco. (The subcontractor had promised a bigger crew and much speedier completion — it seems hard to believe promises from contractors.)
So this will be an entry consisting of photos, all taken on August 3rd, showing the house on the inside and out as of that day. There will be minimal commentary and, for one of my sisters, no discussion of construction details.
To orient yourself, look at the image of the model made by the architect. What you should notice in the model is that the house and the garage/apartment are two completely separate structures, connected by a patio. These two structures are on the lower part of the hillside that comprises our property, with the house completely above the garage/apartment.
The apartment and garage are each five-sided: a rectangle with one of its long sides abutting the hypotenuse of a right triangle. The apartment (its walls are white in this rendition) sits on top of the garage (its walls are rendered in gray). The apartment walls are cantilevered past those of the garage on three sides.
Model produced three and a half years ago by the architect.
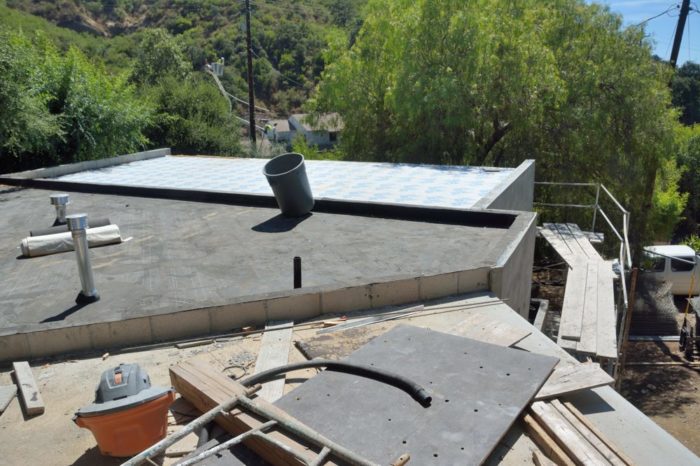
The patio, between the apartment and the house, sits on top of a hidden, 10,000 water bag that will be filled with water from the roof of the house that can be used for irrigation or fire control. Because the patio is at the height of the apartment roof if you are on the patio, one of the primary views will be across the apartment roof, part of which (that shown in green) will be a green roof consisting of a mixture of growing sedums. The house itself, has a partial second story; two decks and another green roof cover the rest of the first floor.
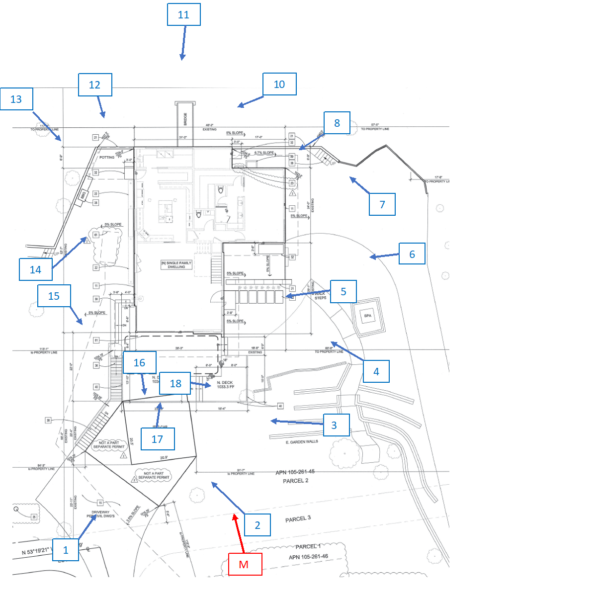
The diagram below shows the layout of the garage/apartment and the house. The red M and the associated line, roughly show the point of view used in the model above. Each of the 15 numbered labels and their associated lines indicate the point of view for the next 15 photos. The number here will be that used to identify the photo. This part of the tour starts in the driveway looking up at the garage. The subsequent photos will then move around the house in a counterclockwise direction. Use this diagram, as necessary, to orient yourself as you view the next 15 photos.
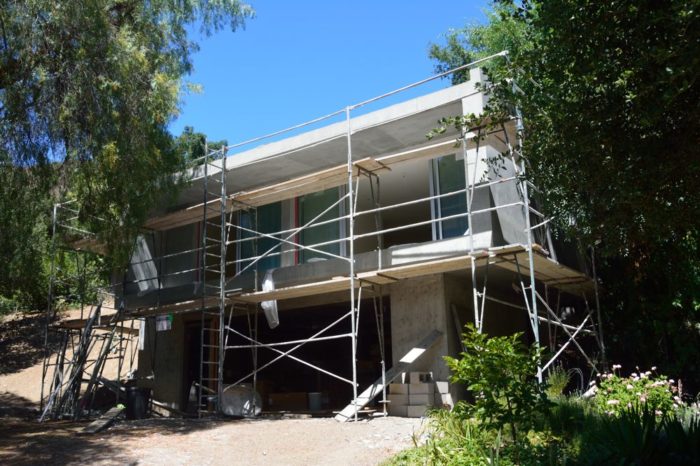
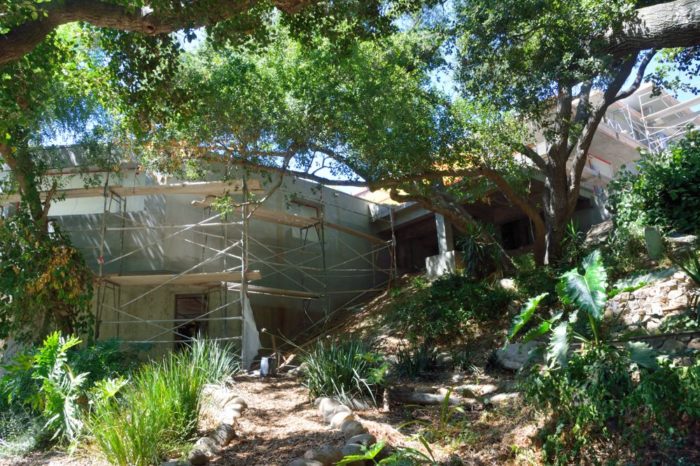
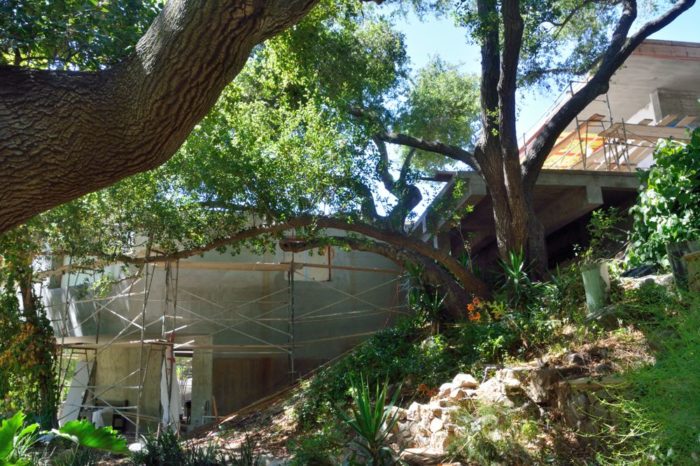
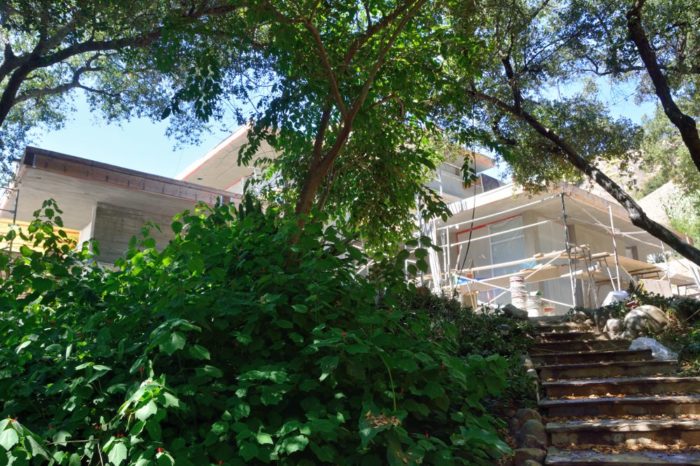
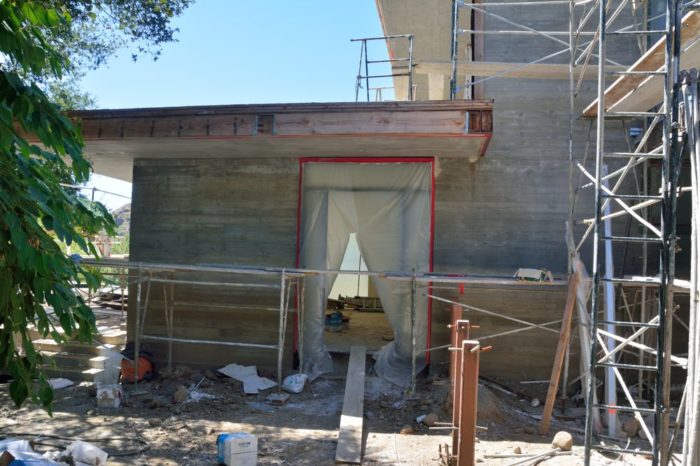
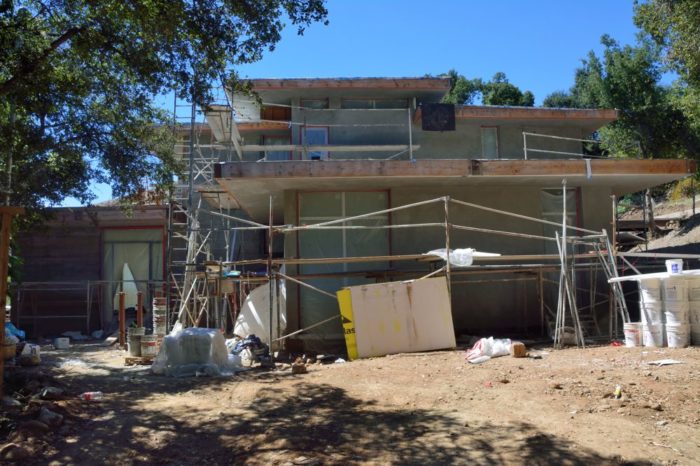
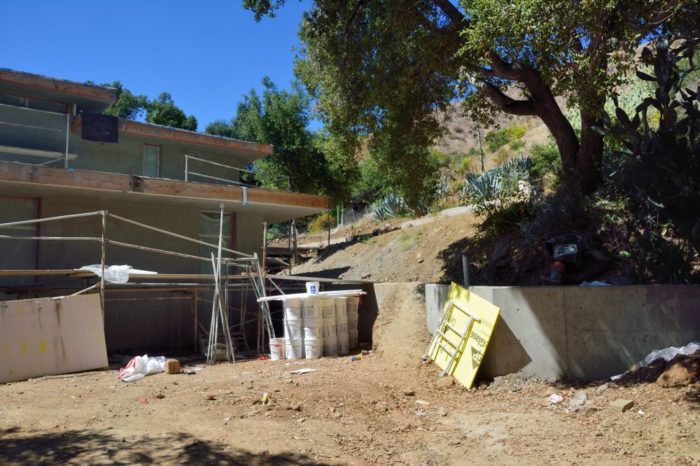
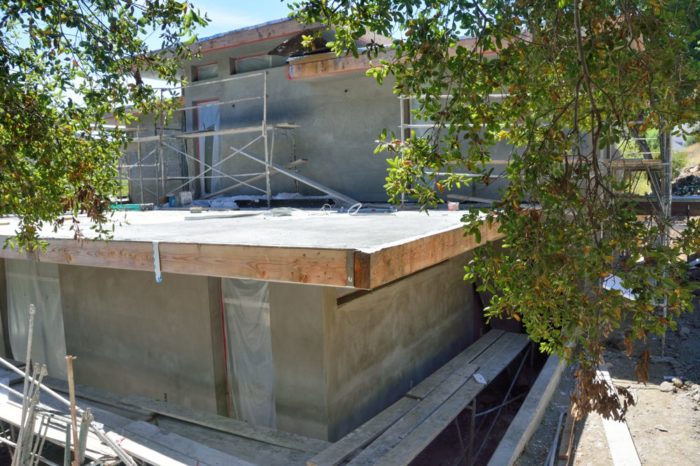
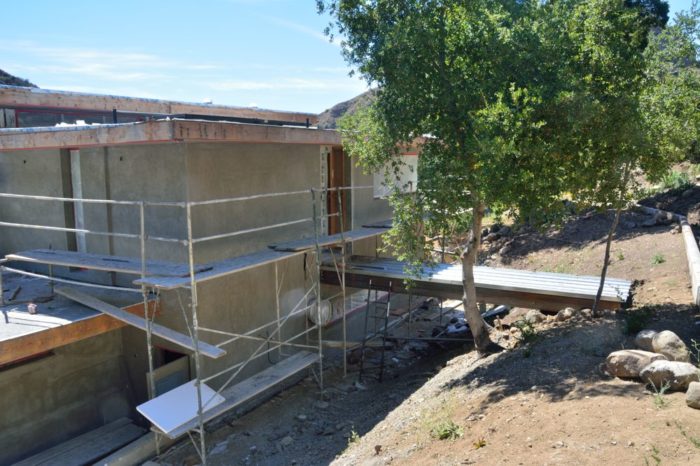
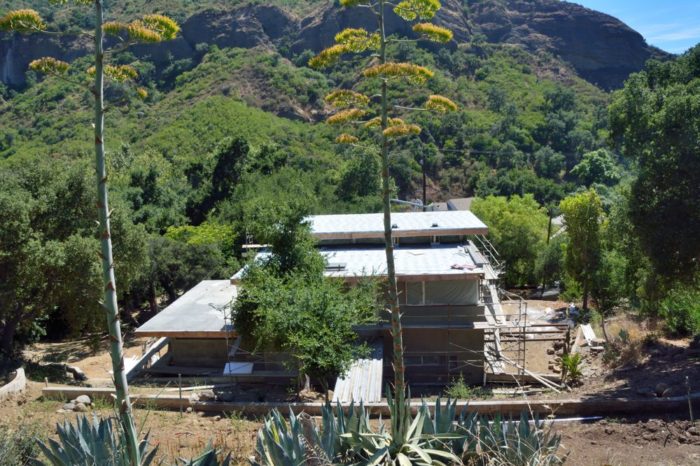
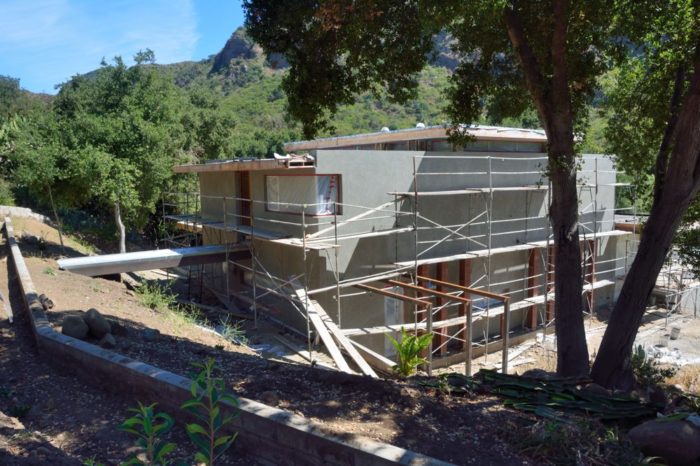
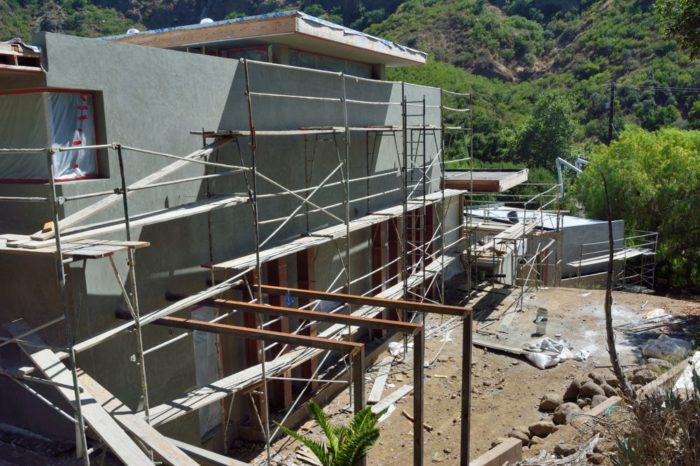
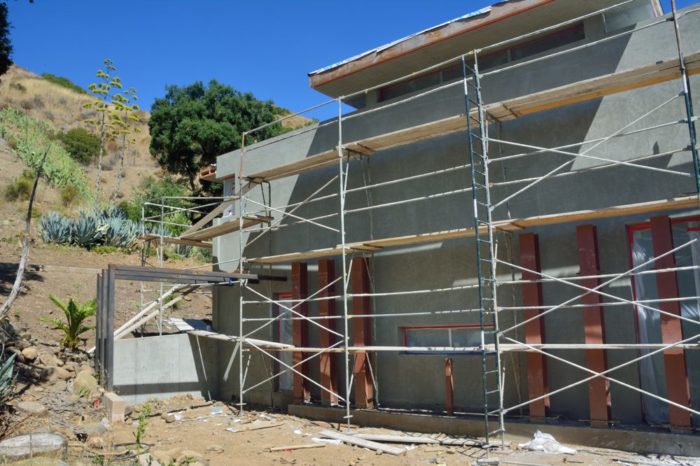
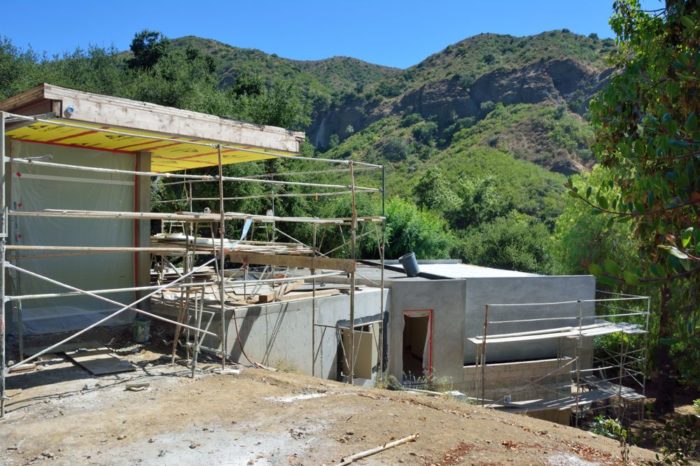
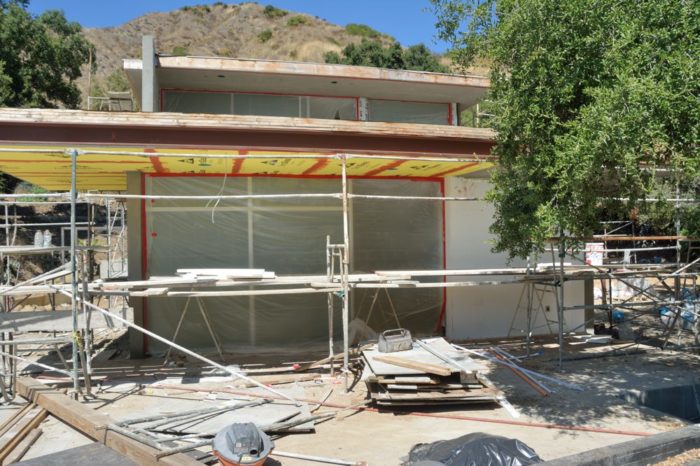
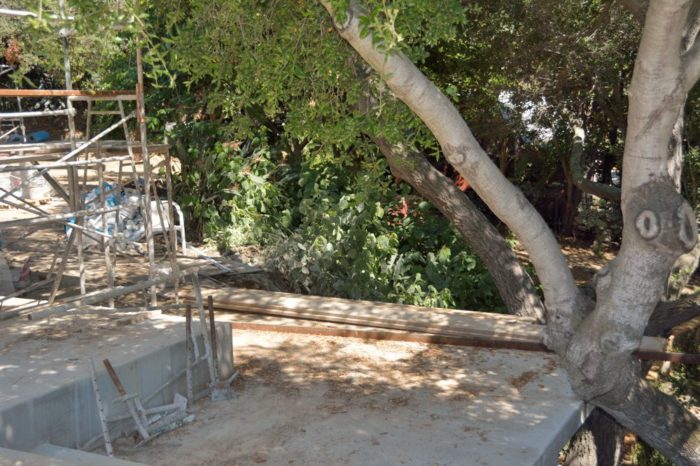
Map of the photos of the outside of the house. Each numbered box shows the point of view of one of the following 17 photos (Note: #9 is intentionally missing.)Outside 1 – The apartment above the garage. The opening of the garage will be the garage door. The apartment has sliding doors from the living room and bedroom onto a small porch.Outside 2 – Garage, with a people door, below, and the apartment, with a window into the living room on the left and above the kitchen sink on the right.Outside 3 – Center left is the apartment above the garage. Moving right is part of the deck, cantilevered so that it sits in the middle of a clump of oaks. Further right you can see the roof overhang for the windows opening onto the deck.Outside 4 – Steps up to the main entrance (which is hidden behind the tree in the middle of the frame. To the left, is the roof overhang for the windows opening onto the deck. To the right, are the windows and walls of the master bedroom. In the middle, you can glimpse the roof of the second floor.Picture 5 – The front door, which is not visible, since it is open and covered in plastic sheeting. The walls on either side were “board formed” and will not be stuccoed. Picture 6 – View of the house from the east driveway. The front door is on the left. The walls and windows of the master are straight ahead below. Above it is a deck. Behind that are the walls of the second floor. Notice that there is a second, high roof, making space for a row of clerestory windows.Outside 7 – Northeast corner of the house with a glimpse of the hillside rising up behind the house. The house continues the visible retaining wall. The dirt ramp in the center of the frame will become a concrete stairway to the backyard.Picture 8 – Northeast corner of the house from above. The walls and windows of the master bedroom are below the patio in the middle and then, setback, the walls of the second floor.Picture 10 – Looking across the back of the house. The bridge will run from a door at the end of the second-floor hallway to the backyard.Outside 11 – View from part way up the hillside looking down on the back of the house.Outside 12 – Northwest corner of the house from up by the chicken coop. The windows visible on the second floor are for the guest room.Outside 13 – The west wall of the house viewed from the northwest. The steel posts and girders will support a cover over the backdoor that opens into the kitchen and laundry room.Outside 13 – West wall of the house from the southeast. Because the western sun is so hot and not shaded by mature trees, we minimized the widows in this wall. The vertical steel posts will support gabbions — rock filled wire cages — that will line most of the first floor of the western wall. In the center is a low, horizontal window that will open into a gap in the gabbions. On the right, is a full-height window into the dining room that that will get light and air filtered through the gabbions.Outside 15 – On the left is a large window at the front of the great room. The yellow is sheathing on the bottom of the 8-foot, roof overhang for this window. In the center is the deck, with the opening to the space that will have the 10,000 gallon water bag. Continuing further to the right is the apartment — the hillside largely blocks any view of the apartment underneath it. The opening outline in red tape is the door to the apartment.Outside 16 – Looking out from the house at the deck in front of the great room. The deck ends at the 8″ high wall. The black area beyond that will be the green room. The white-sheathed area beyond that will be a standard, raised seam, metal roof. Both roofs are above the apartment.Outside 17 – Looking back from the green roof above the apartment to the house. The windows below open into the great room. Those above open into a sitting area outside of the office and to the stairway between floors.Outside 18 – To finish the outside tour, this promises to be one of our favorite elements: a part of the deck that has been cantilevered out so that it sits within and under a cluster of oak trees.
This post has gotten quite long. We will continue with the inside picture tomorrow. Stay tuned.