September 2, 2019

Happy Labor Day! There has been significant progress on two projects during the last two weeks and minor additional progress on the stucco.

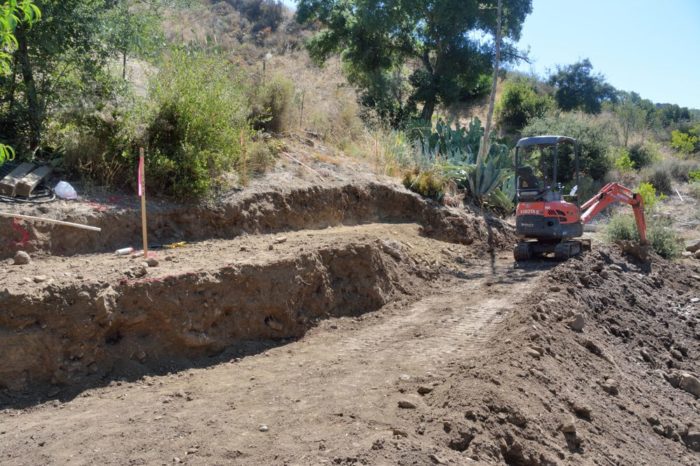
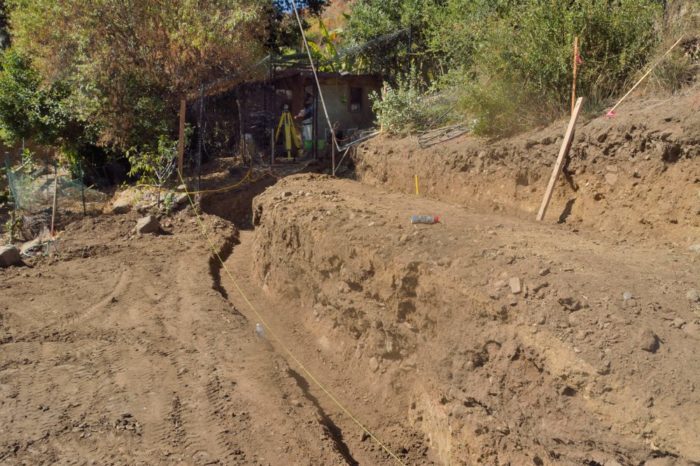
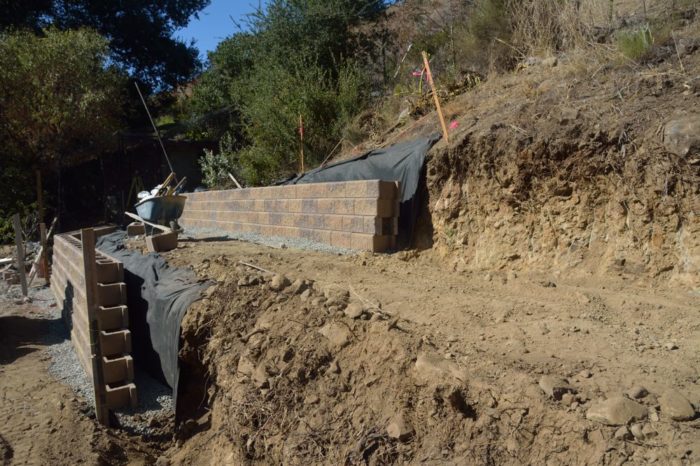
After a slower than expected start the backyard grading is now moving forward nicely. Pictures 1 and 2 show the first, rough grading for the top two (of four) walls that will separate three terraces in the re-contoured backyard. These were taken 10 days ago Saturday (August 24).

Picture 1- First rough grading for the top two terraces and walls.
Picture 2 – Another view of the rough grading for the top two terraces and walls. Even to my eye, it was clear that neither wall was tall enough and that they would need to lower the elevation of both the terraces. The top wall was meant to be 3 feet high and the one below 4 feet high.

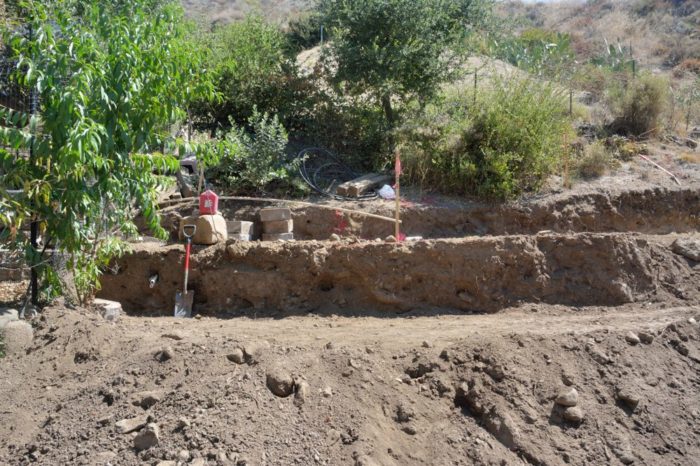
By the afternoon of the next Wednesday (August 28), they had gotten the terraces to the correct levels and dug the 8″ deep footing trench required for these block walls.

Picture 3 – Cuts for the top two garden walls and terraces in the re-contoured backyard. In this picture you can see the footing for the lower wall. This is an 8-inch deep, 2-foot wide trench. The bottom four inches will be filled with gravel on which the blocks are laid. The gravel then continues up behind the wall.

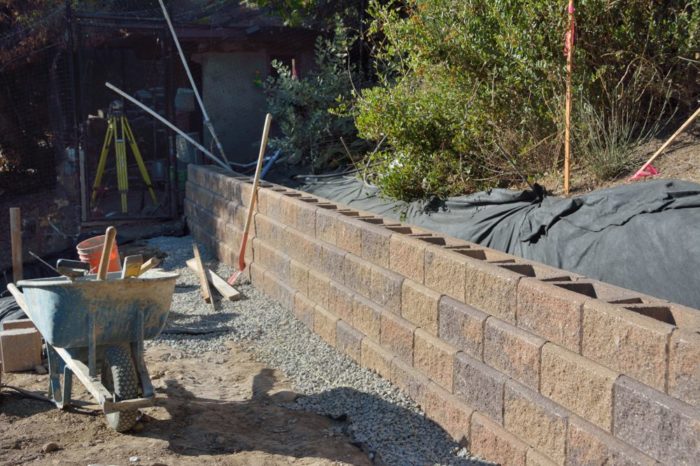
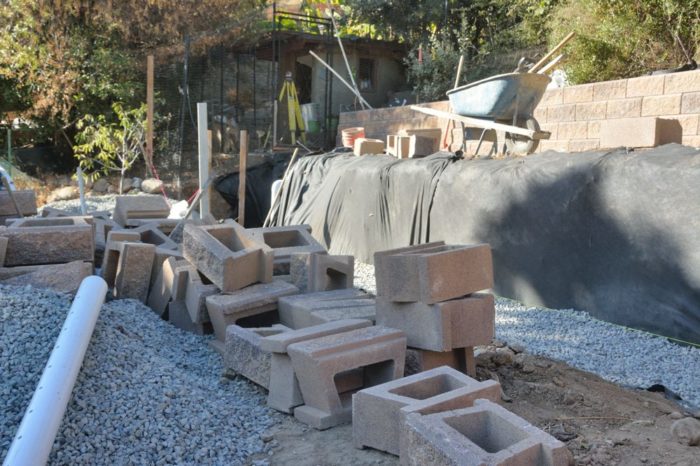
Picture 4 shows that, by Friday afternoon, they had laid the block for the top wall — this terrace runs to the gate of the chicken coop. Unfortunately, as Picture 5 shows, with this wall in place, it was clear that the stairway to the upper backyard cannot go where I had anticipated. Instead, they will extend the top wall another 10 feet where it will start stepping down, forming the downhill side of a stairway to the upper backyard. Picture 6 shows that they have the material ready to put in the first half of the third wall.

Picture 7 shows the competed section of this wall that they completed Saturday morning.

Picture 4 – Top wall in place running to the gate of the chicken coop.
Picture 5 – Whoops! When I was laying the walls out, I thought that a stairway to the upper level could go here, but with everything in place it is clear that this was not a great idea. Instead the wall will extend another 10 feet or and step down to form side of a stairway.
Picture 6 – This shows everything in place to build the first section of the third wall. They have put down the black, filter fabric that lets through water, but keeps mud and silt out of the gravel. On top of the fabric, in the footing for the wall, is the four inches of base gravel. Once the wall is up they will fill the cavities in it and the gap behind it with more gravel.
Picture 7 – The newly completed section of the third wall on the left, below, and the top wall on the right. Notice that they have cut away more of the upper bank to make room for the extension of the top wall.

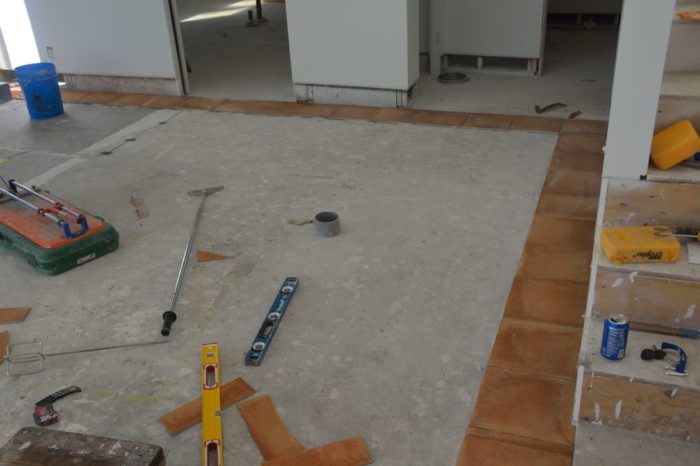
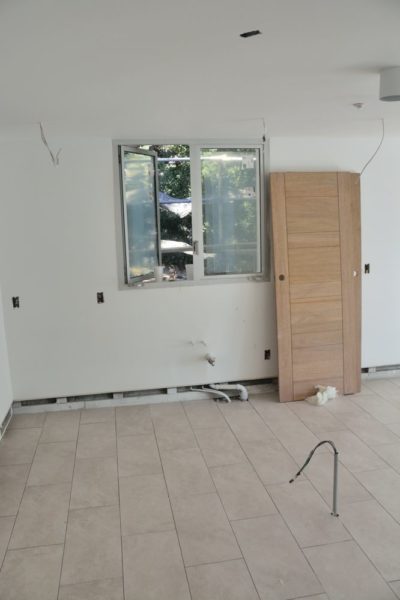
The other area in which there has been exciting progress is the floor tile. By last Friday afternoon they had tiled the apartment. Because this is a five-walled structure, the tile in the apartment has something of the effect of an Escher print. Picture 8 shows how, in the back of the apartment, which includes the entrance, kitchen, bathroom and pantry, the tiles are laid at right angles to the walls. However, if you walk in to look at the living room by turning to the right, as in Picture 9, the same tile layout now is no longer square to the walls but at a 45-degree angle. (The wall to the left in Picture 9, is part of the same wall seen straight ahead in picture 8.)

Picture 8 – View into the kitchen area from the entrance. The living room is to the right.
Picture 9 – View of the living room, with the doors to the deck open.

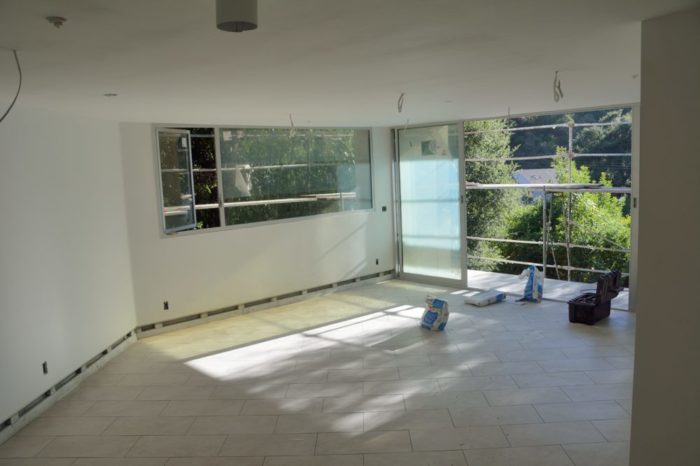
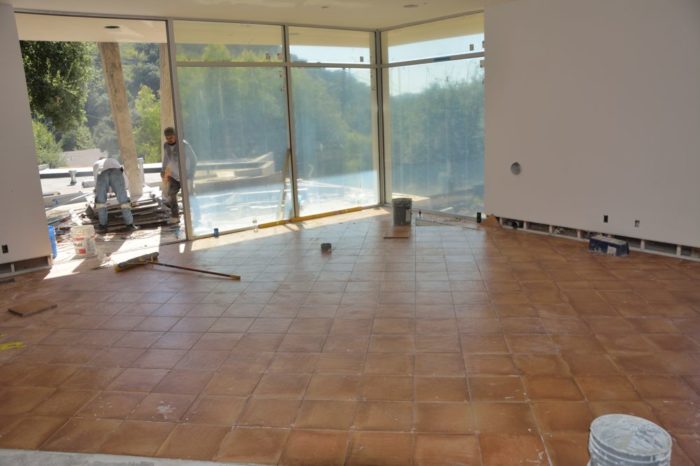
On Friday afternoon, they had also laid the edging tiles in the great room of the house. As Picture 10 shows, these are laid parallel to the walls. The field tiles in this room will be turned at a 45-degree angle from the border. This is shown in Picture 11, taken Saturday afternoon as they were completing the great-room tile. We have been told that having a border like this is no longer done, but we like it, so now we’re waiting for the style to come back into fashion.

Picture 10 – Completed border tiles in the great room. On the left (under the blue pail for instance), the floor without tile looks different than in most of what is visible. That is because in the area on the left, as in most of the room, there are electric heating wires embedded into the floor. There is no heating grid in most of the area in this picture because this area will serve as walkways rather seating areas of the room.
Picture 11: nearly completed great room floor
This entry was posted in house. Bookmark the permalink. Post a comment or leave a trackback: Trackback URL.

Post a Comment

Your email is never published nor shared. Required fields are marked *

*
*