Monday, January 14, 2019

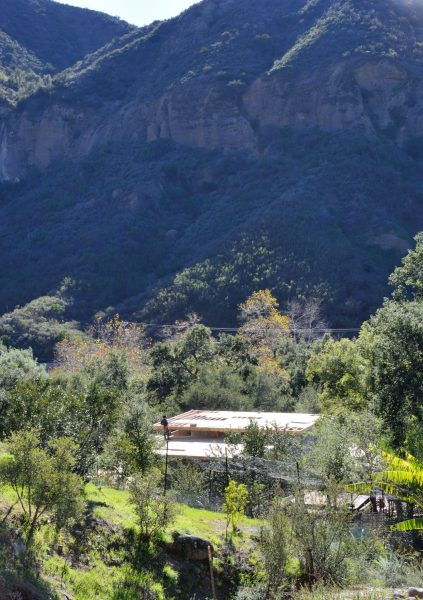
It has been a week since the last blog for a number of reasons. Now that we are living full time 45 minutes from the construction site, it is more difficult to get out there often. In addition, this week Ted was consumed with the Campuswide Honors Program admission process. Finally, it rained some last week and is raining Monday through Thursday this week. So maybe these posts will start being weekly, and maybe not …

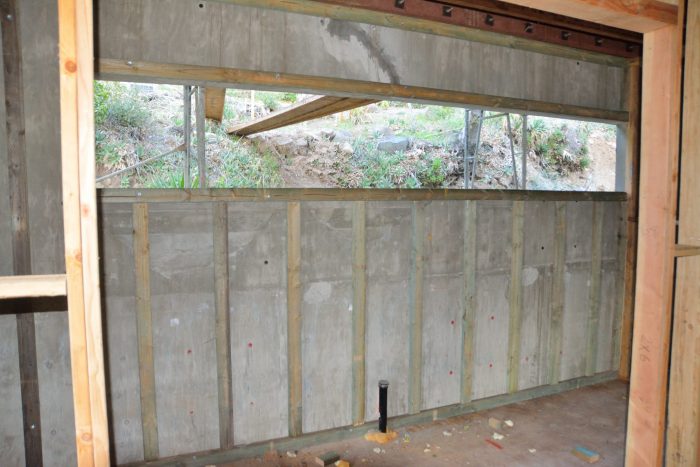
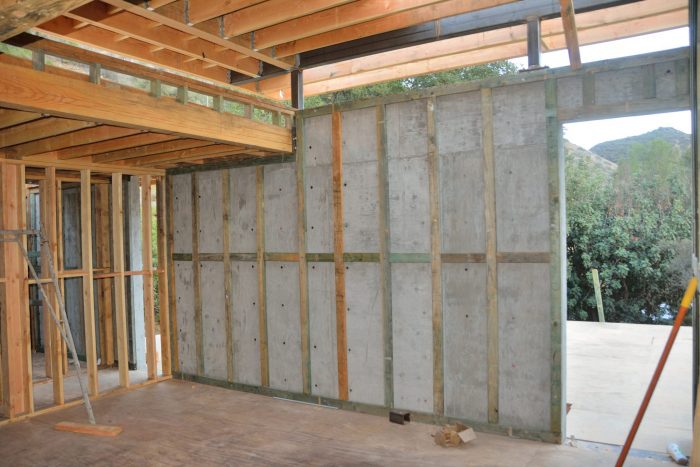
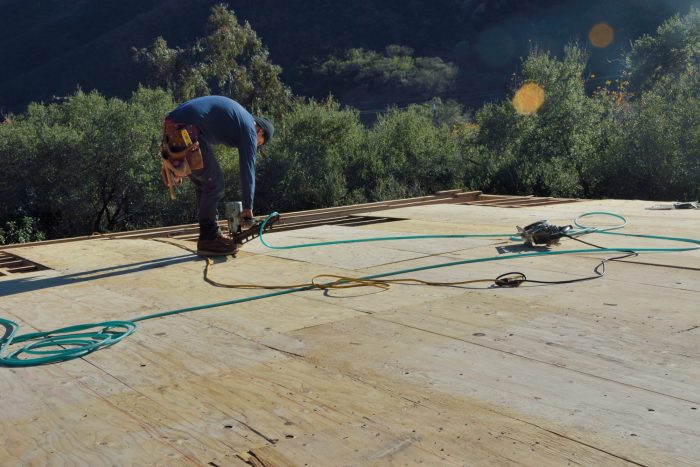
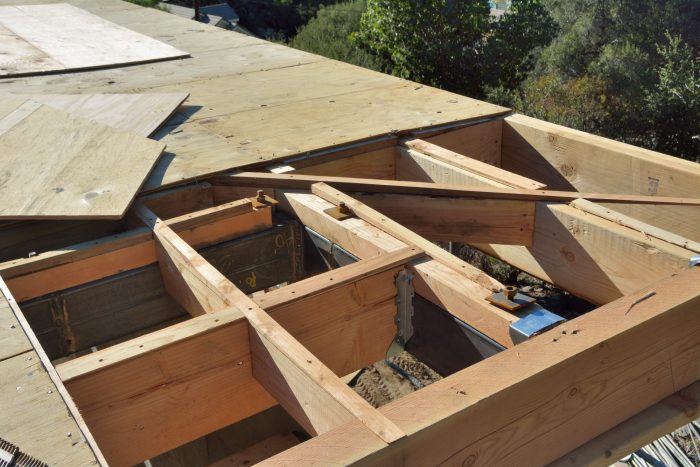
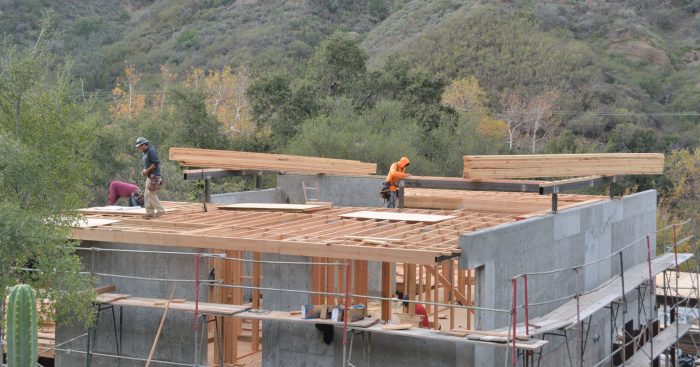
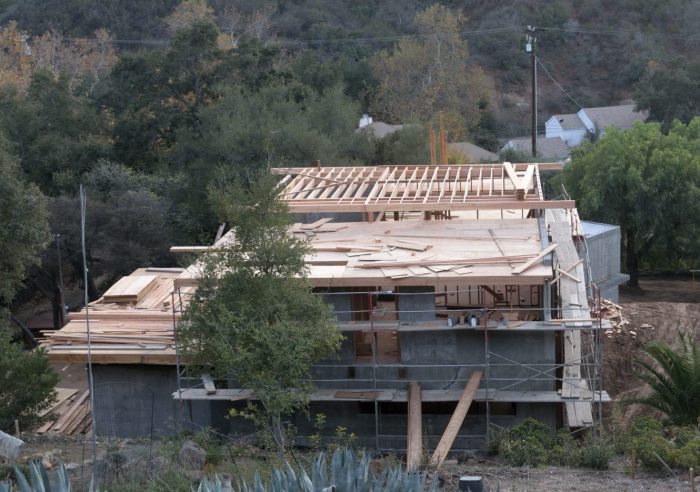
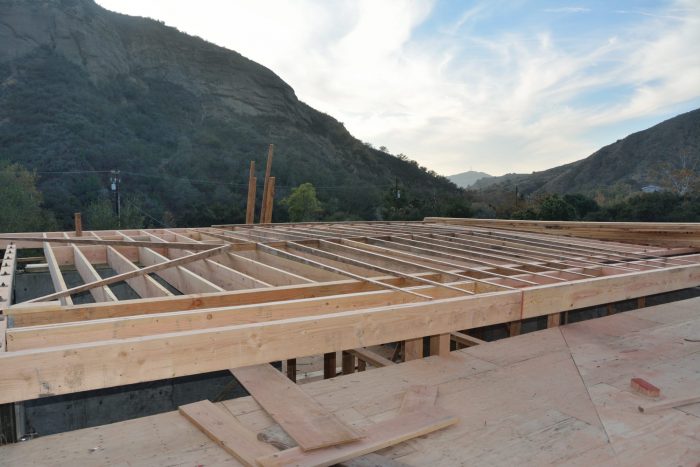
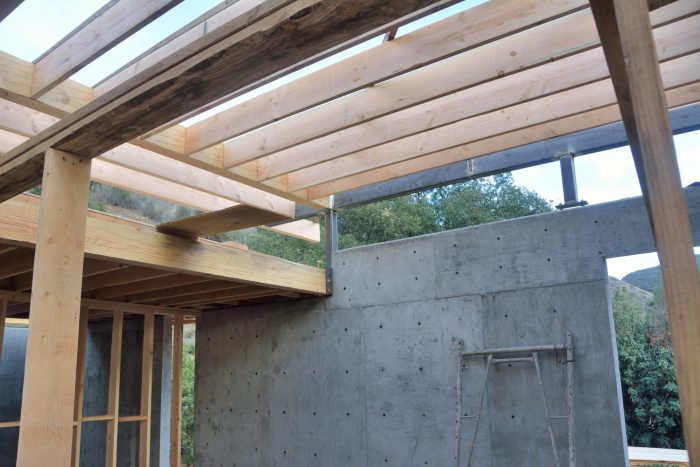
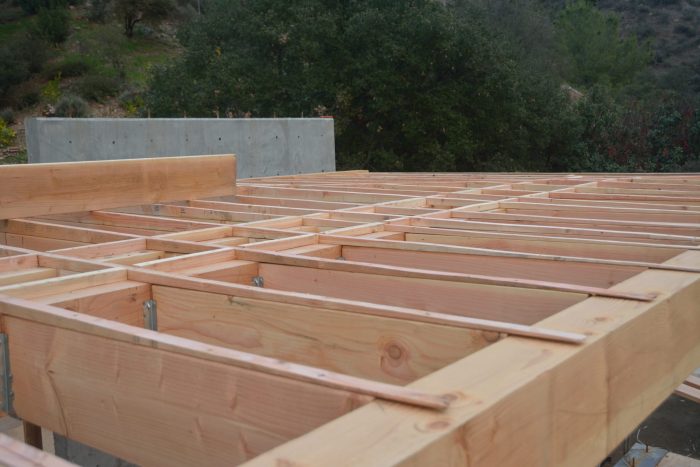
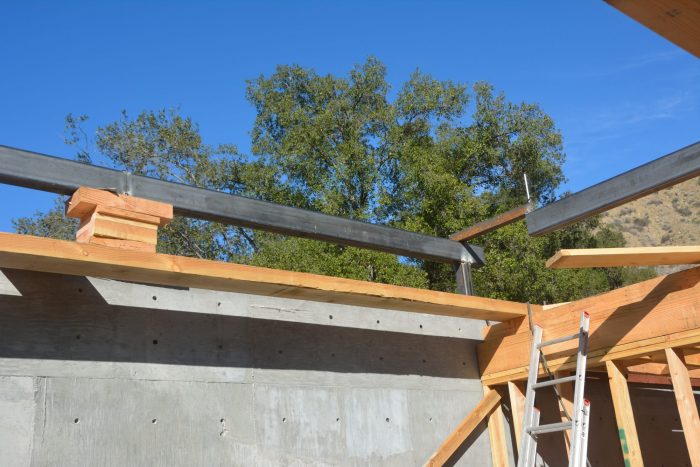
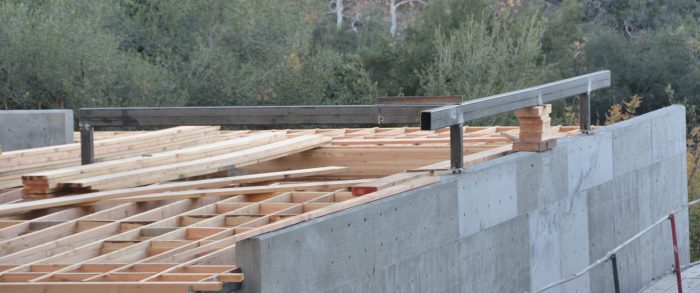
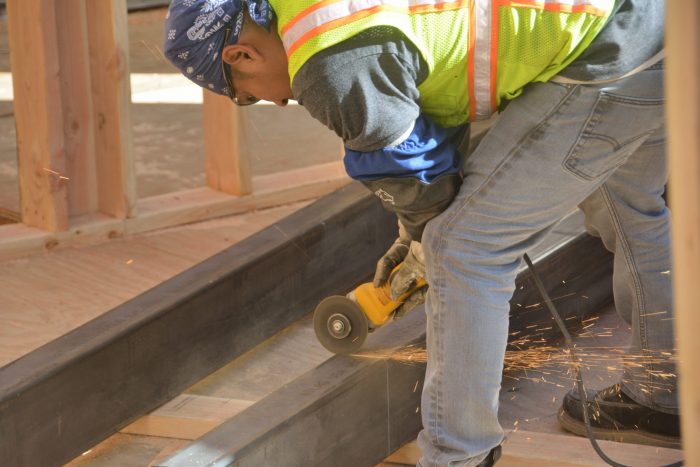
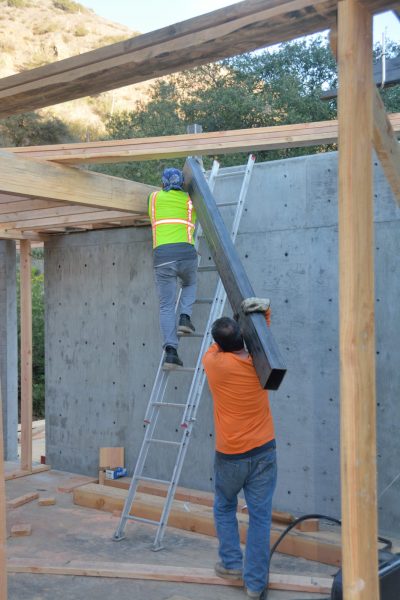
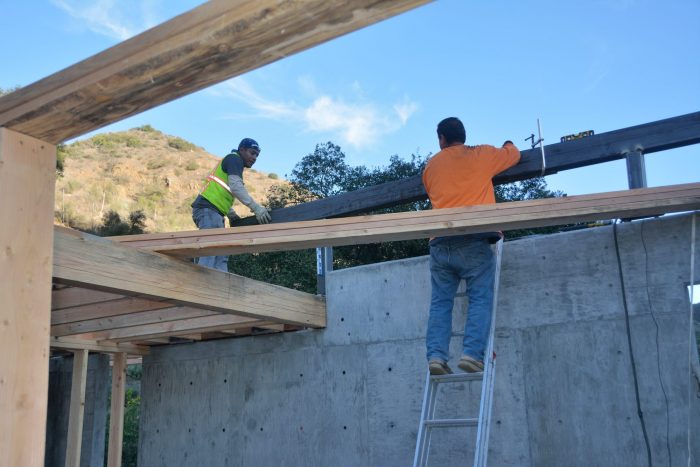
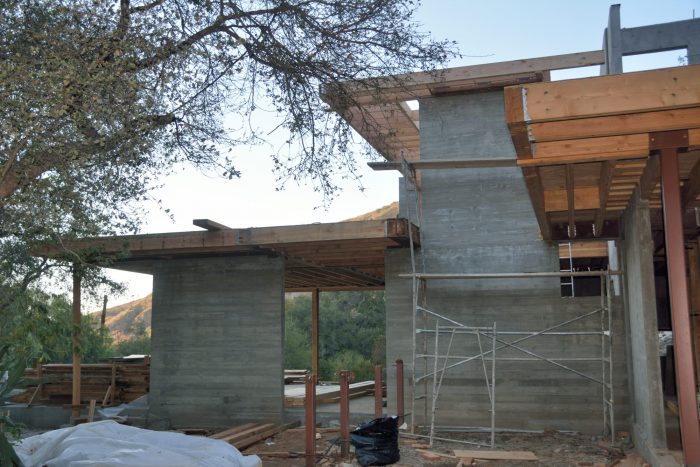
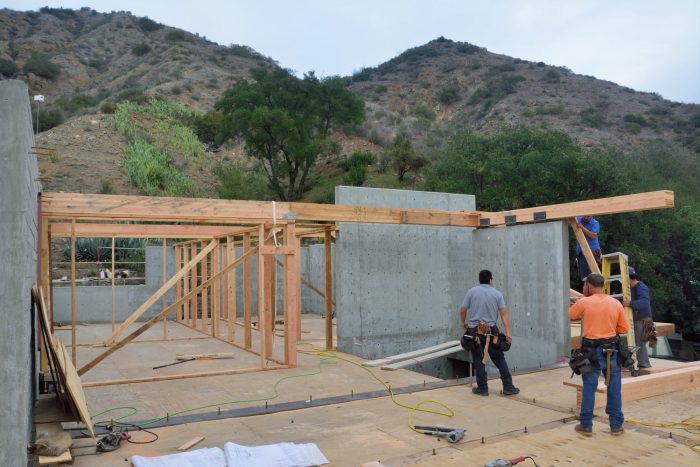
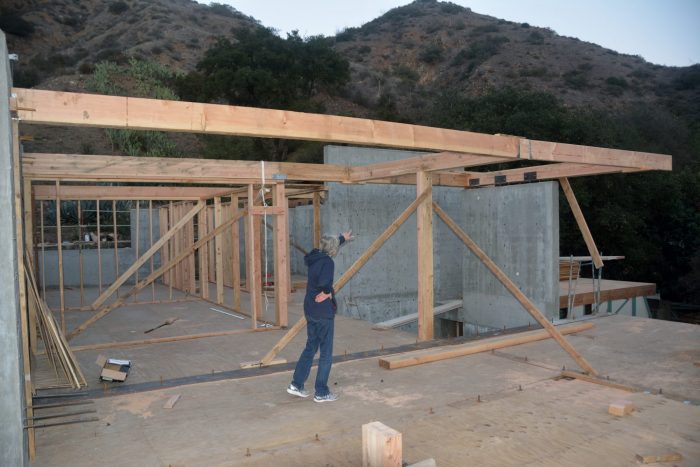
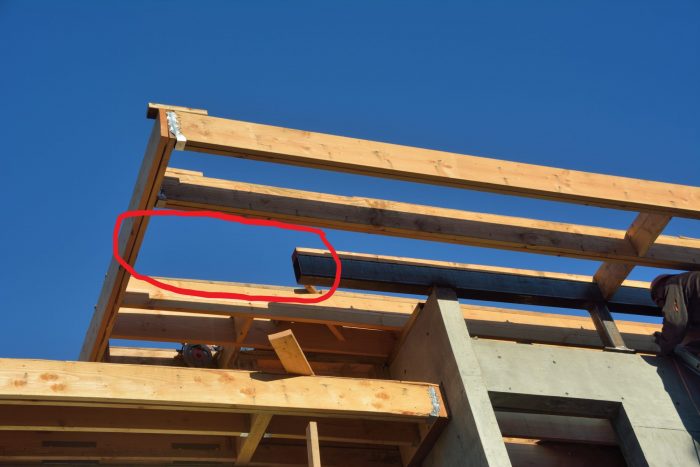
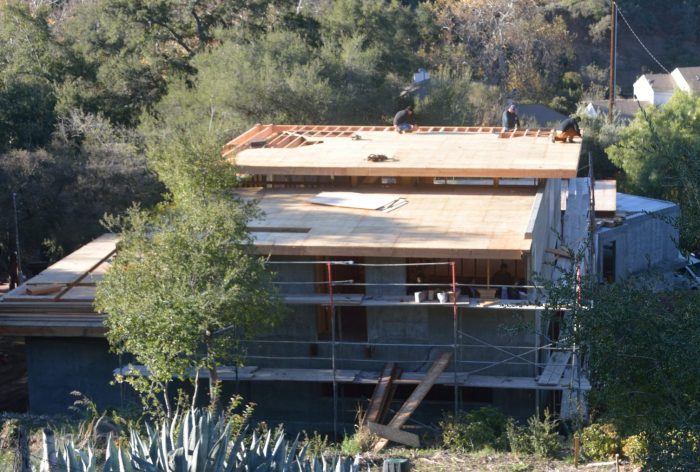
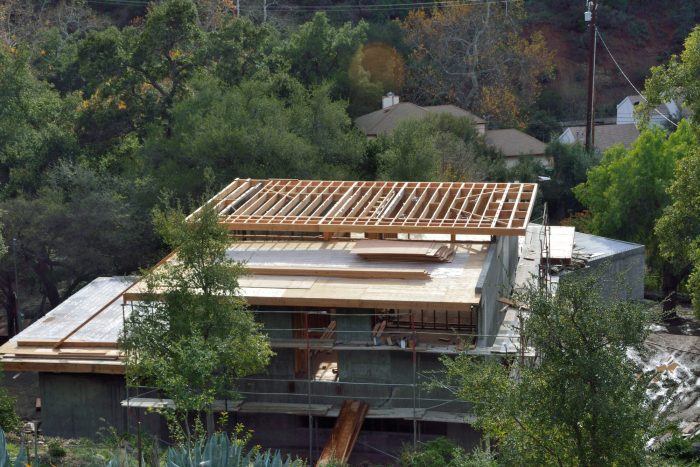
Although most of the high roof has been completed for a week, there was a section, in the southeast corner, that they never put the sheathing on. When we asked, we were told that a steel beam in that section was too short (See Picture 1) and that they needed to fix this before they could complete the roof. When Ted was out last Thursday, the steel workers were there to work on the beam. However, the big news was that the general contractor had looked at the way that the high roof had been constructed, pronounced it completely wrong, and told the framers that they needed to take off all of the sheathing and the wood strips creating the roof pitch on the high roof, and replace it. Picture 2 shows the sheathing coming off. Picture 3, taken when we were out again on Sunday afternoon shows it all off.

What was the problem? What was constructed was a “hip” roof: the high point of this roof was a ridge running in the center of the roof, so that the roof sloped from this center ridge toward all four sides. This is a common roof design that you see on many older houses. The plans, however, call for the roof to be a flat plane, higher on the south side and sloping toward the north side. Because the pitch is only on the order of 1/2″ per foot, which way it runs hardly seems like a major aesthetic issue, but the contractor was adamant that is was “wrong for the style of the house” (and it was not according to the plans). While we are happy to have the contractor making sure this is all done right, we are unhappy that a large section of the house is now open to the elements during the week when we are getting 4-5 inches of rain.

Picture 1 – Section of the high roof with the missing section of steel beam highlighted.
Picture 2 – Sheathing being removed from the high roof.
Picture 3 – High roof with all of the sheathing and shimming to create the pitch removed; ready to be re-roofed and to let the rain in.

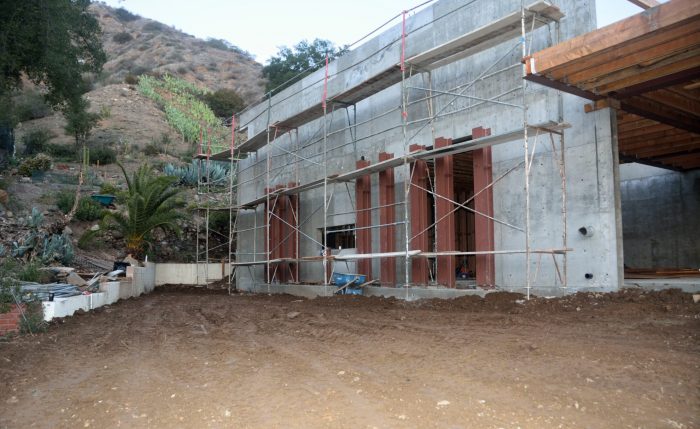
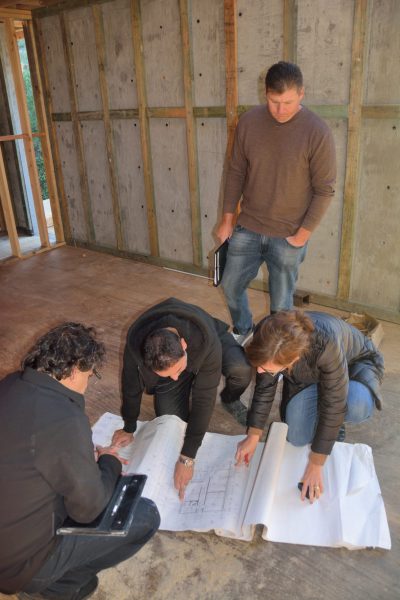
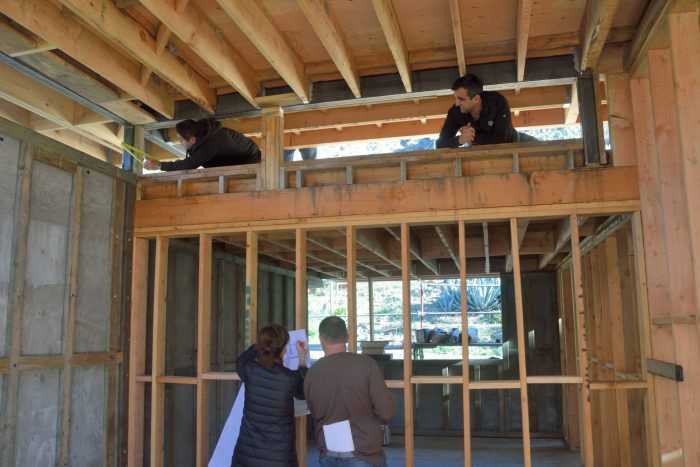
Ted was out on Thursday because Angie, a representative from Fleetwood who is manufacturing our windows, was on site to measure the window openings and consult with Kevin, our general contractor, and the subcontractor who will be actually installing the windows. They are shown looking at the plans in Picture 4. Angie was amazing, dominating the conversation with all of these contractors , because of her knowledge and competence, . Picture 5 shows Angie directing Kevin and his brother as they collect measurements for one of the clerestory windows.

Picture 4 – Angie, the representative of the window manufacturer, looking at the plans with Kevin, our general contractor next to her, and the subcontractor who will install the windows on the other side. They guy behind Angie worked for her, writing down whatever she told him.
Picture 5 – Angie directs Kevin and his brother as they collect measurements for one of the clerestory windows.

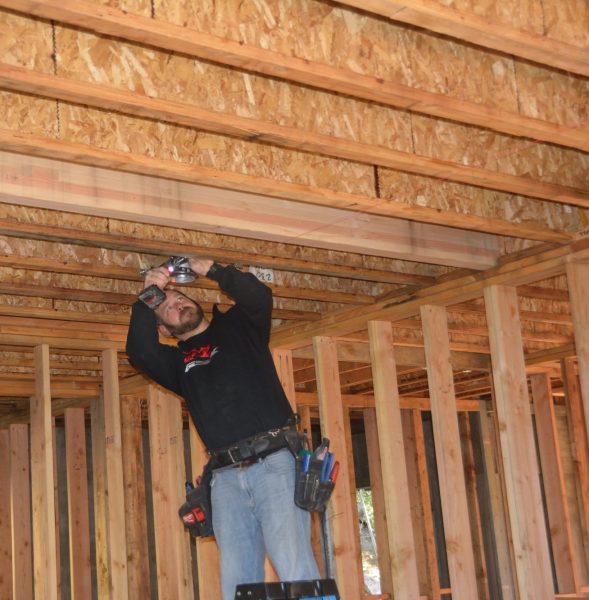
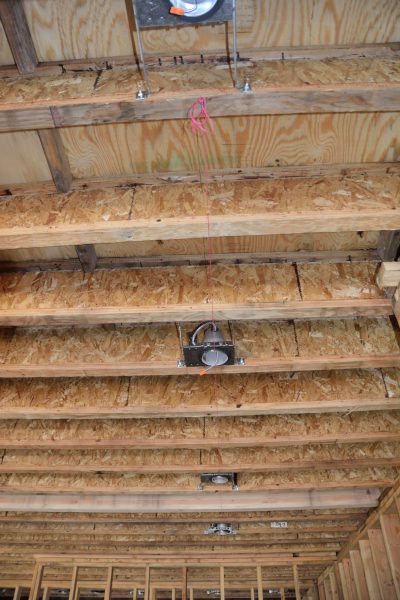
Also at the site on Thursday were electricians who were installing the can light fixtures in the ceiling. Picture 6 shows this work in progress. Picture 7, taken Sunday, shows a line of installed lights in the kitchen.

Picture 6 – One of the can lights being installed in the kitchen.
Picture 7 – A completed line of light in the kitchen. Notice the red string that they used to line them up.

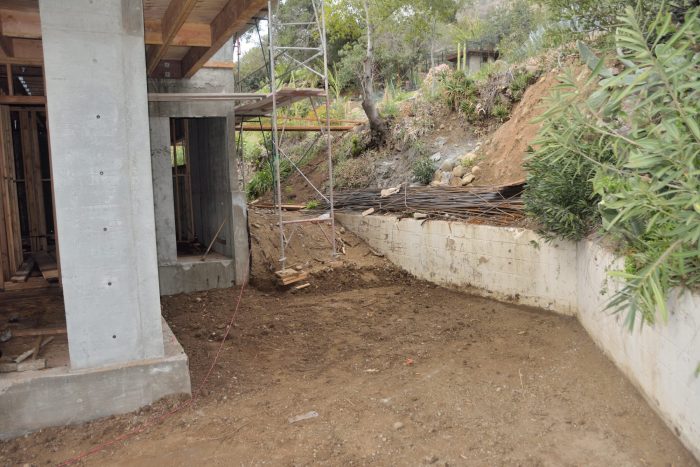
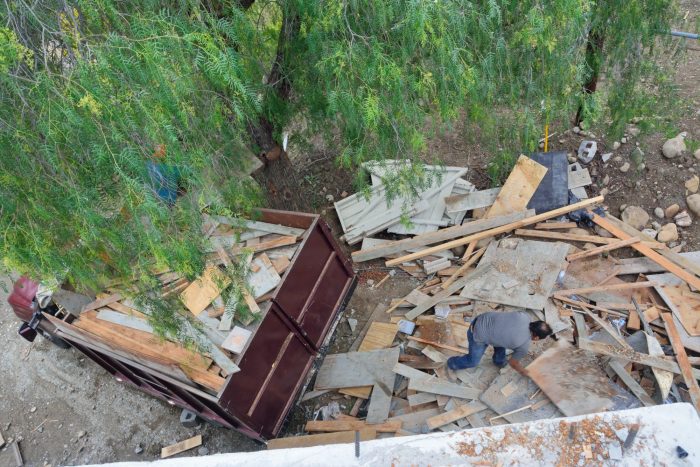
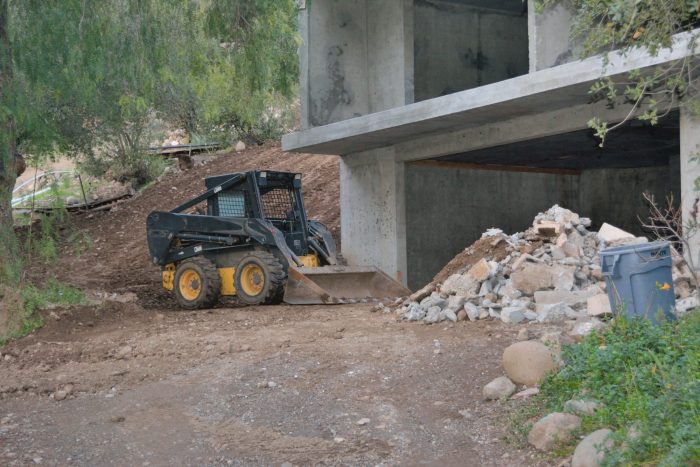
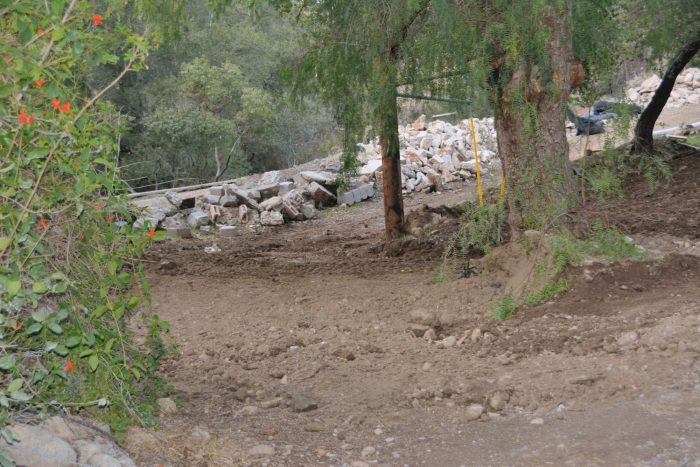
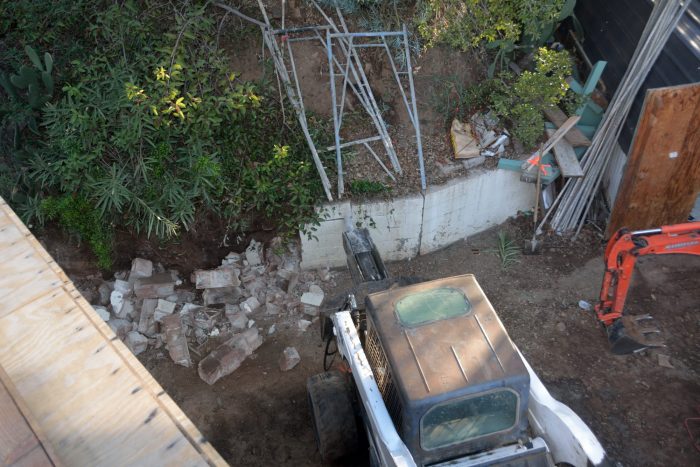
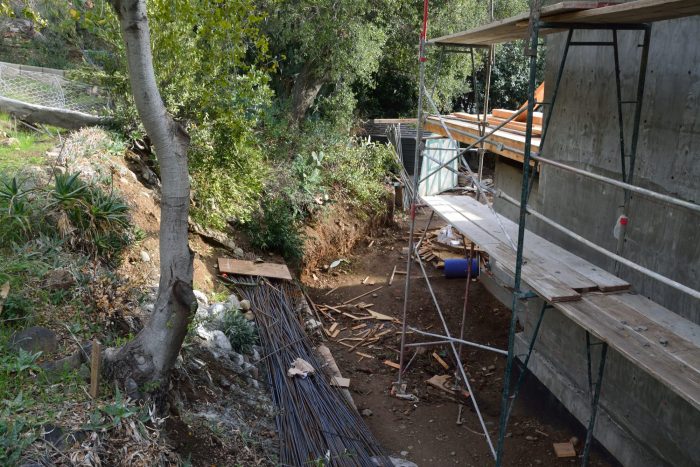
Also on Thursday, a demolition crew was on site removing a section of the retaining wall behind the house (Picture 8). This is in preparation for building the new retaining wall that will extend from the east side of the back of the house and join up with the segment of the existing wall that they will leave in place next to the shed (that will be torn down). Picture 9 shows the site of this wall.

Picture 8 – Jack hammer removing some of the retaining wall behind the house.
Picture 9 – With the wall removed, the new retaining will will be built here.

Pete, our handy, jack of all trades, friend returned right before Christmas, just in time to help us move the backyard plants and tables from our rental to the Modjeska property. He has been busy straightening up from the contractors. This past week he built a small bed at the foot of the solar panels out of some of the blocks from an old removed wall. Standing on the edge of this wall will allow us to clean the solar panels more easily. He planted it with cauliflower and kohlrabi and pea seeds. What you see behind the bed are some of the many things we are storing under the panels. Also notice how green the hillside beyond is already.

New solar bed with cauliflowers.

The picture below shows a large stalk of green bananas with their flower at the end of the stalk.

Bananas in the gully with the second backyard in the background.
Snowdrops

These are the snowdrops coming up at the bottom of the stairway up to the front door.

Posted in house | Leave a comment

Monday, January 7, 2019

This morning a new crew cleared away the refuse from the framing and then began digging the trenches needed for the footings for two retaining walls that will extend out from the back wall of the house.

Picture 1 shows the work on the west side of the house. The orange lines on the ground indicate where the trench for the retaining wall needs to be dug out. Probably because of the limited space, this will be dug by hand. The first foot of this trench needs to be dug four feet wide; however, part of it needs to be dug down six feet.

Picture 2 shows the back wall of the house on the east side. The retaining wall here needs to join up with the back wall of the house visible near the center of the photo. This trench needs to be substantially deeper and wider than the one on the west side. Fortunately, this area is also more accessible and so they should be able to use a machine to dig the trench for the footing.

Picture 1 – Digging of the retaining wall foundation trench on the west side of the back wall of the house.
Picture 2 – Site of the retaining wall on the east side of the house.
Posted in house | Leave a comment

Friday, January 4, 2018

Ted’s sister Norie was in the area today so we were able to show her the current state of the house. There were five framers working, but it was hard to see what they had done. Walking through, it appeared that much of what they were doing was adding more blocking between studs or joists and installing joist hangers, metal U-shaped supports that improve the connection between a joist and the beam or ledger board to which it is connected at right angles.

They also put up many of the studs for the inside of the exterior walls. These will provide a place to attach Sheetrock. They also create voids through which the electrical wiring can be run. Because these studs are next to the concrete walls, which can wick in moisture, they had to be constructed using special, treated lumber. The two pictures below show examples.

Picture 1 – Studs framing the exterior wall of the laundry room with its north-facing high window.
Picture 2 – Studs framing the east wall of upstairs multi-use room. The door on the right opens onto the east deck. Note the opening for clerestory window above the wall.
Posted in house | Leave a comment

Wednesday, January 2, 2019

As Picture 1 below shows, not a lot happened on the house during the week that we were gone. The different vantage point of this picture helps put the house in the larger perspective of the canyon. The structure just visible on the lower right edge of this picture is the chicken coop.

Picture 1 – House viewed from the solar panels.

Of course, as the work progresses more and more of what get done will not be visible from the outside. For example, one of the workers spent much of the day today, putting blocking in between the studs. As you can see in Picture 2, for the walls, blocking consists of horizontal pieces of lumber nailed between the vertical studs. The blocking keeps the studs from twisting or bending under a vertical load.

Picture 2 – Example of blocking for the studs.

As in Picture 3, there was also one man today installing the sheathing on the high roof. This is finicky work because the plywood needs to be cut into odd shapes to follow the ridges in the roof. One advantage, however, is the pneumatic nail gun he is using. With just the pull of a the trigger it fully sets a 3 or 4 inch nail, something that would probably take at least 5 or 6 swings of a hammer and maybe 10 seconds without the nail gun.

Picture 4 is a closeup of a corner of the roof with one of the ridgelines running down into it. Because of the overhangs and the spans of the windows, some of the structural members supporting this roof are steel beams.

Picture 3 – One of the workmen installing the roof sheathing on the high roof.
Picture 4 – Structure supporting the roof at one corner.
Posted in house | Leave a comment

Friday, December 21, 2018

They finished the structural steel for the high roof on Thursday. Today the framers put the sheathing on the lower roof and added a wooden beam to the structure for the high-roof. You can see this work just starting in Picture 1, which was taken Friday morning, and completed in Picture 2, which was taken after the workmen had left Friday afternoon. It is not clear why there is a steel beam on the right (western) end of the north side of the high roof and a wooden beam on the left (eastern) end. Perhaps is is simply that the span on the right side is a foot or two longer.

Picture 1 – Friday morning. They are just beginning to put the sheathing on the lower roof.

Meanwhile, back at the condo, Ted was busy with a smaller building project: adding the storage loft shown in Picture 3 to the garage of the condo. Somehow we just have too much stuff!

Picture 3 – New loft that Ted built in the garage of our condo in Irvine.
Posted in house | Leave a comment

Saturday, December 22, 2018

This will be the last post for a week, since we leave for Austin tomorrow. It is not clear to us how much of a holiday the builders will take, so there may not be much to document anyway.

Today, however, they did most of the framing work for the high roof. This is something that Ted has been eagerly awaiting and quite a watershed event. It is the last structural piece of the house proper that needs to be done. Once they have the high-roof sheathed, they can put down tar paper on all of the roof so the house can begin to shed water. With the inside drier and the framers done, the focus will turn to the plumbing and electrical work along with windows and doors.

Picture 1 shows the house from behind and above, with the framing for the high roof visible at the top of the house. Picture 2 is a detail showing the almost completed arrangement of long pieces of lumber, ripped at an angle to create the slope for the eventual metal roof. Picture 3 is a view from inside a room on the second-floor that shows the openings created i by the high-roof for clerestory windows on the north and east sides of the room.

Picture 1 – View from above with the structure of the high roof visible.
Picture 2 – Closer view of the high roof, showing the wood on top of the joists that will give the eventual metal roofing here pitch so water will run off.
Picture 3 – View from inside one of the second-floor rooms that shows the openings created by the high-roof for clerestory windows.
Posted in house | Leave a comment

Tuesday-Wednesday, December 18-19, 2018

We have been pushing hard to move out of the rented house in Modjeska Canyon and finish the upgrades to the Irvine condo. Between that and the papers that Ted had to get graded so that he could submit grades by 5PM Thursday — they were in at 4:28 — there has not been much blog writing done this week. We did get some pictures on Tuesday and Wednesday, however.

No one worked on Monday. On Tuesday, the framers did the tedious job of “ripping” (i.e., cutting long pieces of lumber lengthwise) angled strips of lumber to create a slope so that water will run off the low roofs. Picture 1 shows a section of roof with these in place. Next will come a layer of plywood and finally metal roofing.

Picture 1

On Wednesday and Thursday, the structural steel for the high roof was fabricated onsite and installed. The high roof is over part of the second floor and will have high, clerestory windows in it. Picture 2, was taken Tuesday morning from inside the house and shows sections of this steel being fabricated on the west and north sides of the high roof. You can see here how they temporarily support these sections of steel so that they can spot weld them. The joint on top of the piled lumber on the left has been spot welded — when everything is in place and they have checked it, they will do a full, continuous weld all around the joint. Just to the right of center is a gap that they need to fill. The beam to the left of the gap is supported by the post it is on. The left end of the beam to the right is being held in place by a piece of scrap steel clamped to it and sitting atop the beam on the left. Picture 3 is a picture taken Wednesday afternoon from the backyard above and to the north of the house. It shows this same area with all of the pieces in place and fully welded.

Picture 2 – Sections of the steel, high-roof supports being fabricated on the west and north sides of the house.
Picture 3 – The same section of beams, completed.

Unlike the heavier I-beams, these rectangular beams can be cut using just a grinder, as shown in Picture 4. They are heavy, however. I can barely lift up one end of one of these beams. Picture 5 shows two guys carrying one up a ladder and then, in Picture 6, clamping it in place to weld it.

They should have finished this work on Thursday, but we did not get out to the house in the afternoon (we are now living in Irvine 45 minutes away) to get any pictures.

Picture 4 – Cutting the rectangular beams with a grinder.
Picture 5 – Lifting a beam up to where it goes.
Picture 6 – Clamping the beam in place to be welded.
Posted in house | Leave a comment

Saturday, December 15, 2018

When Ted was growing up the tradition was that we waited to decorate for Christmas until December 15th. Although it was not quite the same, Picture 1 shows the exciting addition to the house today was the roughed-in stair from the great room to the second floor.  Picture shows what we hope that this will look like when it is done.

Picture 1 – Roughed in stairway.
Picture 2 – Photo showing — more or less — what we hope the stairway will look like when it is done.

Picture 3 is a view down the stairway from the 2nd floor. The interesting thing here is the divided window at the landing. The small section of window is under the overhang on the east deck roof; the larger window above looks out to the east above the deck.

Picture 3 -view down the stairway from the 2nd floor.
Posted in house | Leave a comment

Friday, December 14, 2018

As Picture 1 shows, a substantial portion of the second-floor, wood framing is now complete.  There is still a section in the middle that has not been done, however. (This is the area with some lengths of lumber just laid across it.) This will be the “high-roof.” It is high to accommodate a set of clerestory windows.

Picture 1 -Framing for the second floor. Most of what you can see are the roof joists.

Picture 2 shows the area near the front entrance — the front door will be where you can see the large gap in the first-floor, concrete wall, just to the left of the scaffolding. With the overhangs of the second floor framing in place, it is possible to get a better sense of what this area will look like.

Picture 3 shows the area just tothe right of that in Picture 2. This is the east wall of the master bedroom. The two openings in this wall are both for windows. There will be a door on the back side of the steel post that is visible on the left side of this picture.

Picture 2 – The front entrance to the house.
Picture 3 – The east wall of the master bedroom.

It has been getting cold at night (for here), low 40s to mid 30s. As Picture 4 shows, the chill has caused the leaves in the orchard to begin to turn. Last year, because we did not get enough chill hours (hours that a fruit tree spends in cooler temperatures, ranging from 32 to 45 degrees F), many of our fruit trees did not flower or bear fruit — of course it probably did not help that there were two days of 100 degree whether in late February!). I hope that these cool nights are harbingers of a better fruit year this summer.

Picture 4 – Leaves turning in the orchard.
Posted in house | Leave a comment

Monday+Tuesday, December 10-11, 2018

Note: The blog post for Monday, which is below, did not get posted in time to get distributed Monday, so there is an addendum for Tuesday at the end.

After a few days with little happening because our contractor had been away for a week and we had several days of rain, finally there was visibile progress today in two areas. First, one crew started to do some long needed clean-up of construction debris. Picture 1 shows that they have already filled their truck once and there is still much in the pile — and this is just one pile of several!

Picture 1 — Loading construction debris for removal.

The other exciting thing is that they began the framing of the second floor. Picture 2 is an overview of the framing taken from what will be the green roof on the south side of the house.

Picture 2 – Framing of the second floor.

Just before Picture 2 was taken, they were attaching a beam that will support the overhang from the front door. This is shown in Picture 3.

Picture 3 – setting the beam that will hold the overhang above the front door.

Pictures 4 and 5 show them placing another beam that is in the ceiling at the stairwell and extends out to form the overhang for the deck on the south side .

Picture 4 – Lifting one of the HEAVY beams into place.
Picture 5 – Attaching it.

Just to do any of this, as Picture 6 shows, they had to carry the materials up from the bottom of the yard and then lift them up on the second floor.

Picture 6: plywood lifted onto the second story floor.

On Tuesday the framers completed the structure of beams on the south side of the house, and added studs and beams that are not visible in Picture 7.

Picture 7 – The completed system of beams for the roof on the south side of the house.

The clean up continued along with grading of the area outside of the garage (Picture 8) and by the house (Picture 9).  For the first time in months we can now drive the truck up to the level area above the west side of the house where the solar panels are (Picture 10).

Picture 8 – Cleanup and grading of the area by the garage.
Picture 9 – Grading along the west side of the house.
Picture 10 – The road up the west side of the property to the solar panels is now accessible.
Posted in house | Leave a comment