Sunday, May 26, 2019

Ted and Nina went out to the house yesterday. Ted had been away Tuesday and Wednesday at a conference in Utah, so this was the first time that he had been to the house all week.

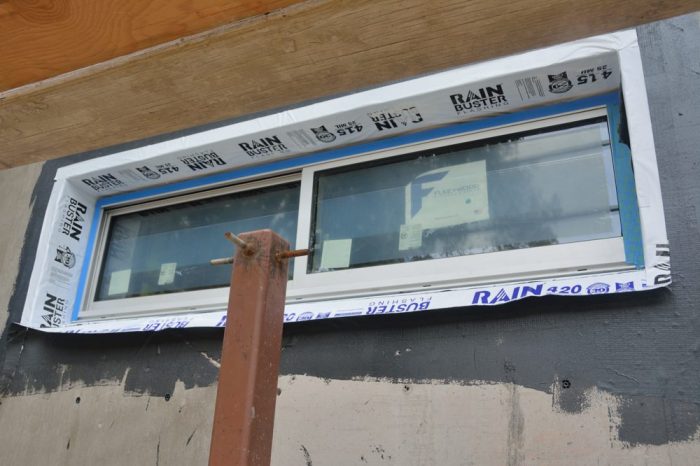
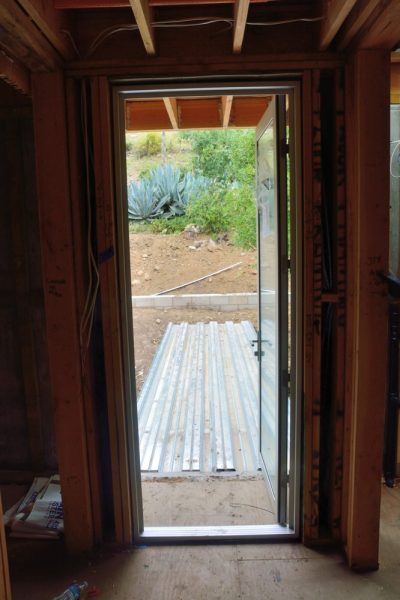
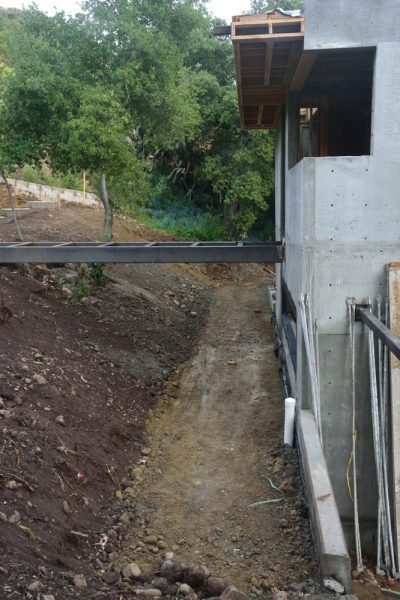
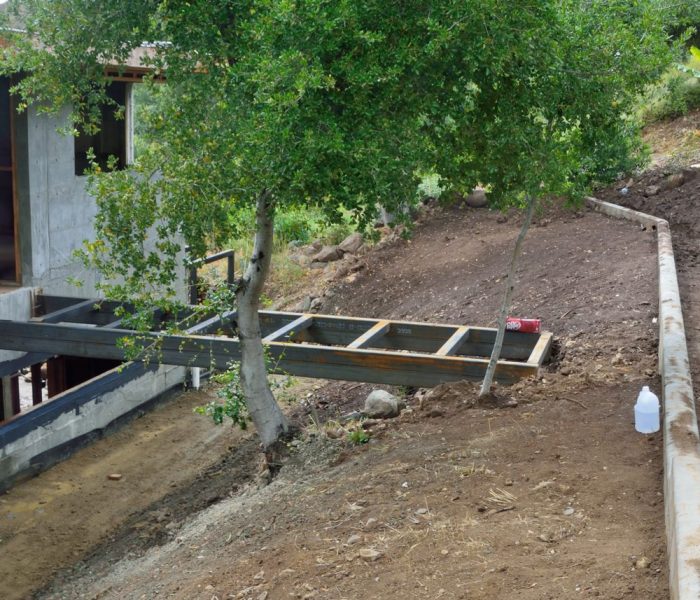
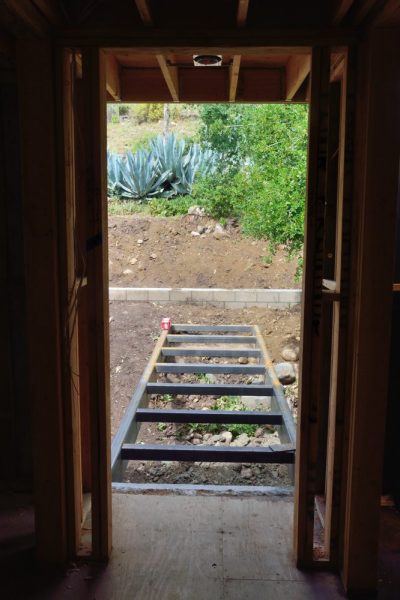
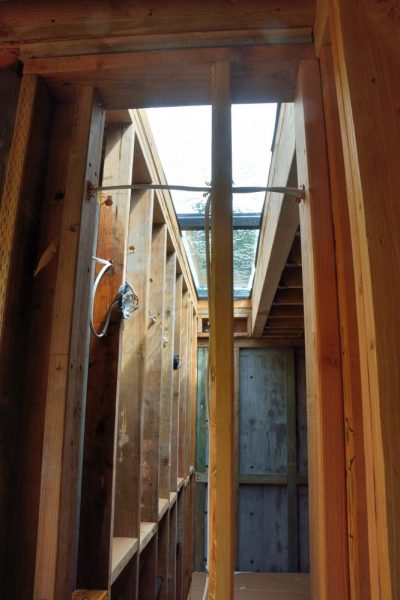
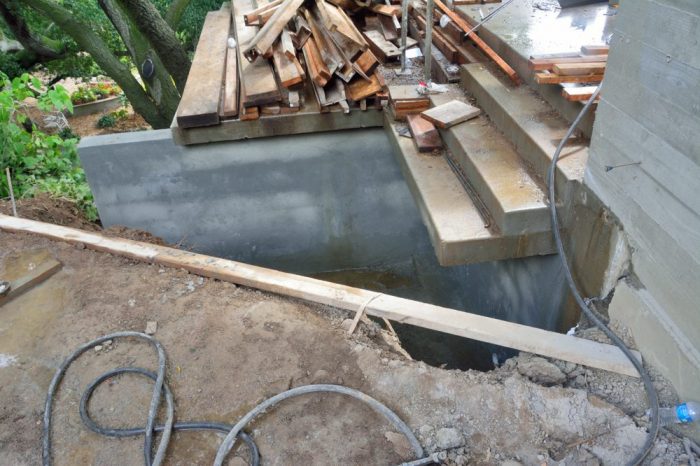
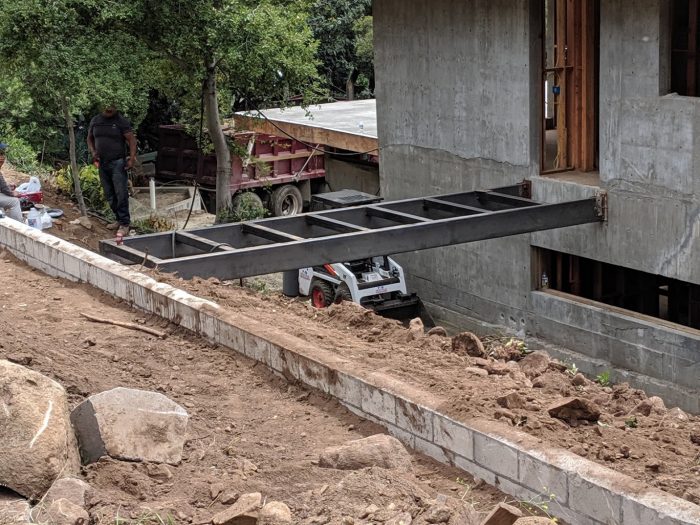
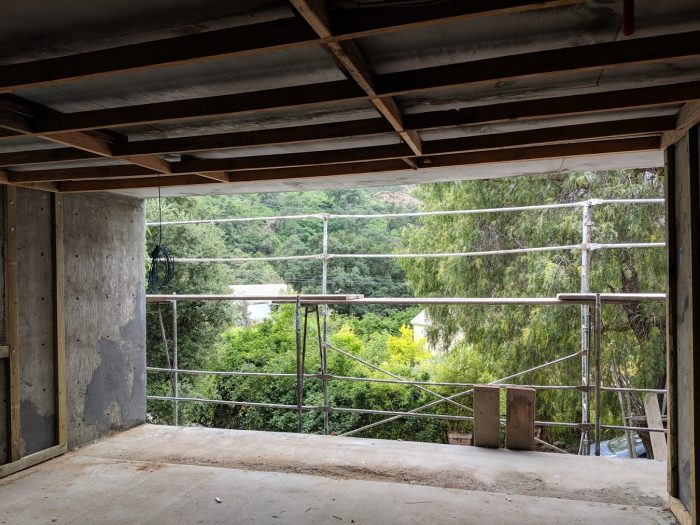
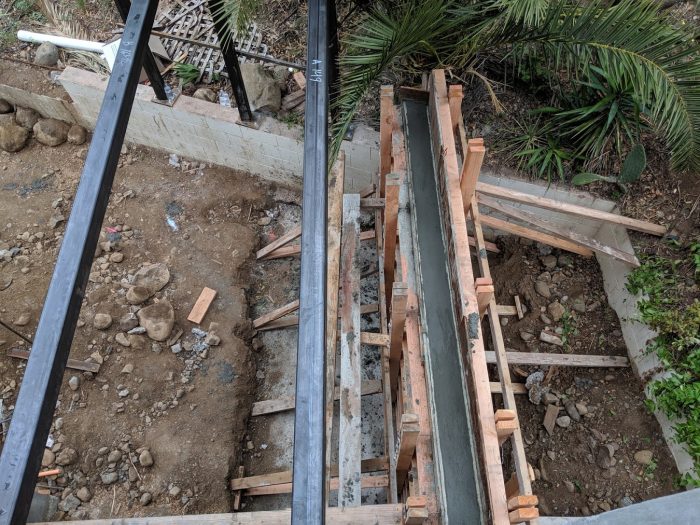
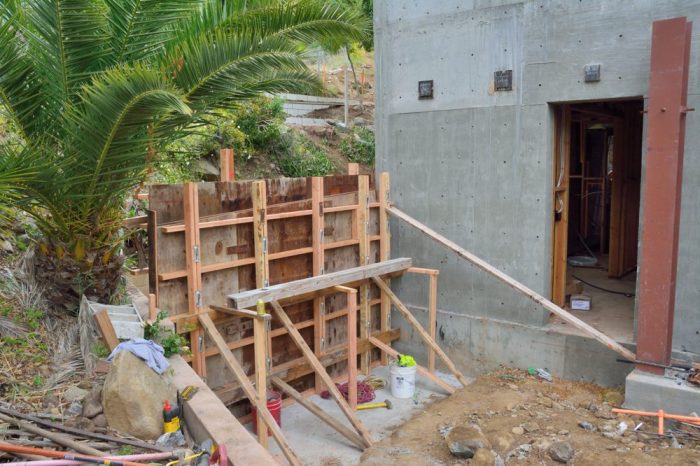
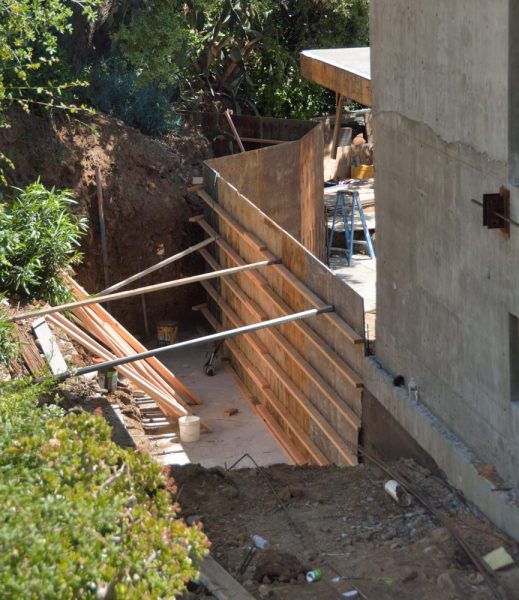
Somewhat disappointingly, not much was actually done installing the doors and windows this week. Picture 1 shows the installed kitchen window, one of the two windows that did get installed. Picture 2 is the latest iteration of the view out the backdoor on the second floor. In this version, there is a door! Also, note the metal form that has been welded to the steel support beams for the bridge from this door to the backyard; eventually this will be filled with concrete to form the deck of the bridge.

Picture 1 – The installed kitchen window.
Picture 2 – Latest view out of the back door on the second floor.

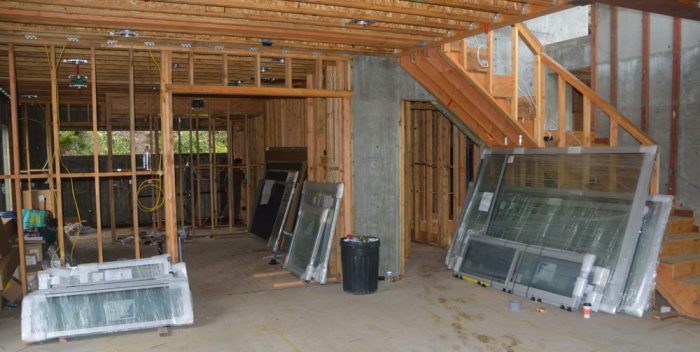
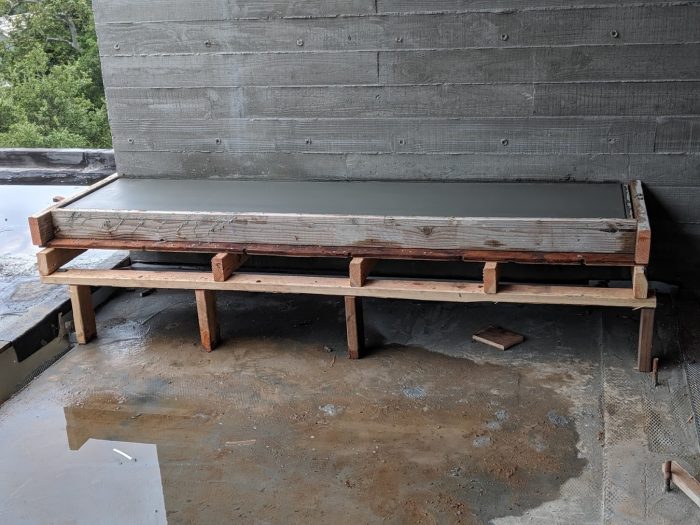
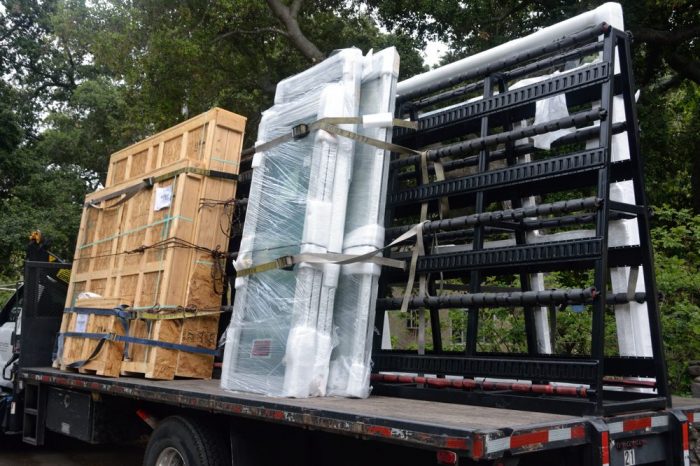
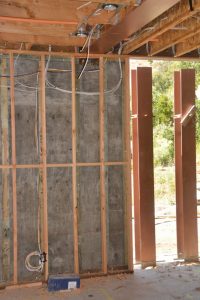
Picture 3 shows the sliding door that will be installed in the south wall of the great room that will open to the deck. In the picture the door is on its side. When it is installed, it will be almost 10′ tall and over 4′ wide. It will be next to two fixed windows in a large window wall. This will open as a pocket door; its pocket will be built in front of the concrete wall that it is currently leaning against. This will be set up so that either this door or a screen can be pulled from the pocket into the doorway.

Picture 3 – Sliding door for the opening from the great room onto the deck.

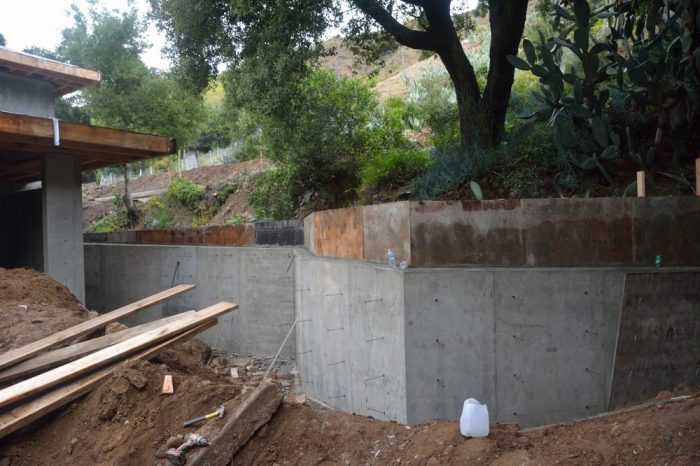
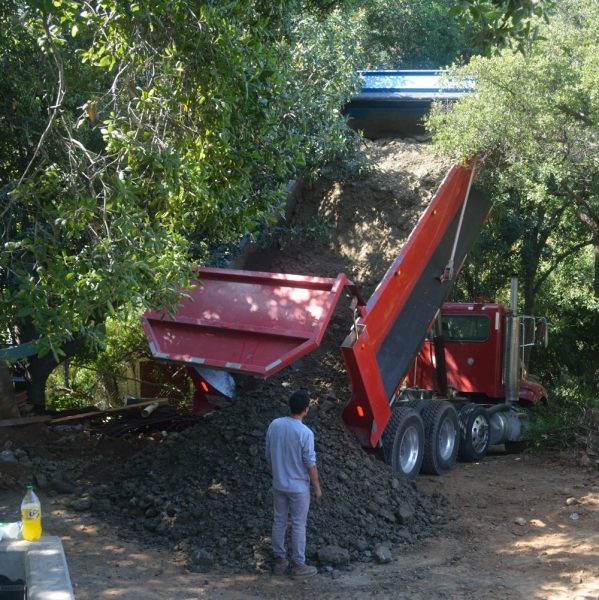
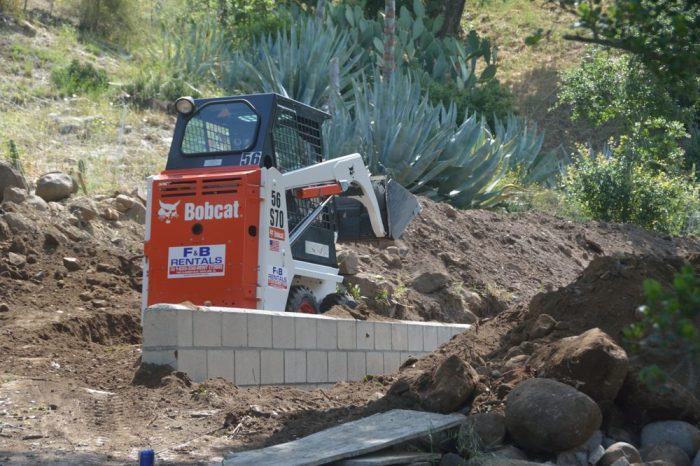
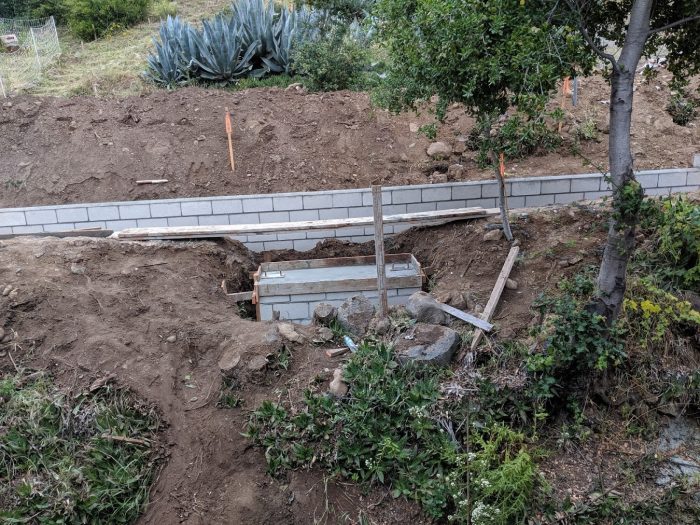
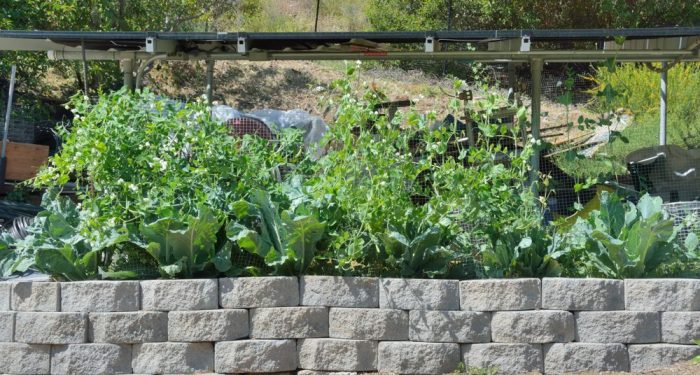
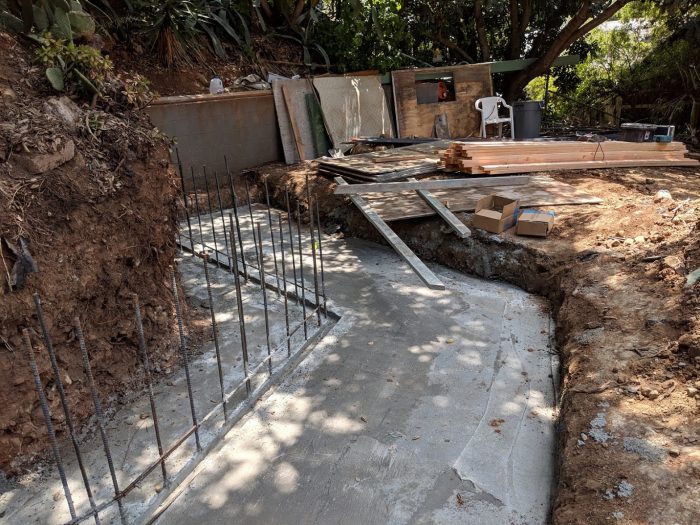
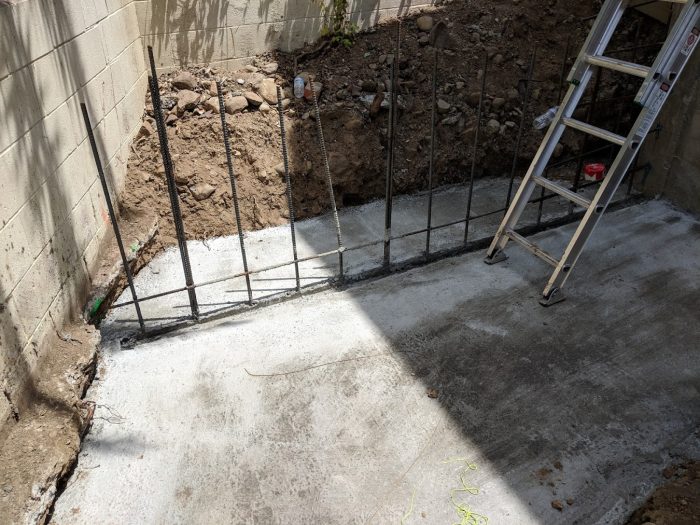
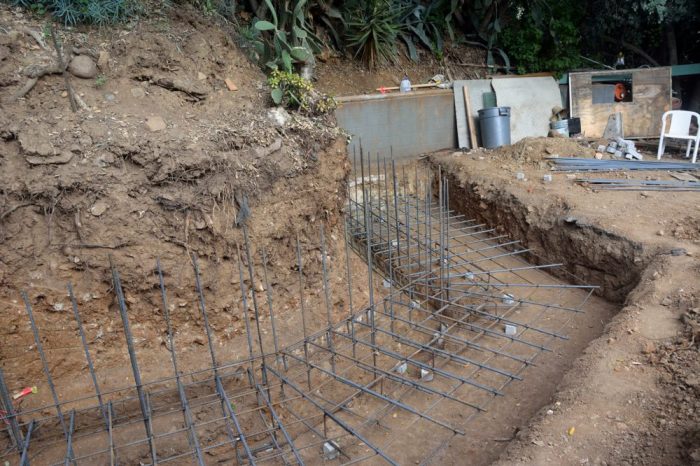
The masons and the earth movers have also been at work. Picture 4 shows Nina, Pete, and Stella on the newly filled in dirt behind the retaining wall that they just built under the cantilevered deck. A photo in last week’s post shows this as a large hole in the ground; last week if Nina had stepped off of the step she is on, she would have ended up in the hole and if Stella is where she is now, she would have been at the bottom of the hole.

Picture 4 – There is now something to step onto coming off the deck by the front door.

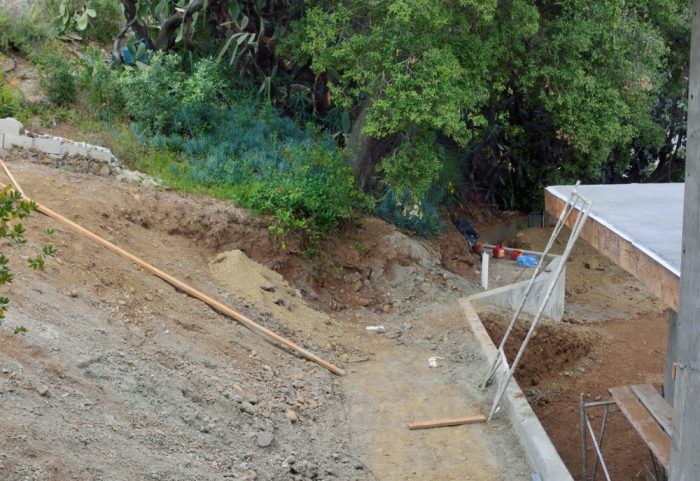
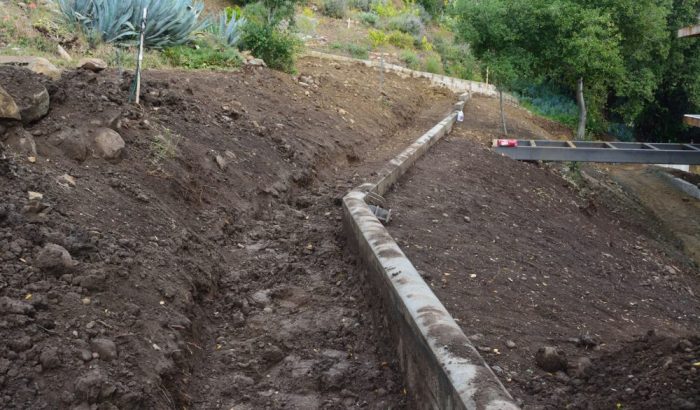
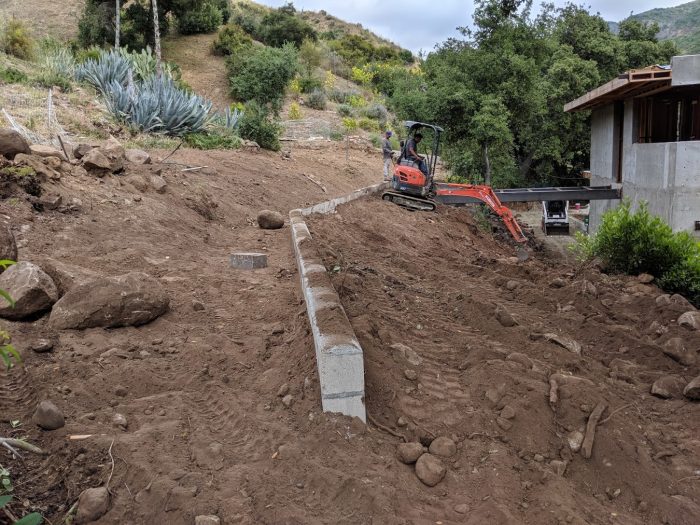
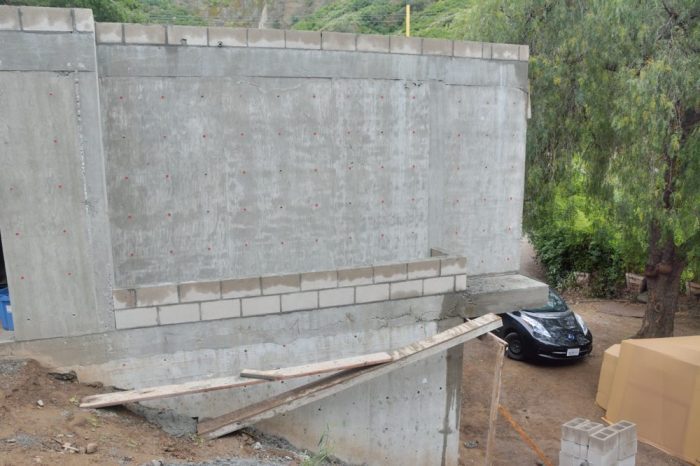
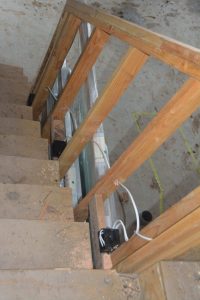
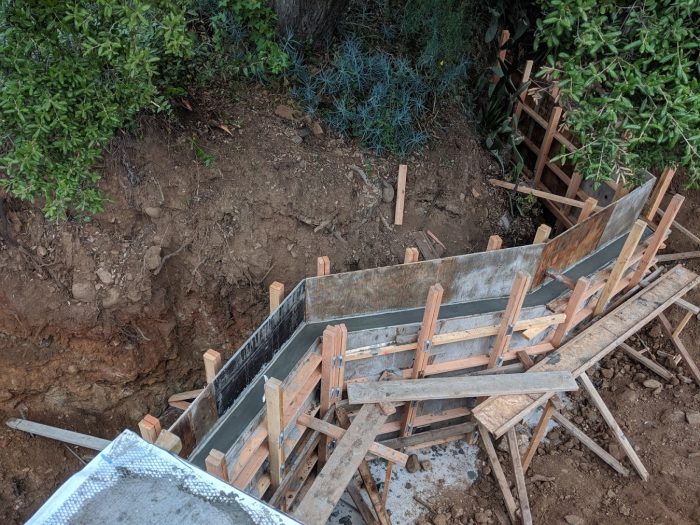
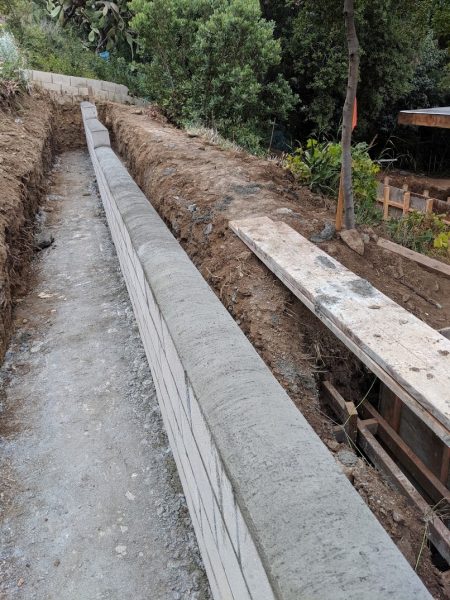
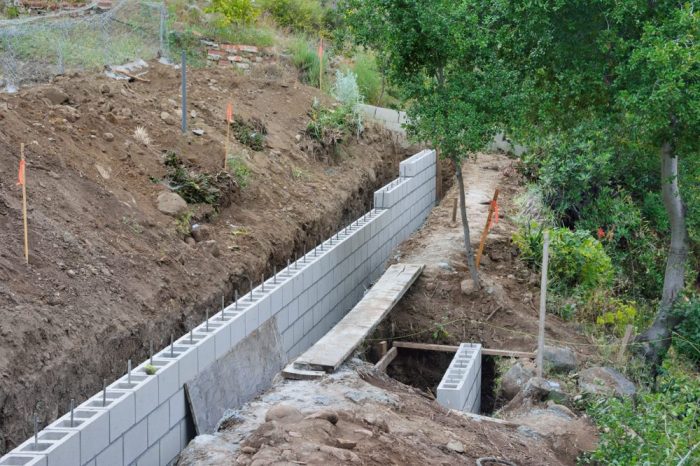
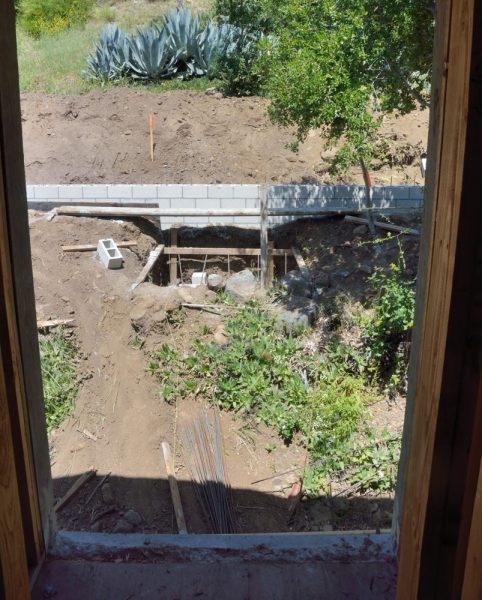
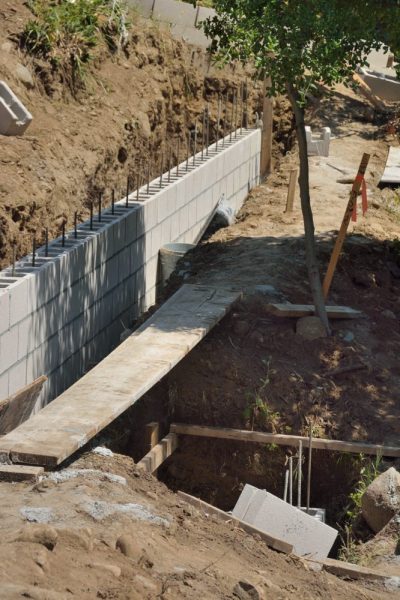
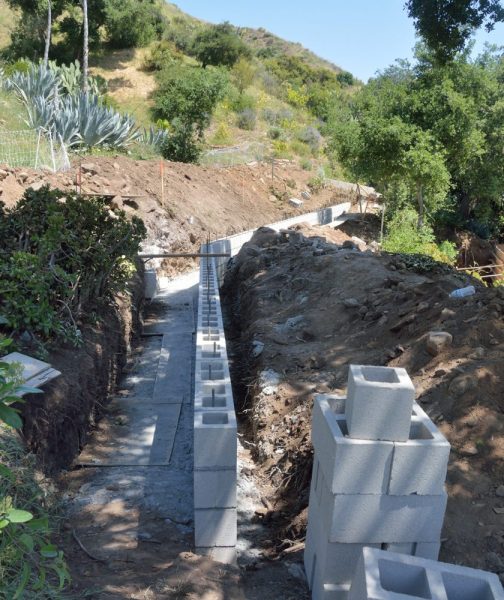
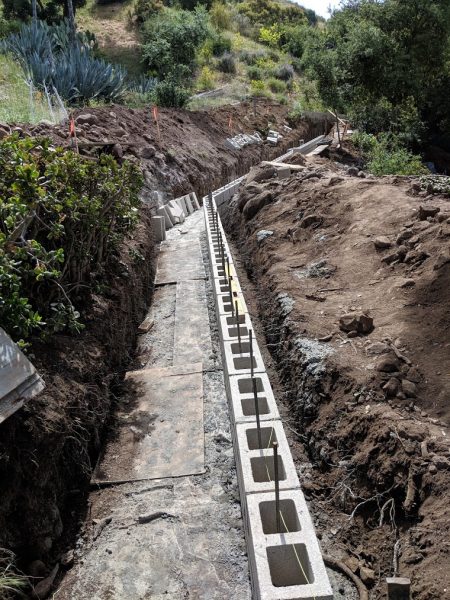
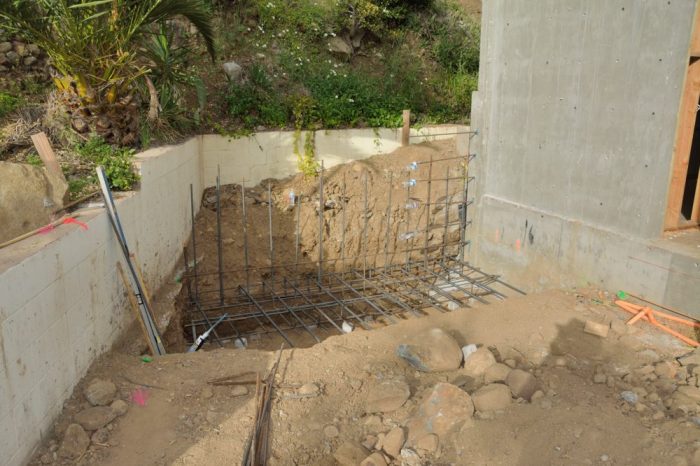
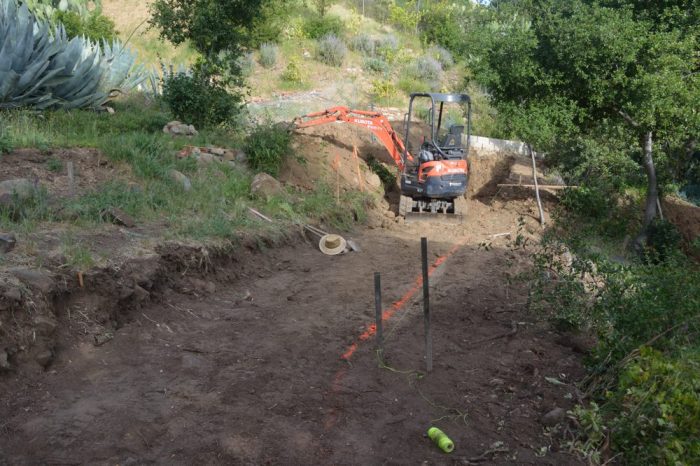
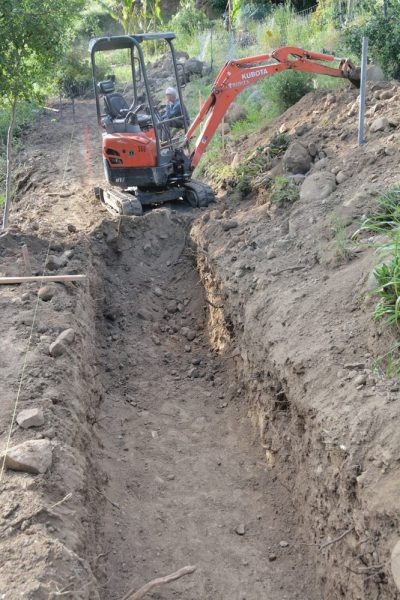
Picture 5 is taken from the bridge and shows the beginning of a set of stairs that will run from the driveway to the first terrace in the backyard. The dirt ramp in front of the wall is where the first set of stairs will go. They have cut out the bank to the left of that for the second set of stairs that will go to the backyard.

Picture 5 – Looking east from the bridge to where they are building steps that will run from the driveway up to the first terrace of the backyard.

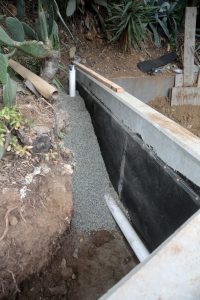
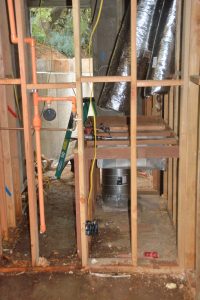
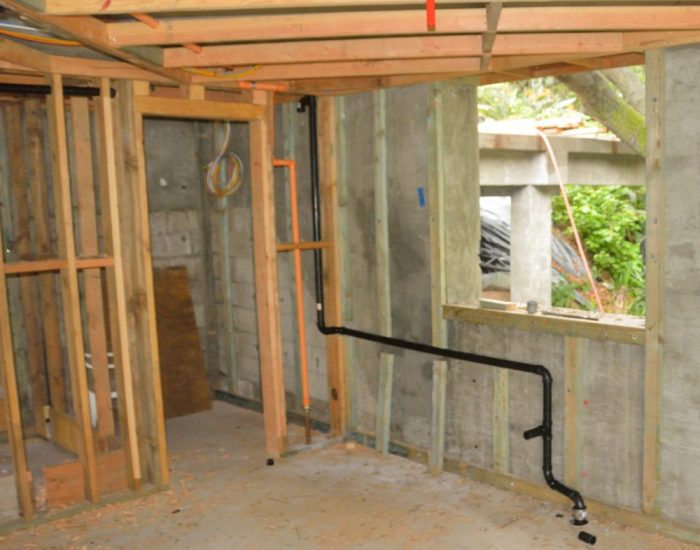
The plumbers have now almost finished in the garage apartment. Picture 6 shows the setup for the washing machine for the apartment that will be in the garage. To the right of that, the sewer pipe will empty into a sump in the garage floor. A pump there will then pump the sewage up to the septic tank, which is next to the house.

Picture 6 – Setup for the washing machine in the garage which is next to where the sewer lines go down into the sump.

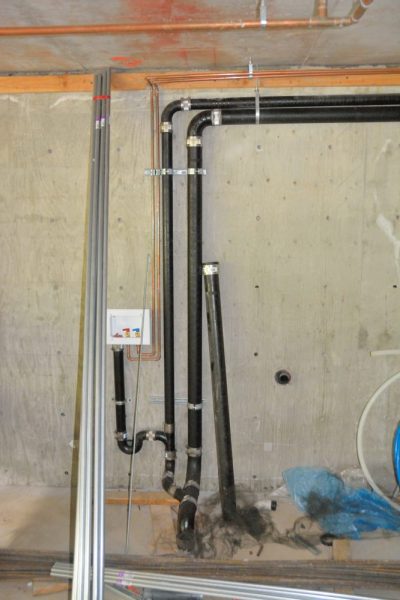
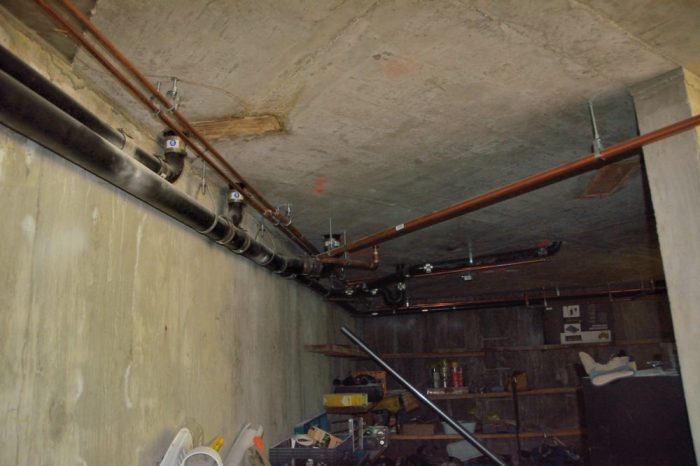
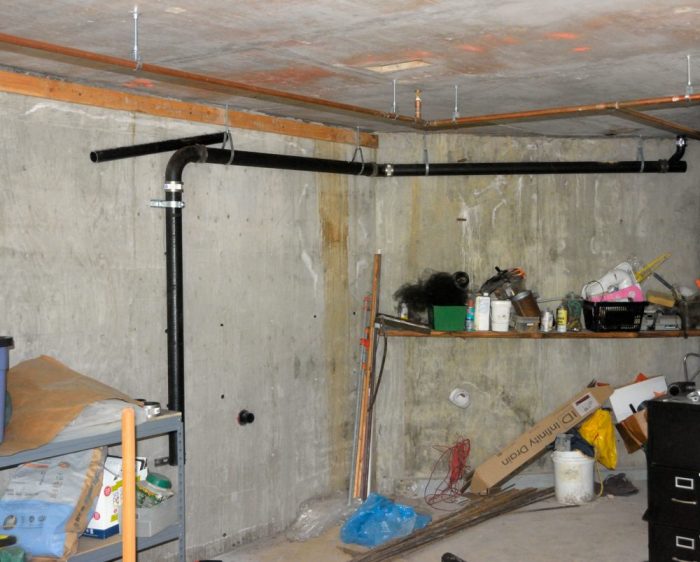
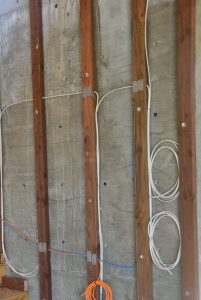
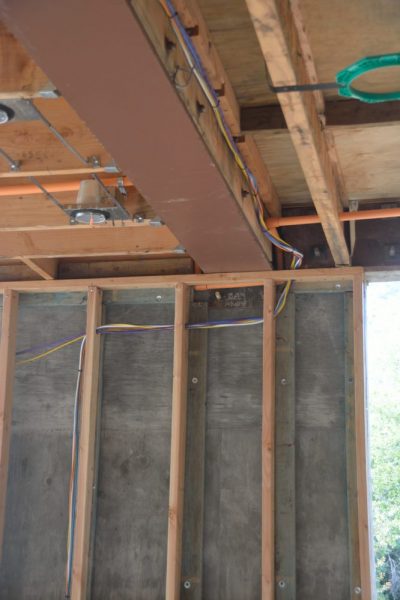
Picture 7 shows plumbing in the garage ceiling for the apartment. Because there will not be wallboard in the garage, all of the supply pipe has to be copper and the waste pipe has to be cast iron.

Picture 7 – Plumbing lines in the garage ceiling for the apartment above.

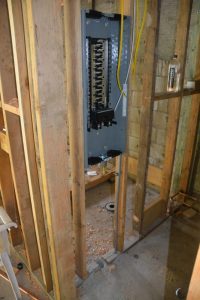
The same crew that did this plumbing is also starting the electrical installation. Picture 8, shows the circuit breaker box — which will technically be a sub-panel of the main panel in the utility room of the house. Picture 9 is your bonus photo for this week: one of the gargantuan sunflowers that we manage to grow at Modjeska.

Picture 8 – Electrical panel for the garage/apartment.
Picture 9 – One of our sunflowers to brighten your day.
Posted in house | Leave a comment

Sunday, May 19, 2019

Nina and Ted went out to house on Sunday to see the progress since Wednesday. There was no work Thursday because of rain, and it had been raining again today. Despite the rain, much of the scaffolding is up (Picture 1). The scaffolding needs to be up so that the crew that will install the rigid insulation and stucco can apply a special waterproofing treatment around the openings before the windows are installed. Picture 2 shows one of the windows with this treatment in place. Picture 3 is a closeup of this material showing that it consists of a fabric mesh with a waterproofing material applied over it. This work should be completed tomorrow so that the window installation can start on Tuesday.

Picture 1 – Scaffolding installed on the west side of the house and the garage/apartment.
Picture 2 – Window opening with waterproofing applied in preparation for the window installation.
Picture 3 – Closeup of the waterproofing material.

All of the rough grading behind the house was completed before the rain on Thursday. The crew was back on Friday and Saturday to set the final grade and clean up the slope. Picture 4 shows the flat area directly behind the house with the slope running up from it to the debris wall. Eventually there will be a concrete ditch in the middle of the flat area to carry any water to the area at the back of the photo where it can drain out onto the driveway and run down to the the bottom of the property, where we plan to catch it and let in sink in.

Picture 4 – Finished grading of the area directly behind the house.

Picture 5 shows the debris wall, above the slope, and the swale behind it. This wide ditch and wall have two functions. First they should work together to stop and catch any larger rocks that might manage to come loose and roll down the hill. This does happen on the hillside above us; however, because of the layout of the terrain, most of these would end up on either side of the house. The debris wall is then insurance against an unlikely event. In addition, however, this ditch will funnel excess runoff toward the gully on the west side of the property — back behind the photographer.

Picture 6 shows another wonderful thing. The tree in that picture used to be at the top of the 8 foot drop off that was behind our house. Because we really like the oak trees and they are slow growing, we have been hoping that its elevation might be about right when the slope was eventually graded — we have literally been pondering this question for over two years. As the photo shows, it seems to fit nicely onto the newly grade slope.

Picture 5 – Debris wall with the graded swale uphill from it.
Picture 6 – Looks like the oak belongs on the regraded slope!

Picture 7 is the view from the second floor at the back of the house out over the bridge. For comparison, there was a photo of this scene taken May 7th https://www.wright-macdonald.com/blog/wp-content/uploads/bridge-footing-5-9-19.jpg before the grading or the bridge were in place. (In that photo, you can see the saved oak tree on the right.) They still need to build the steps at the end of the bridge to the top of the debris wall.

Picture 7 – View from the door on the back of the second floor out over the bridge to the backyard.

There are a couple other new things since last Wednesday. They installed the skylights for each of the bathrooms in the main house. Picture 8 shows the one over the vanity in the second floor guest bath.

Picture 8 – Skylight over the vanity in the guest bathroom.

They have also built a small retaining wall that is needed to support the soil at the transition from the decks to the main walk.

Picture 9 – New retaining wall under the cantilevered deck. This is needed to support the walkway to go off of this deck to the front door.
Posted in house | Leave a comment

Wednesday, May 15, 2019

We now have a house full of windows waiting to be installed (Picture 1). As they hustle to get everything ready for the window installation there has been lots of activity. The grading work was given extra urgency by the forecast of rain tomorrow (Thursday) and Sunday. They really want to get all of the piled up dirt placed and compacted behind the new retaining walls before it turns to mud. This blog has photos that we have taken over three days during the last week, but have not had time to post. (Ted spent all of Saturday cooking in preparation for the large Mother’s Day brunch that our church does each year and that threw much of his schedule into disarray.)

Figure 1 – The great room and, in the back, the kitchen are now full of expensive windows waiting to be installed.

Picture 2 shows part of the east wall taken last week after they had started taking off the forms used to construct it. Pictures 3 and 4 were taken on Tuesday and show the process of waterproofing the wall, providing drainage behind it, and then using the soil that they had saved from digging out the area for the wall to fill in behind it. Because the grade behind the house is being raised, they had to bring in additional soil for fill (Picture 5).

Picture 2 – The retaining wall on the east side of the house after they had begun to remove the forms.
Picture 4 – For the part of the wall closest to the house they have begun using the soil that they dug out to build the wall, which had been mounded on the driveway, to fill behind the wall.
Picture 3 – Several days later, all of the plywood forms have been taken down and they have added waterproofing to the back of the wall and drainage behind it. This is the part of the east wall furthest from the house.
Picture 5 – New fill arriving. One of the challenges of building this house is that there is so little area around it to deliver things like this!

They have also been working on the area around the diversion wall and on constructing the slope between this wall and the back of the house. For this work, they brought in a special, small Bobcat with a narrow bucket (Picture 6). Picture 7 shows this grading work closer to completion, with yet a different machine doing the work. In the background of Picture 7, you can also see that they have installed the steel framework for the bridge from the second story of the house to the backyard. This is shown more clearly in Picture 8.

Picture 6 – The small Bobcat adding fill on top of the diversion wall foundation to create the swale that will drain the area behind the diversion wall to the west gully.
Picture 7 – The debris wall with the swale uphill (to the left) from it and the slope down to the house and the new retaining walls.
Picture 8 – Steel framework for the bridge from the second story of the house to the backyard.

When they were building the retaining and debris walls, they also built several other things out of concrete. Picture 9 shows the edging for the green roof on top of the garage/apartment. This is what you will look out over from the deck. Pictures 10 and 11 show two stages of the construction of the planter on the north side of the apartment. The difference is that, in Picture 11, an extra piece of concrete flooring, that was poured by mistake, has been removed. Picture 12 illustrates how, taking this extra concrete out reveals the intended design — a rectangle sitting on a second, offset rectangle.

Picture 9 – Edging for the green room on top of the garage/apartment. It had rained just before this picture was taken. The standing water shows that they will need to do some work to adjust the slope so that the water drains appropriately from the green roof.
Picture 10 – Photo taken last week of the edging for the planter on the wall of the apartment.
Picture 11 – The same planter on Tuesday; now they have cut out the extra concrete on the right side that was poured by mistake when this was built.
Picture 12 – View of the garage/apartment from the front. With the extra piece of concrete removed, the apartment now looks, as intended, like a rectangle stacked on a lower, offset rectangle.

While all of this concrete work and the grading were happening, other trades have been busy inside the house and the apartment. Picture 13 shows Julio, the cabinetmaker, and Julie, the designer last week as they were going over the design for the guest bathroom. When it was first framed, the utility room seemed huge. Now as things go into it, it is beginning to seem a lot smaller. Picture 14 shows a frame that will both create an air plenum and support the two air handlers for the house. The electricians have also been busy. Lots of what they have been doing is not particularly obvious, but Picture 15 shows the new boxes they have added to the banister for the step lights on the stairway to the second floor. The plumbers have also been busy in the garage/apartment. Picture 16 shows the waste piping running to the sump pump in the floor of the garage. Picture 17 shows the drain pipes for the kitchen sink in the apartment. The last photo, Picture 18, is the view out of the main window in the apartment. Although the view is wonderful, the point is that it shows the beginning of the scaffolding going up around the garage/apartment and the house. This is the scaffolding that will be used to put up the insulating panels and do the stucco on the outside of the house. This is also the scaffolding that needs to be in place so that they can install the waterproofing materials that need to be in place so that the windows — remember all those windows sitting in the house in Picture 1?! – can be installed next week.

Picture 13 – Julio, the cabinetmaker, and Julie, the designer going over the design for the guest bathroom. They are actually standing in what will be the shower stall.
Picture 14 – Framing to support the air handlers in the utility room.
Picture 15 – Boxes for the step lights on the stairway.
Picture 16 – Sewer pipes in the garage running to the sump pump in the garage floor.
Picture 7 – Drain piping in the apartment for the kitchen sink.
Picture 18 – This is a view out of the window wall in the living room of the apartment. Besides the view, it shows that they have begun to put up the scaffolding!
Posted in house | Leave a comment

Thursday, May 9, 2019

Nina went out to feed the chickens yesterday and took some photos of the new concrete. They had not yet taken down the forms around the new retaining wall. The first picture is looking down onto the retaining wall on the East side, and the second is on the West side. On the West side, they have added the iron bars to support the covered area surrounding the back door. These were screwed into the old retaining wall, which in most places will be covered by dirt. (Some on the East side wall was removed.)

Photo 1: Part of East side retaining wall.
Photo 2: The short retaining wall on the West side near the back door. The wall at the back with the supports for the cover is the old retaining wall.

The debris wall is now covered with a nice concrete top as shown in Photo 3. The bridge footing is shown in Photo 4.

Photo3: Debris wall
Photo 4: Bridge footing with debris wall behind it.

The workers also took time to construct the cement bench on the upstairs patio and probably the concrete planter along the garage wall (but Nina forgot to look for that.)

Photo 5: concrete bench on upstairs patio in front of the second board form cement wall. (The other is next to the front door.)
Posted in house | Leave a comment

Tuesday, May 7, 2019

Ted was out on Tuesday cutting down the grasses and weeds that will become a fire hazard on the slope above our citrus grove. While he was there, the inspector came to look at the rebar and forms for the retaining walls on the west (Picture 1) and east sides of the house (Picture 2). Both of these walls start out highest at the house and get lower as they move away from the house.

Picture 1 – Forms containing rebar for the retaining wall on the west side of the house.
Picture 2 – Forms for the retaining wall on the east side of the house. Notice how the height of the plywood on this side of the forms decreases moving away from the house.

Since we were they, they have also done some more work on the debris wall behind the house, shown in Picture 3. After a survey, they added the two additional rows of blocks on the far end of the wall as well as a row of blocks for the bridge support in front of the wall. The concrete for these walls should be poured on Thursday.

Picture 3 – Debris wall and bridge foundation in front of it.

As Ted was leaving, two trucks from Fleetwood with our new windows arrived. One of these is in Picture 4. Earlier an earth mover had been moving the dirt dug out for the retaining walls (next week this will need to go back behind those walls) to clear a path to bring the windows into the house. Unfortunately, everything will not be ready to begin installing these windows until a week from Monday.

Picture 4 – One of the two trucks bringing our windows form Fleetwood.
Picture 5 – The Bobcat shifting the dirt that will go back behind the retaining walls to clear a path for the window delivery.
Posted in house | Leave a comment

Friday, May 3, 2019

Ted found it confusing that I took the pictures on Thursday but labelled the blog entry, Friday, so I have changed it to Thursday, and named this one Friday, which is the day he took the pictures.

He had to drive out to Modjeska to meet the shipping company driver who had our 10,000 gallon water bag. The first driver arrived at the head of the canyon on Tuesday but refused to drive his truck down to our house, despite being told that cement trucks and cranes were all able to back out of our driveway or turn around at Tucker WIldlife just a few hundred yards before our house. So Ted arranged to pick up our pickup from our construction site and drive to meet the driver just outside the canyon. The water bag is still in our truck back at the house.

He was, however, able to get some photos of more work on the two retaining walls. Photo 1 is of the wall just behind the house of the East side. The workers have put up forms to allow cement to be poured over the foundation. Photo 2 is farther along the back of the house and ends at the middle of the house where there is dirt where the bridge from the second story of the house to the backyard will be. At the right edge of the photo, you can see one of the brackets which will support the bridge.

Photo 1: East side of back wall.
Photo 2: Middle of east side of retaining wall.

We are thrilled that this work, which was originally going to be done late last fall and then in January (and, in Ted’s mind, really should have been done last summer) is finally getting done, since it needs to be completed before the doors and windows can be installed. This is because, prior to doing that installation, scaffolding needs to be erected around the house and that requires the level ground that these retaining walls will provide.

The good news about the doors and windows is that they will be delivered next Tuesday. Unfortunately, the most hopeful estimate is that the concrete for these walls will be poured on Wednesday — if the possible rain predicted for Monday, Tuesday, and Wednesday does not interfere. They will then have to back fill soil behind the walls, put up the scaffolding, and then apply a sealant coating to the cement before the windows can be installed. So, after waiting so long for the windows to get here, the windows will be sitting around for at least a week before their installation can begin. That process should take 10 days to 2 weeks. Once that is done, the insulation and stucco can be applied to the outside of the house, which will probably require another two weeks. Still it is progress!

Photo 3: The view out of the second story door where the bridge will be. In the distance you see the footing area for the bridge and the debris/diversion wall. There will be steps from the end of the bridge to the top of the debris wall.
Photo 4: The debris wall is on the left. The hole in the middle of the frame is for the footing for the end of the bridge

Photo 4 shows the debris wall. On Thursday it was one block high, but the workers worked steadily adding blocks and gluing them together with cement out of a bag. There probably will need to be one, or possibly even two more courses of cement blocks on the far end of the wall. Once all the blocks are in place, pour cement into their interiors to fill them.

Photo 5: This shows the debris wall running across the entire backyard. This photo was taken from the edge of the gully west of the house.
Photo 6: New wiring on the west wall of the great room.
Photo 7: East wall of the great room with electricity finished.

Photos 6 and 7 show some of the work the electricians completed in the great room on Thursday. This was the one room in the main house that had the most of their work left to do. The wiring in Photo 6, has been routed through the new, additional stud wall that was built on the west side of the great room to provide a way to run wiring and plumbing past the steel beam in the ceiling.

Previously, we showed a photo of a garden bed Pete built under the solar panels. This placement means that it catches the runoff from rain that lands on the solar panels. Also, the wall provides a place to stand while cleaning the dust off of the solar panels. Pete planted this bed with cauliflower, strawberries, sugar snap peas, and kohlrabi. However, because he left to go back to New Mexico in the middle of April, he is not here to enjoy the fruits of his labors — he should return in a week to 10 days.


Photo 8: Solar panel bed


Photo 9: Full grown cauliflower from the solar panel bed. This is undoubtedly the fullest head of cauliflower ever grown at our house.


Photo 10: This bunch of bananas in the gully bed formed last fall before it got cool. They have been hanging on the plant ever since. As soon as it gets warm enough again, they should ripen quickly!

Posted in house | Leave a comment

Thursday, May 2, 2019

The inspector came on Tuesday and the cement truck came on Wednesday to fill in the foundation of the new back wall behind the house. At the back of the photo, you can see some of the old retaining wall, which they kept.

This wall will be just behind the house. This is on the east side.
This is on the west side of the house, with the old retaining wall retained here. In between is dirt, which will support the bridge from the second floor to the backyard.

Behind the walls above, is another wall, called the debris wall, which is designed to catch any debris that slides down the slope in a rain or earthquake. It stretches across the whole backyard from one gully to the other. Beyond it and up, you can see the citrus orchard on the other side of the east gully.

The debris or diversion wall. This sits at the bottom of the lowest tier of the backyard.
Posted in house | Leave a comment

May 1, 2019 — More Interlude

They poured the concrete for the foundation of the retaining walls attached to the house and the diversion wall above the house today, but neither of us could be there, so no pictures. Instead, here are some more pictures of the things growing on the property. Many of these are followups to the pictures included in the earlier “Interlude” post (https://www.wright-macdonald.com/blog/april-25-2019-an-interlude-from-construction/), which were taken over the last 2-5 weeks, and you might want to compare those previous picture with these.

Plum Tree with fruit. See a picture of the tree in flower, taken 6 weeks ago, https://www.wright-macdonald.com/blog/wp-content/uploads/D_20190323-019.jpg.
We also have a great apricot crop starting. These are Moorpark apricots, one of three varieties we are growing.
These are young Silver Logan Peaches. We have four peach varieties and it looks like all four are setting fruit.
This is rhubarb. We can start harvesting this.
This is the first time that we have had a real set of almonds. Compare these with the pea-size ones there were 5 weeks ago: https://www.wright-macdonald.com/blog/wp-content/uploads/D_20190329-025.jpg
Remember the picture of the vicious looking artichoke plant in the Interlude post (https://www.wright-macdonald.com/blog/wp-content/uploads/D_20190323-023.jpg)? Here it is with several large artichokes — we’ve already eaten one; it was great!
Then there are flowers. Ted has always loved peonies and here is one of the few varieties he found that we could grow here.
The same bed also has these Peruvian lilies.
And 7, ever-blooming, David Austin rose bushes. This is one of the first to flower.
Posted in house | Leave a comment

April 29, 2019

Yesterday, Ted’s colleague Charlie Chubb helped him cross off another bucket list item: hiking the truck trail from our house to Modjeska Peak. They started early on a day with low, coastal effects clouds (Picture 1). Picture 2, taken about 5 miles into the hike, shows that, by that point, they were above the low-level clouds that had, by then retreated to close to the coast.

Picture 1 – Starting our hike on a misty morning.
Picture 2 – Five miles along the trail we can look out over Lake Forest, Irvine, and the clouds at the coast that are now below us.

They did not actually do the final climb to the peak. After hiking about 10 miles and climbing 3600 feet, they decided to skip the last 1.5 miles (500 feet of elevation). It was getting late (having left at 7AM it would be 5 PM before they made it back down, they were beginning to get tired, they knew that they still had to hike at least the 10 miles back down, and it was getting foggy so there would not have been good views form the peak had they reached it.

What they reached is called the Main Divide Rd. This is a fire road that runs along the ridges that connect the peaks, forming the spine of this section of the Santa Ana mountains. From this ridge, they could see that one flank of Modjeska peak had burned in last fall’s Holy Fire (Picture 3). This happened right after Haywood’s wedding when we were away. We and the other canyon residents were fortunate that the winds blew toward the east all during this fire; the so-called Santa Ana winds, from the west would have brought the fire down into our canyons.

Picture 3- Burned flank of Modjeska Peak from the Holy fire.

Nina joined the guys on the way back down and we all went to the house to see the progress from the last week. Picture 4 shows that the workers added an additional 2×4 wall onto the west wall of the Great Room. Although we lose some interior space, this was necessary to create a path to run the wires under the large steel beam. This shows the AV wires, but, eventually, wires for power and a water line will need to follow something like this route.

Picture 4 – AV wires running through the additional 2×4 wall framing on the west wall.

More exciting, however, they dug the foundation and put in the rebar for the retaining walls on either side of the back of the house. With luck this concrete will be poured on Wednesday. Picture 5 shows part of the wall on the east; Picture 6 shows all of the much smaller wall on the west side. Picture 7 shows the back of the house connecting these two retaining walls. The pink string roughly indicates what will be the top of the slope running from the house to the backyard.

Picture 5 – Foundation for the retaining wall extending from the east side of the house.
Picture 6 – The analogous wall foundation for the much shorter wall on the west side of the house.
Picture 7 – The wall for the east side of the house starts in the lower, left corner; that for the west side is mostly hidden behind the tree in the upper middle of the picture. If you can make it out, there is a pink string running across much of the mid-height level of the picture that shows the approximate grade of the slope that will join the back of the house and the diversion wall that will be in the backyard on the right edge of this photo.

The workers have also started work on the diversion wall that will be above the house at the bottom of the backyard. This wall will form the downhill side of a shallow drainage ditch that will keep any water flows that might come down the hill from getting to the house, carrying them to the western gully instead. The purpose of the diversion wall is to catch any boulders that might come down the hillside and keep them from the back of the house.

Picture 8 shows the area that they flattened so that they could dig the footing for the diversion wall. Picture 9 shows the initial part of the trench for that footing. The eventual plan is to terrace the backyard above the diversion into three levels and use this are as a large garden.

Picture 8 – What will be part of the bottom terrace of the backyard where the ditch and diversion wall to protect the house will go.
Picture 9 – Initial part of the foundation for the diversion wall.
Posted in house | Leave a comment

April 25, 2019 – An Interlude from Construction

One of the things we love about being out at Modjeska is that the landscape is a constantly changing show and always interesting to look at. All of the winter rains that delayed both the grading above the house and the construction of the retaining walls gave us a better than the usual wildflower displays. The pictures below provide some sense of this.

Picture 1 – The hillside behind the house covered with wildflowers.
Lupines behind the deer fencing just above the solar panels.
Picture 2 – One of the flowers that grow in profusion are these lupines.
Picture 3 – A closer view.
Picture 4 – Another are the blue dicks (Dichelostemma capitatum). The yellow in the background is wild mustard, an invasive found on many of the hillsides.
Picture 5 – Every year some of the agaves on the hillsides also put on their show.
Picture 6 – Then there are the California poppies, which Nina has been successfully encouraging.
Picture 7 — This year was a great year for our fruit trees. This is one of the plum trees putting on a show.
Picture 8 – The flowers on this grapefruit tree not only look pretty, but they scent the air across the hillside — and, next winter, the grapefruits will be wonderful.
Picture 10 – Less than 2 weeks later the growing almonds are visible.
Picture 9 – These almond blossoms are gorgeous miniature flowers.
Picture 11 – In several weeks this scary looking plant will be sending up flower buds on long stalks that we will cut off and eat — they are artichokes.
Posted in house | Leave a comment