We were both at the house early Tuesday morning for a marathon session with successive contractors. Things are happening quickly now, although the schedule is now that the house will not be ready until the end of November.
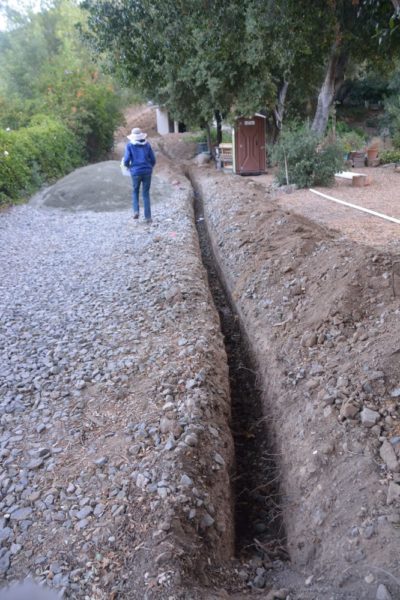
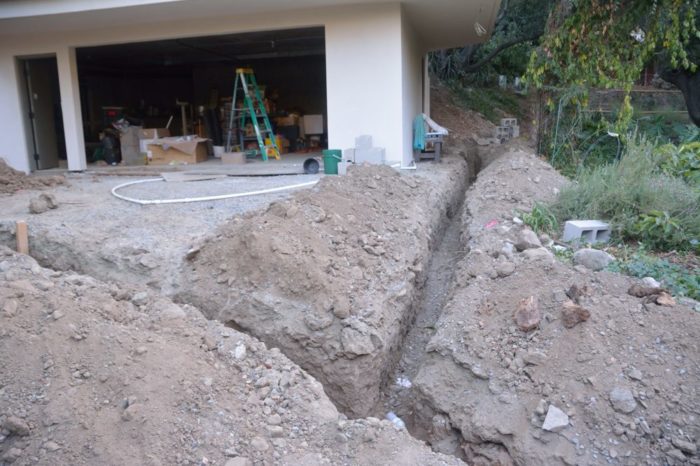
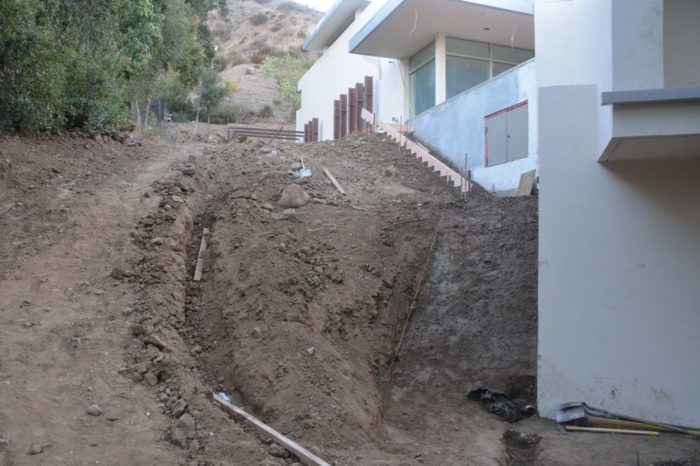
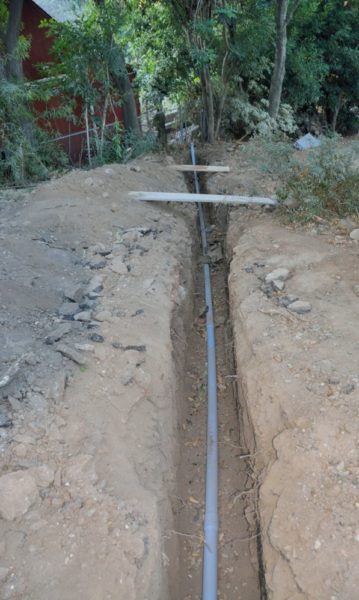
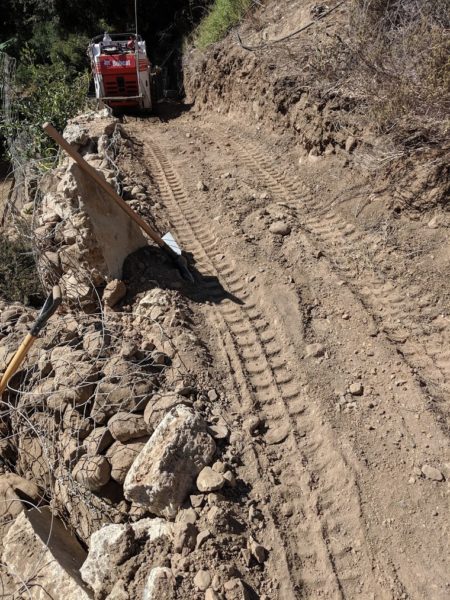
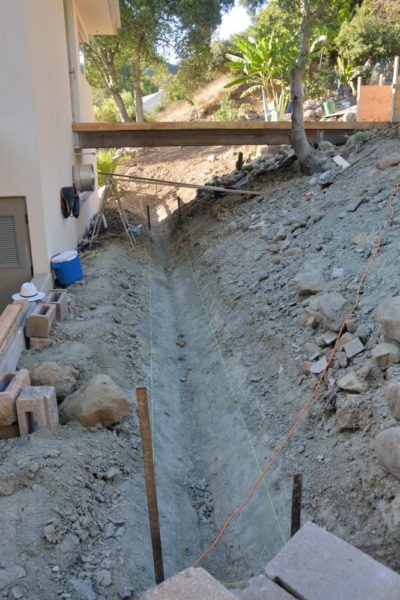
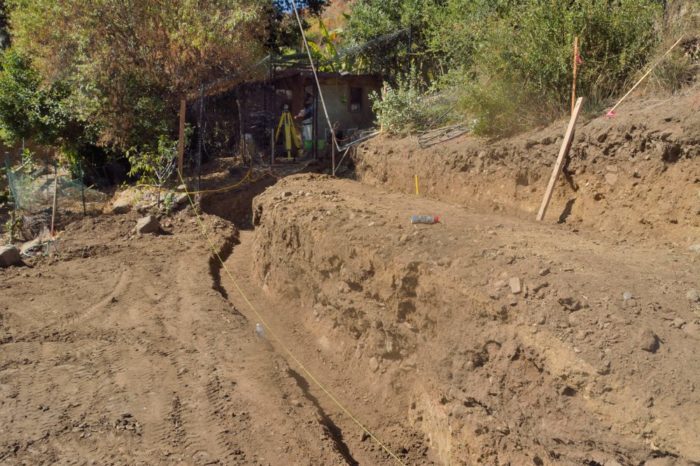
Both of the driveways are now disrupted with trenches. Picture 1 shows the trench in the lower part of the west driveway. This is for a new waterline, which we will connect to a new, larger water meter. Picture 2 shows the branch of this trench that runs to the garage/apartment. Picture 3 shows the trench running up the hill to the house.
Picture 1 – Trench for the new waterline in the lower section of the west driveway.
Picture 2 – Branch in the water line trench to service the garage/apartment.Picture 3 – The trench continues up to the house. Notice, on the upper right, the start of the framing for the stairs from the garage to the apartment and the deck.
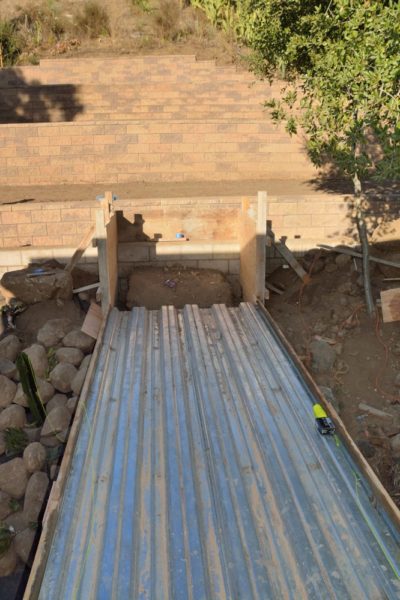
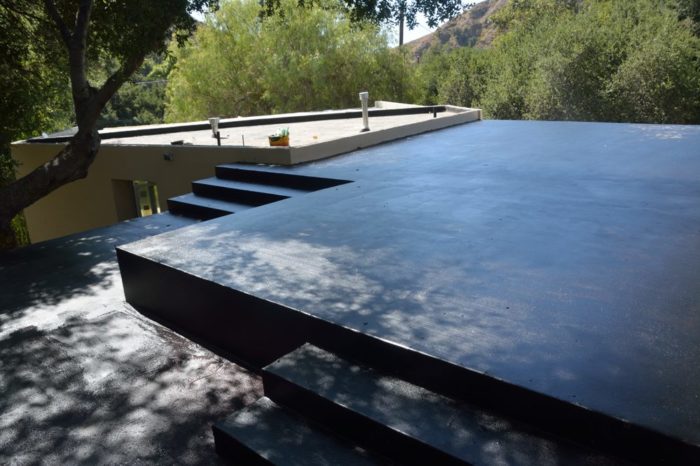
In the upper right of Picture 3, you can see a large piece of wood. This is the stringer for the top of the stairs that will run from the deck, back down to the apartment and then the garage. These are the forms that will allow them to pour the cement stairs. Picture 4, shows this construction from the top.
Picture 4 – Top of the stairs running to the apartment and then the garage.
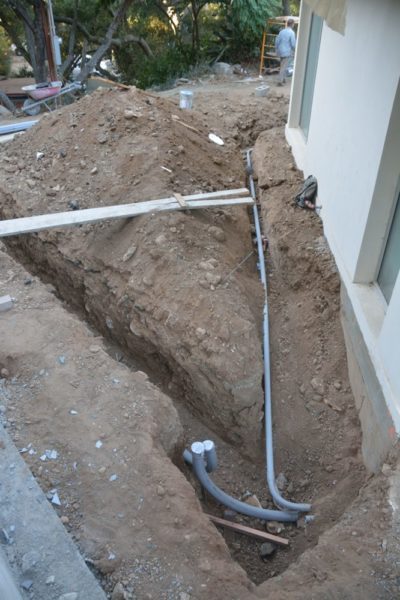
Picture 5 shows trenching on the east side of the house, for electrical conduits. The conduit running along the house will go down to the garage/apartment. The conduit running away from the house is for the main power connection to the utility pole. Picture 6, shows the continuation of the trench for the main power. At the far end is a utility pole hiding in the trees.
Picture 5 – Electrical conduits on the east side of the house. The conduit running along the house will go down to the garage/apartment. The conduit running away from the house is for the main power connection to the utility pole.
Picture 6 – Continuation of the trench for the main power. This runs down the east driveway to the utility pole that is hiding behind the tree at the bottom end of the trench.
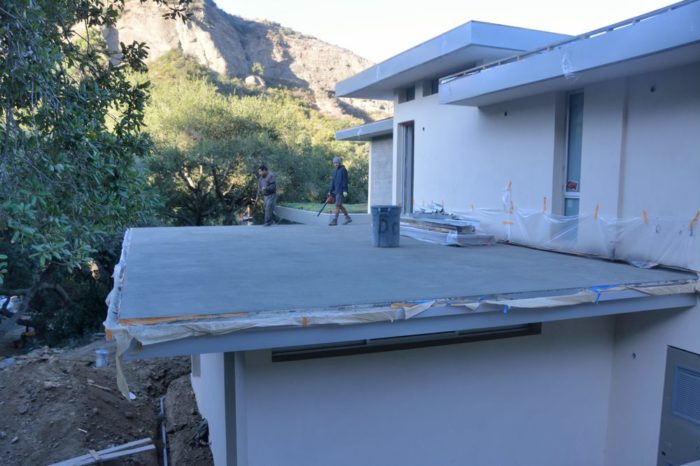
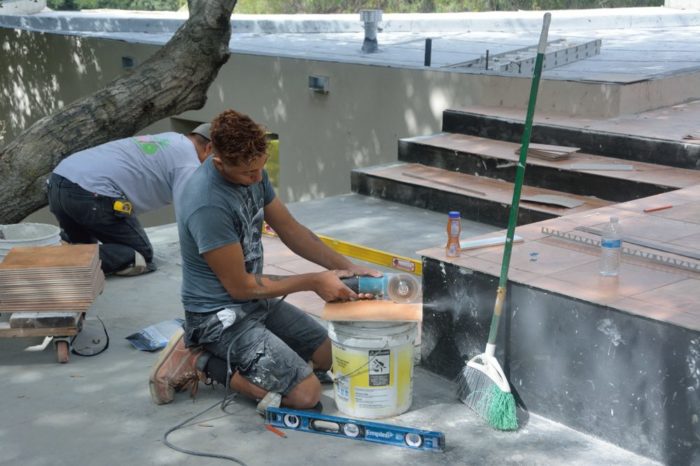
Picture 7 shows the roofers getting ready to apply the primer for a cement-based coating that will be decking for the deck on the east side of the house.
Picture 7 – Workers preparing to apply the final coating to the deck on the east side of the house.
Nina made it out to the house yesterday after the cement truck was gone. It had brought the concrete for the V-ditch and two pads next to the back of the house for AC units to sit on.
Picture 1: Seen from the bridge to the backyard. Part of the vditch and the two concrete pads.
The cement truck will be back in a few weeks to pour the top of the bridge and the various steps and staircases.
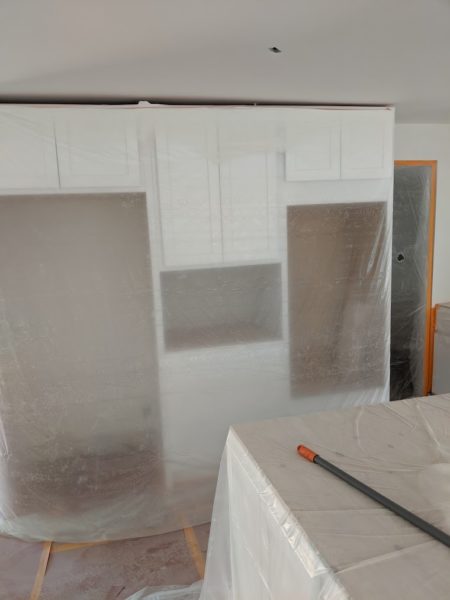
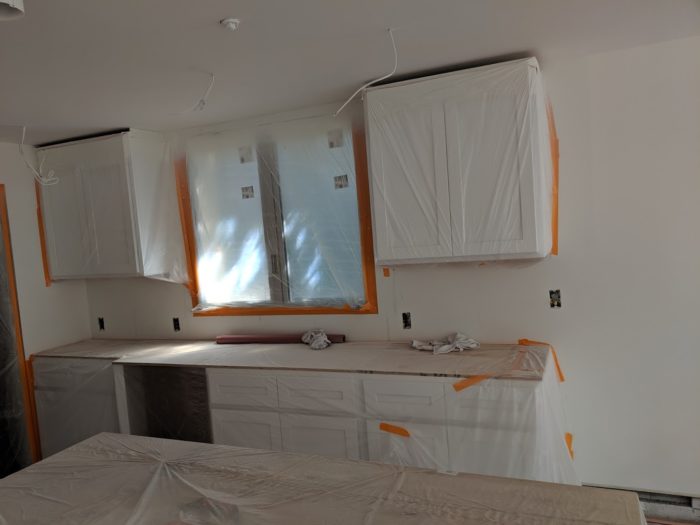
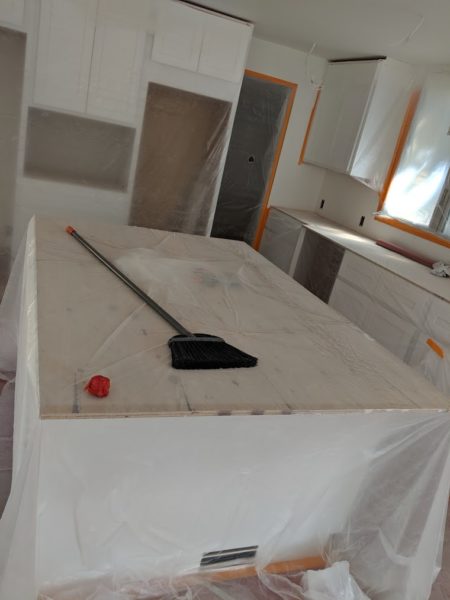
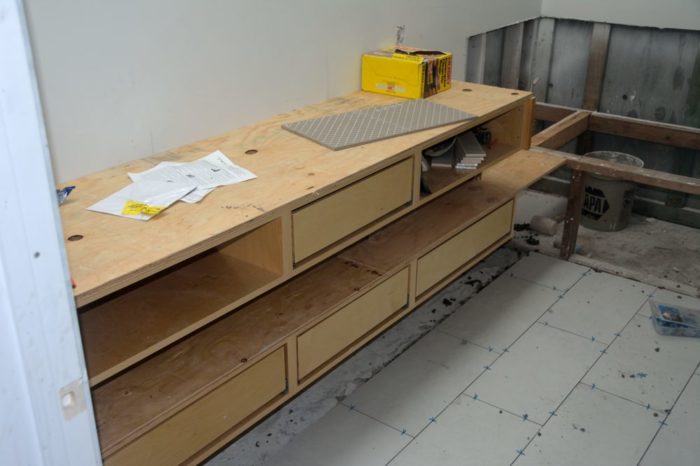
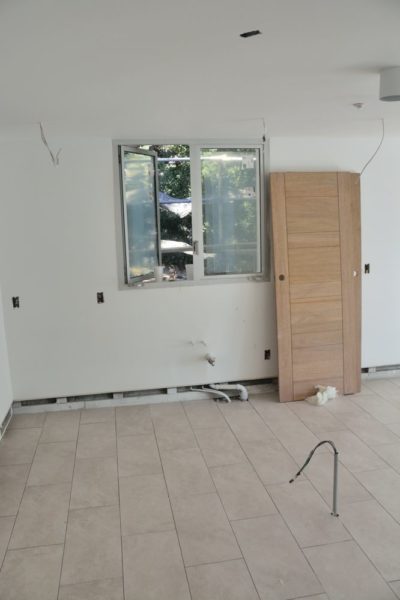
The painters were painting some early coat on the house and apartment yesterday so there was plastic all over. The apartment cabinets are finished. Picture 2 shows the refrigerator and stove wall. Picture 3 shows the east sink wall and Picture 4 shows more of the island.
Picture 2: Apartment wall for refrigerator and stove. The door on the right leads to a pantry.Picture 3: Apartment east wall. The sink will go under the window/Picture 4: The apartment center island.
Next
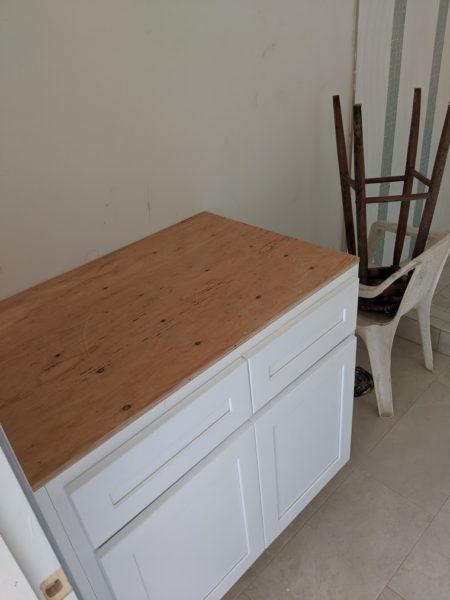
Picture 5: The apartment bathroom sink cabinet. The chairs are piled where the toilet will go.
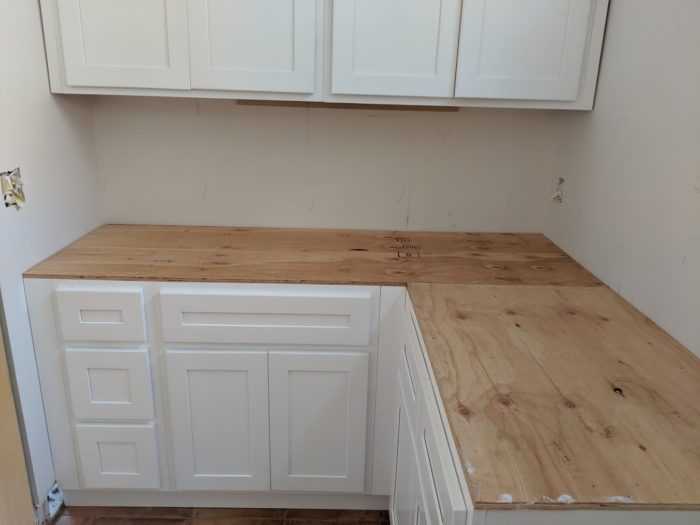
The next picture, #6, looks the same, but it is from the laundry room in the house. Ted and Julio, the cabinet maker, purchased all the white cabinets at the same place in Anaheim.
Picture 6: Part of the laundry cabinetry. The cabinet straight ahead will hold the sink.
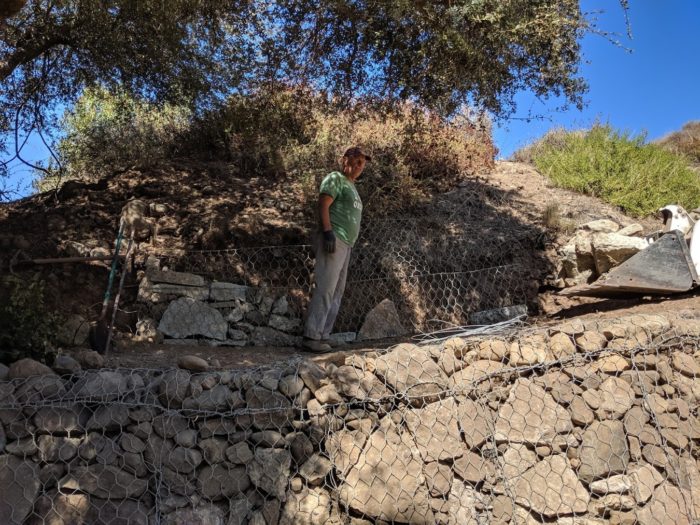
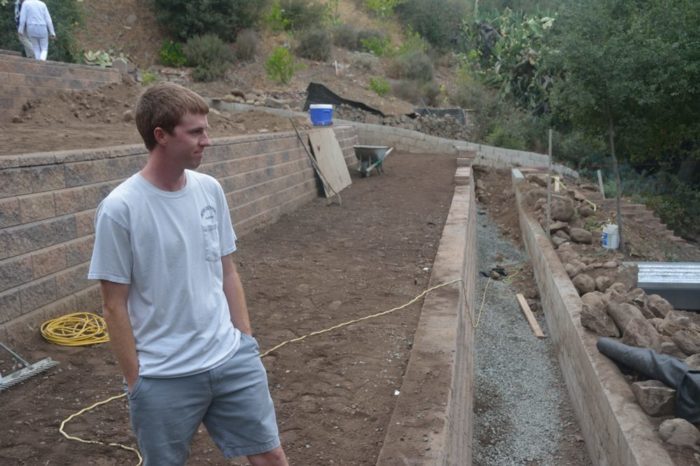
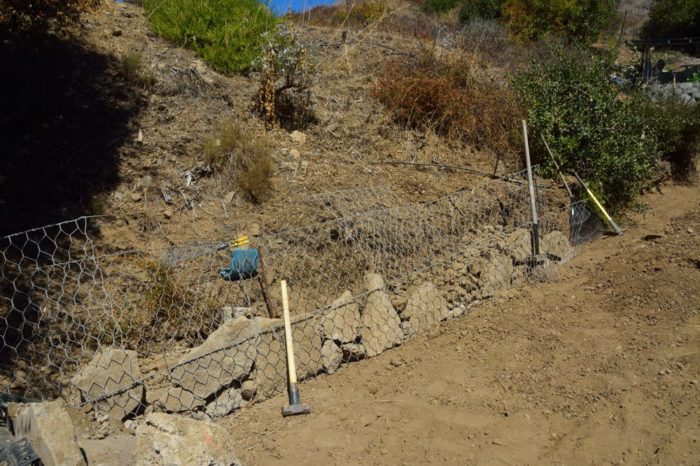
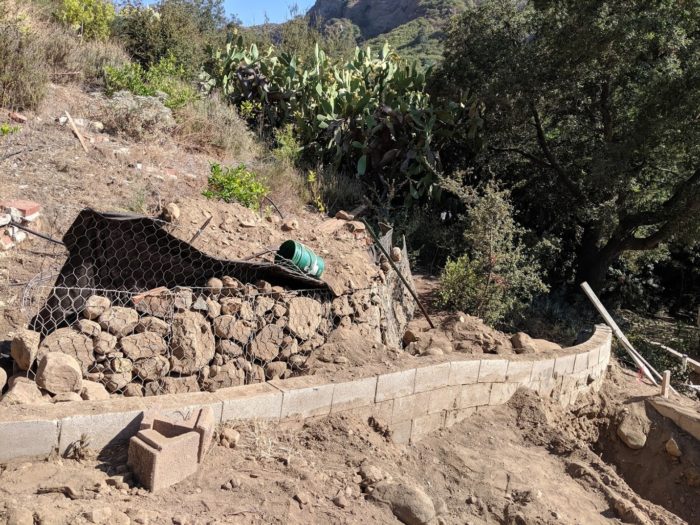
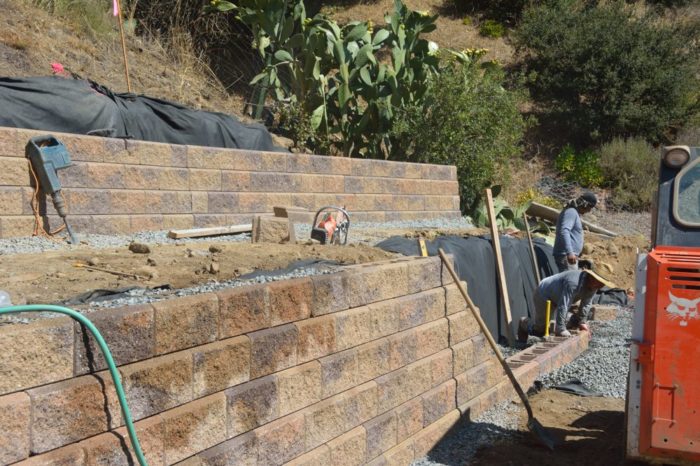
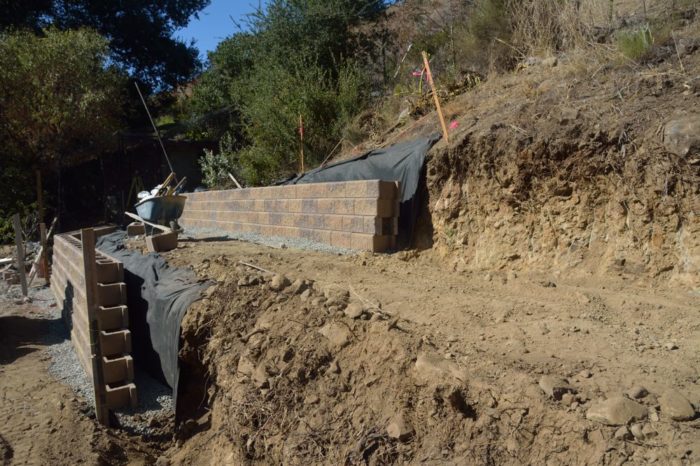
Because the contractors were busy working on the vditch, Pete has been unable to spend any more time on covering the slope at the back of the house with weed fabric, rocks, and cactus. He has spent his time continuing to work on the gabions along the upper part of the left-hand driveway. Picture 7 shows him on a ledge that he has created in the steep hillside to let him terrace it so we can weed it and get to it easily.
Picture 7: Pete above the first layer of gabions along the driveway.
Picture 8 shows a view down the length of the ledge he is standing on.
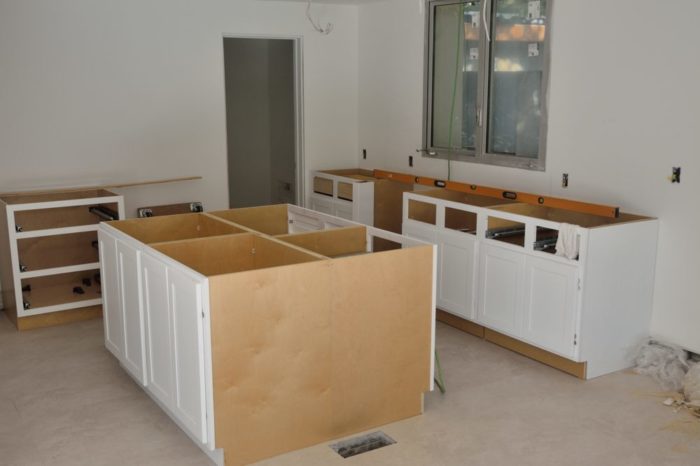
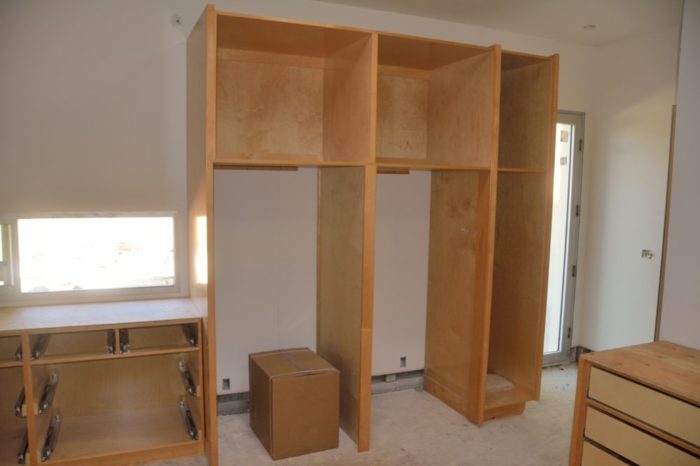
There was progress in four areas last week. We had arranged with the cabinet maker to buy simple, prefab cabinets for the apartment kitchen. Picture 1 shows that he began installing those last week.
Picture 1 – Some of the cabinets being installed in apartment kitchen. All of the mounted cabinets are still missing.
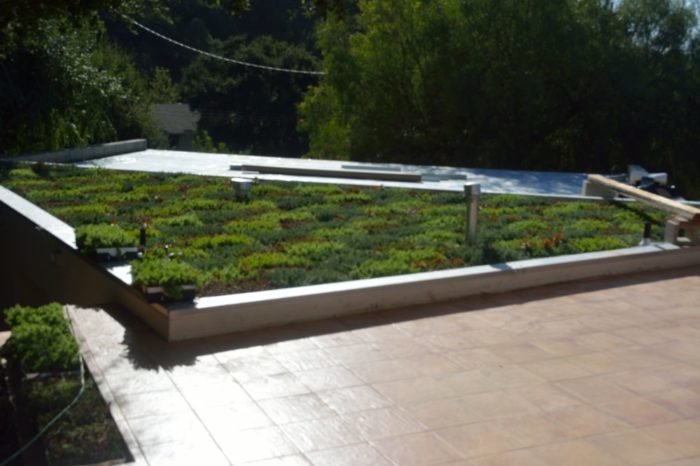
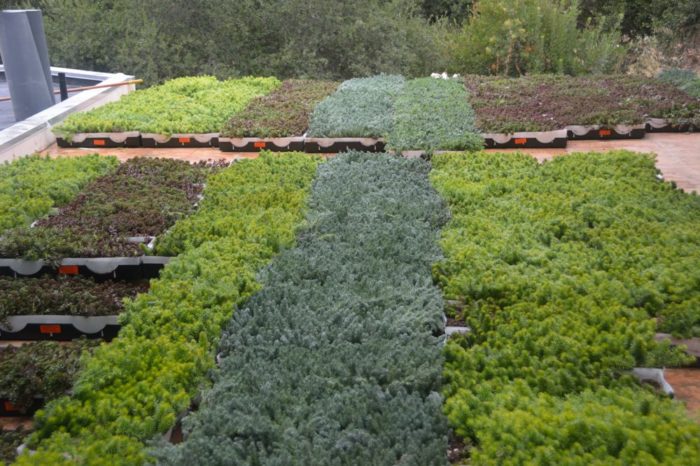
They also finished installing the green roof above the apartment (Picture 2). We decided not to extend the green roof onto the far section of the roof which will get, starting tomorrow, a standing-seam metal roof, because the green roof is substantially more expensive and we thought that the near section would be sufficient. Now we are wondering if we should have sprung for the extra dollars.
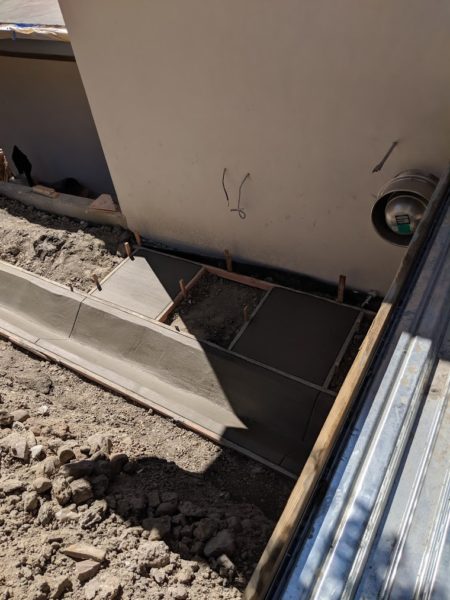
There was also a lot of earth moving to establish the finished grades on both sides of the house. There are no pictures of this, because there is not much to actually see. Once the grades are set they can finish the hardscape — stairways, concrete-lined ditches to move water away from the house, etc. Picture 3 shows the forms for a stairway at the end of the bridge behind the house that will lead to a short bridge to get to the first level of the backyard. The bridge will also be surfaced with concrete when the steps are poured.
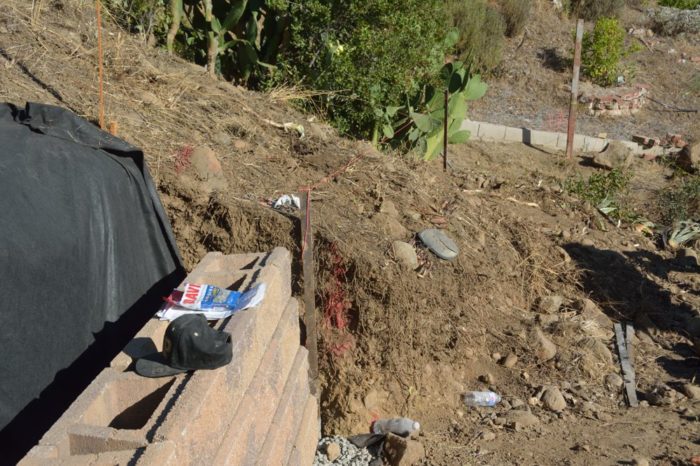
Below the bridge will be a concrete-lined V-ditch. This will be the last line of defense to keep water away from the back of the house. Picture 4 shows the trench that they have dug for this ditch.
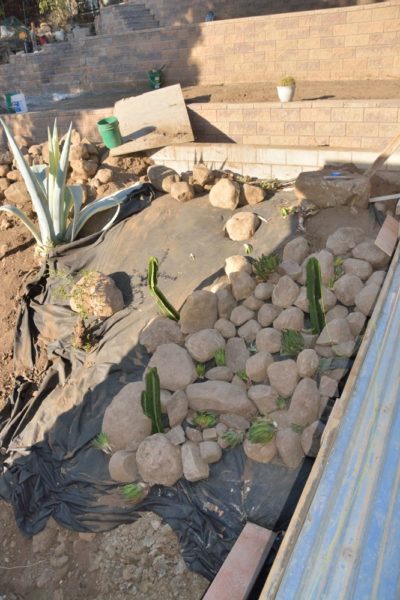
The slope between the ditch to the backyard is an area where the fire authority wants to severely limit flammable materials. As Picture 5 shows, Pete has started covering this area with large rocks — fairly inflammable! — succulents (in this section aloe plants are visible), cacti, which are also classified as succulents, and yuccas, which technically are not succulents, but close enough.
Picture 3 – The bridge from the 2nd floor of the house. At the end you can see the forms for steps that will lead to a small bridge to the lowest level of the terraced backyard. When these steps are poured, they will also pour concrete to make the surface of the bridge.
Picture 4 – Excavated area for a V-ditch running below the bridge.
Picture 5 – Pete has started creating a largely inflammable slope on the side of the bridge.
Ted’s sister Cecily and her son Sean came out for a visit to the house on Thursday afternoon. Some of today’s pictures are from then and some from Sunday afternoon.
On Thursday, they started delivering the green roof boxes. There were four types of sedums. The first photo shows some of them laid out on the deck. They filled the office, the upstairs hall, the great room, the two decks and a few more near the front walk.
Photo 1: Green roof boxes laid out by variety on the large deck.
One of our goals for the green roofs is to let you see something pretty when looking off into the distance from either deck. Instead of seeing roofing material, you see greenery. Of course, it was our architect’s idea in the first place.
Photo 2. The upper green roof filled in on Sunday. The varieties are placed randomly. The foreground deck will be covered in a brown concrete.
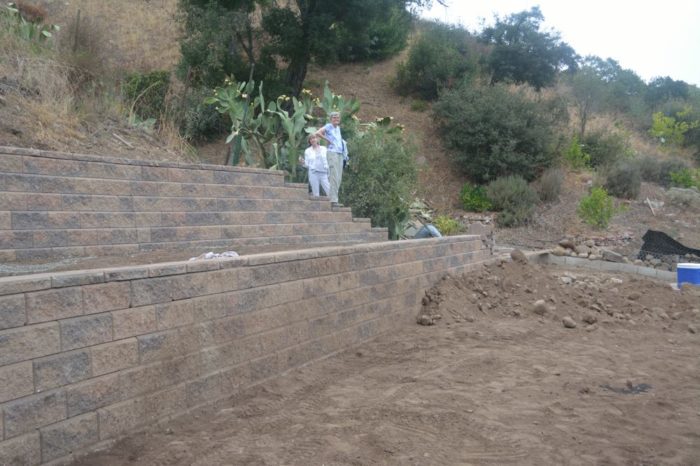
The backyard is nearly done. Photo 3 is a photo at the far right (east) of the backyard running from the bottom of the slope up through the slope that will be rocks and cactus. The guy in charge of the backyard crew, has, however, been pulled into the duty of laying out the green roof boxes.
Photo 3: This stair will eventually meet a concrete stair from the driveway.Photo 4: Sean on the first level of the backyard above the water gully.Photo 5. Cecily and Nina on the stair up to the top level.
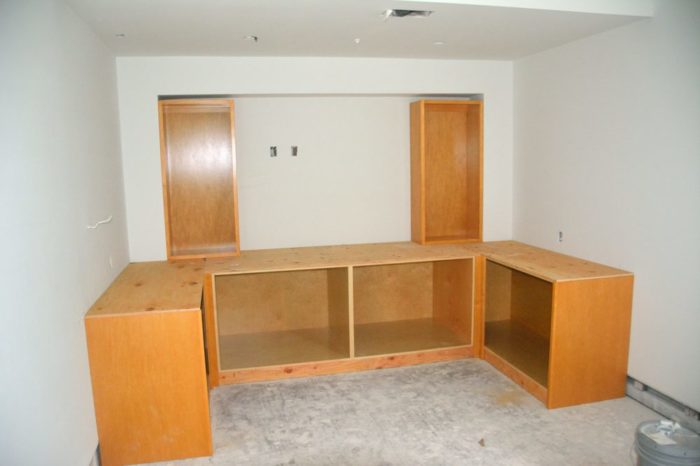
Not only has the cabinet maker brought out the cabinets for the kitchen, but for all the bathrooms and the TV room. Photo 6 is a picture of the TV room wall. The TV will fit in between the upper cabinets. Nina has claimed these large cabinets for Christmas decorations and kids’ toys.
Photo 6: North wall of TV room. Behind where the photographer stood will be a sofa and a game table.
Photos 7 – 10 are of bathrooms. All the house bathrooms have cabinets now, but we don’t have a photo of the powder room one.
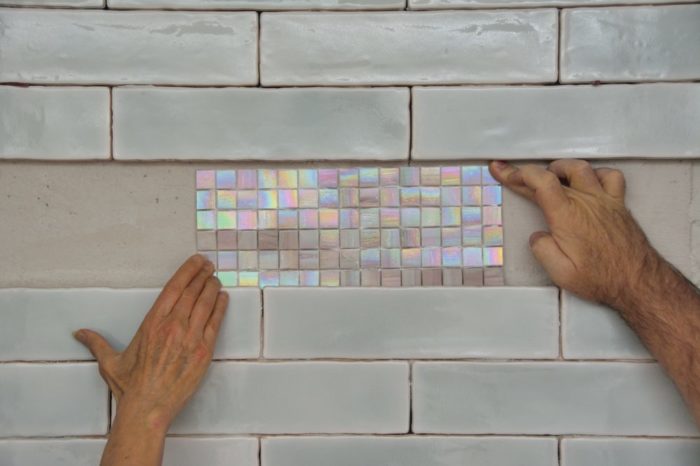
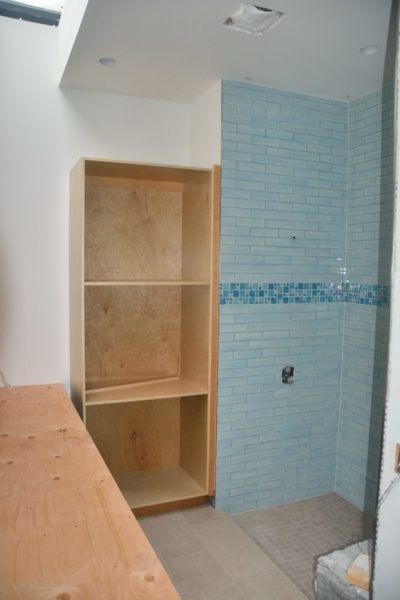
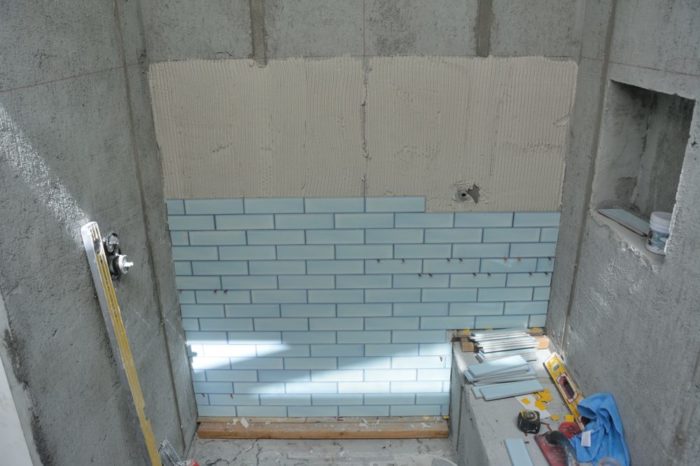
Photo 7. The guest bathroom. The space at the end is for the tub, which they moved temporarily.Photo 8: This is a photo showing that they’ve started tiling the guest bathroom shower. The tiles is an iridescent green. Sandwiched in the spaces, you can see in the next photo a strip. Photo 9. One of the strips that will fill in the gaps.Photo 10. Our bathroom with some of the cabinets visible.
On Friday afternoon, Ted met Julio, the cabinet guy, at a cabinet shop where Ted purchased white cabinets for the apartment kitchen and for the laundry room. Julio was able to take them that afternoon, but the drawers and other parts had to be put together. By the time we meet Curtis, who is in town, tomorrow afternoon at the house, perhaps those cabinets will be installed.
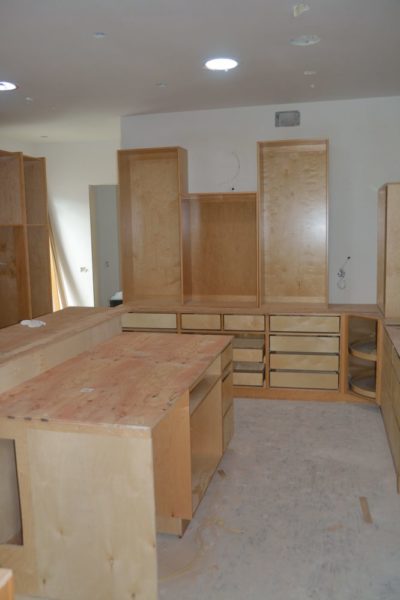
The kitchen cabinets seemed almost finished on Sunday. Here are pictures going in a circle from entering from the great room around the room clockwise.
Photo 11. Kitchen. Looking straight ahead as you walk in.Photo 12. Kitchen. The south and west walls. The cooktop will be in the corner and there will be two sinks in the two sides of the counter.Photo 13. Kitchen. The refrigerator area.Photo 14: Kitchen. More or less the same view as Photo 11. The north wall with drawers for placemats and cabinets for glassware.Photo 15. Kitchen. East wall where desk and TV go. Far right is for microwave and second oven.
Much has been happening, but Ted’s camera was out of battery at the beginning of the week. We were out there yesterday taking current pictures. They divide into four categories: backyard grading, tiling, kitchen cabinets, and what Pete’s been doing.
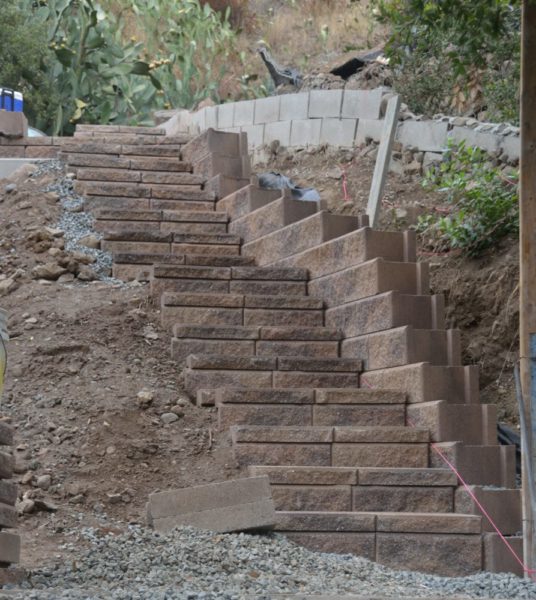
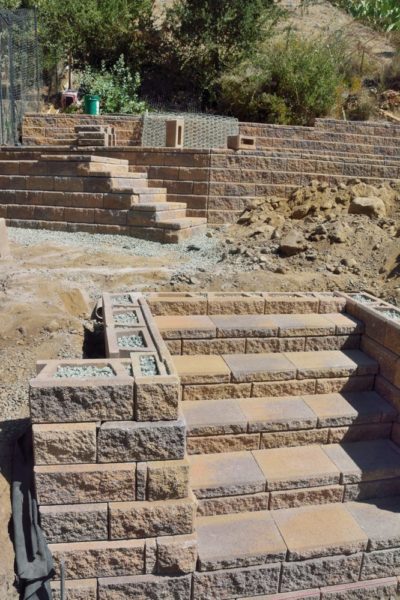
The backyard grading is almost done. This past week, they made three staircases including a beautiful stair-step sideways staircase up to the top level of the main backyard.
Picture 1: Overview of backyard terracing.Picture 2. The top wall, above terrace 3, with its sideways staircase up to the top slanted slope.
Later in the week, they built a staircase from level 1 to 2 and another sidewaysish staircase up to level 3, where the chicken coop is.
Picture 3. Two staircases through the levels.
Picture 3 Shows a straight staircase from terrace 1 to 2 and another above from terrace 2 to 3, where the chicken coop is.
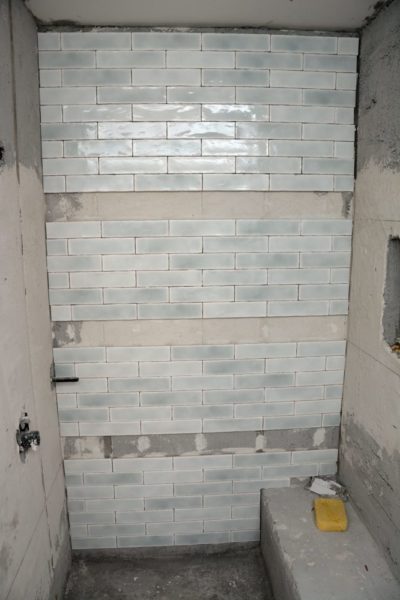
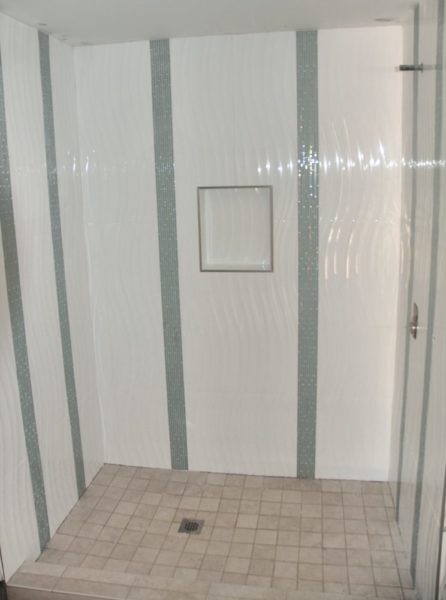
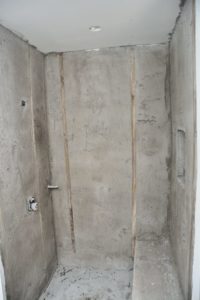
The tiling in the apartment bathroom is done; they were cleaning grout off the tiles yesterday. Picture 4 is the shower stall for the apartment. The tile on the floor is the same tile used throughout the apartment. They have also finished tiling the outside deck.
Picture 4: Apartment shower stall.
The shower stall in the master bathroom and the floor are also finished.
Picture 5. Master bathroom shower stall.
The tiling of the decks, powder room, and laundry room are now finished as well.
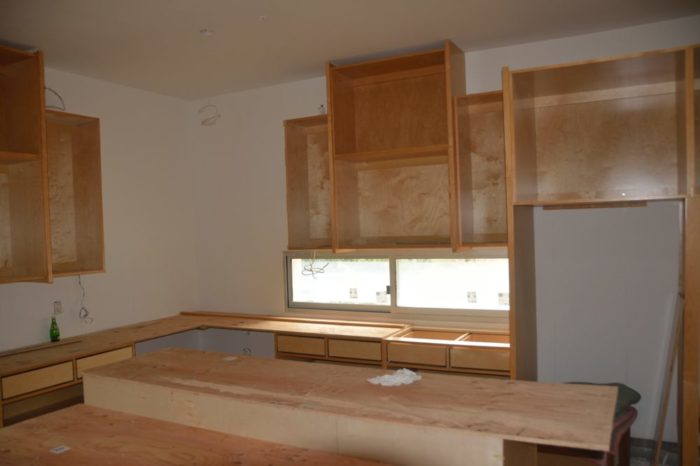
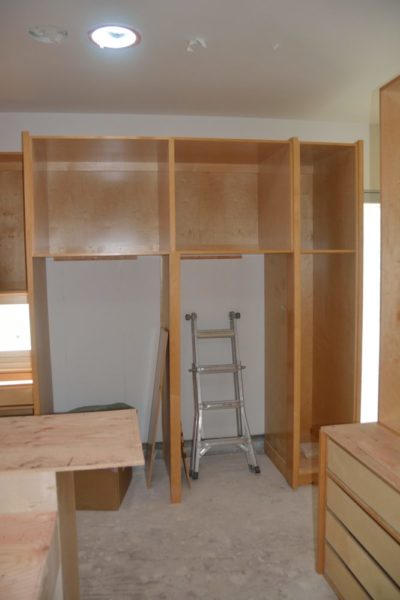
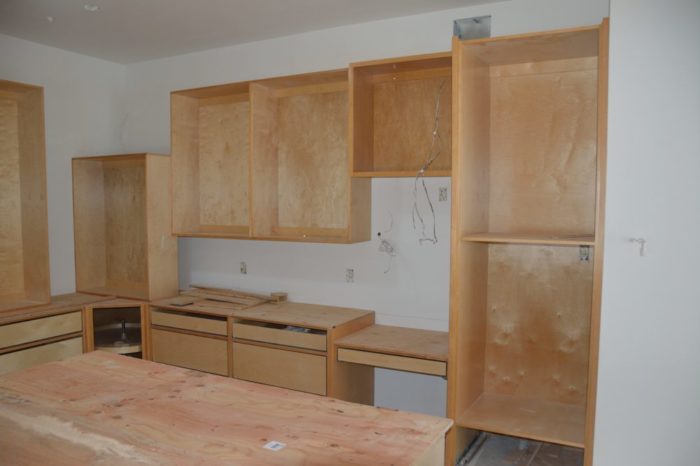
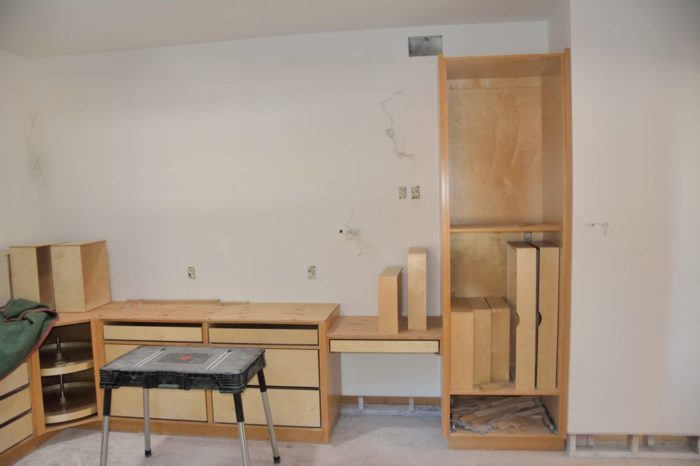
The cabinet guy has been working this week setting up the kitchen cabinets. Pictures, 6-8 show different views of the kitchen. There is, as yet, no center island nor any cabinets on the south side.
Picture 6. West wall with cutouts for two refrigerators and a broom closet.Picture 7: The north wall with drawers for placemats. The cabinet doors will be added later.Picture 8. The east wall with a desk area and a cabinet to hold the second stove and microwave.
As soon as the backyard grading is complete, they will start bringing dirt into the area just outside the kitchen. This area needs to be built up by 12-18 inches. After that is complete, Pete can start building the gabions that cover the lower part of the west side of the house.
In the meantime, Pete has been building gabions in non-construction areas of the yard.
Picture 9. This is a new gabion filled partially with broken concrete from the foundation of the old house. This is along the road to the solar panels. Although, not visible, Pete has added a lot of dirt to the road near the top where it was very uneven.Picture 10. This is a week-old picture of the new west gabion wrapping around citrus hill. The backyard construction goes up to that pre-existing block wall. The other side has a gully and then citrus hill.
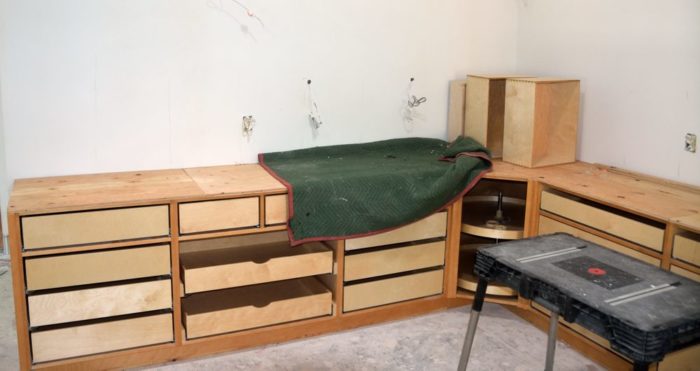
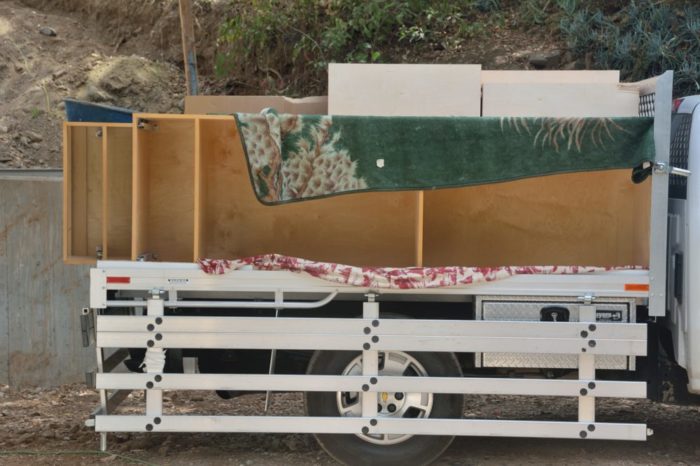
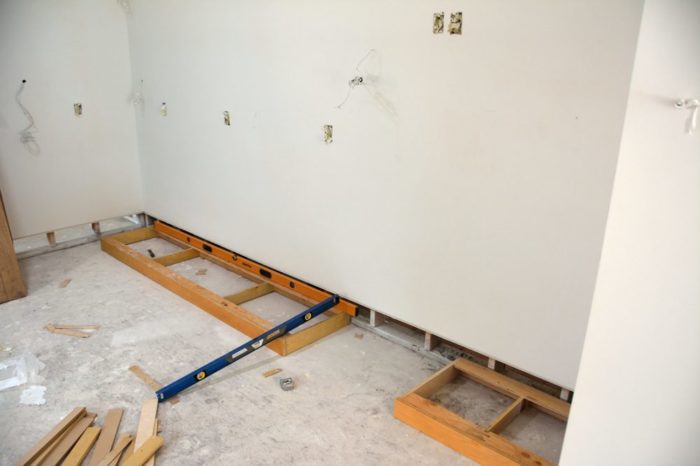
Ted was out at the house all morning to talk with the cabinet maker about the vanity cabinets and the kitchen cabinets for the apartment. The cabinet maker was there to begin installing the kitchen cabinets in the house — very exciting! Picture 1 shows some of the base cabinet frames in his truck, ready for unloading. In Picture 2 they are beginning to put down and level the bases that go under these cabinets. Perhaps the next time we are out there it will look something like a kitchen.
Picture 1 – Base cabinet frames for the kitchen waiting to be unloaded.Picture 2 – The first cabinet bases — these form the kickplates — being leveled and installed.
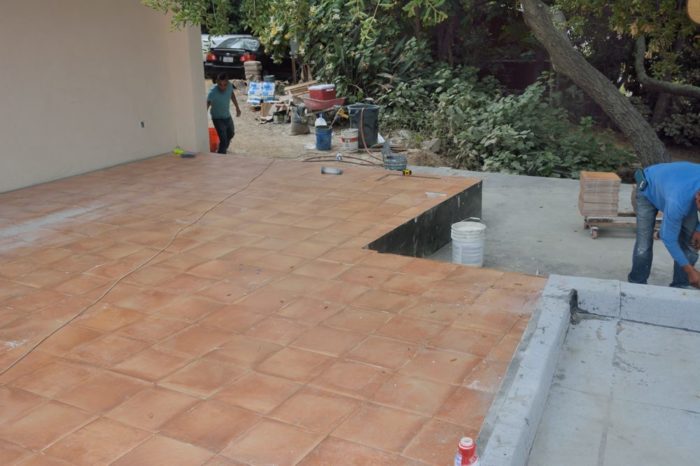
The tilers were busy yesterday, laying the tile for the main part of the deck (Picture 3). This is the same tile as in the great room to enhance the unity of the indoors and the outdoors. Later in the morning, they were making progress on the lower deck (Picture 4). Others of the tilers were beginning the tile of the shower surround in the master bath (Picture 5).
Picture 3 – Completed tile on the main part of the deck.Picture 4 – Starting the tile on the lower deck. Apparently, the last step is installing the tile on the vertical surfaces.Picture 5 – First tile in the shower enclosure of the master bath.
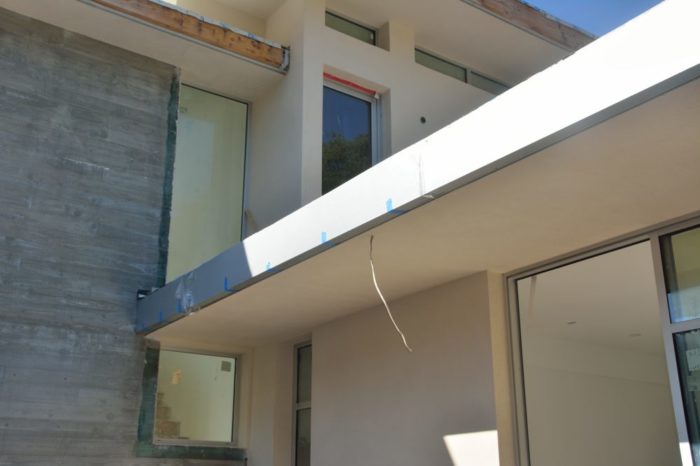
The last blog showed the metal installed on the edge of one of the roof overhangs. Picture 6 shows the same spot with the gutter installed.
Picture 6 – First section of gutter installed.
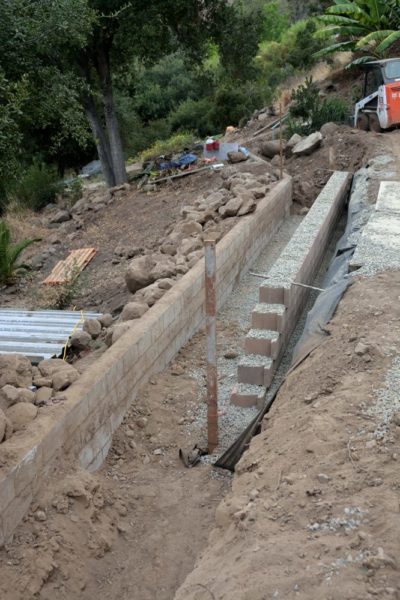
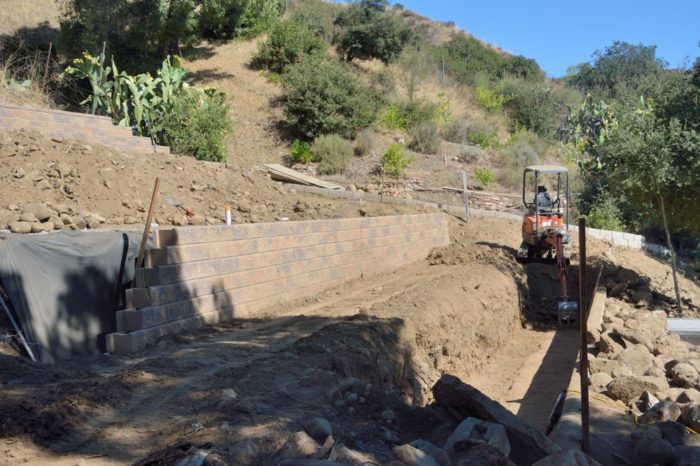
There was, sadly, no one working on the upper yard because they have to wait for more blocks to be delivered. Monday however, they began work on the lowest wall (Picture 7).
Picture 7 – Work has begun on the lowest of the block walls. The wall on the left is the debris wall that they built several months ago. It is much stronger, with the blocks cemented in place. The ditch between these two walls is intended to catch any rock or debris that might come down the hillside in some terrible future storm. It will channel any water that makes it this far to the west gully, which is at the back of the picture.
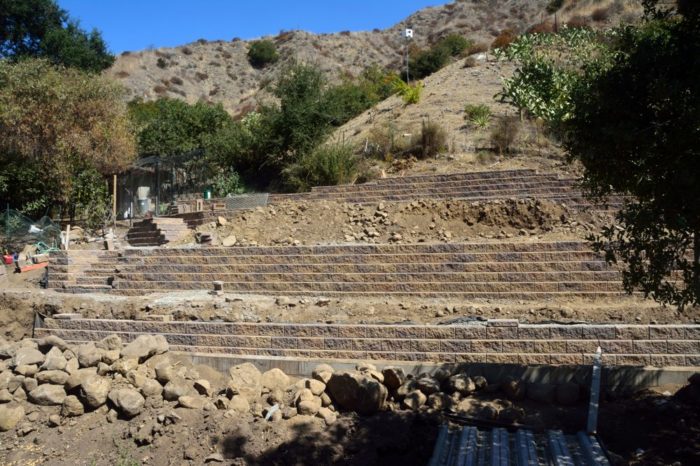
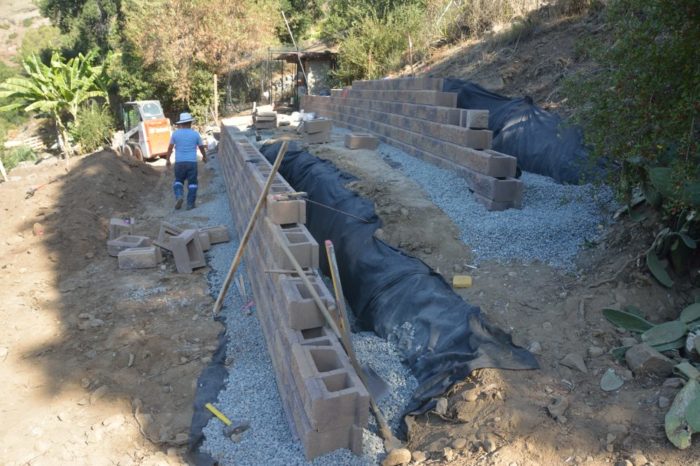
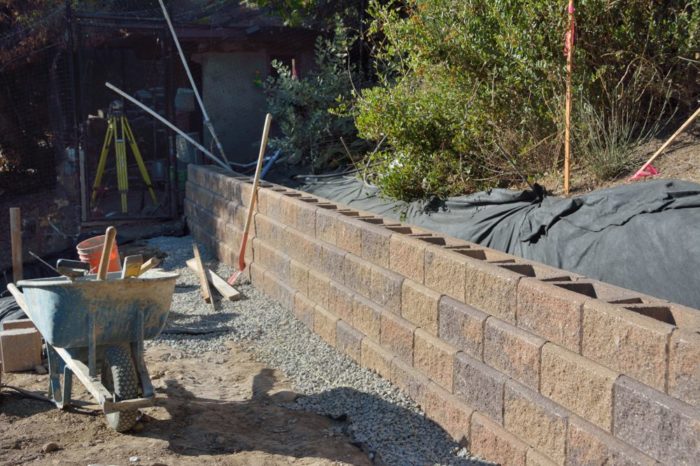
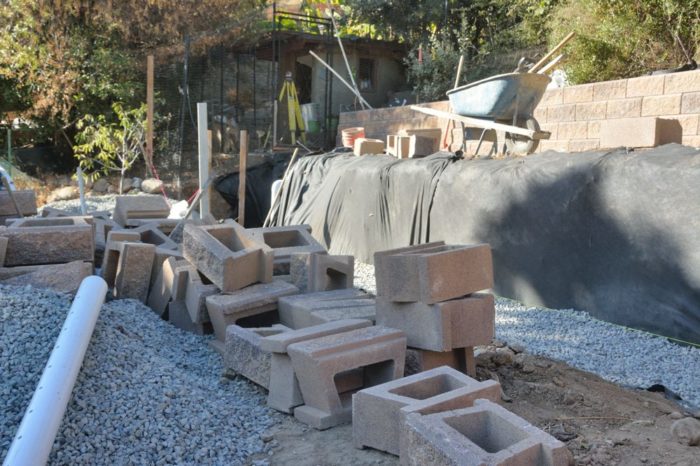
Because of Labor Day it was a short week. (The tile contractor did try to work on Monday, but a neighbor complained and that crew was sent away.) The most dramatic progress has been in the grading for the back yard. By Wednesday, they had gotten the blocks for the top two walls in place (Picture 1). One advantage of these walls is that they will slow and catch water coming off the hillside, so there is a network of drainage tubing running behind the walls protected by black cloth that lets through water but not soil (Picture 2). The space behind each wall is then filled with gravel, as are the cavities in the walls themselves (Picture 3). Each stone itself weighs 75 pounds; filling them with gravel adds to that weight so that they are better able to hold back the soil behind them.
Picture 1 – Blocks in place for the top two walls.
Picture 2 – Drainage behind the walls.
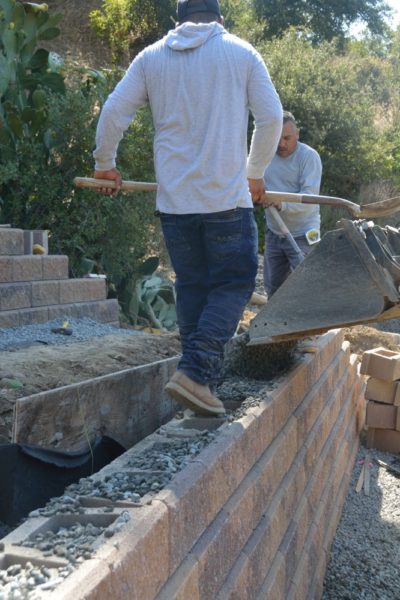
Picture 3 – Filling the space behind a wall and the cavities in the blocks themselves with gravel.
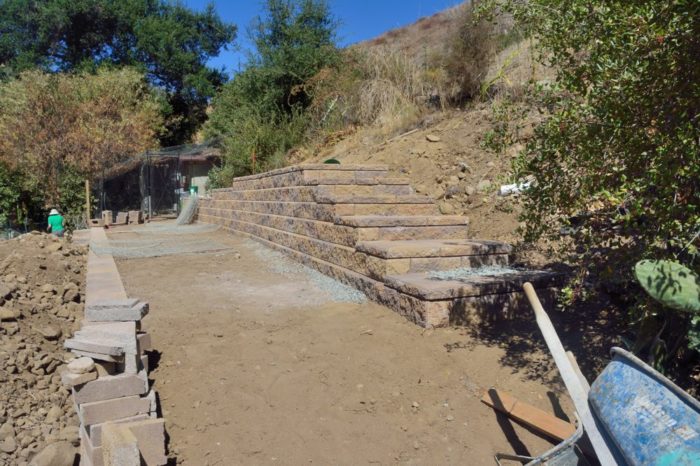
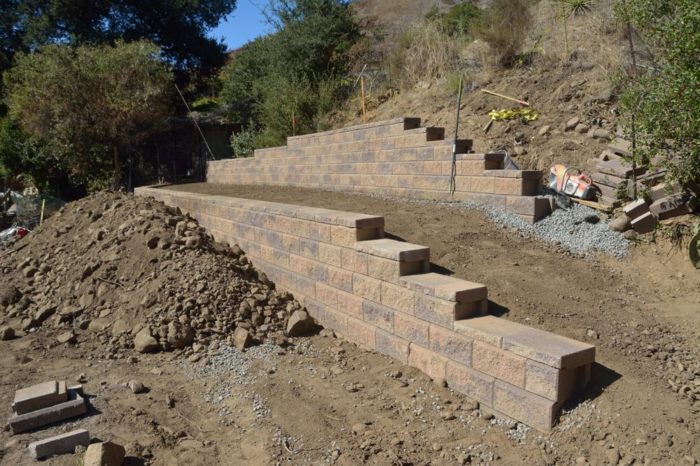
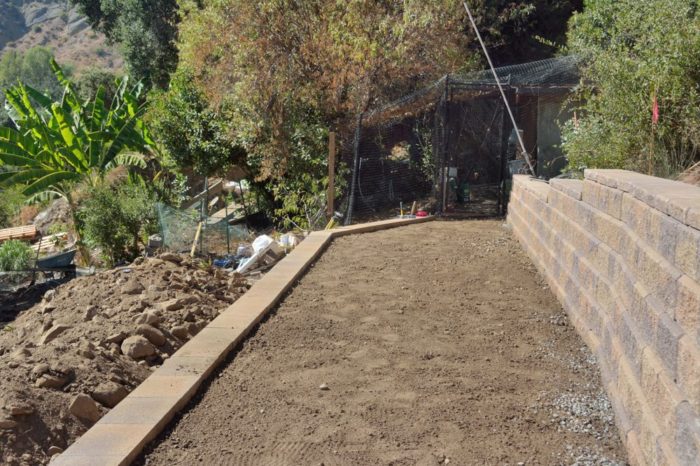
By Friday afternoon, the top two walls were complete (Picture 4) and the terrace between them was nicely graded (Picture 5). The next wall down was largely in place and the focus was on digging out the footing for the bottom wall (Picture 6). Once the walls are in place they will add stairways between the terraces to augment the graded transitions at the ends where it is also possible to walk (or push carts) between the terraces.
Picture 4 – The top two walls are now complete. The pile of dirt below the lower wall is being stored while the lower two walls are finished.Picture 5 – The finished top terrace running to the chicken coop.Picture 6 – The third wall from the top is largely in place on the left. The focus is on digging the footing for the bottom wall.
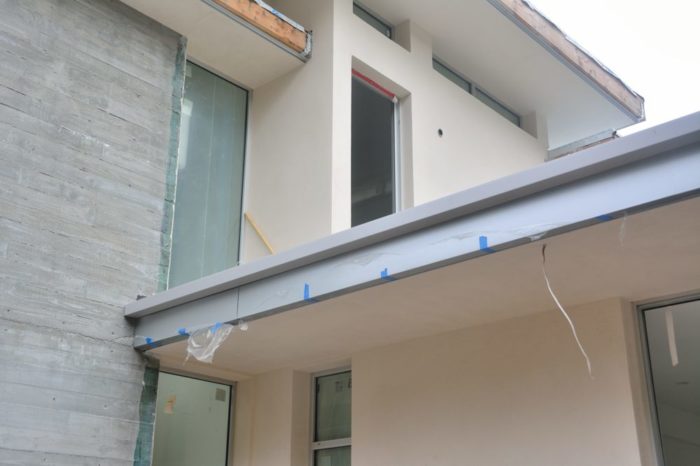
The other development of note is that they have begun to install the metal that will cover the heavy wooden joists on the edge of the roof overhangs. These match the metal around the windows (Picture 7).
Picture 7 – Metal covering over the wood joists that edge the overhangs. This is not quite finished and still has blue tape on part of it. However, compare it to the wood edging visible above and on the left.
Margot pointed out that the last image was missing from yesterday’s post. Sorry! It’s a mystery. If you go back to that post the image has been added, but even better might be Picture 1 here. This shows them grouting the great room tile. In it you can see the rotated field tiles and the straight set border.
Picture 1 – Grouting the great room tile.
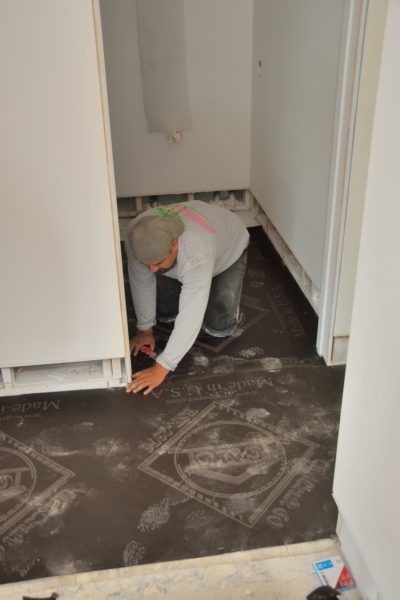
Pictures 2 and 3 show that yesterday afternoon they were getting ready to put this tile down in two other places: in the hallway to the master bedroom and in the powder room, where they are putting down black, builders paper, on top of which will go metal lathe, and on the deck, where they have applied a layer of waterproofing tar.
Picture 2 – Preparing the hall and the powder room for the same tiles as the great room.
Picture 3- The decks with tar applied. The great room tile will extend out onto the decks to minimize the boundary between the inside and outside of the house.
Picture 4 shows them laying the first (and most difficult course) for more of the third wall.
Happy Labor Day! There has been significant progress on two projects during the last two weeks and minor additional progress on the stucco.
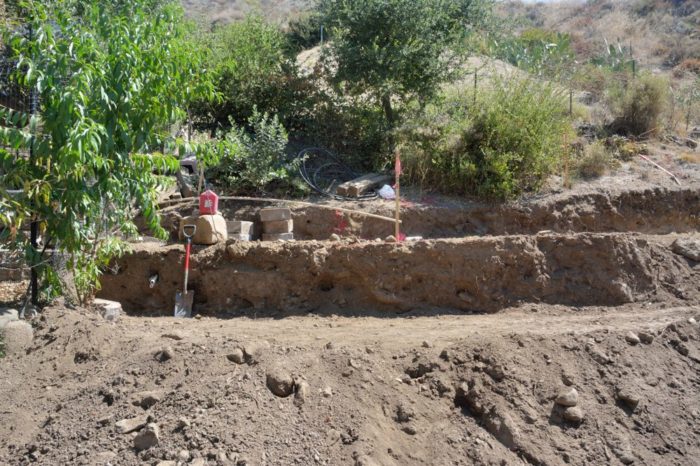
After a slower than expected start the backyard grading is now moving forward nicely. Pictures 1 and 2 show the first, rough grading for the top two (of four) walls that will separate three terraces in the re-contoured backyard. These were taken 10 days ago Saturday (August 24).
Picture 1- First rough grading for the top two terraces and walls. Picture 2 – Another view of the rough grading for the top two terraces and walls. Even to my eye, it was clear that neither wall was tall enough and that they would need to lower the elevation of both the terraces. The top wall was meant to be 3 feet high and the one below 4 feet high.
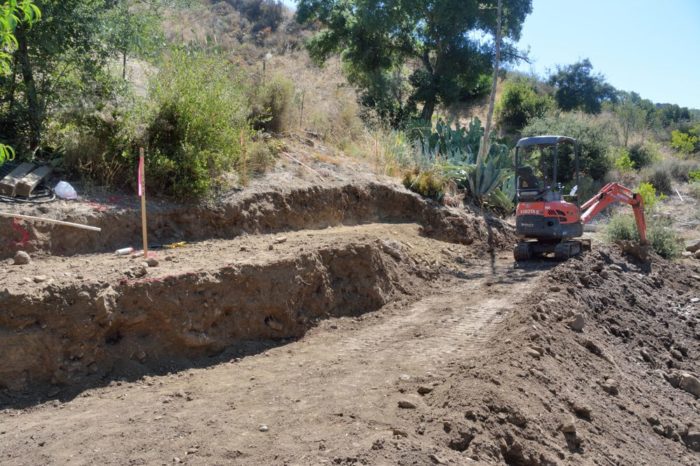
By the afternoon of the next Wednesday (August 28), they had gotten the terraces to the correct levels and dug the 8″ deep footing trench required for these block walls.
Picture 3 – Cuts for the top two garden walls and terraces in the re-contoured backyard. In this picture you can see the footing for the lower wall. This is an 8-inch deep, 2-foot wide trench. The bottom four inches will be filled with gravel on which the blocks are laid. The gravel then continues up behind the wall.
Picture 4 shows that, by Friday afternoon, they had laid the block for the top wall — this terrace runs to the gate of the chicken coop. Unfortunately, as Picture 5 shows, with this wall in place, it was clear that the stairway to the upper backyard cannot go where I had anticipated. Instead, they will extend the top wall another 10 feet where it will start stepping down, forming the downhill side of a stairway to the upper backyard. Picture 6 shows that they have the material ready to put in the first half of the third wall.
Picture 7 shows the competed section of this wall that they completed Saturday morning.
Picture 4 – Top wall in place running to the gate of the chicken coop.Picture 5 – Whoops! When I was laying the walls out, I thought that a stairway to the upper level could go here, but with everything in place it is clear that this was not a great idea. Instead the wall will extend another 10 feet or and step down to form side of a stairway.Picture 6 – This shows everything in place to build the first section of the third wall. They have put down the black, filter fabric that lets through water, but keeps mud and silt out of the gravel. On top of the fabric, in the footing for the wall, is the four inches of base gravel. Once the wall is up they will fill the cavities in it and the gap behind it with more gravel.Picture 7 – The newly completed section of the third wall on the left, below, and the top wall on the right. Notice that they have cut away more of the upper bank to make room for the extension of the top wall.
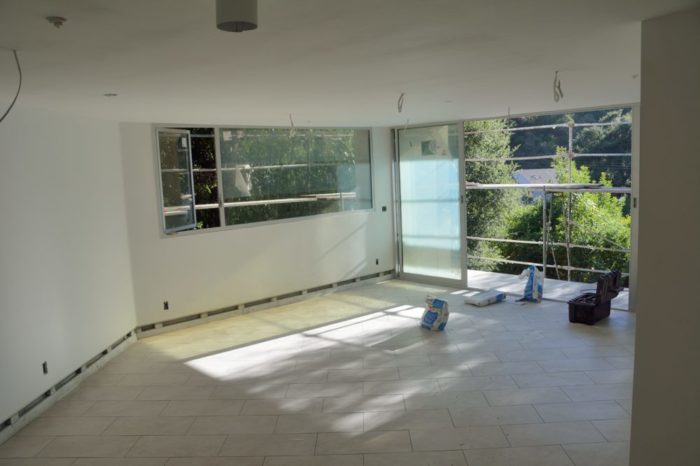
The other area in which there has been exciting progress is the floor tile. By last Friday afternoon they had tiled the apartment. Because this is a five-walled structure, the tile in the apartment has something of the effect of an Escher print. Picture 8 shows how, in the back of the apartment, which includes the entrance, kitchen, bathroom and pantry, the tiles are laid at right angles to the walls. However, if you walk in to look at the living room by turning to the right, as in Picture 9, the same tile layout now is no longer square to the walls but at a 45-degree angle. (The wall to the left in Picture 9, is part of the same wall seen straight ahead in picture 8.)
Picture 8 – View into the kitchen area from the entrance. The living room is to the right.
Picture 9 – View of the living room, with the doors to the deck open.
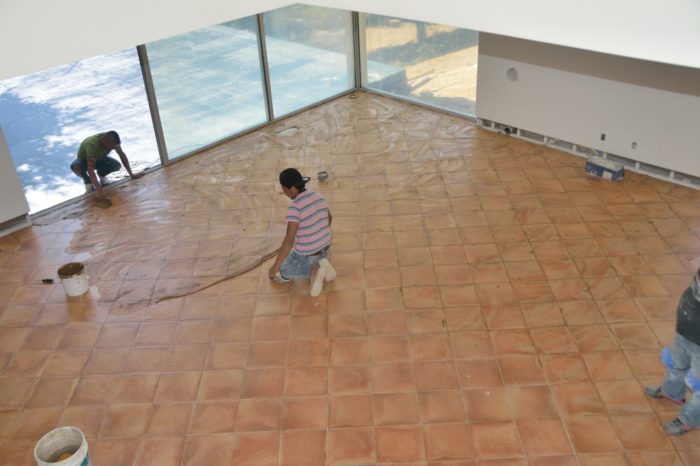
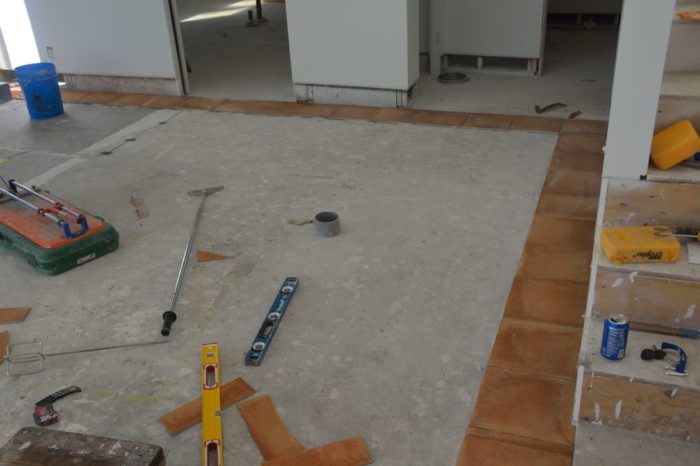
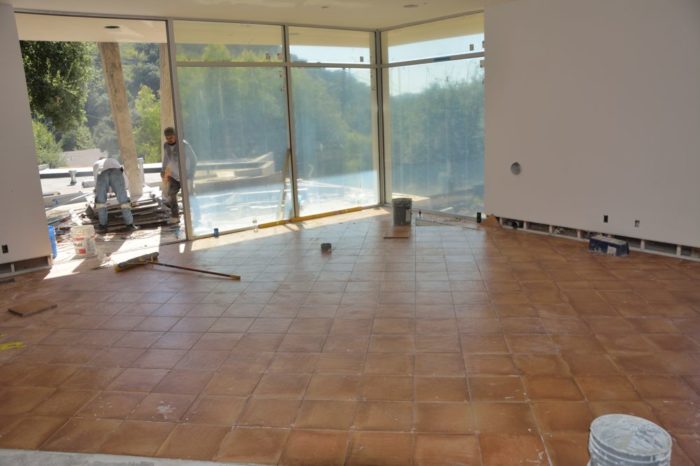
On Friday afternoon, they had also laid the edging tiles in the great room of the house. As Picture 10 shows, these are laid parallel to the walls. The field tiles in this room will be turned at a 45-degree angle from the border. This is shown in Picture 11, taken Saturday afternoon as they were completing the great-room tile. We have been told that having a border like this is no longer done, but we like it, so now we’re waiting for the style to come back into fashion.
Picture 10 – Completed border tiles in the great room. On the left (under the blue pail for instance), the floor without tile looks different than in most of what is visible. That is because in the area on the left, as in most of the room, there are electric heating wires embedded into the floor. There is no heating grid in most of the area in this picture because this area will serve as walkways rather seating areas of the room.Picture 11: nearly completed great room floor
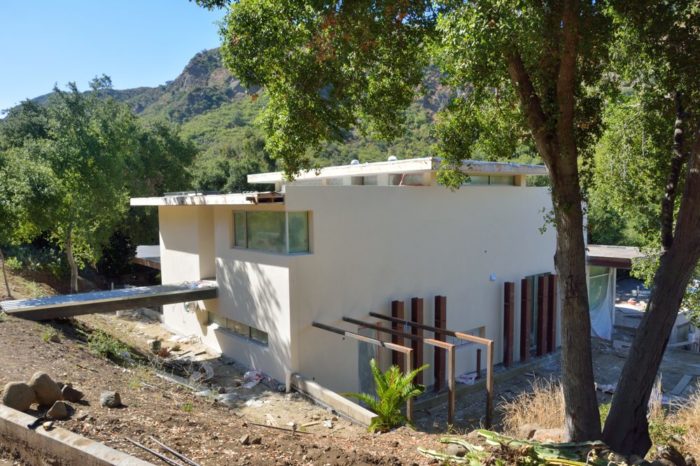
The upside of the fact that it took so long to get the tour assembled and posted is that some visible progress has been made! As Picture 1 shows, the stucco is now done on most of the house and the scaffolding is down so the house is now truly visible again. We think that the masons really did a great job. There are still a few small bits to do on the house and, as you can see in Picture 1 the scaffolding is still up on the garage/apartment because there is more of that still to do. But we are thrilled.
Picture 1 – View of the house from the hillside. The scaffolding is finally down everywhere but the garage/apartment at the bottom because most of the stucco is done.
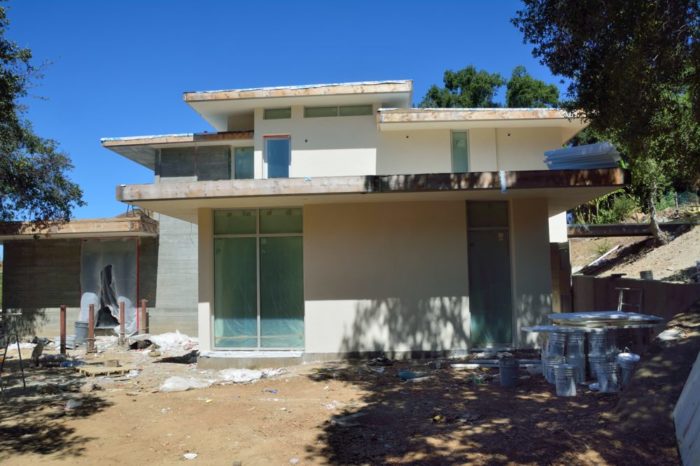
Picture 2 and 3 provide a closer look at the house with the stucco done and the scaffolding down. One thing that still looks wrong are the exposed wood beams on the edges of the overhangs. These soon will be covered with metal matching the window frames.
Picture 2 – View of the house from the northwest.Picture 3 – View of the house from the east. Finally, you can really see the wonderful lines created by the windows, the roof overhangs, the setback second floor, and the different height roofs.
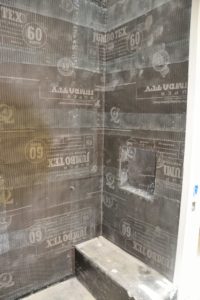
There has also be some work in the house. Picture 4 shows the metal lathe applied to the inside of one of the shower stalls. Picture 5 shows the “scratch” coat of cement, applied over the lathe; this will provide the foundation for the tile.
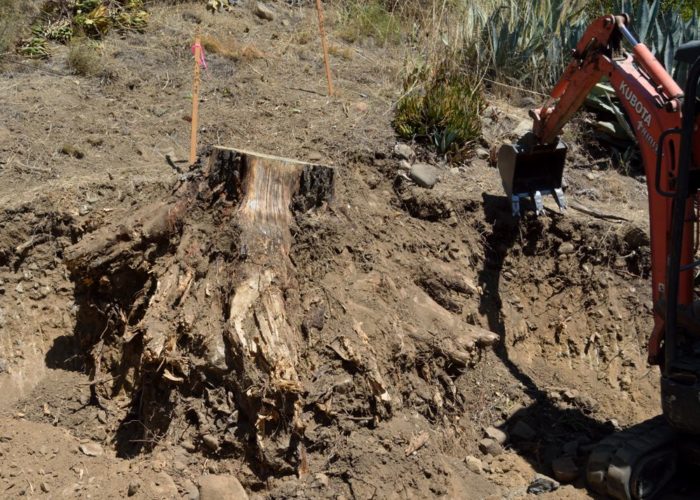
Today, as Picture 6 shows, they also began the grading for the backyard garden terraces.
Picture 4 – Metal lathe applied to the shower stall walls.
Picture 5 – Cement scratch coat applied over the lathe. The tile can be applied to this.
Picture 6 – Today they began the grading for the mortarless walls that will terrace the backyard. To start, they needed to clear out the existing vegetation — including this epic battle: small machine versus huge stump.