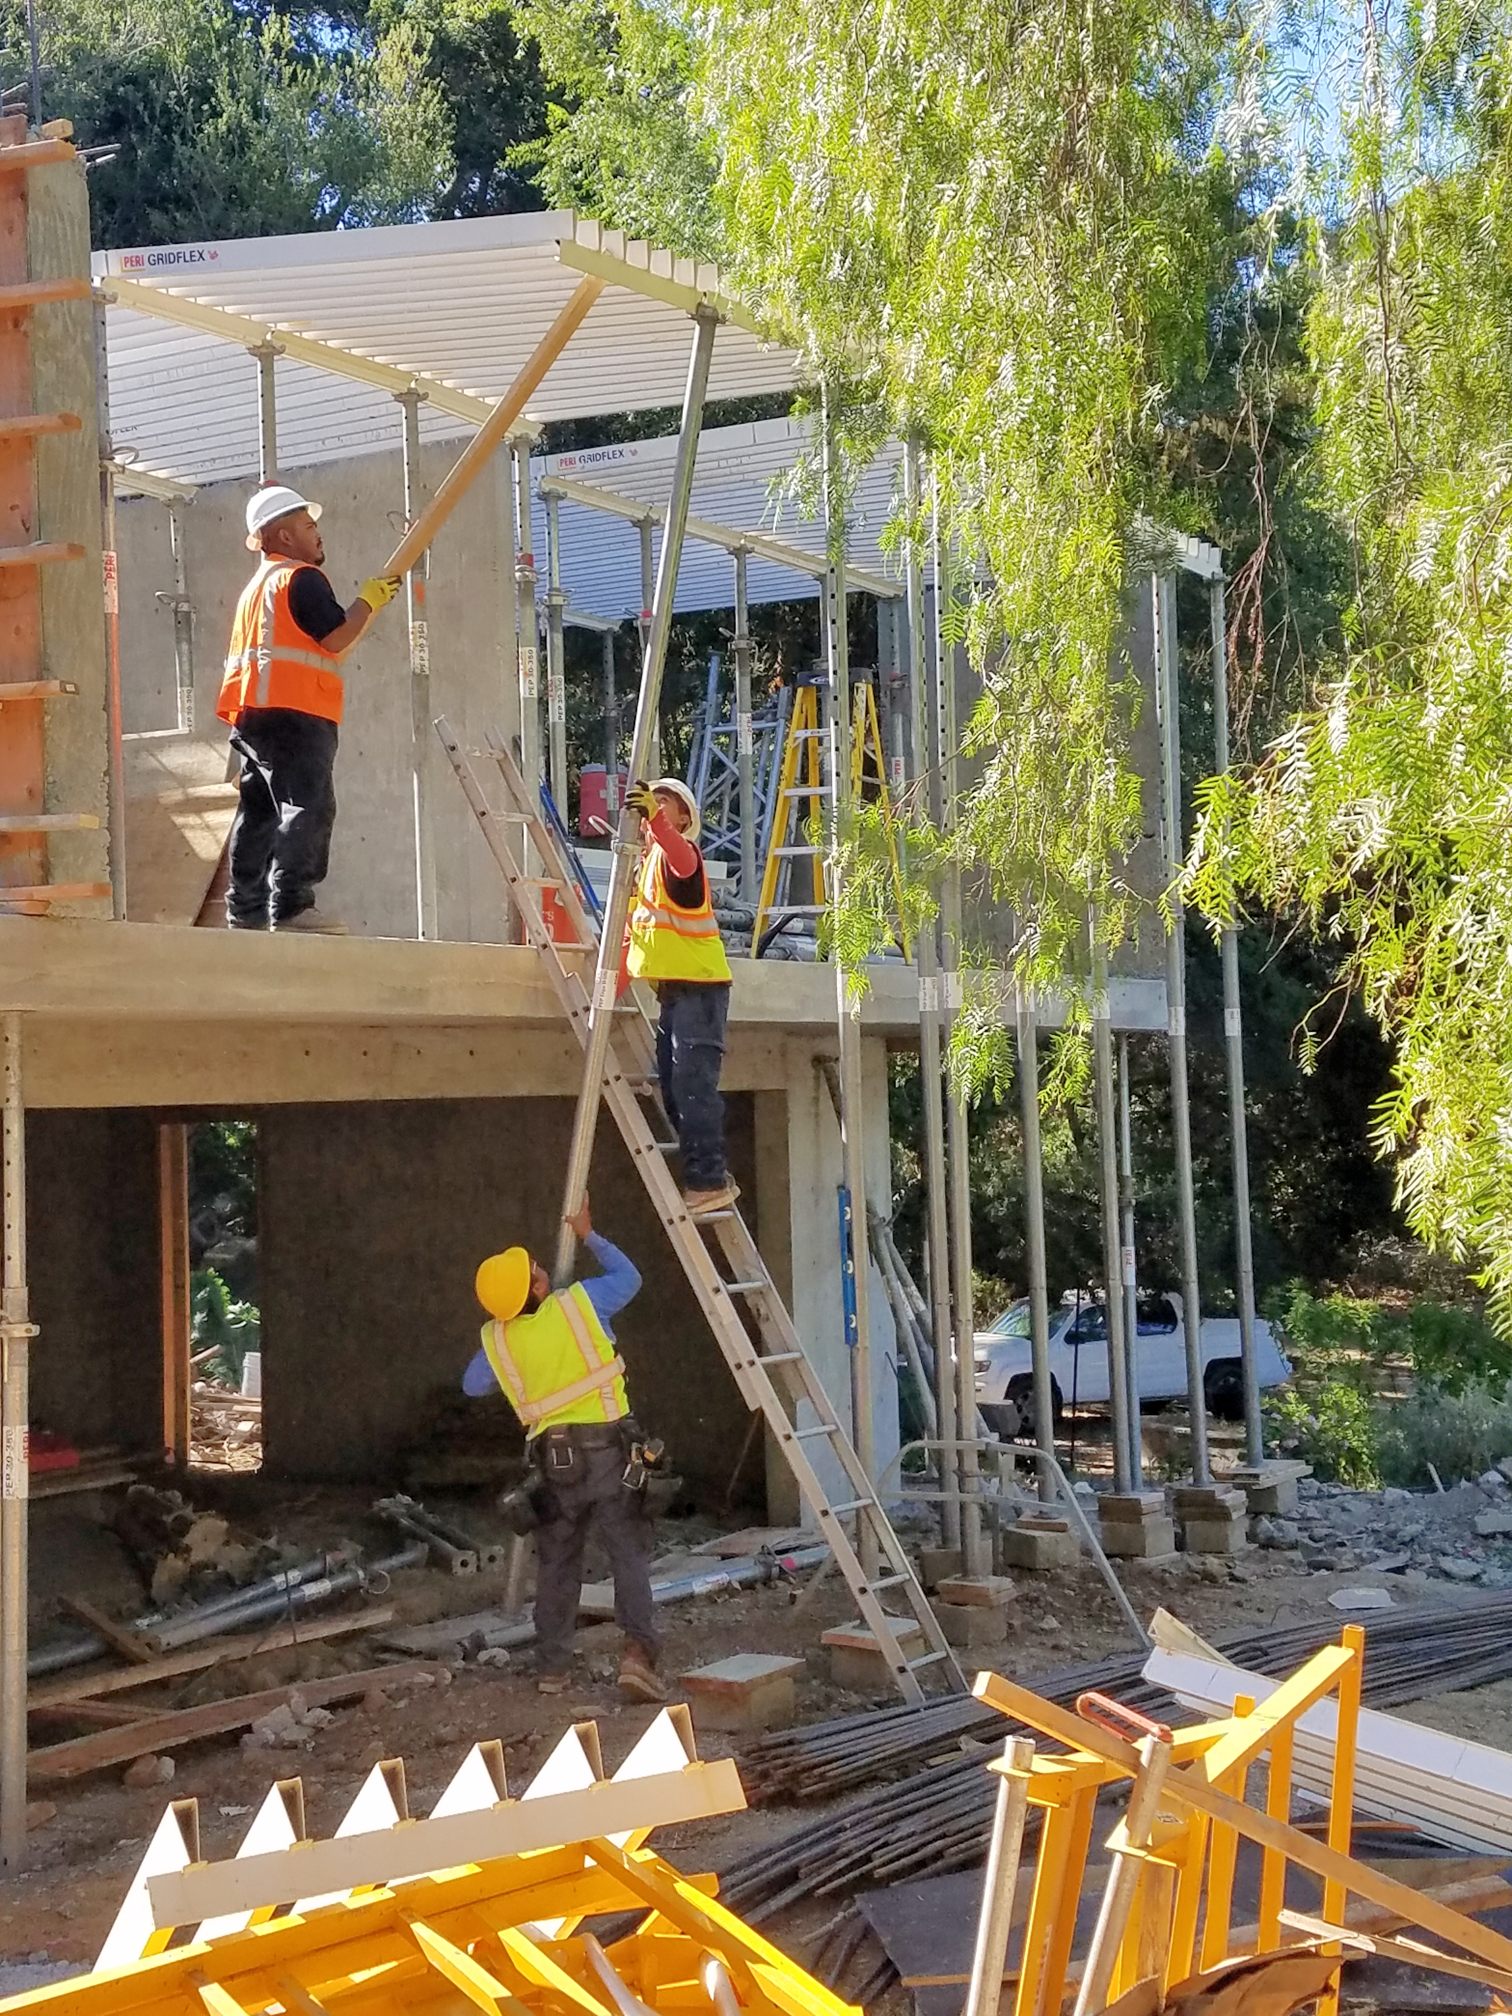
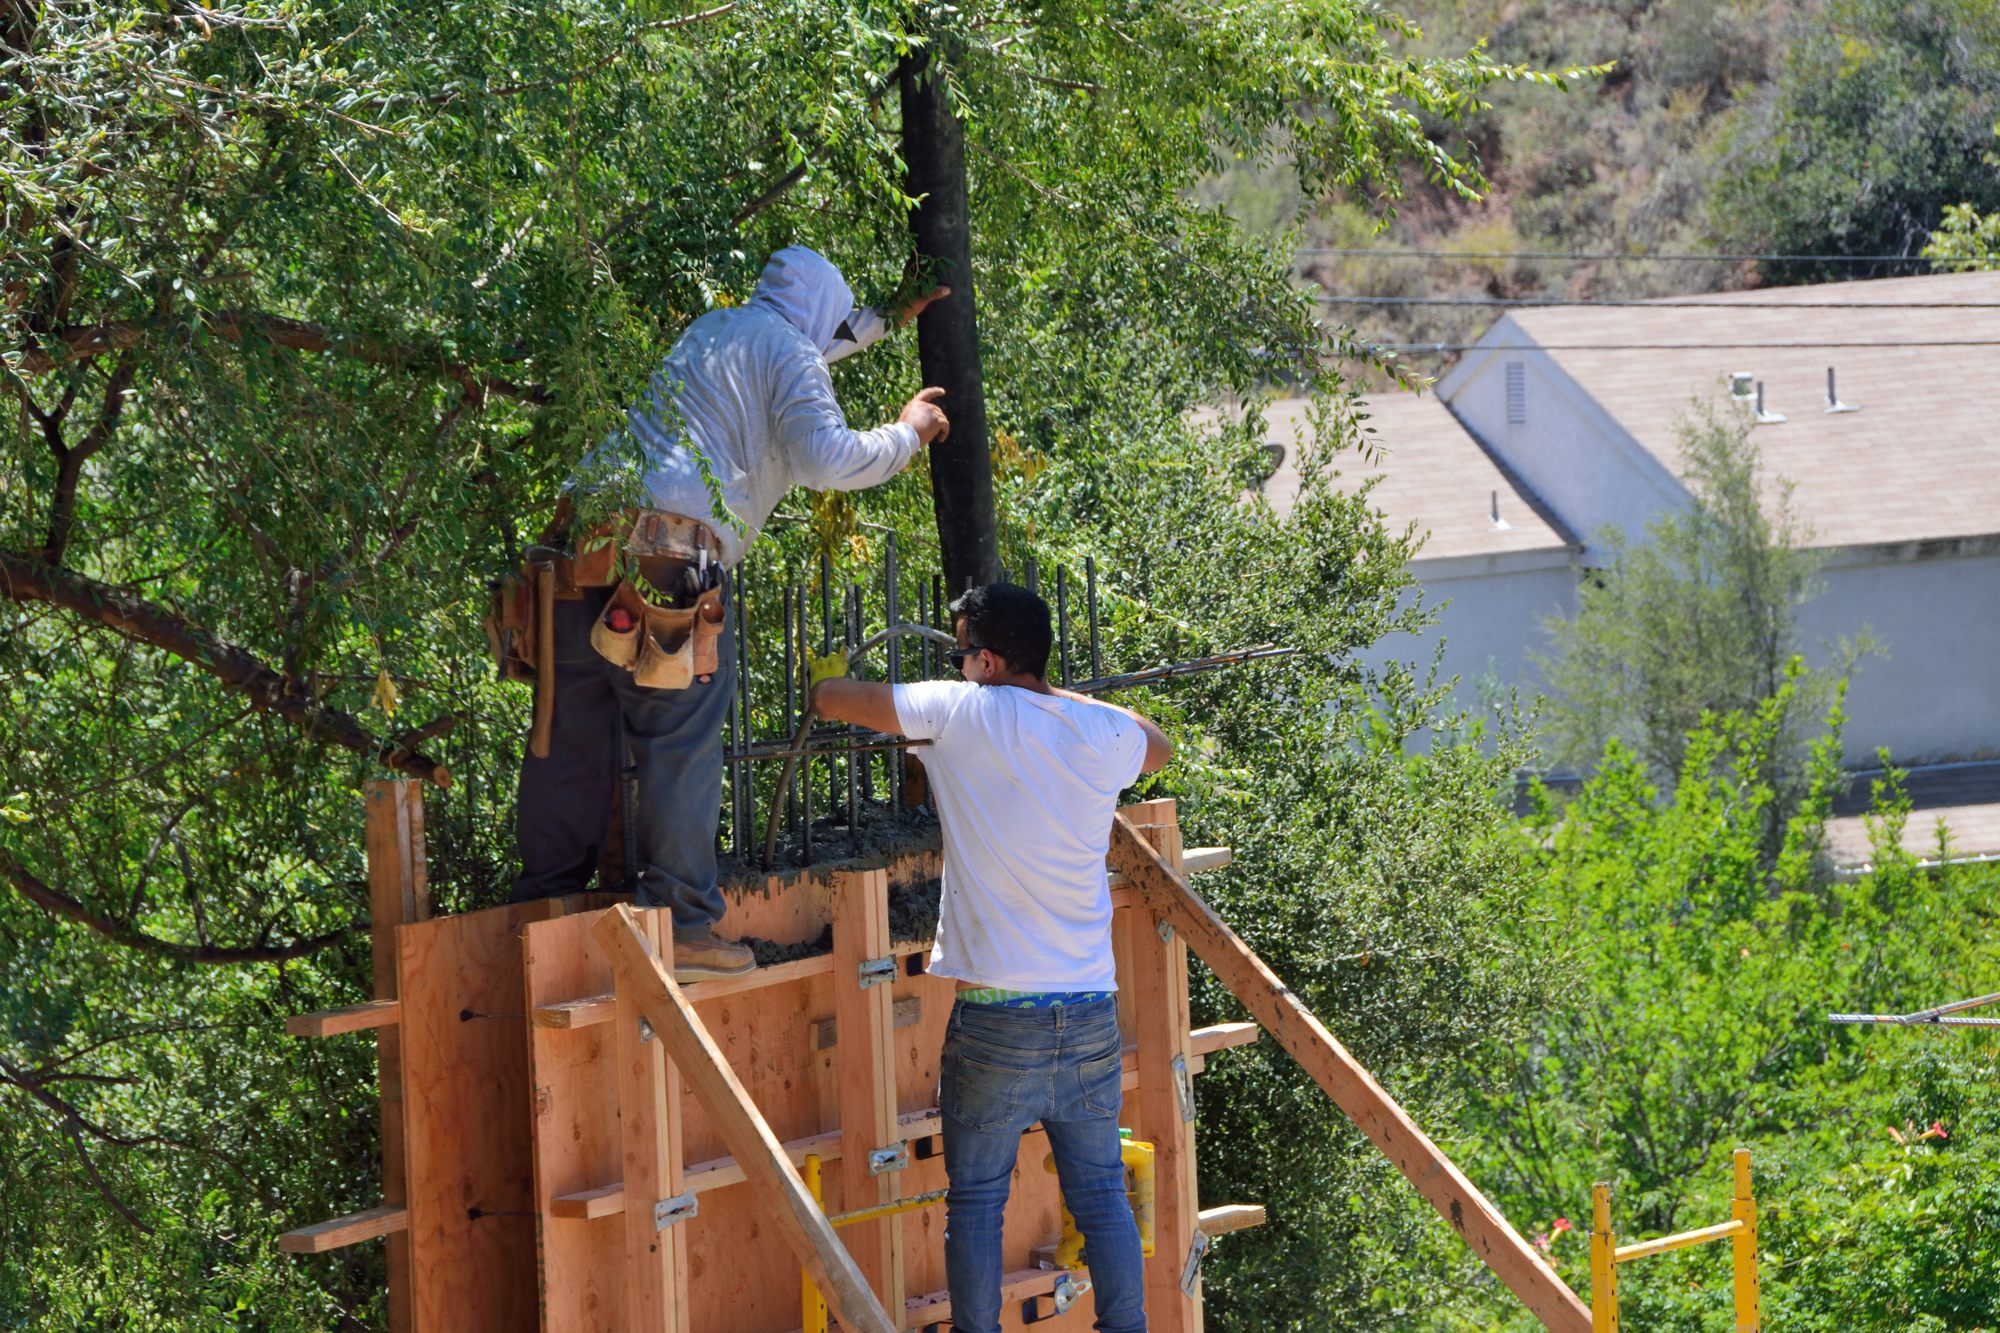
Guys on Wednesday getting one of the support posts into position.
Wednesday, the front of the garage with support posts done
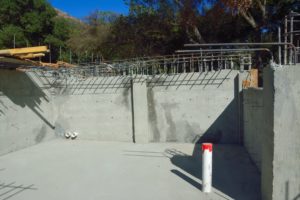
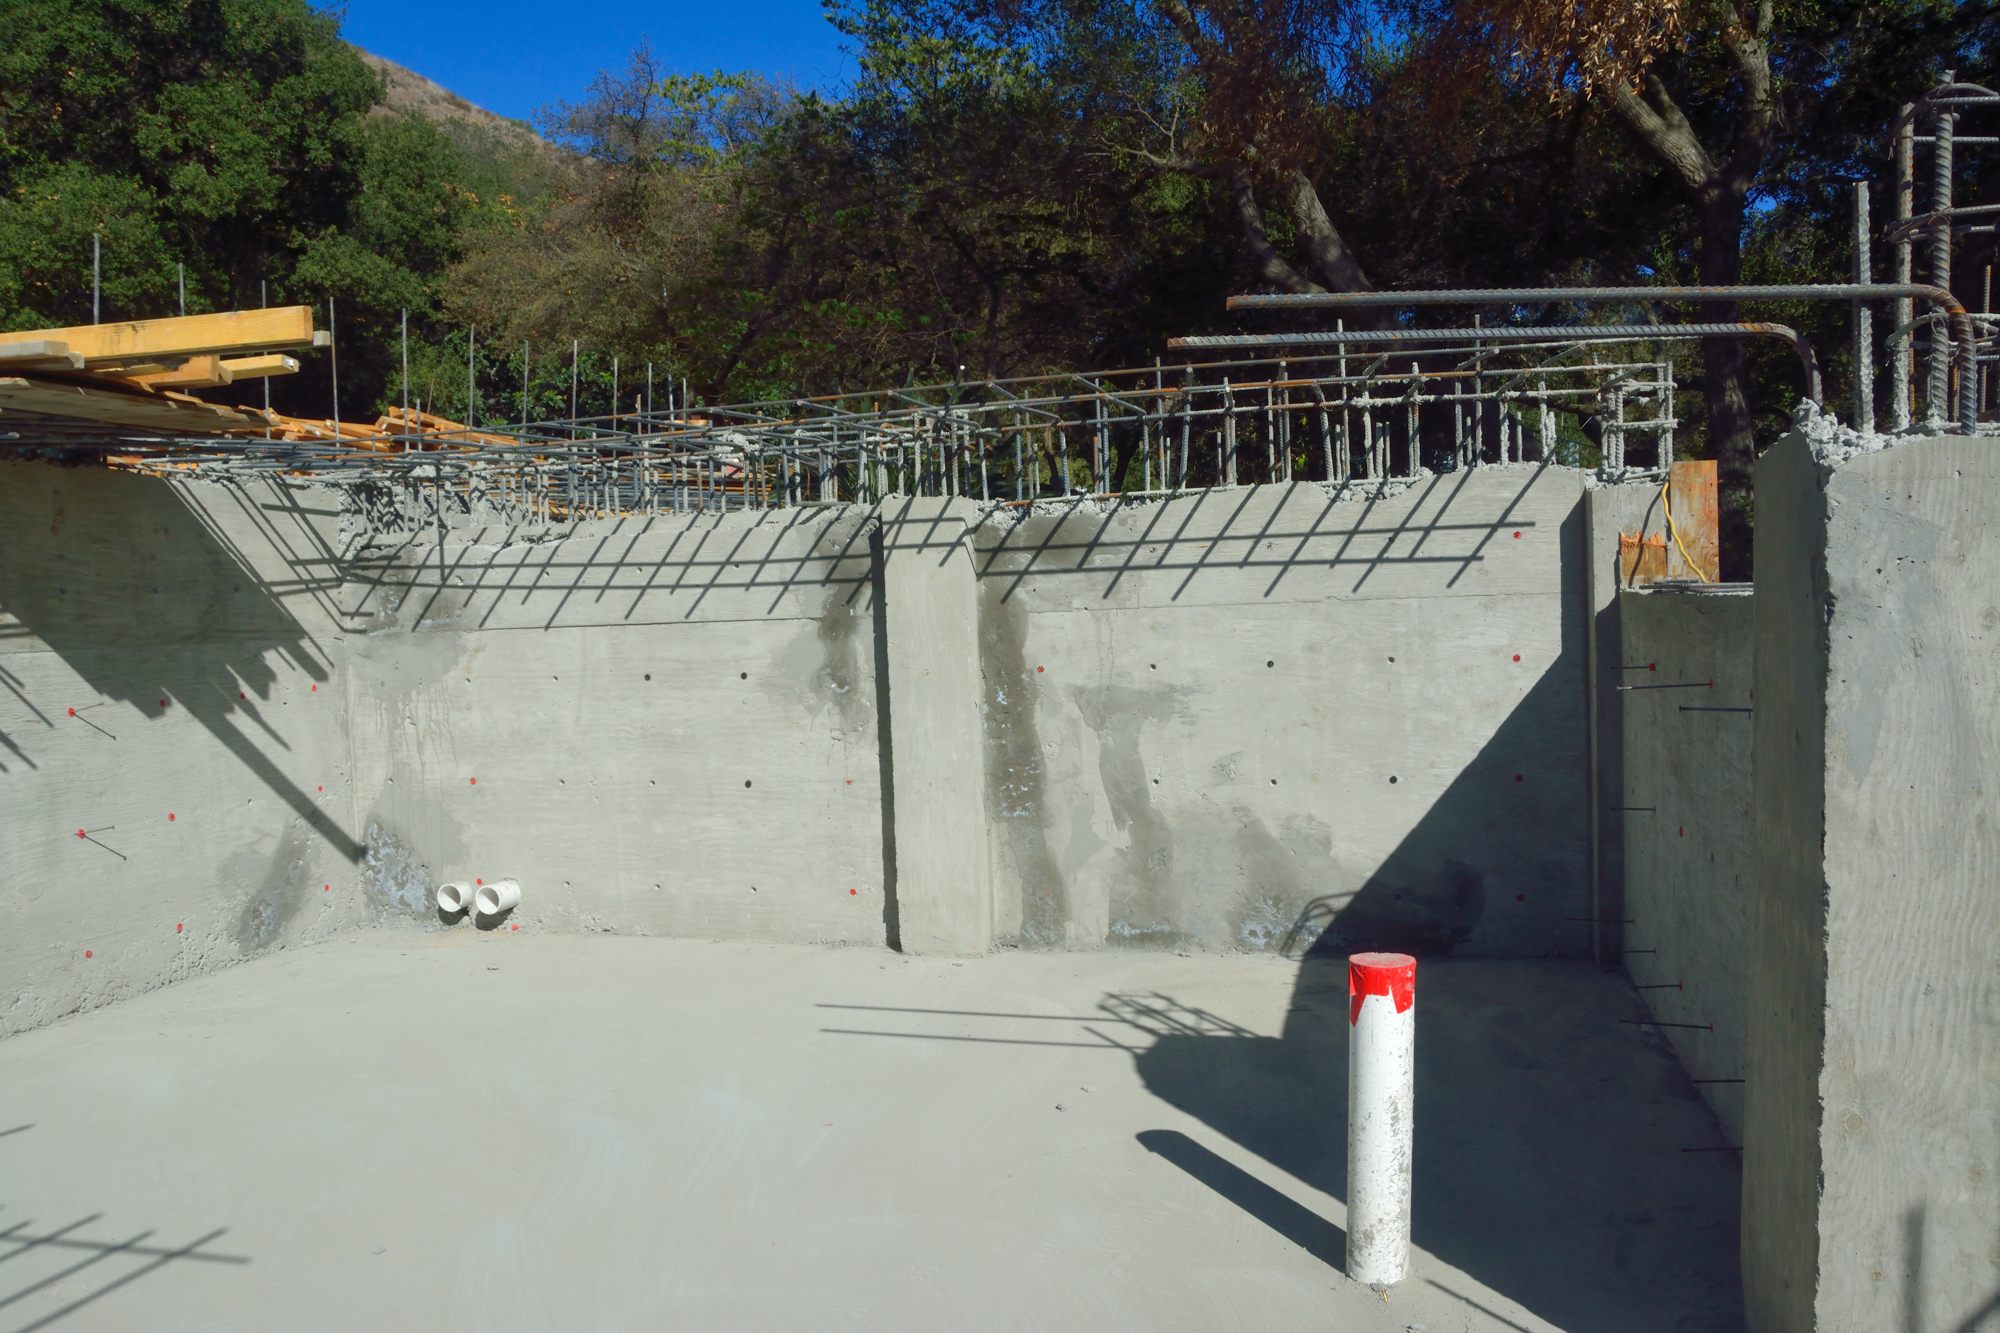
Cleaned out area for water bag. Pipe sticking up is for a drain.
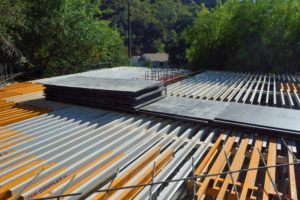
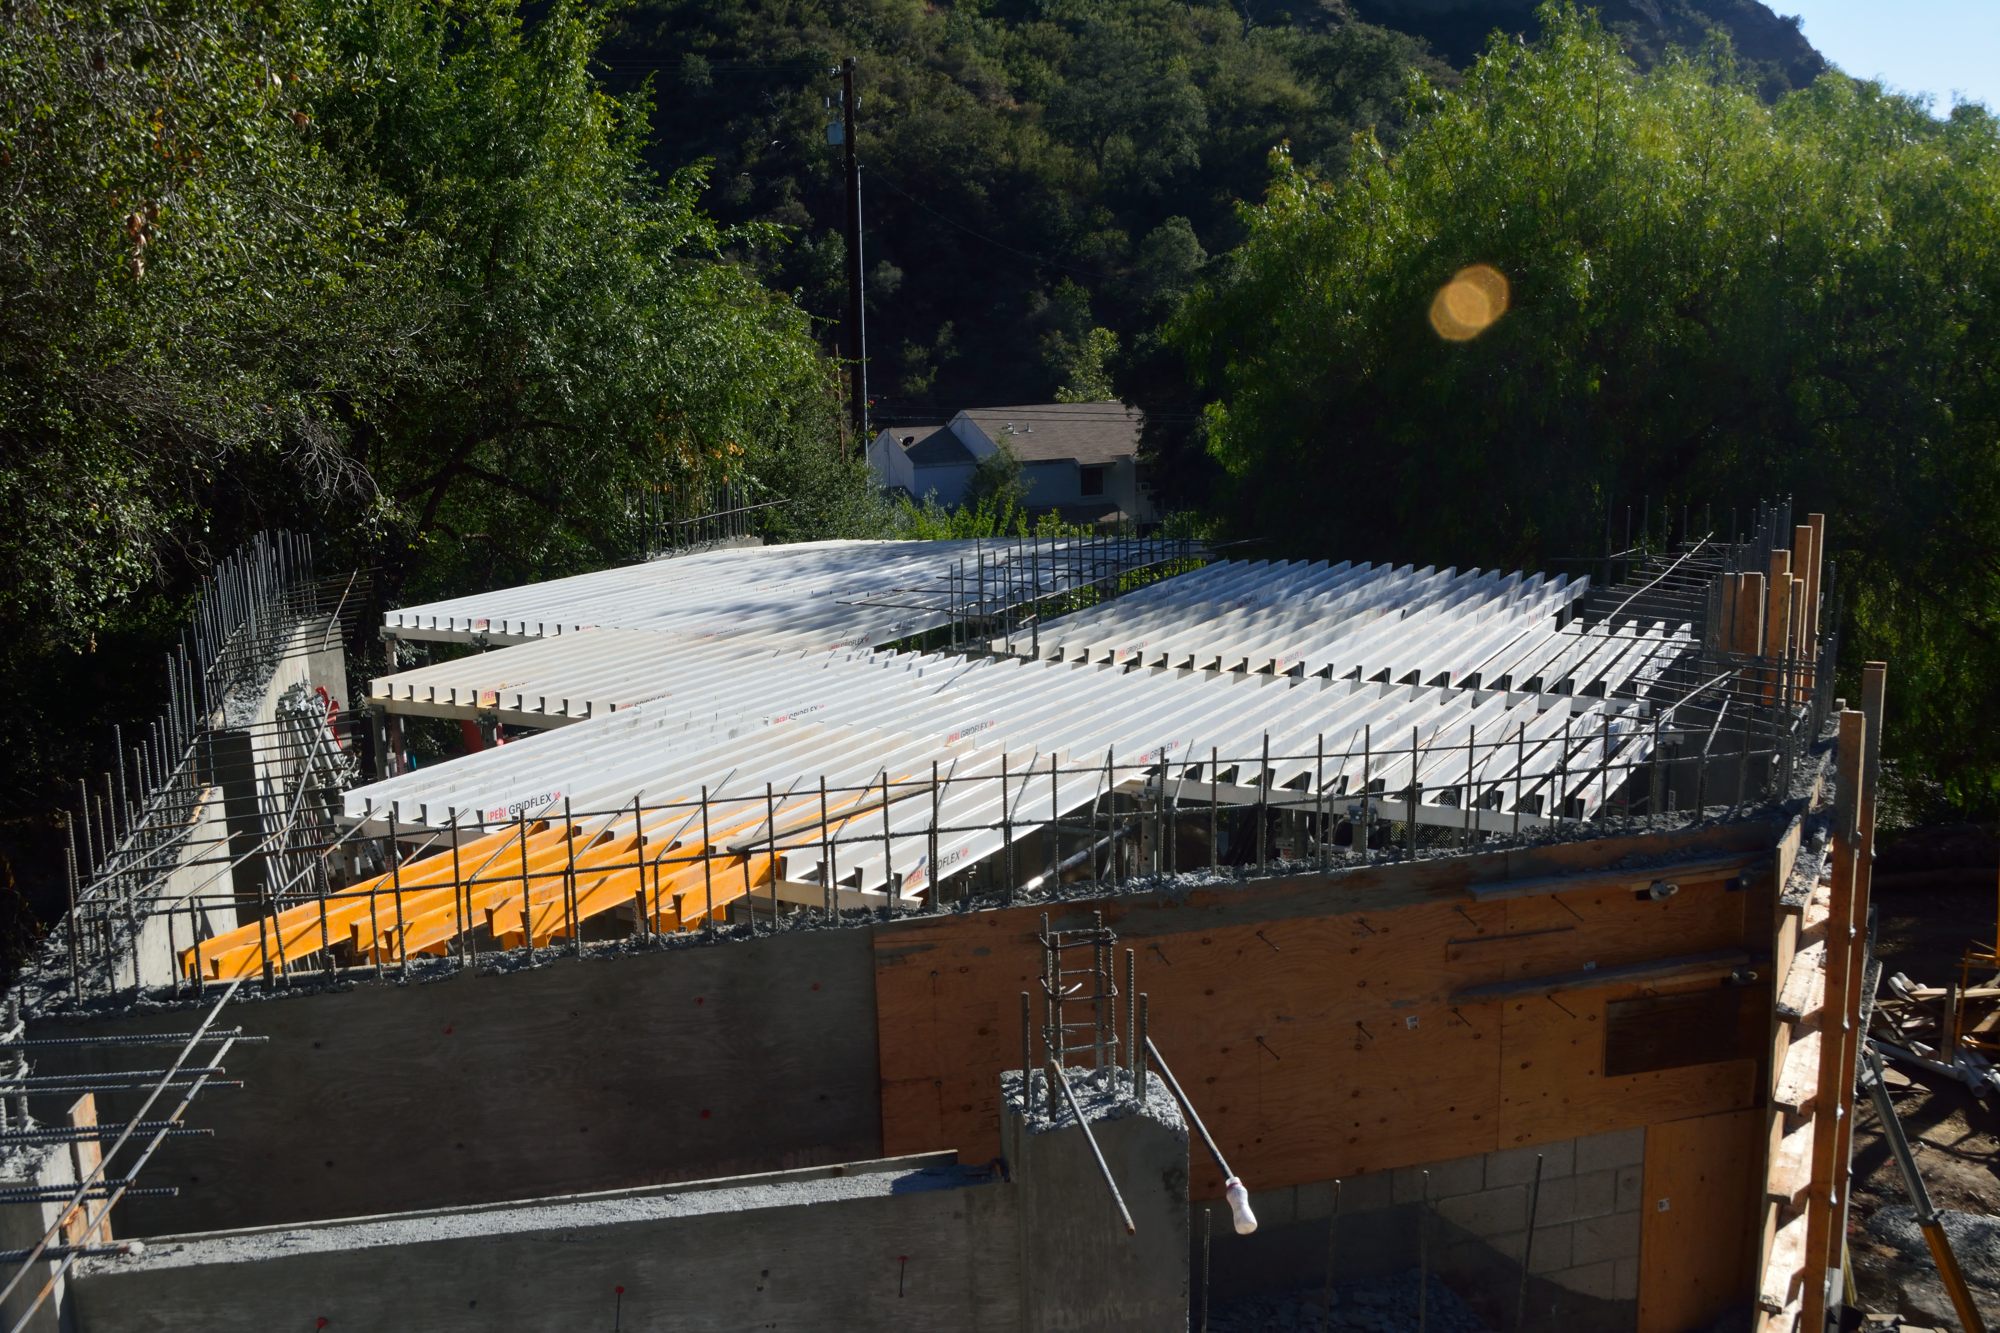
Wednesday, roof with stacks of covering to be deployed
The guys didn’t work on Tuesday. We were given no explanation. They resumed putting up scaffolding on the garage on Wednesday and finished the front. They also cleaned up other areas, including the cavity that will hold the water bag and stacked much of the material for the forms that came from the apartment and next will be used for the house.
Today, Thursday, they spent a large amount of time moving materials around. The new scaffolding and old removed scaffolding had been placed on top of the plants in a couple of Ted’s terrace beds on Friday. Today they got almost all of it moved off to the house site. They were carrying these heavy pieces of metal by hand when I was there in the morning. But perhaps they had some kind of machine because they also dug up dirt in front of the rear house wall and separated our rocks. That requires some machine, but it was not in evidence when I was back up around 5PM.
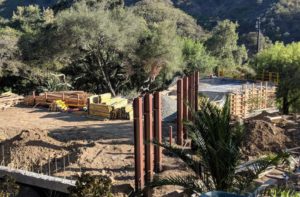
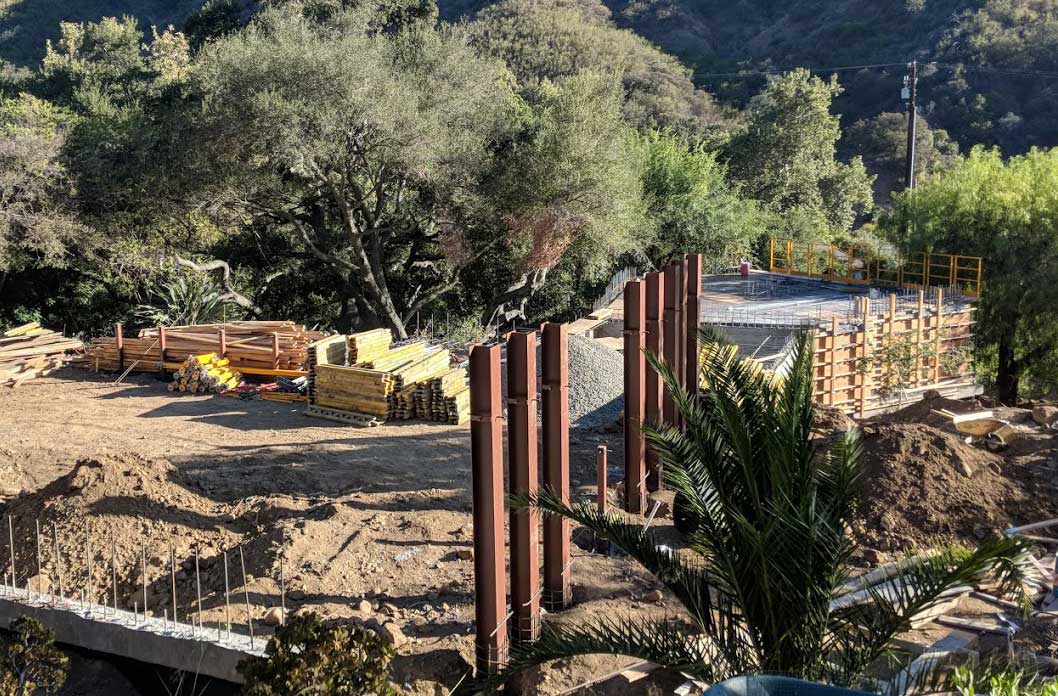
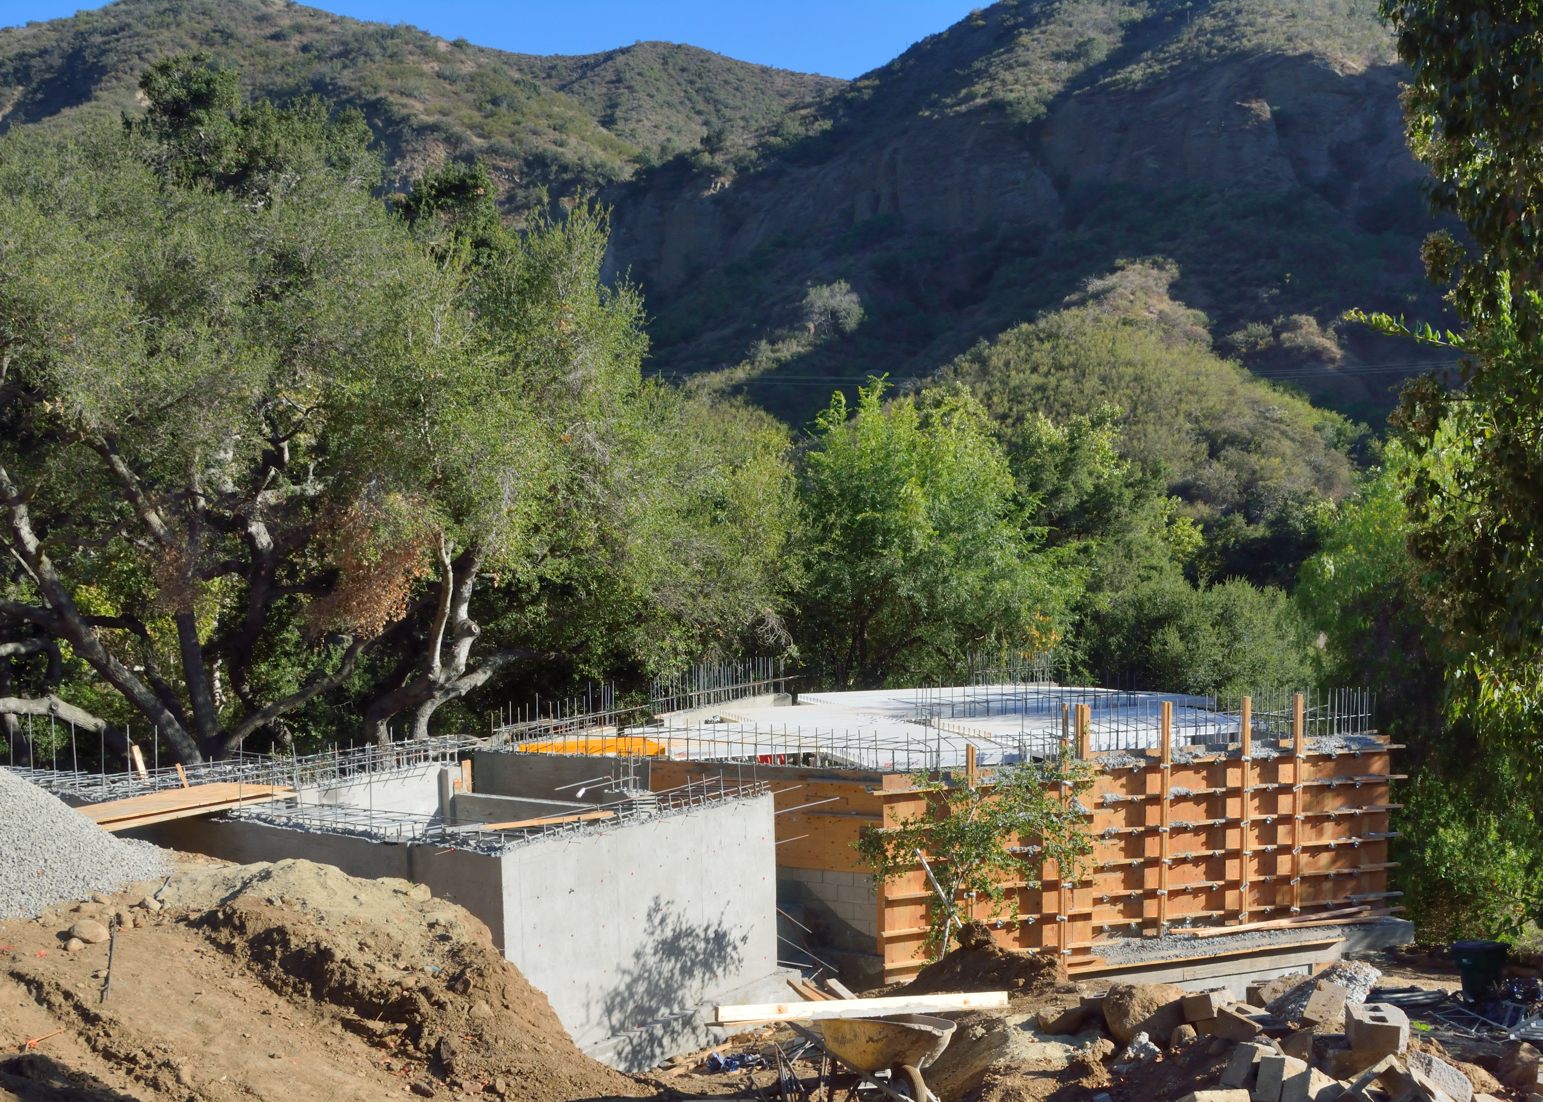
House site photo with piles of material in the far left background
interior of apartment
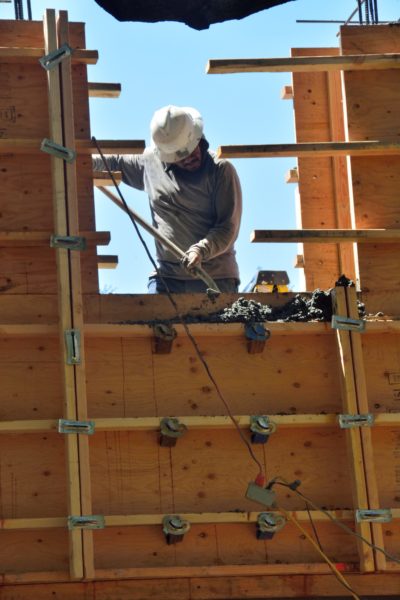
The workers also added cross-bracing to the scaffolding in the apartment to support the ceiling and they covered the racks with the smooth-finished phenolic plywood. Although it’s hard to see the coverings in the house site picture, you can tell the roof is covered because no light is shining down into the apartment.
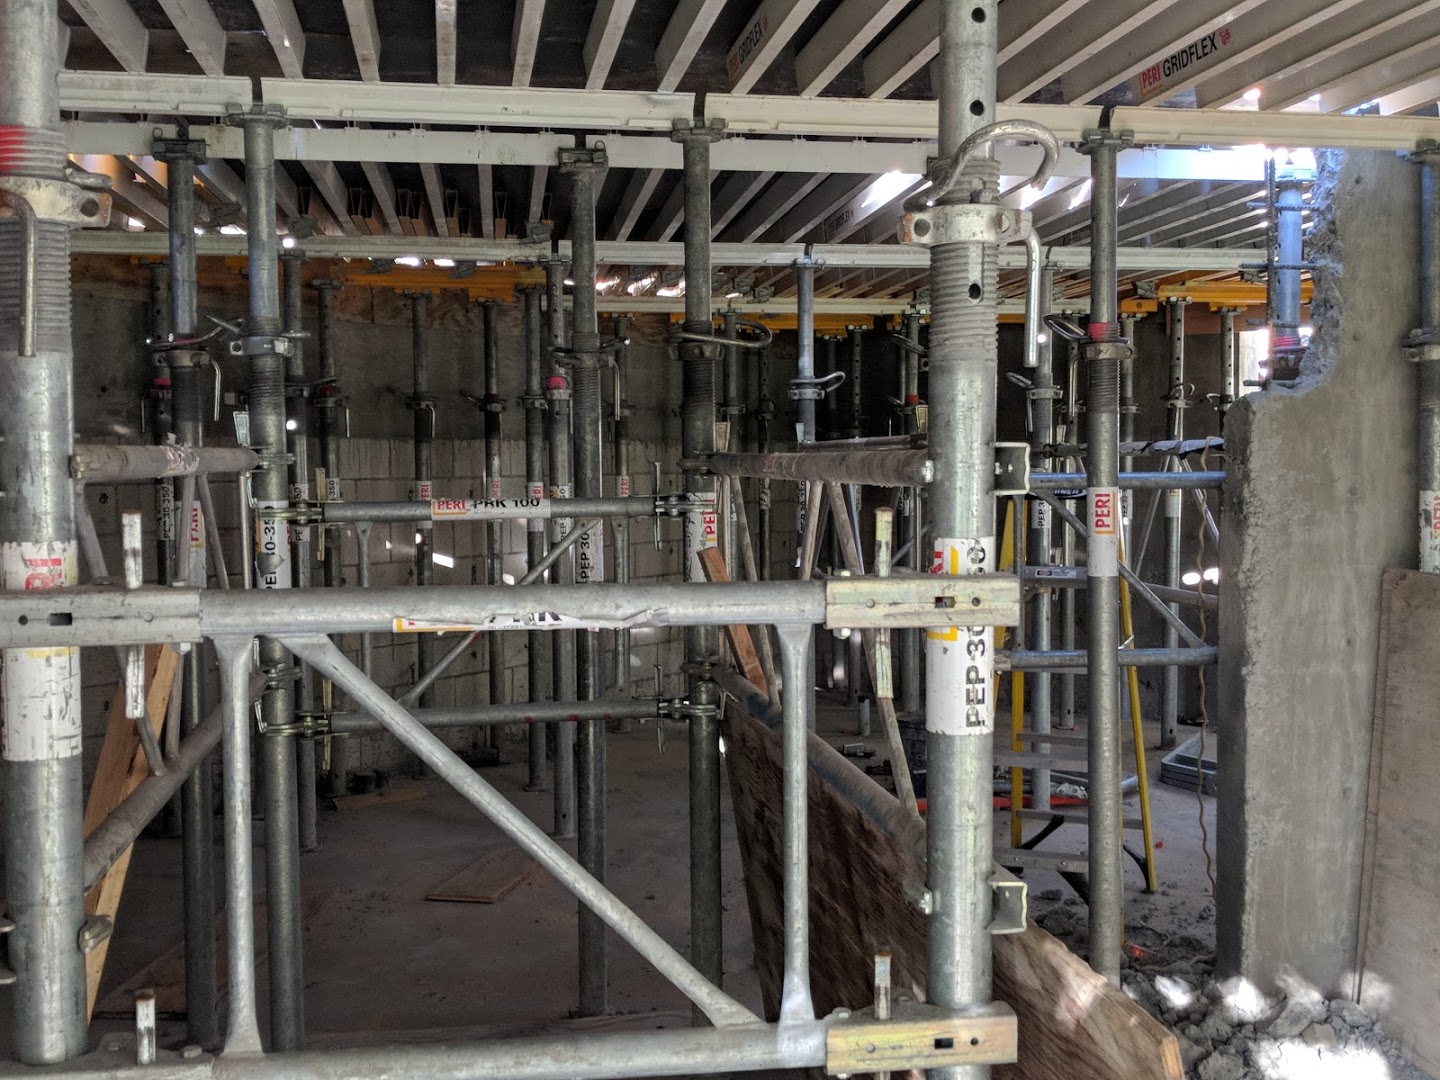
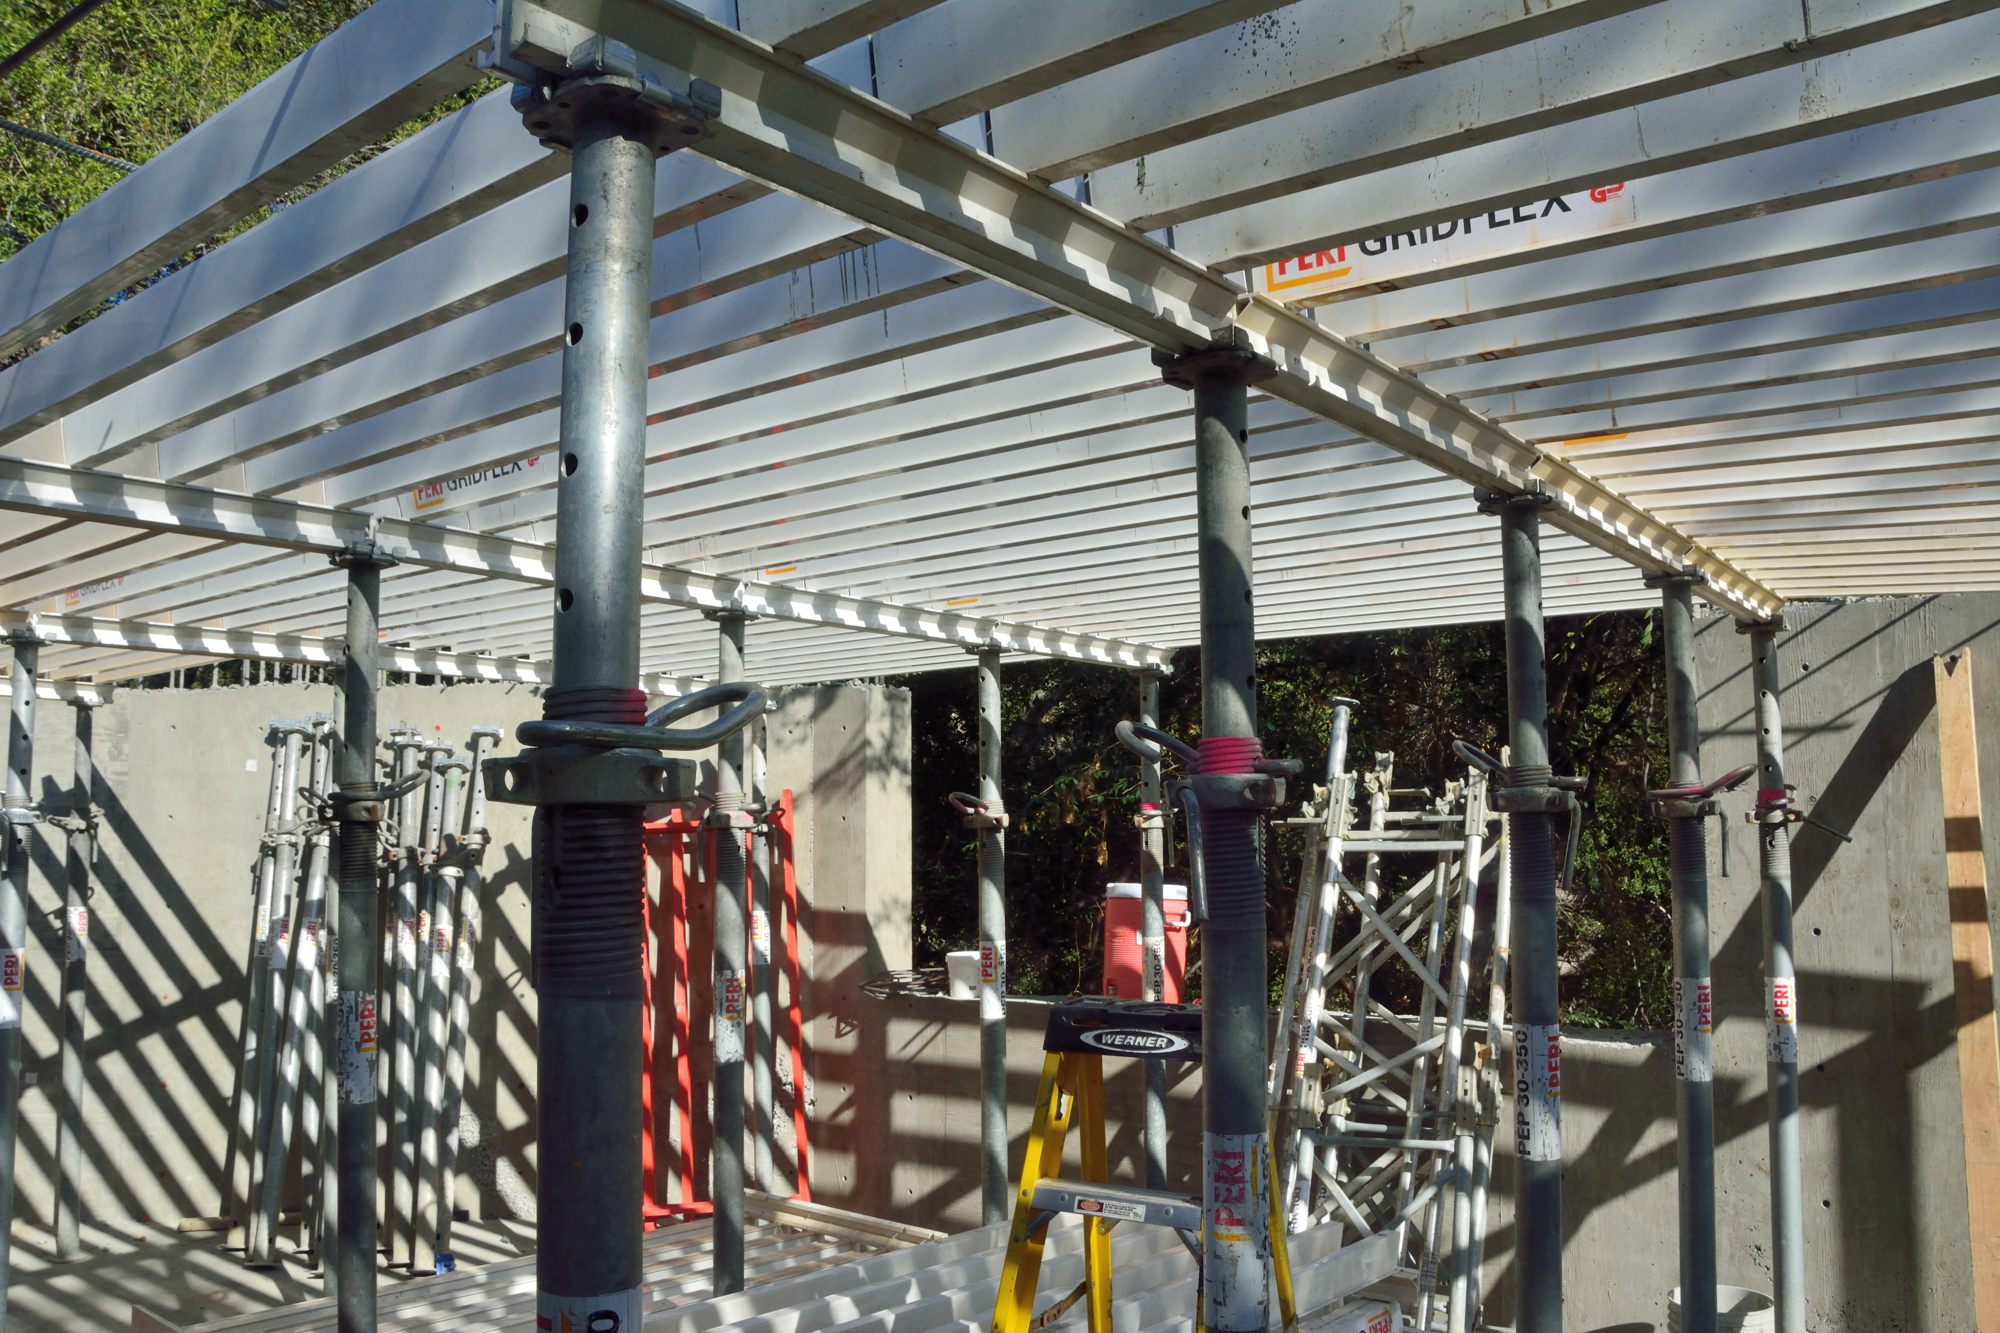
The workers finished removing the remaining scaffolding from the garage (except for some of the posts) and made good progress using the pieces to build the ceiling of the apartment. As you can see, most of the apartment ceiling scaffolding is now up.

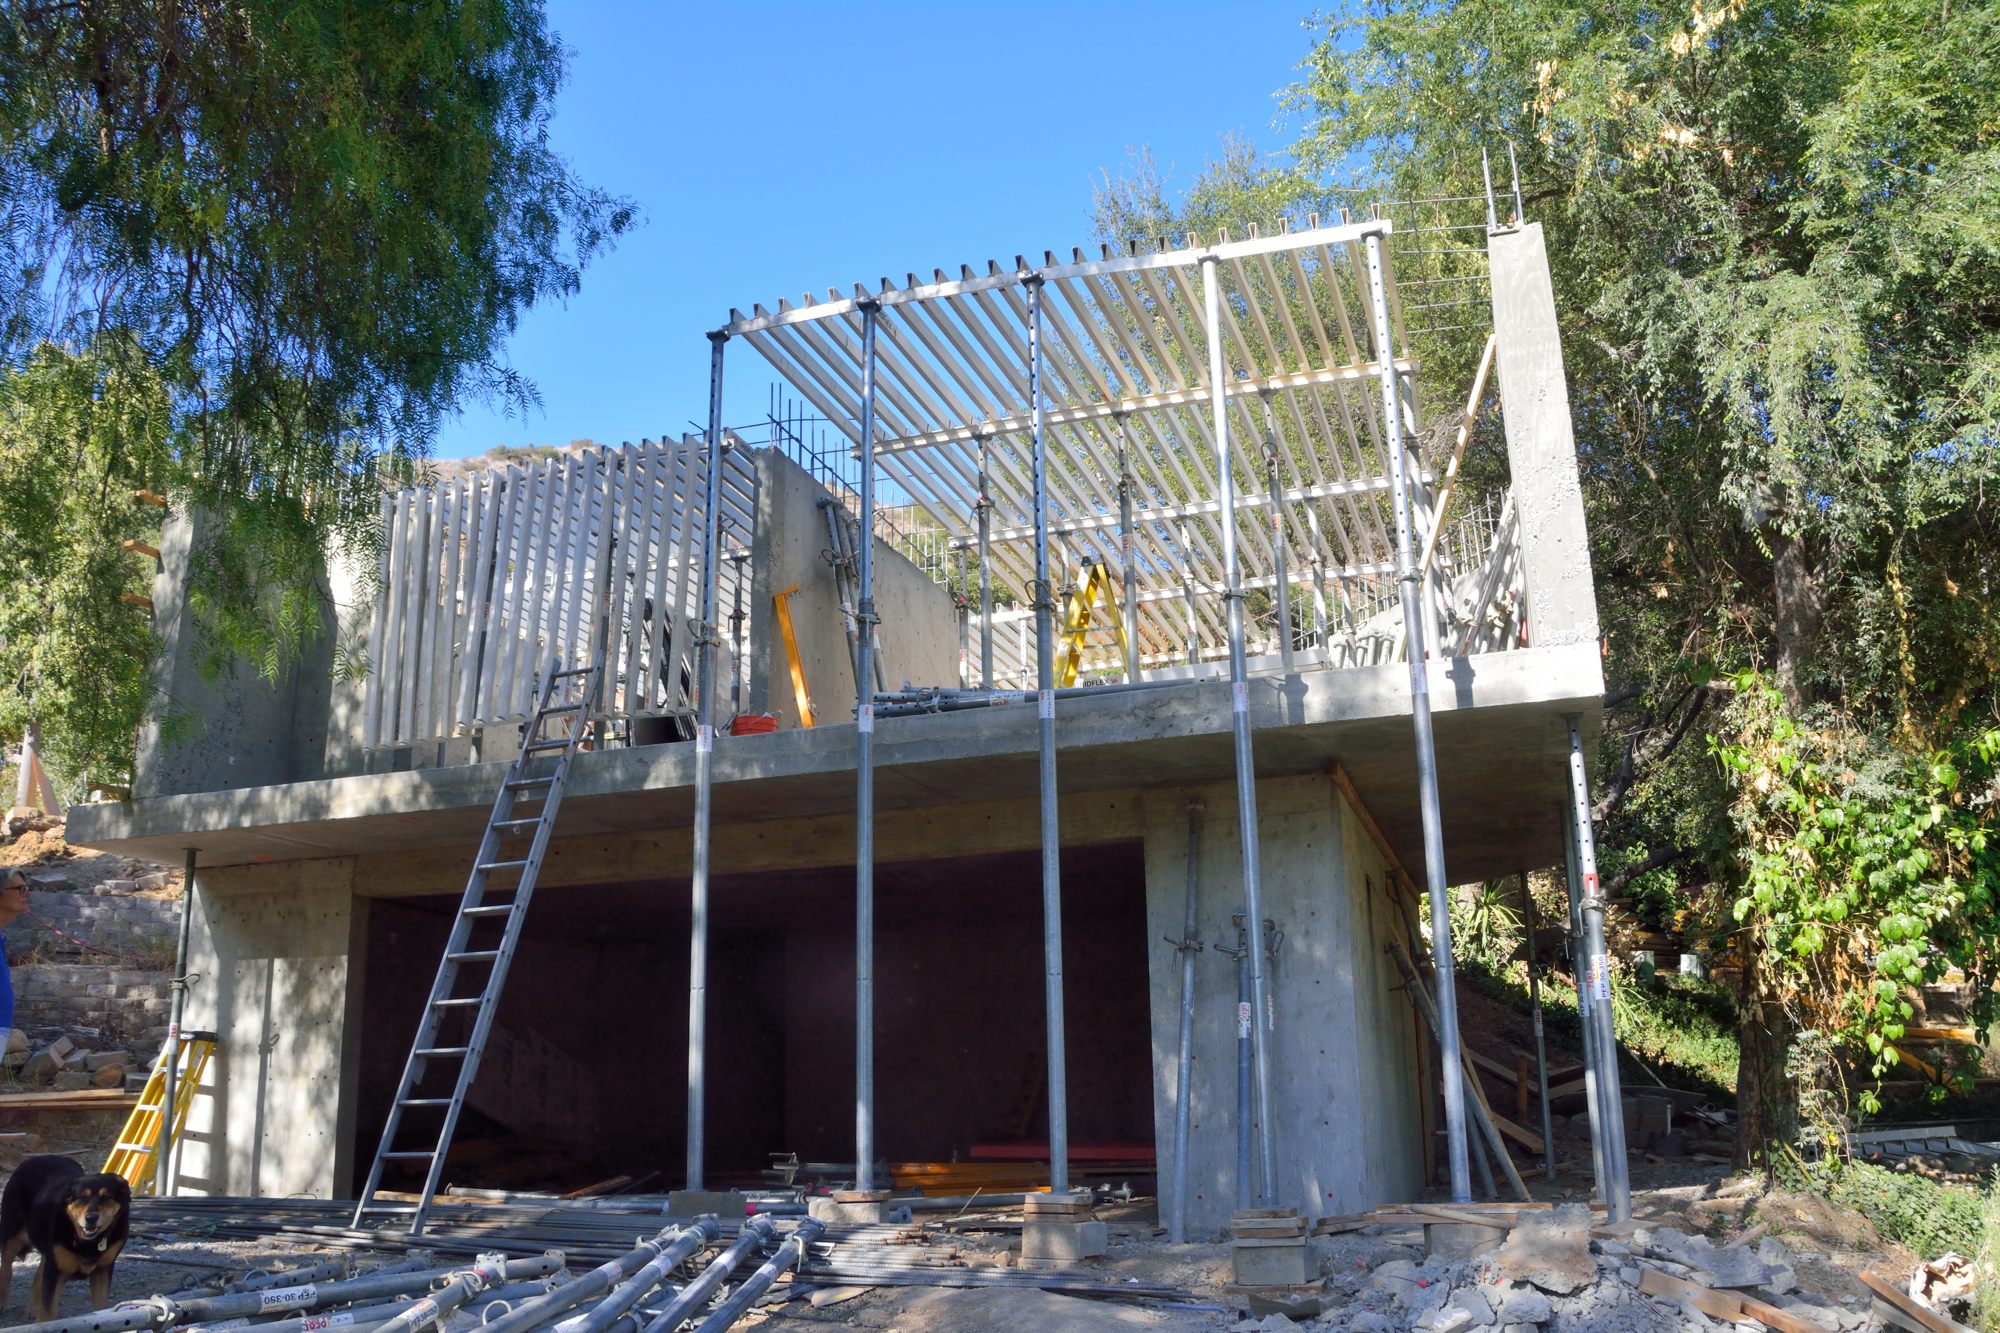
Side view of the garage with the apartment on top. The large window is in the living room.

Front of the garage with the scaffolding removed

Interior of the apartment in front of the living room window.
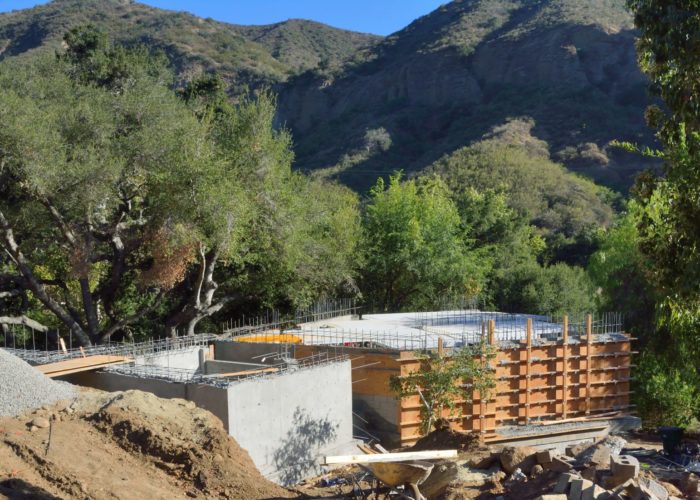
Picture of the garage/apt to the right and the water bag holder to the left with the ridge that makes this site so amazing in the background.

Another view of the roof scaffolding

Apartment entry door
On Friday, the workers worked hard to get the apartment cleaned up for our interior designer to see the space around lunch time. The first picture shows the entry door into the apartment. The second shows the interior of the living room.
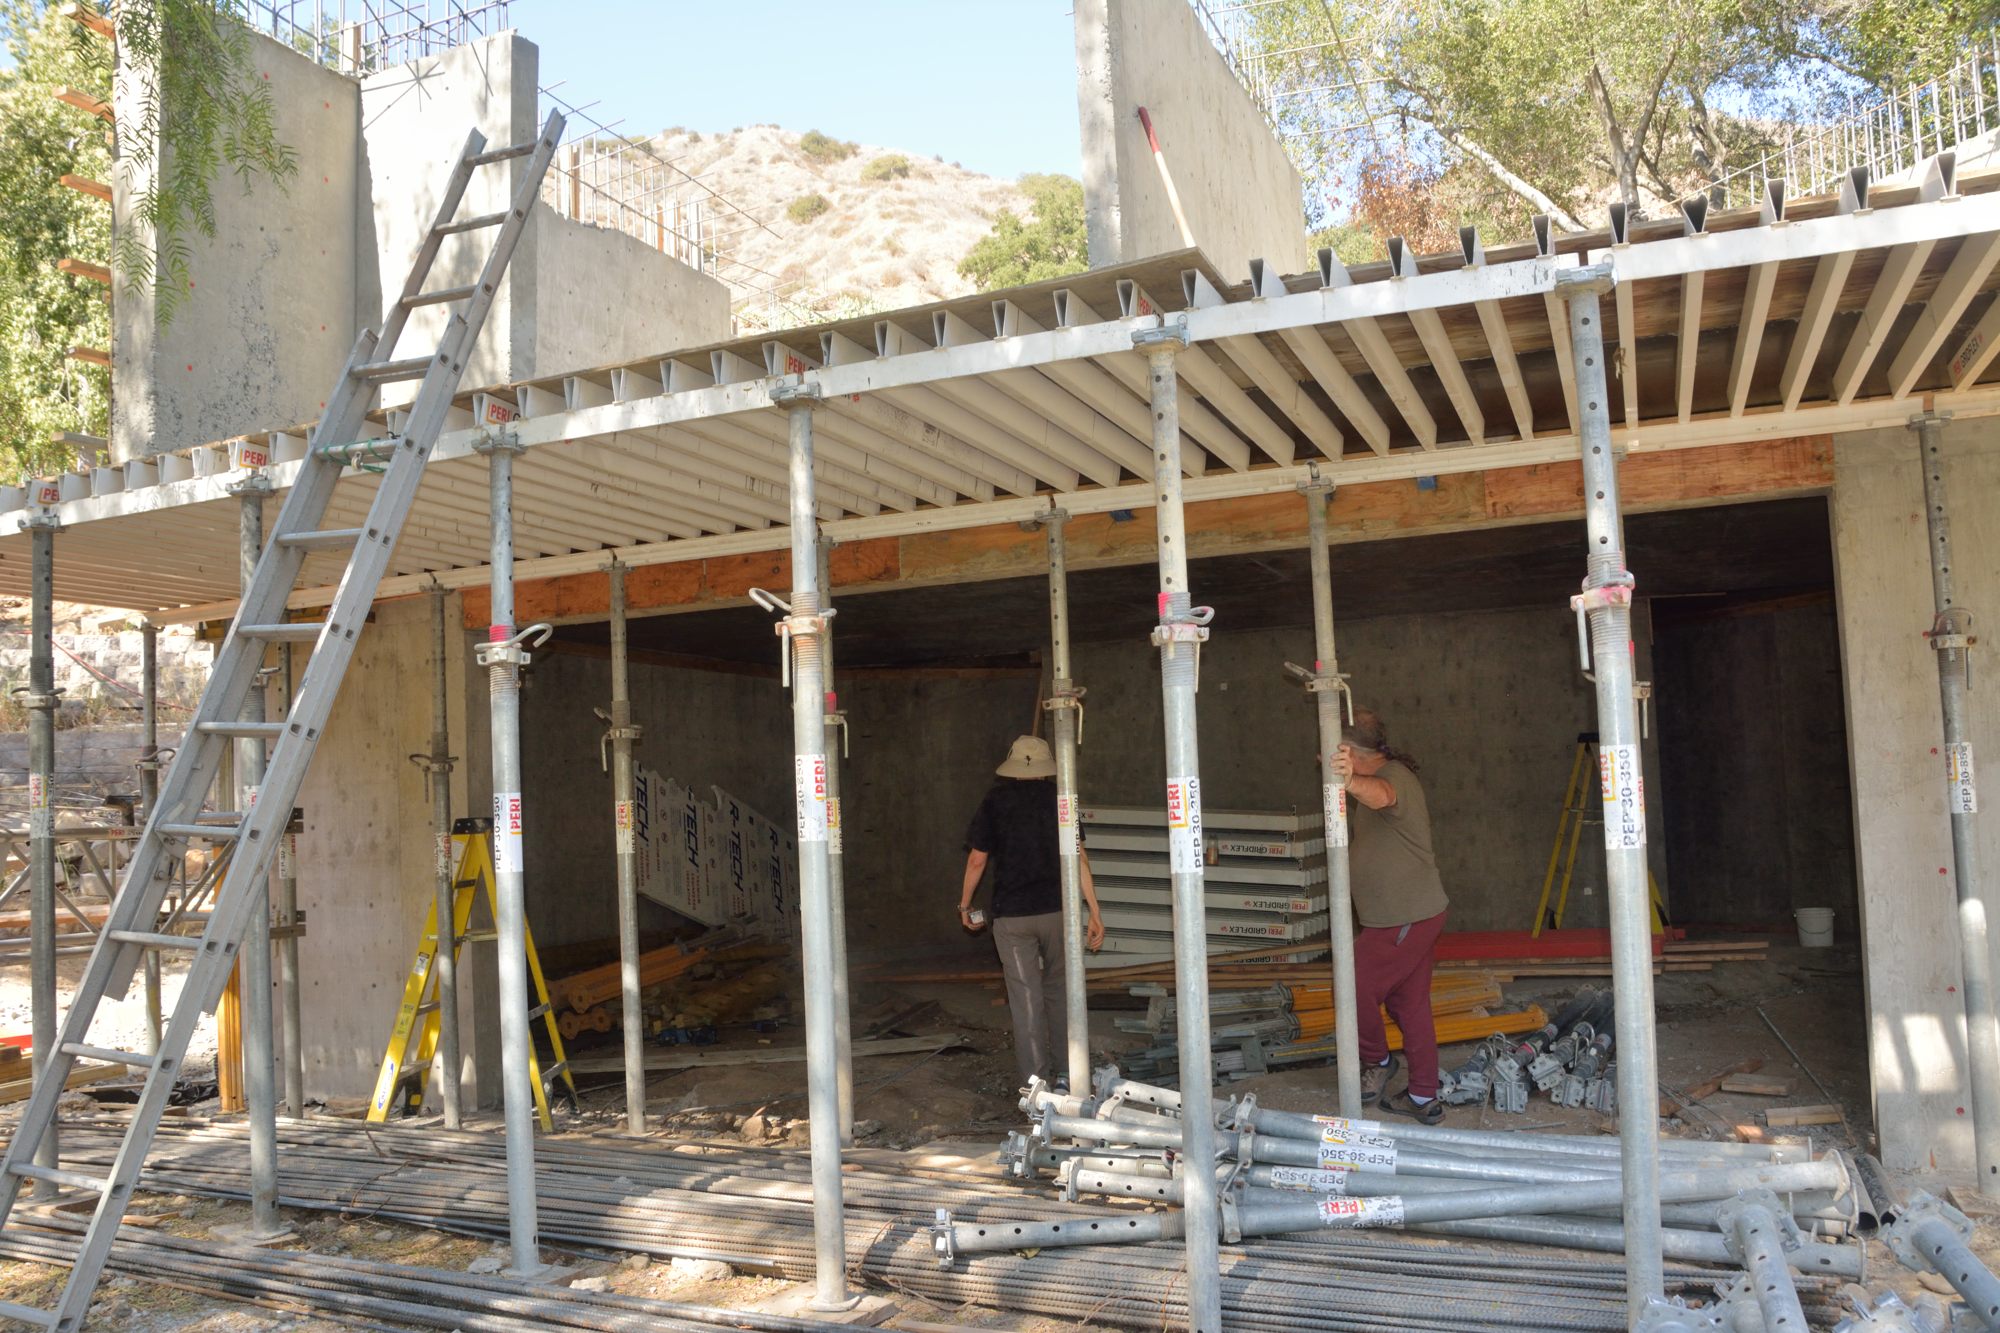
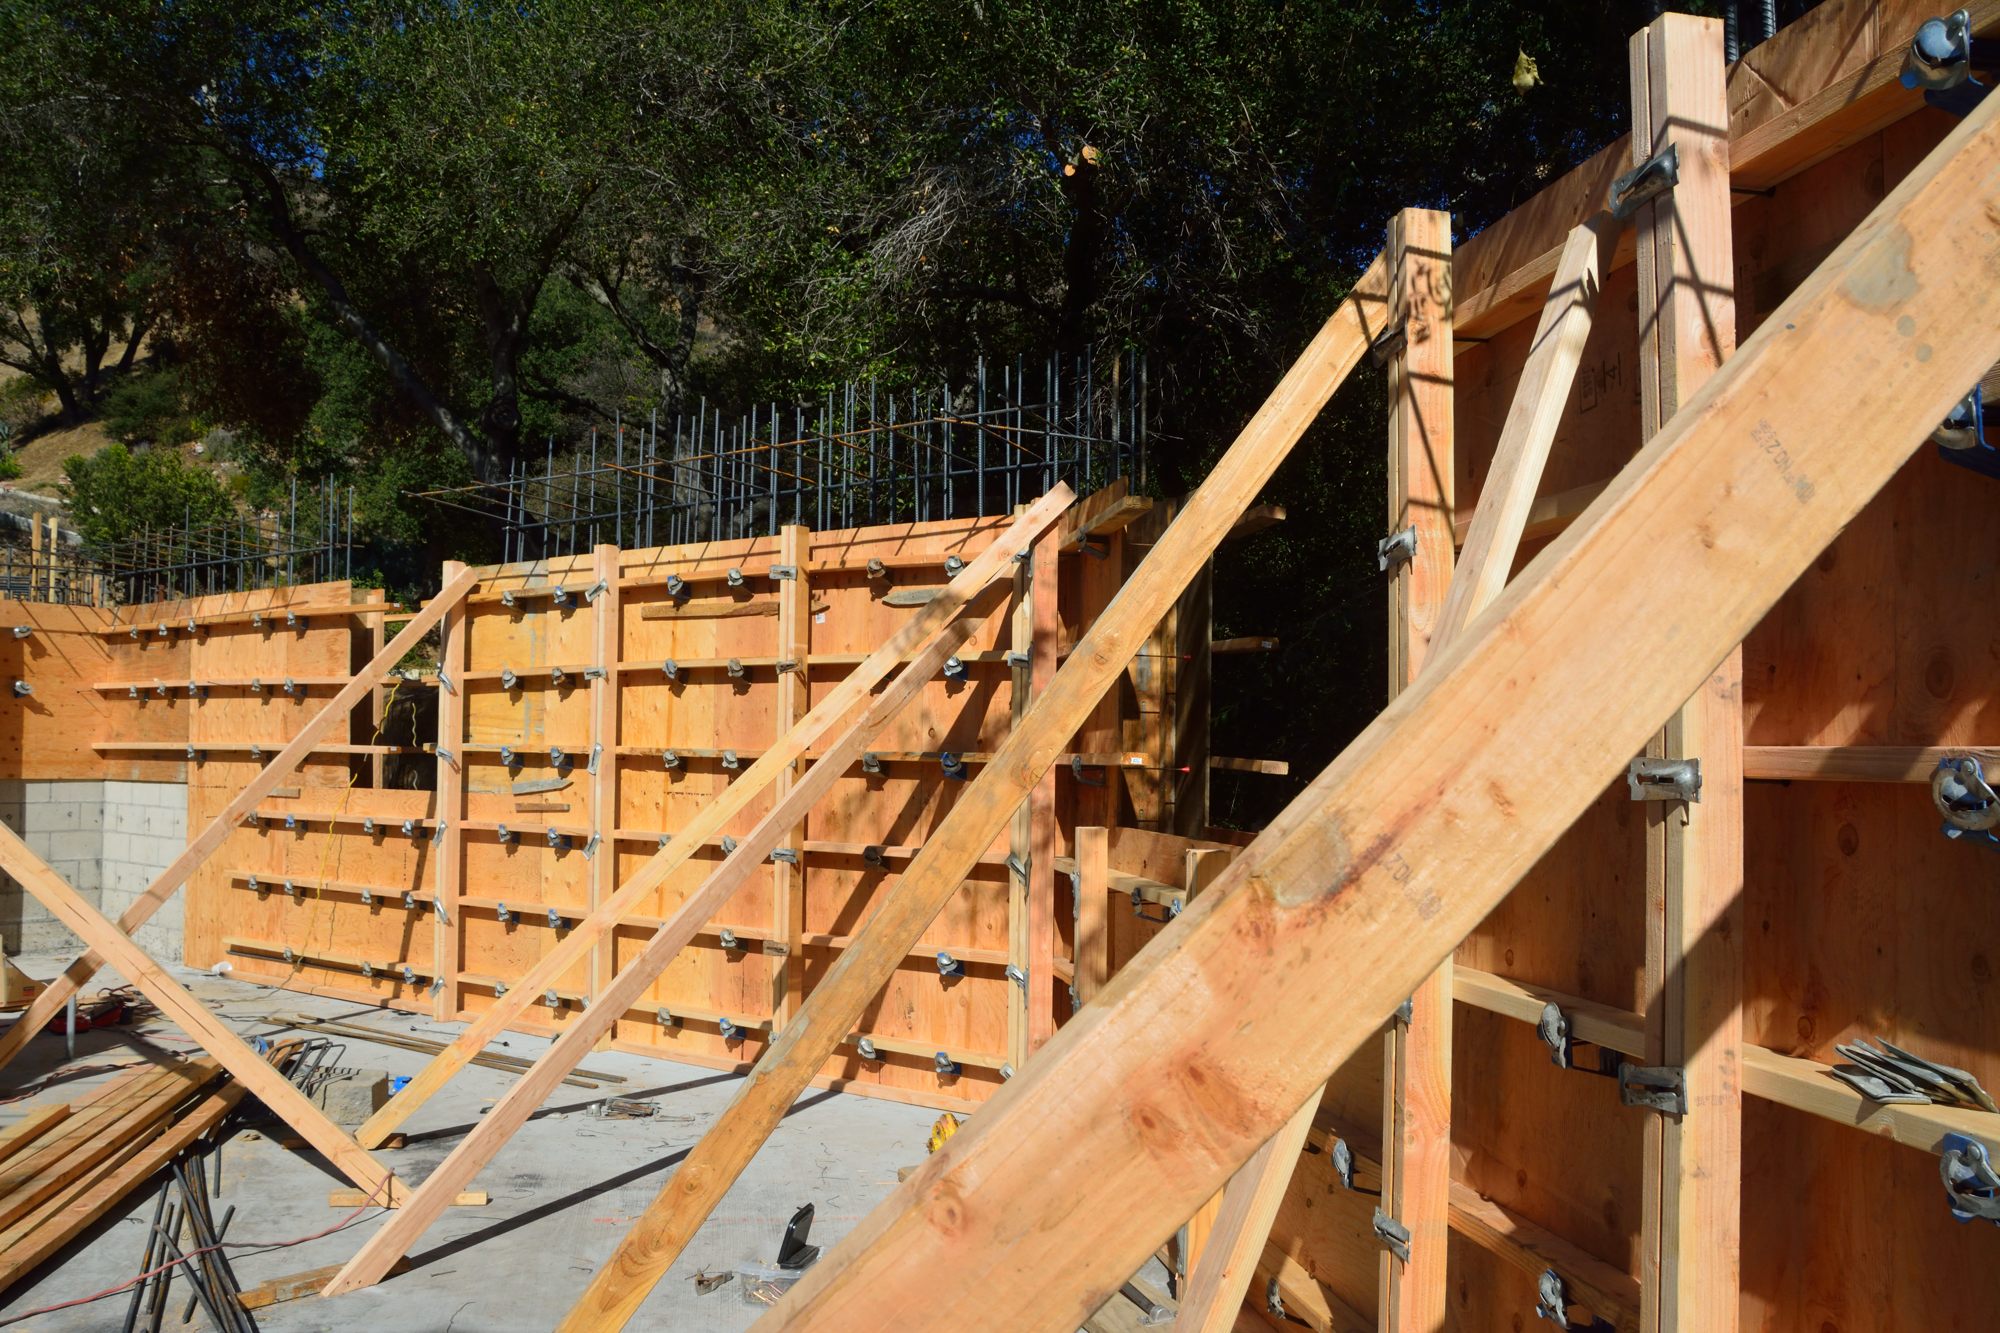
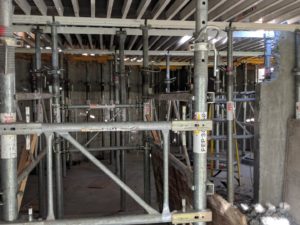
On Saturday, a smaller crew arrived to start taking down the forms holding up the structure of the garage ceiling. Once the many posts were removed, it is a much more spacious seeming area.
Living Room window
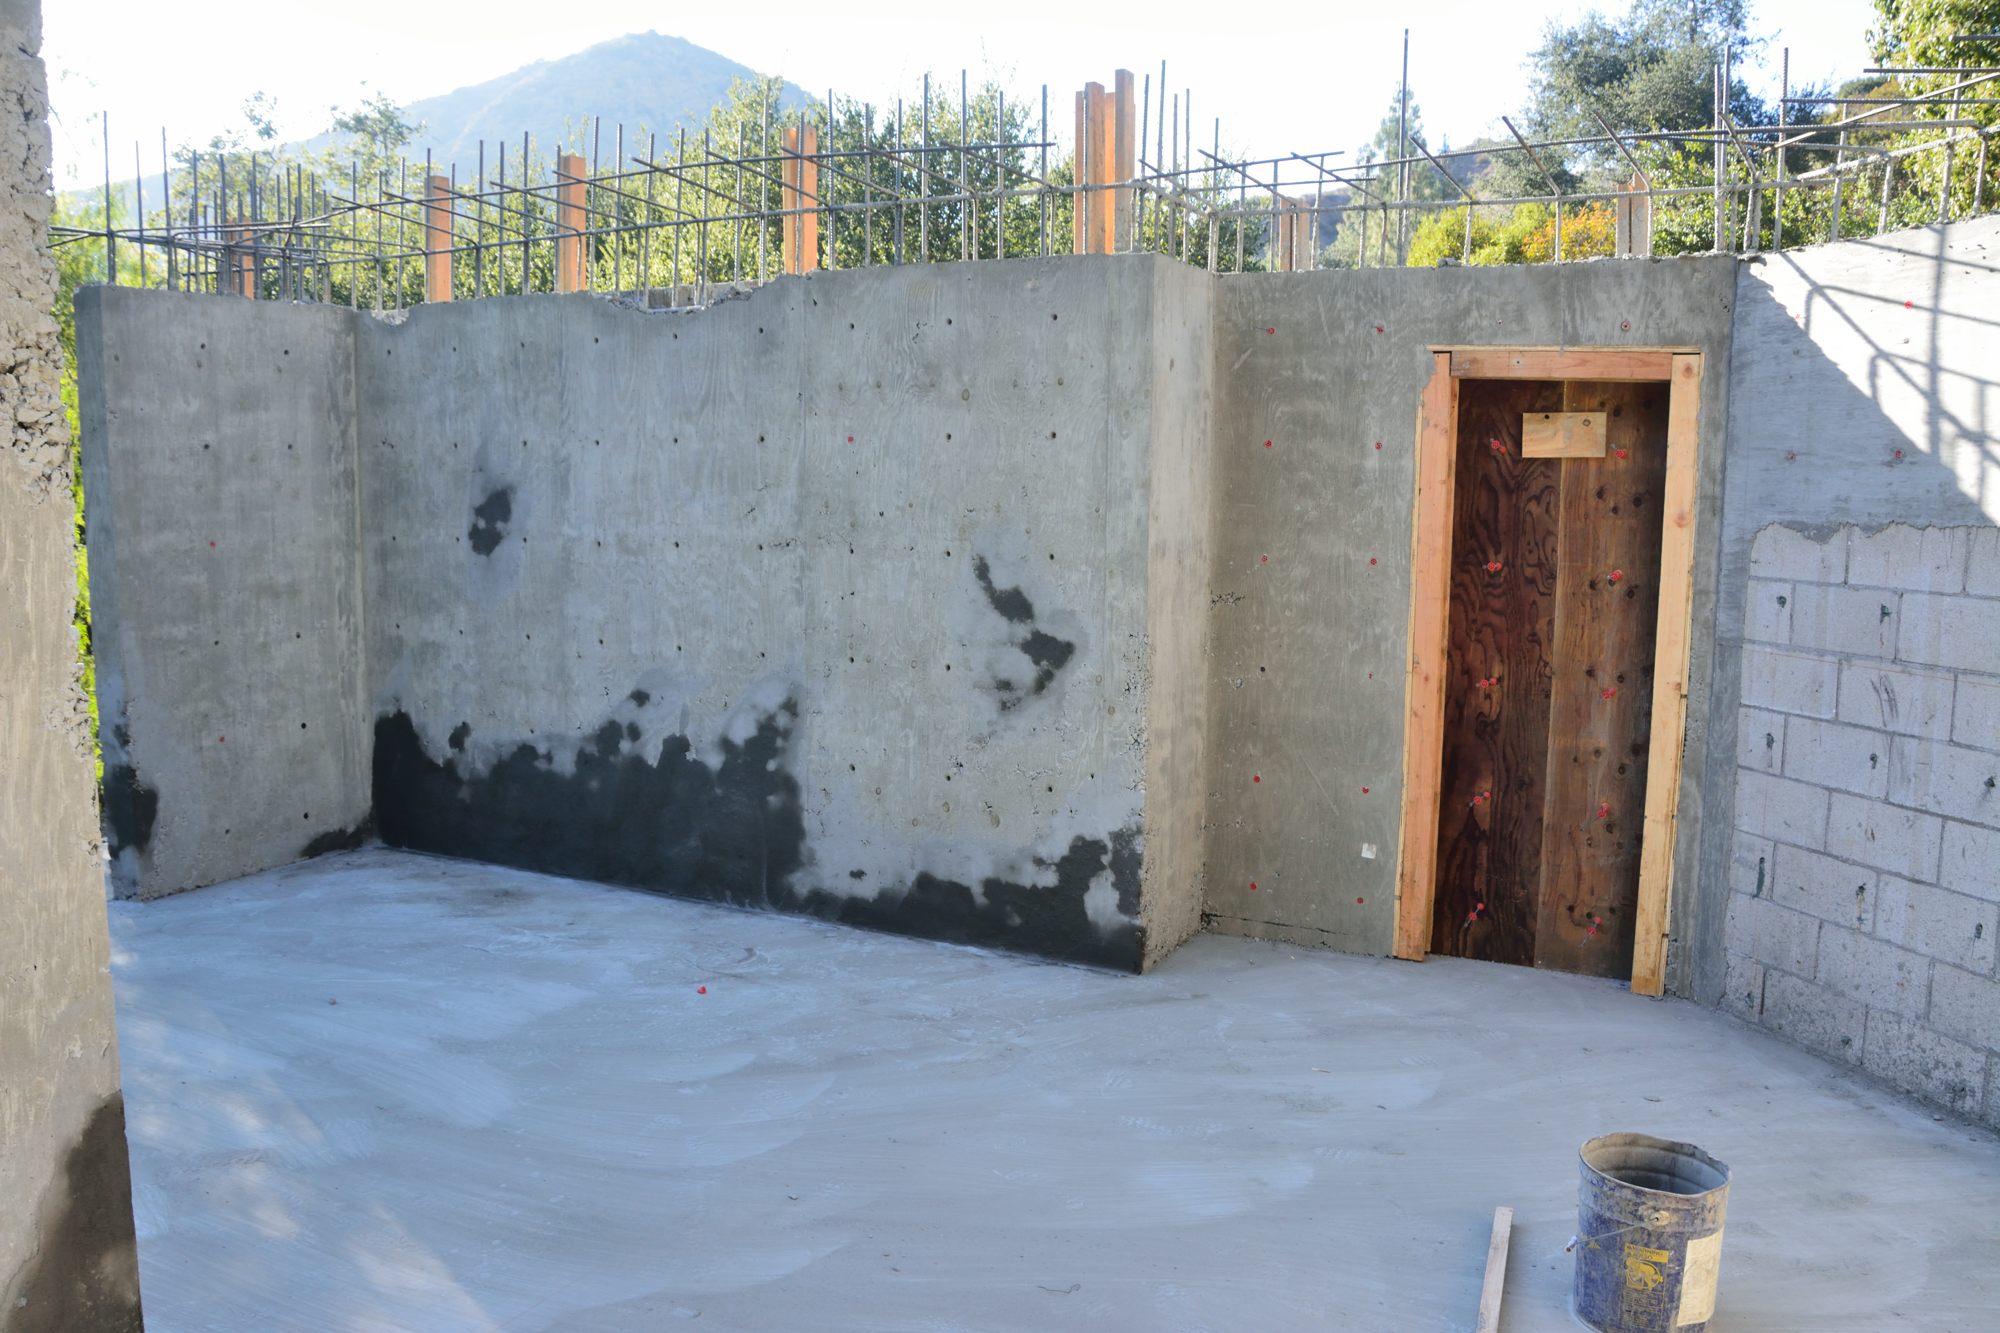
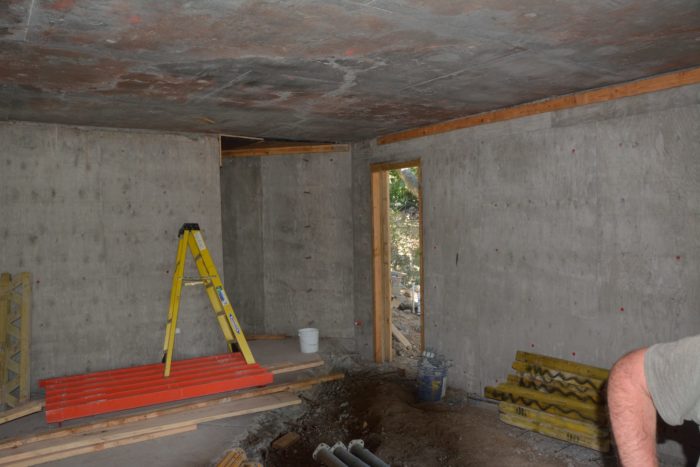
Wall that divides the living room from the bedroom in the apartment. This is made of concrete to help support the load from the concrete roof.

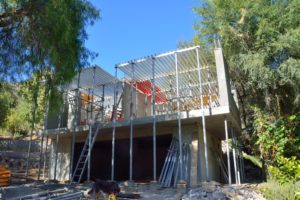
Outside of garage with much of the interior scaffolding removed. The exterior scaffolding will be retained and used to support the next layer of scaffolding.
Interior of garage
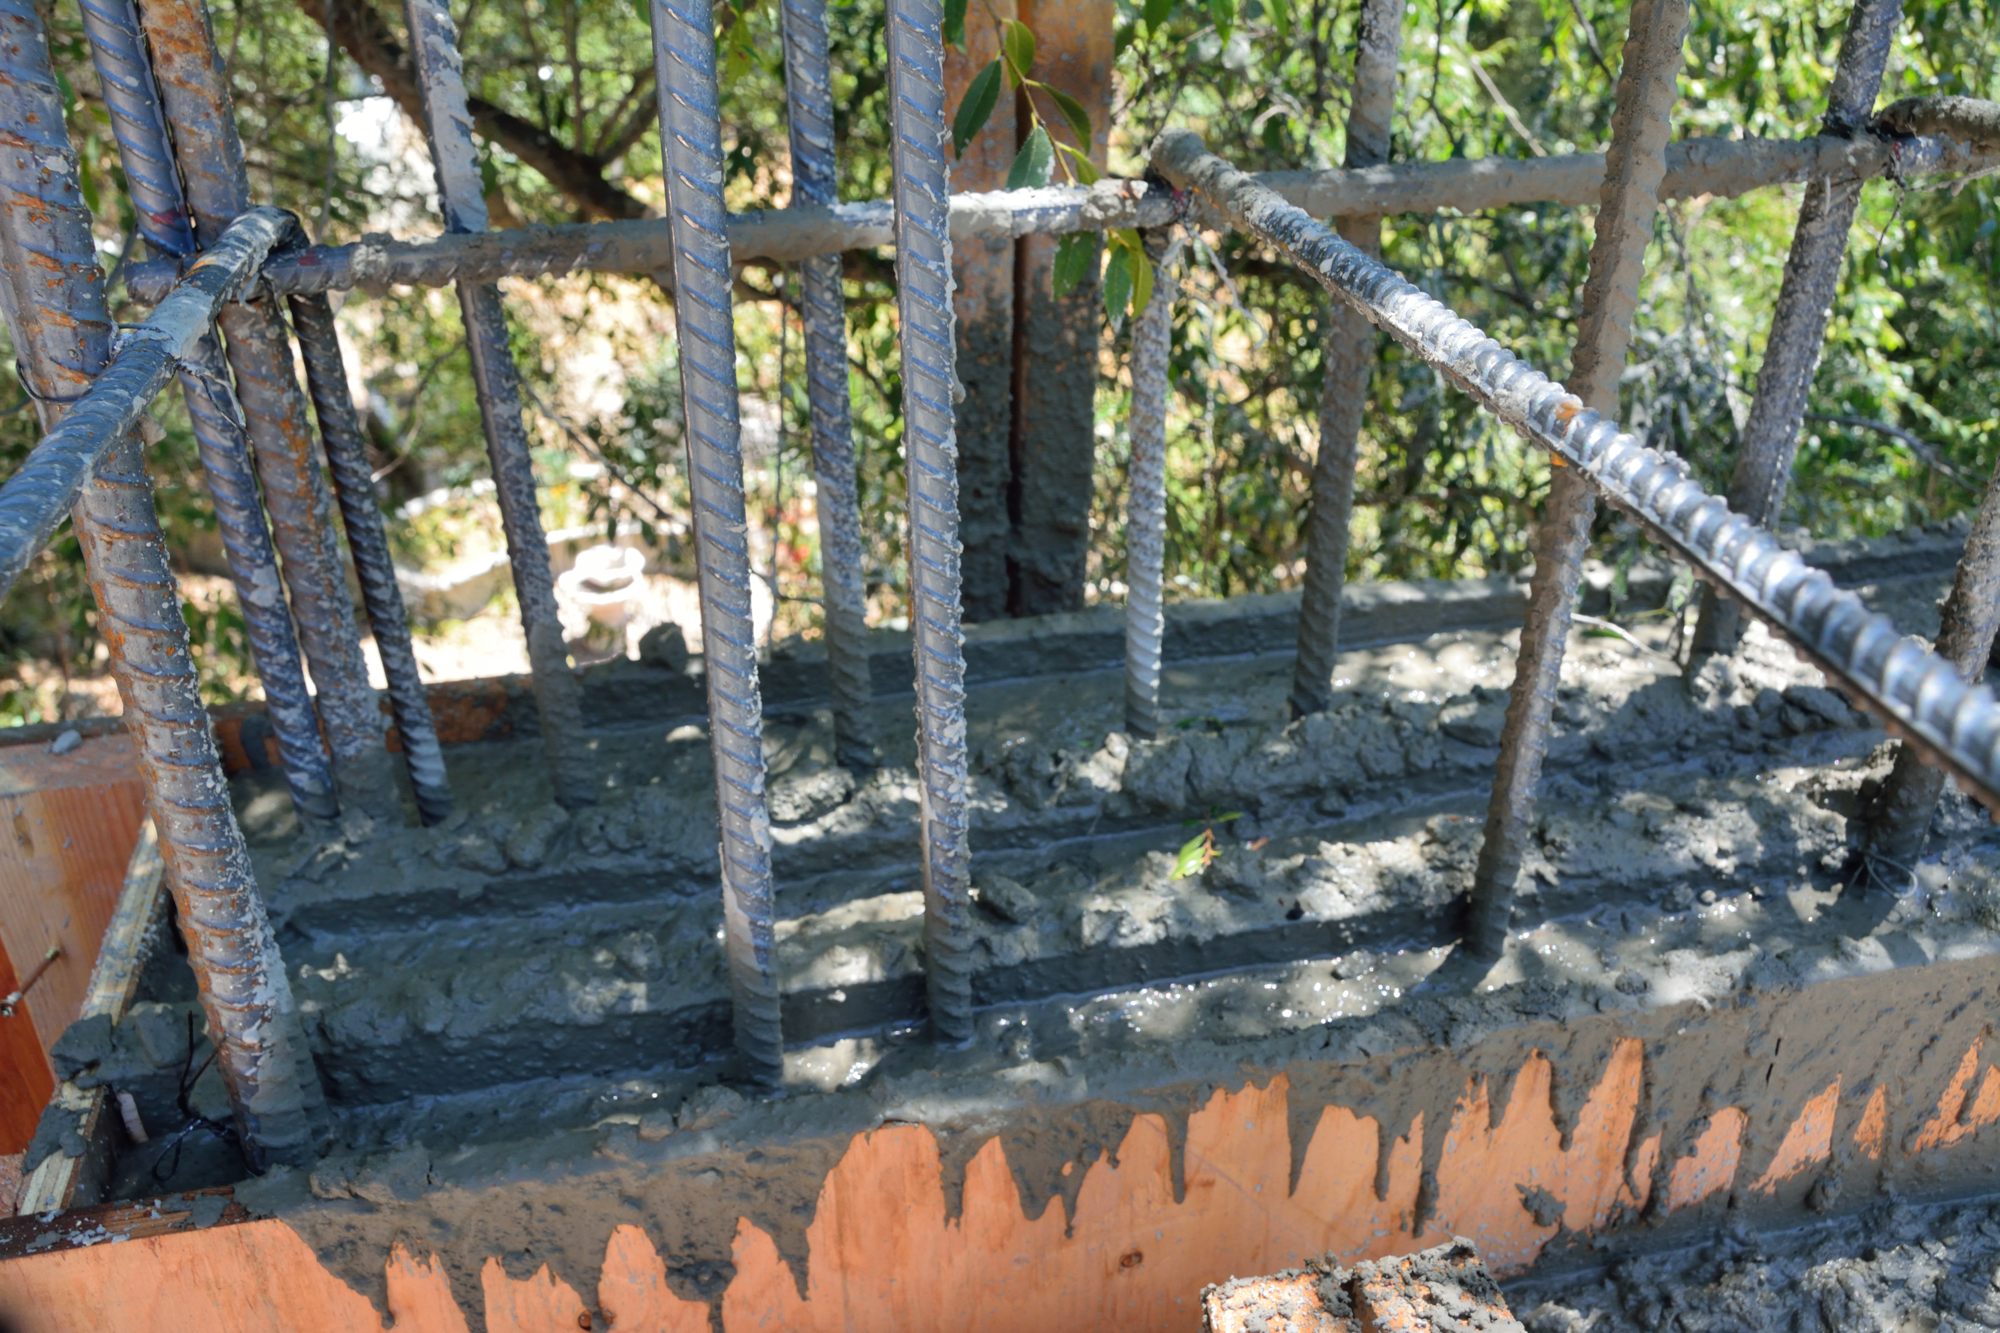
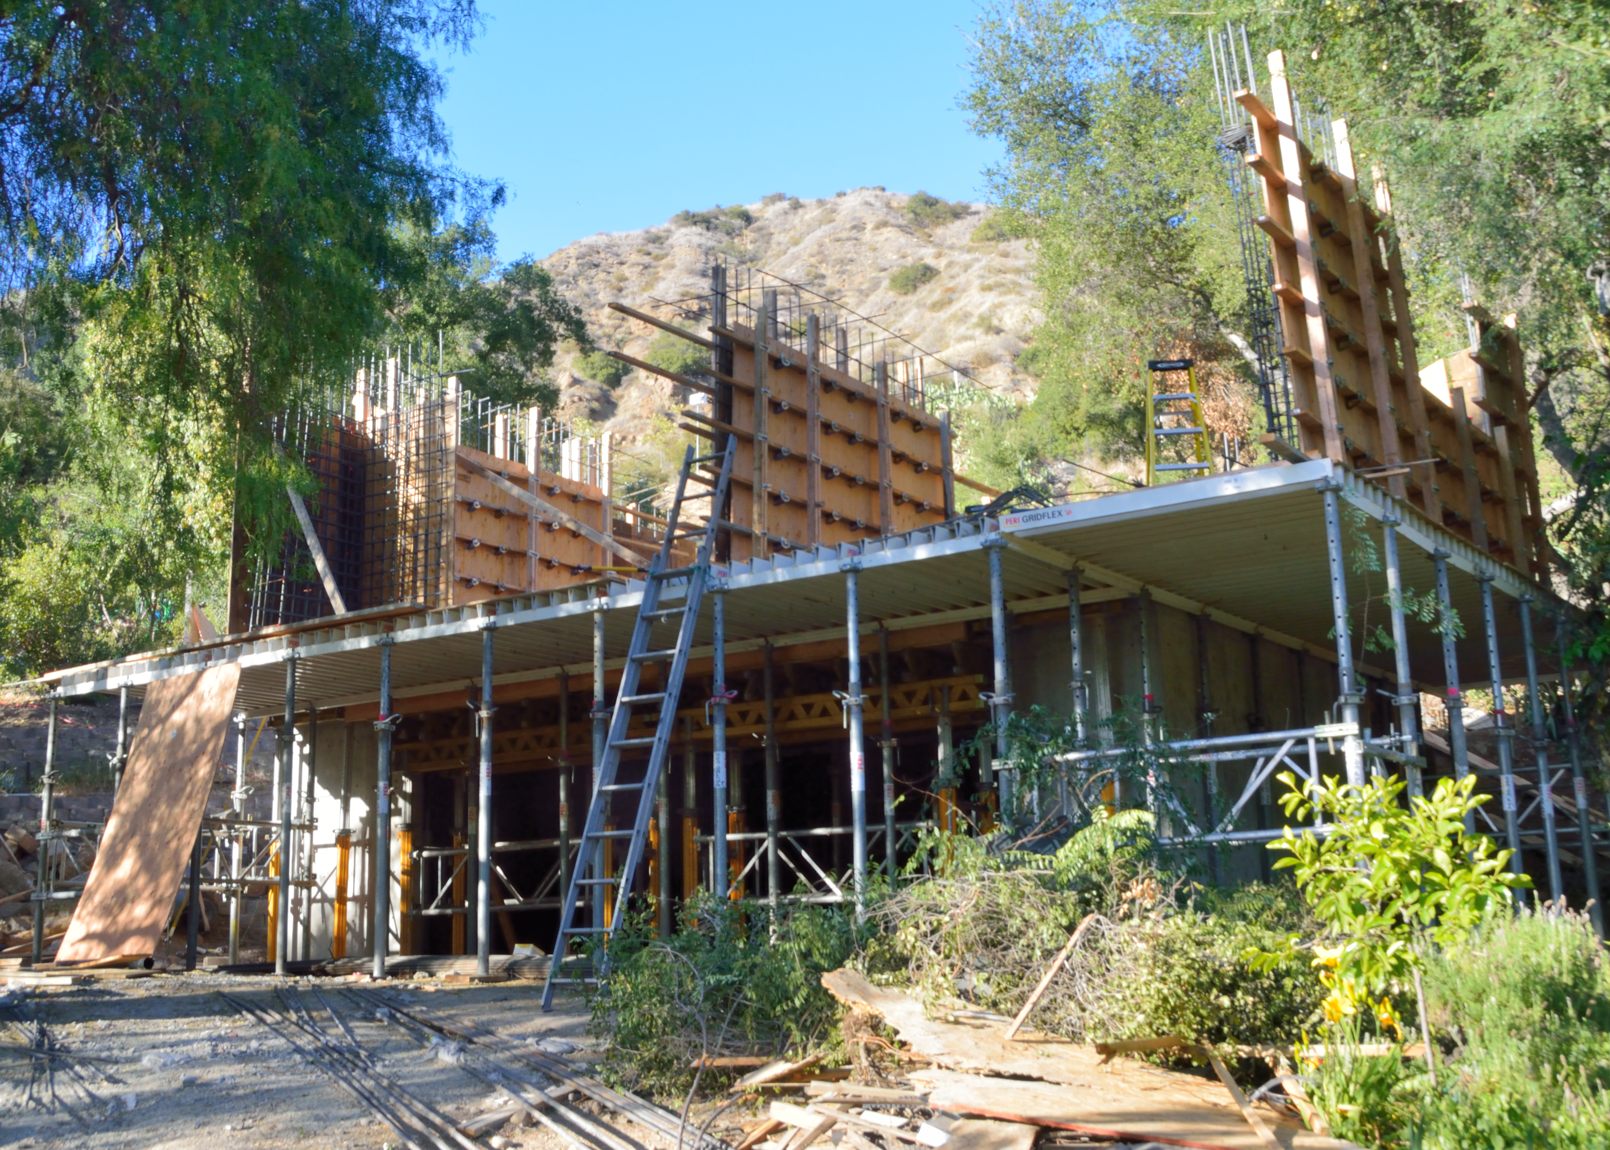
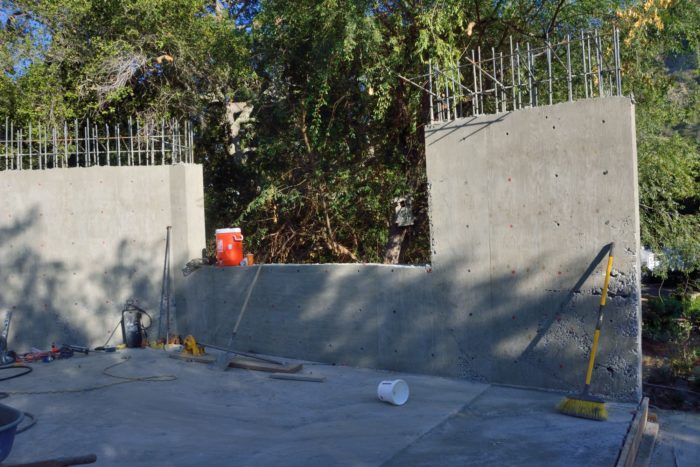
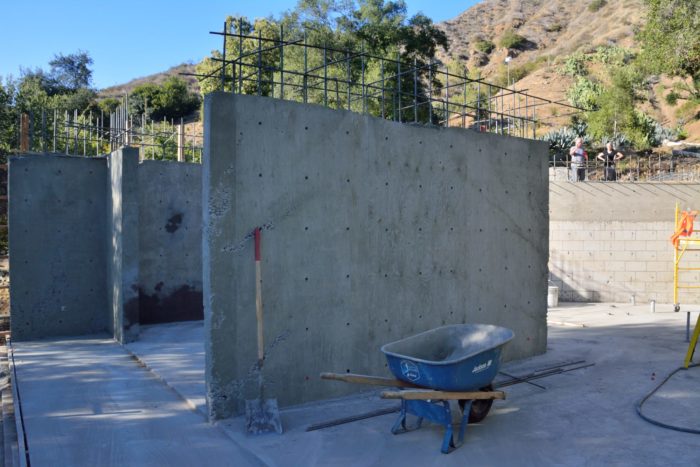
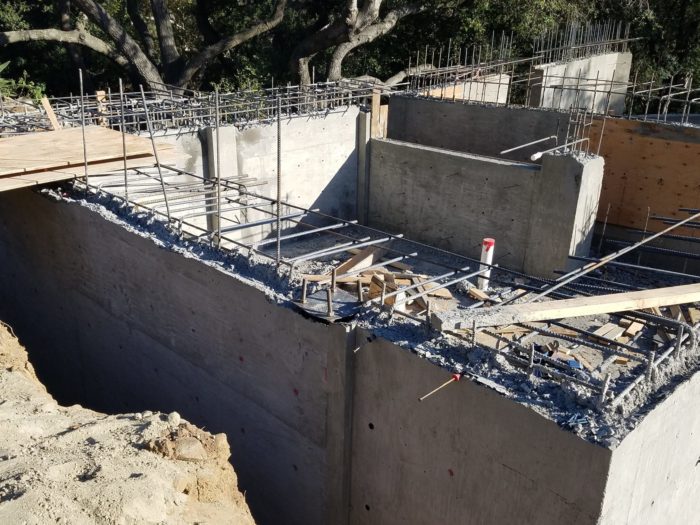
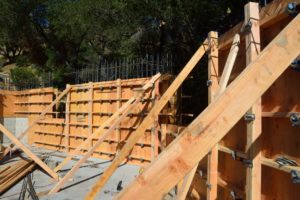
Today they began taking the forms off of the newly poured concrete walls and cleaning up the site in preparation for the work putting up the forms for the slabs that will be the house deck and the roof of the apartment. As the pictures show, they still have a ways to go to complete this.


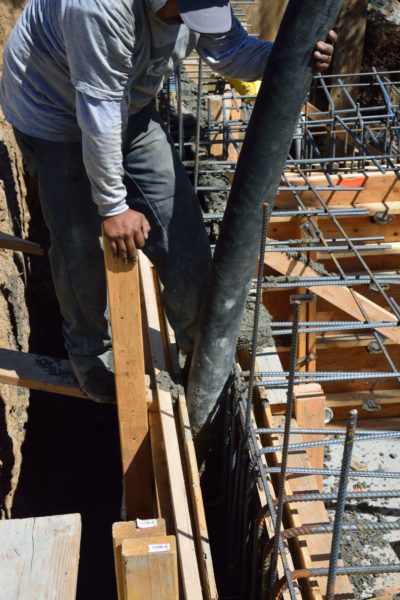
The concrete all got poured today. Making this happen took an impressive amount of work. Originally the cement trucks had been ordered for 7AM. When it became clear yesterday afternoon that there was still a lot to do, they pushed them back to arrive starting some time between noon and 2. The first truck arrived at 1. A little later would not have hurt. The story continues in the figure captions below.

Picture 1 – While Javi steered the tube depositing the cement, Kayvan, the brother of our contractor and his onsite foreman, ran the vibrator. This crucial piece of equipment makes sure that the concrete flows down to fill all of the voids.

Picture 2 – While they were doing that, another of the workmen was busy putting in strips of wood at the top of the forms that would create keys to lock this concrete in with that which will be poured on top of it next week.
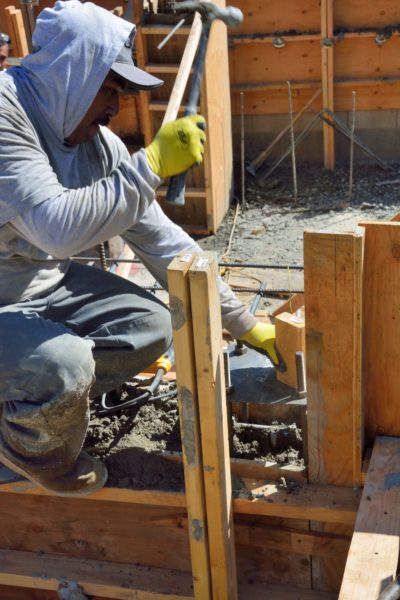
Picture 3 – Primo, another of the workmen, was busy attaching blocks that would hold the two pieces of plywood together that joined at a 45 degree angle. Javi, had seen that these were missing while he was up on the wall pouring the cement.
Picture 4 – And two of the workmen were straightening a wall, for which they just finished the forms this morning, and adding a brace to hold it in place.

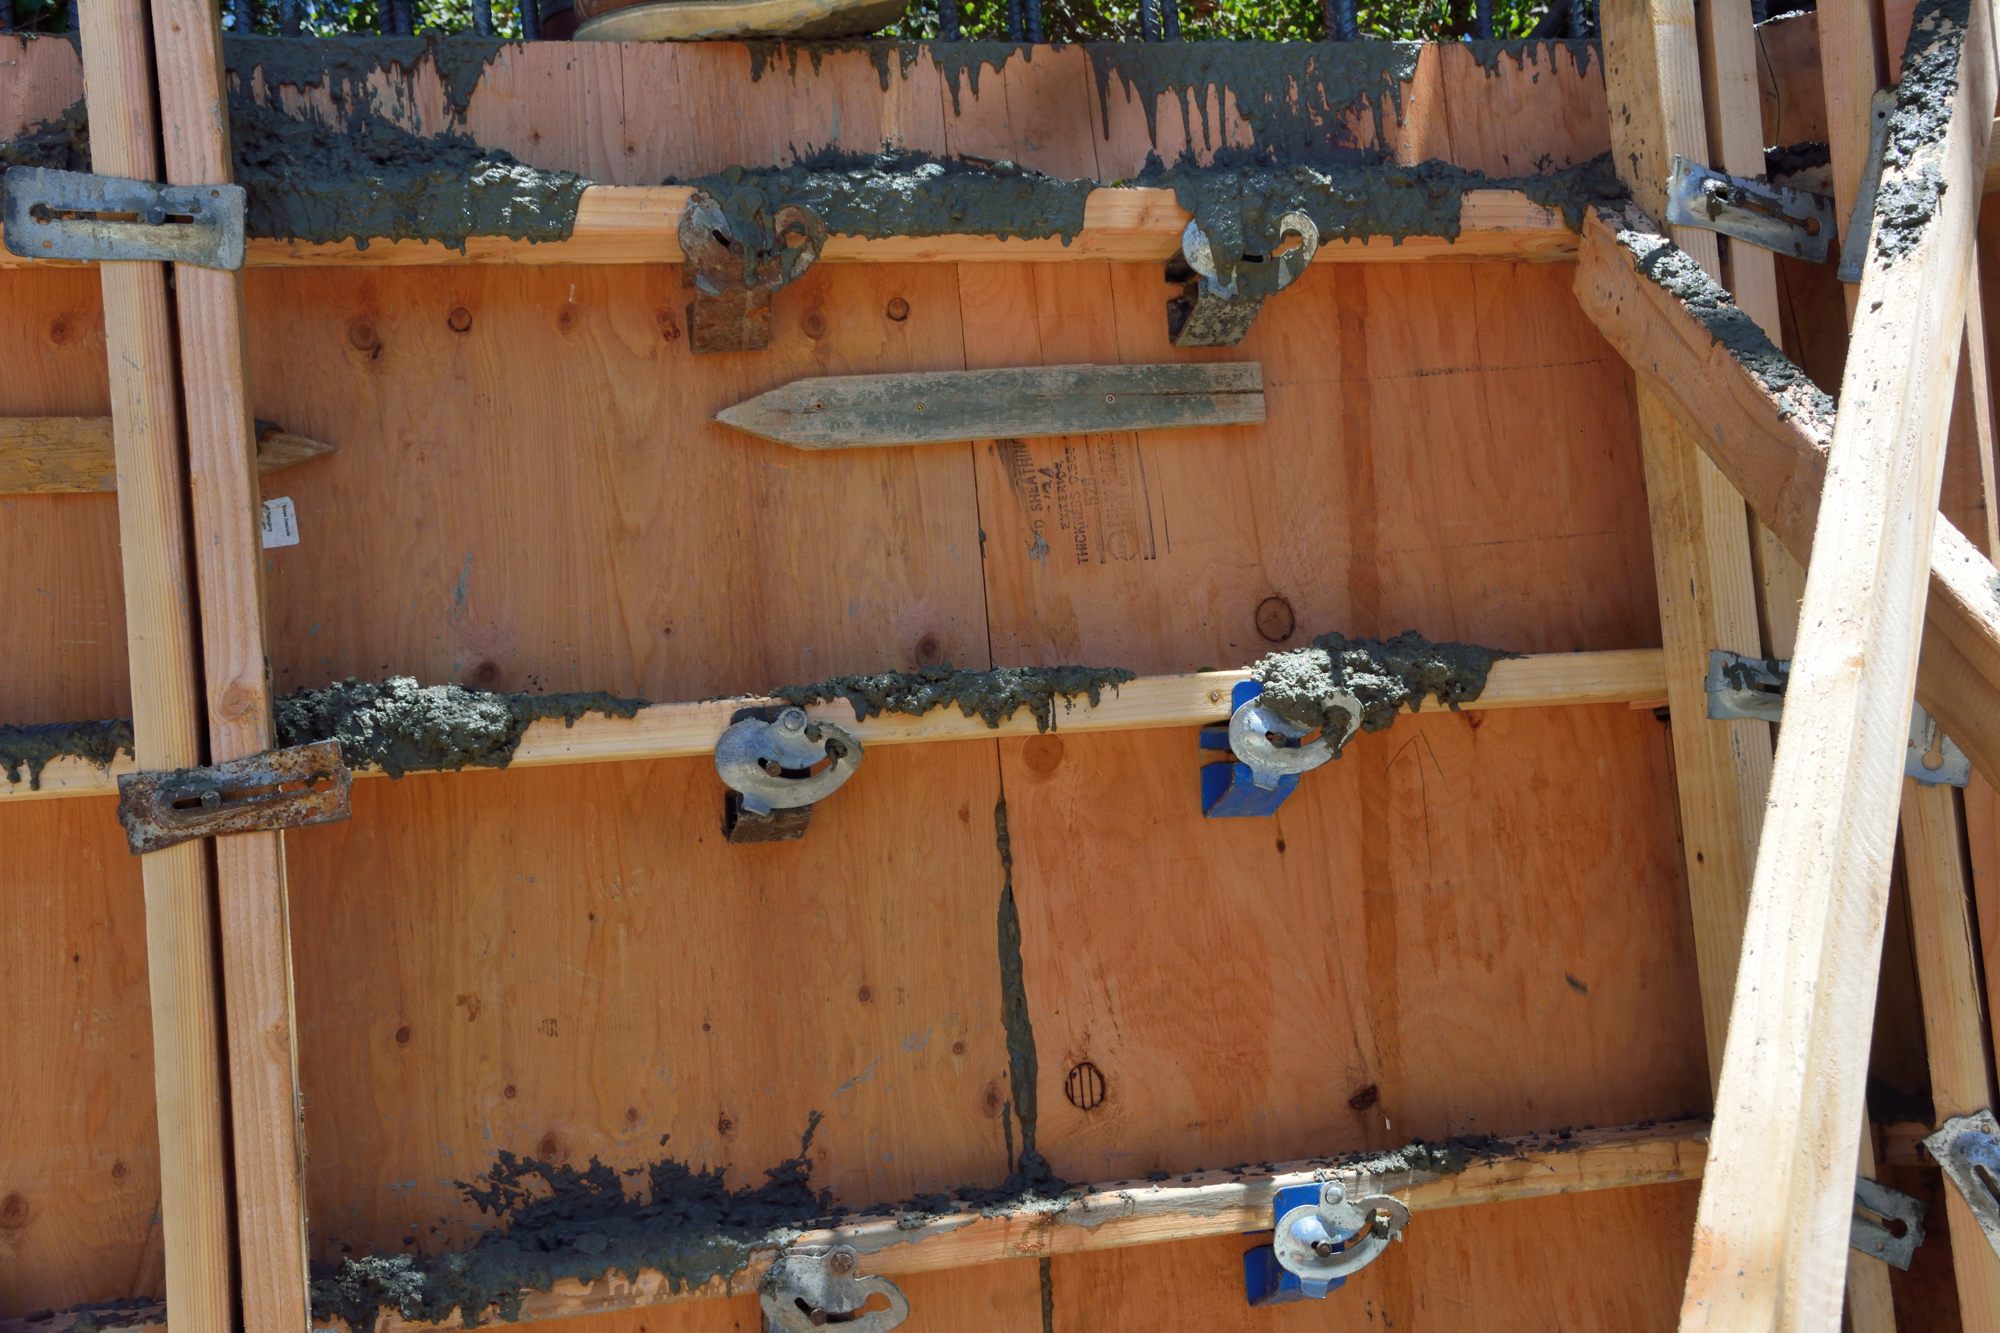
Picture 5 – This is what it should look like when they finished. The two humps running left to right in the picture are lengths of wood that will form the keys.

Picture 6 – Although the concrete is full of sand and gravel and seemed incredibly stiff, its pressure was such that it pushed out through any crack or hole. Even more concrete came out of the tube, hit the wood for the keys or the rebar at the top of the form, and splattered all over the place.
Picture 7 — To avoid some of this, toward the end, Javi started taking out one of the two pieces of wood for the keys at the top of each wall section, so that he could insert the tube into the wall. But this meant that someone had to come by later and dig those keys out of the hardening concrete by hand.
Picture 8 – And then, occasionally, too much concrete ended up somewhere. This is Primo shoveling extra concrete out of the bottom of one of the window openings.
Picture 9 – One of the last steps was to install the anchors for this plate into the hardening concrete. Eventually, this will hold the steel post that will form the southwest corner of the house.

Picture 10 – I was amazed at how hard they all worked to get everything that needed to be done in time. Certainly, by the end of the day, Kayvan looked like he had been pouring concrete — It’s not clear that he’ll ever be able to wear those glasses again. The crew certainly appreciated the beer that I got them when they all came off the site at the end of the day.
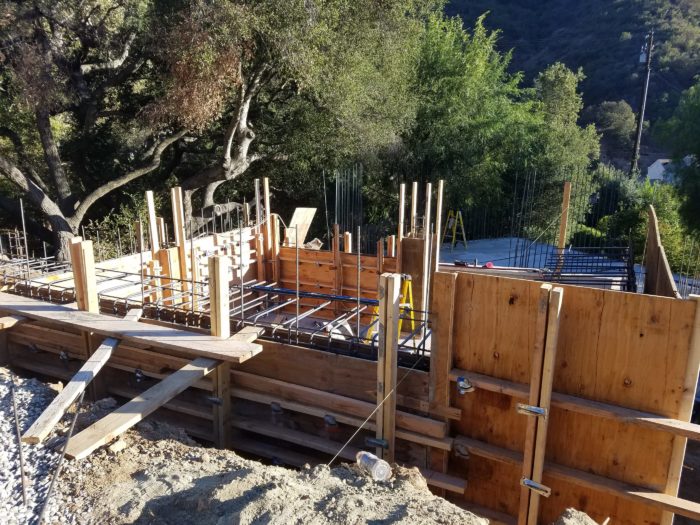
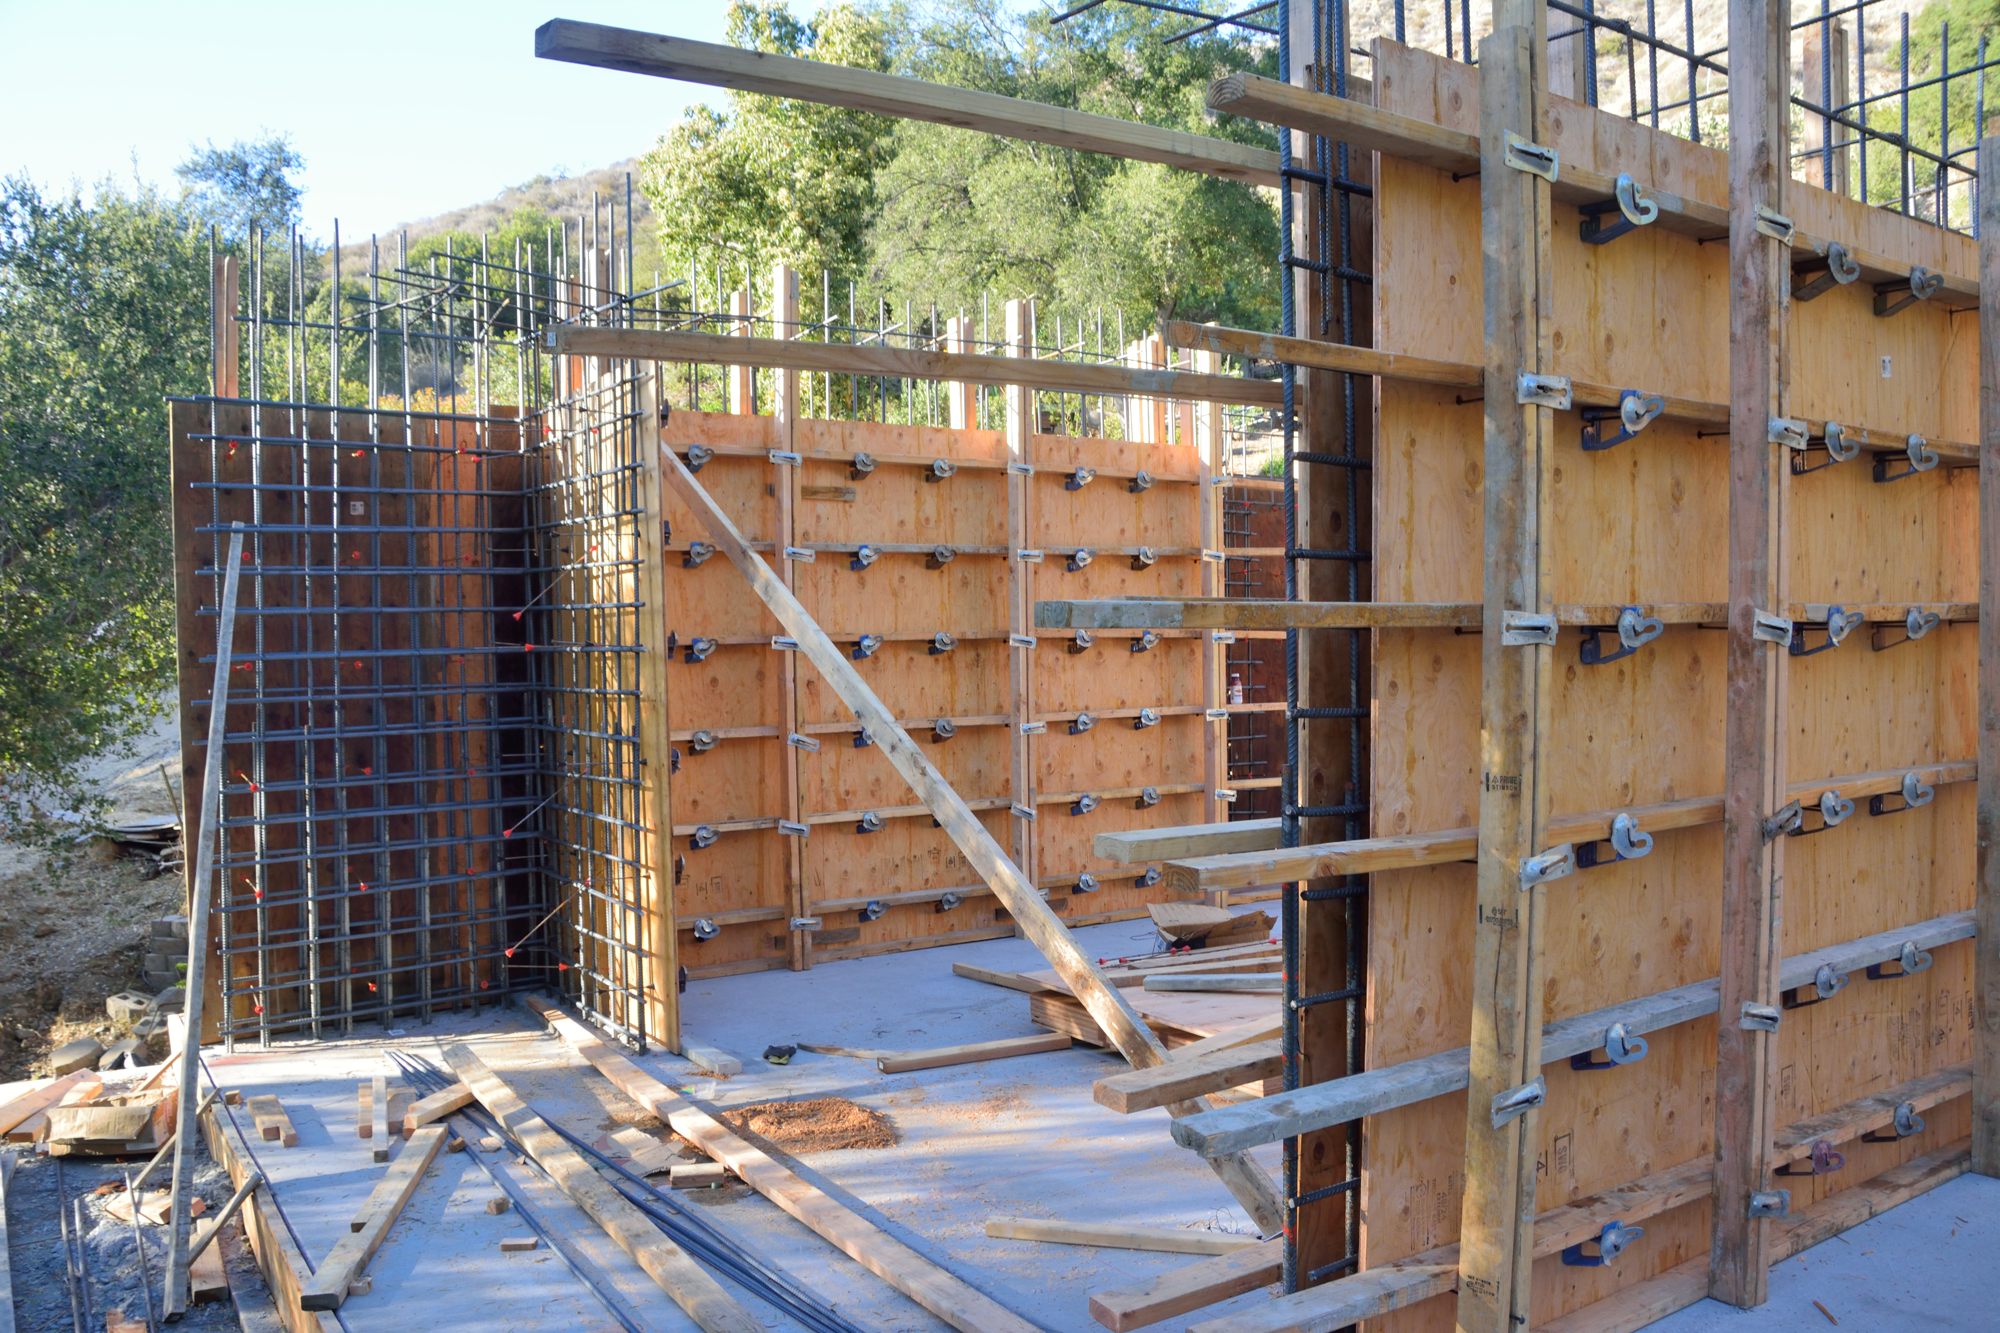
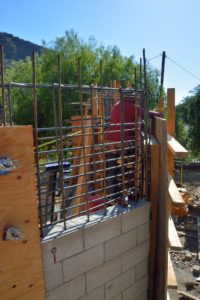
All the rebar is up. The work passed two inspections this morning. Originally, we were told that they would pour cement starting at 7 tomorrow, then it was noon, and finally it is now 2 PM. The problem is that, although all the rebar and most of the forms are in place, the forms in the last few sections have been particularly difficult.
Pictures 1 and 2 shows some of the finished forms; Picture 2 shows what will eventually be the view out of one of the windows.
Picture 1

Picture 2
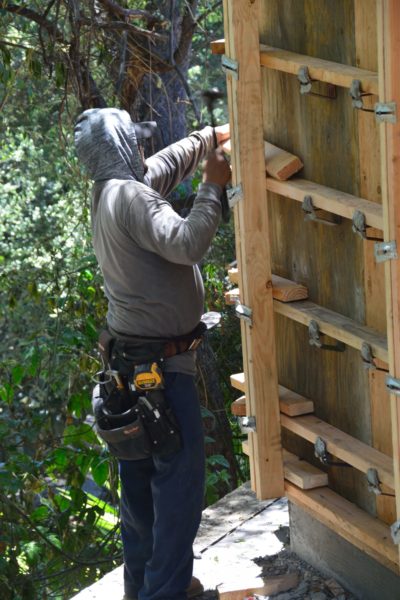
However, Pictures 3, 4, and 5 show the guys working on one section of forms, around what will be the entrance doors, that proved particularly difficult to get into place and straight up and down. Another factor slowing work down is that one of the four workers developed a bad case of sciatica in the morning and could not work. With all of these things they will need the morning to get everything finished to be ready to pour concrete.
Picture 3
Picture 4

Picture 5
The workers were working late today trying to get the forms finished before the inspection tomorrow. They have a bit more to do in the apartment still. No new pictures–looks pretty much like Friday. If the inspector passes it, we should have a new cement pour on Wednesday.
Yesterday, we thought that we had come to a solution for the problem of raising the height of the apartment ceiling by raising the roof slab to match the height of the deck slab. This morning, however, that solution looked less simple: with the roof slab and the deck slab at the same height, the deck slab could no longer be supported by the garage/apartment wall that supports the roof slab. Fortunately, two calls to the structural engineer later, it became clear that, although, in the original plans, the deck slab was over the wall of the garage, it was designed to be free-standing and unconnected to the garage. So, in the revised plan, the deck slab simply extends to within an inch of the roof slab, but they are not connected; instead there will be an expansion joint between the two slabs. It is fortunate that this is true, since any other kind of change would have required further review by the County, which could have set work back several weeks.
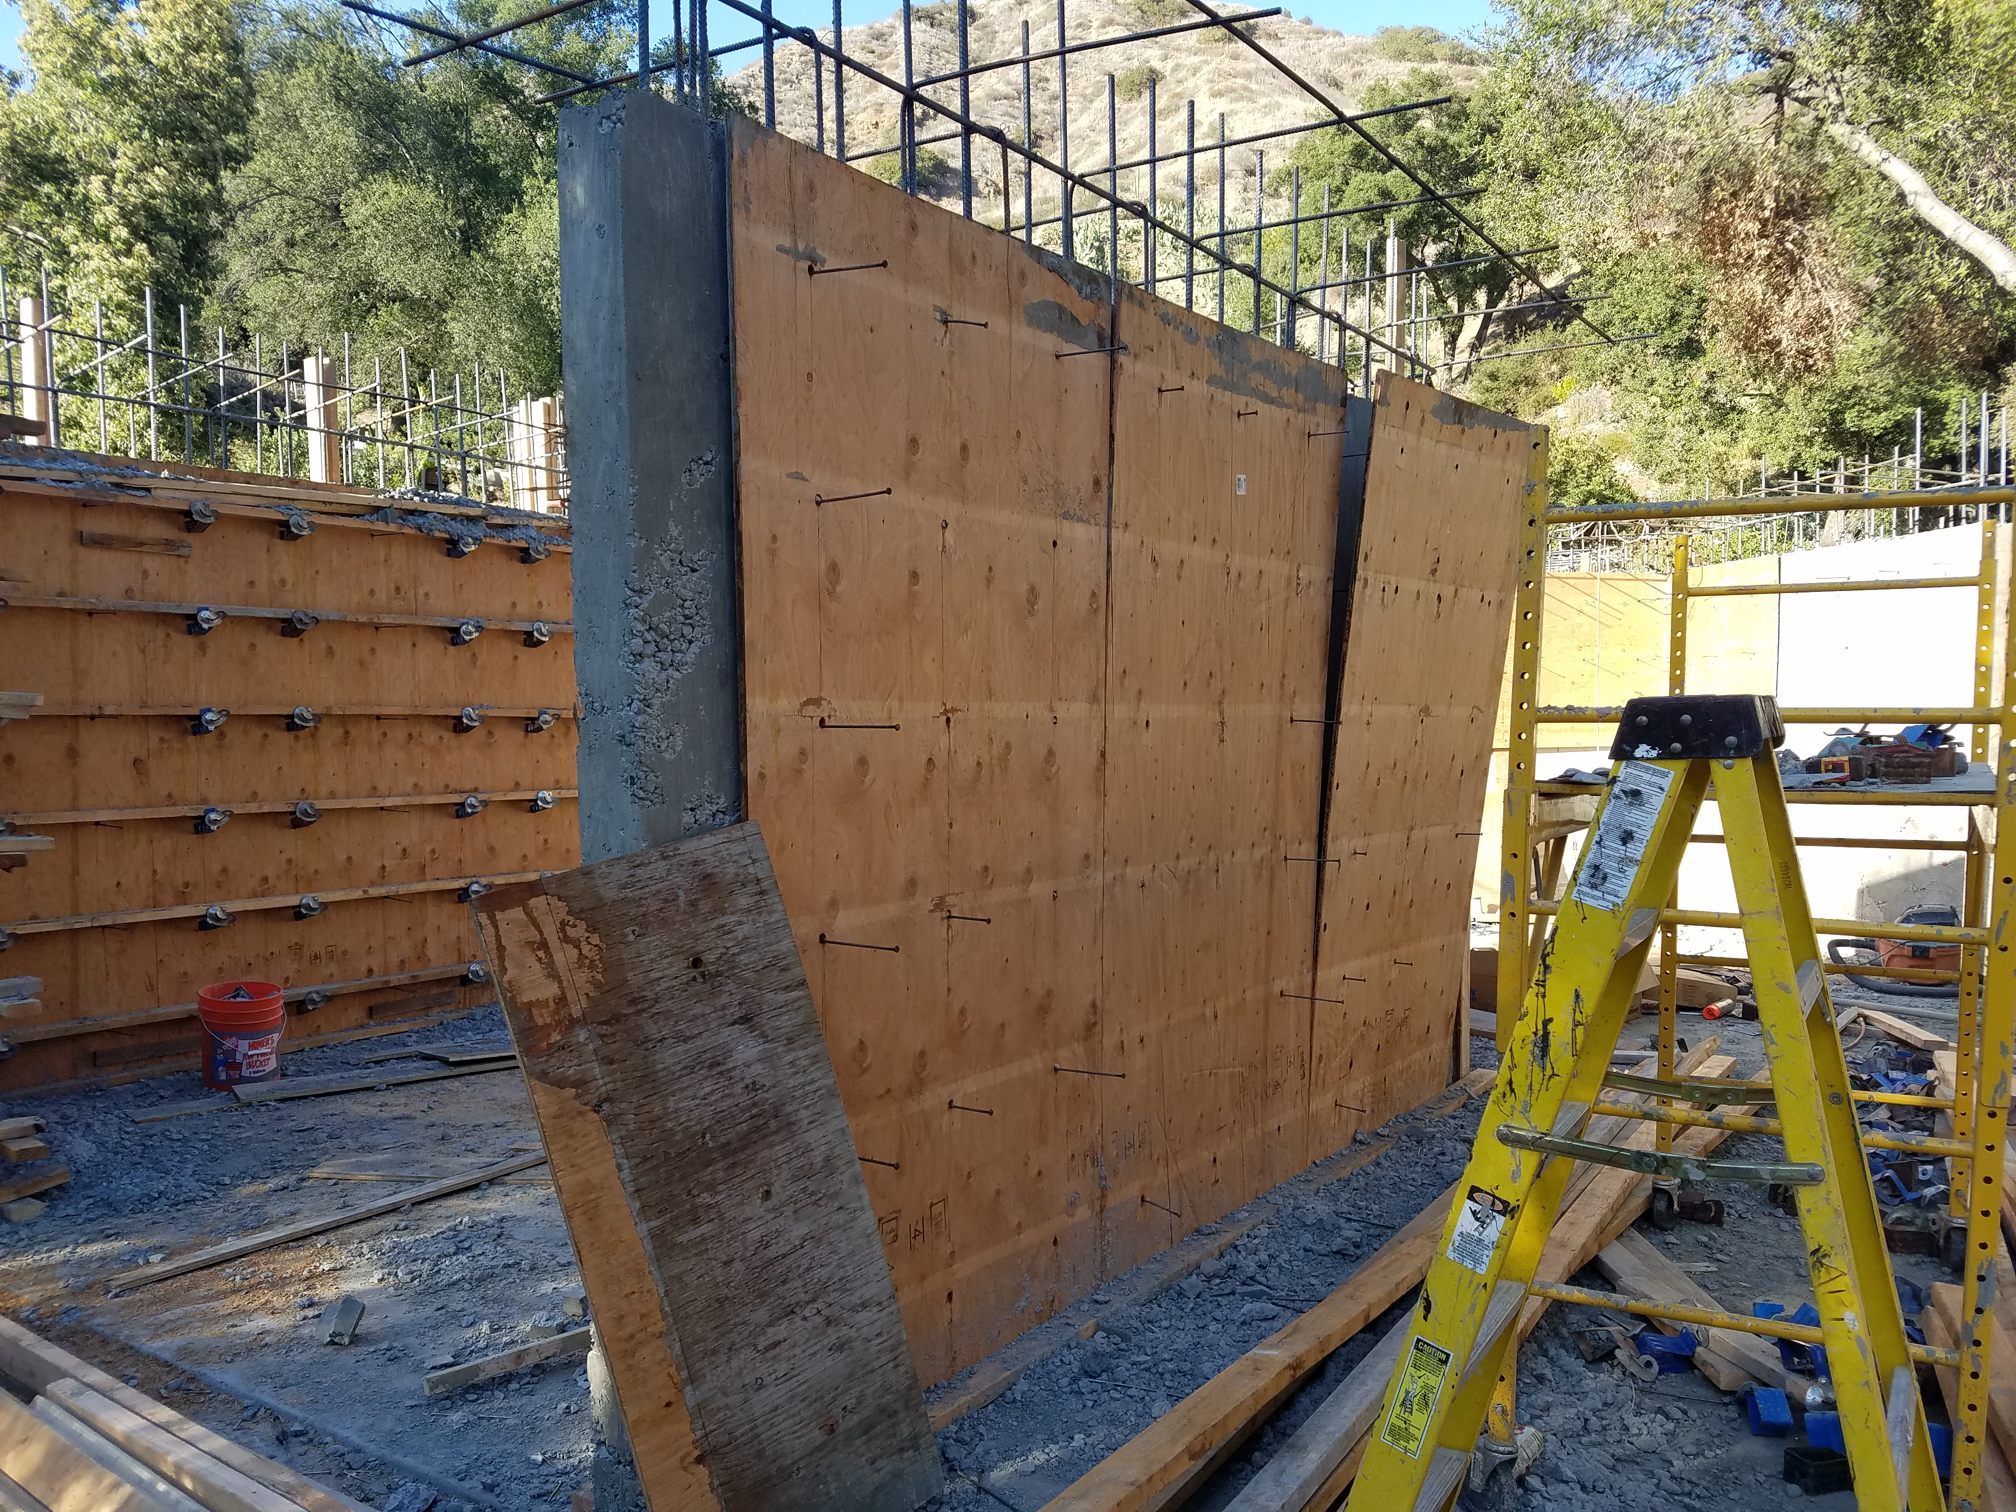
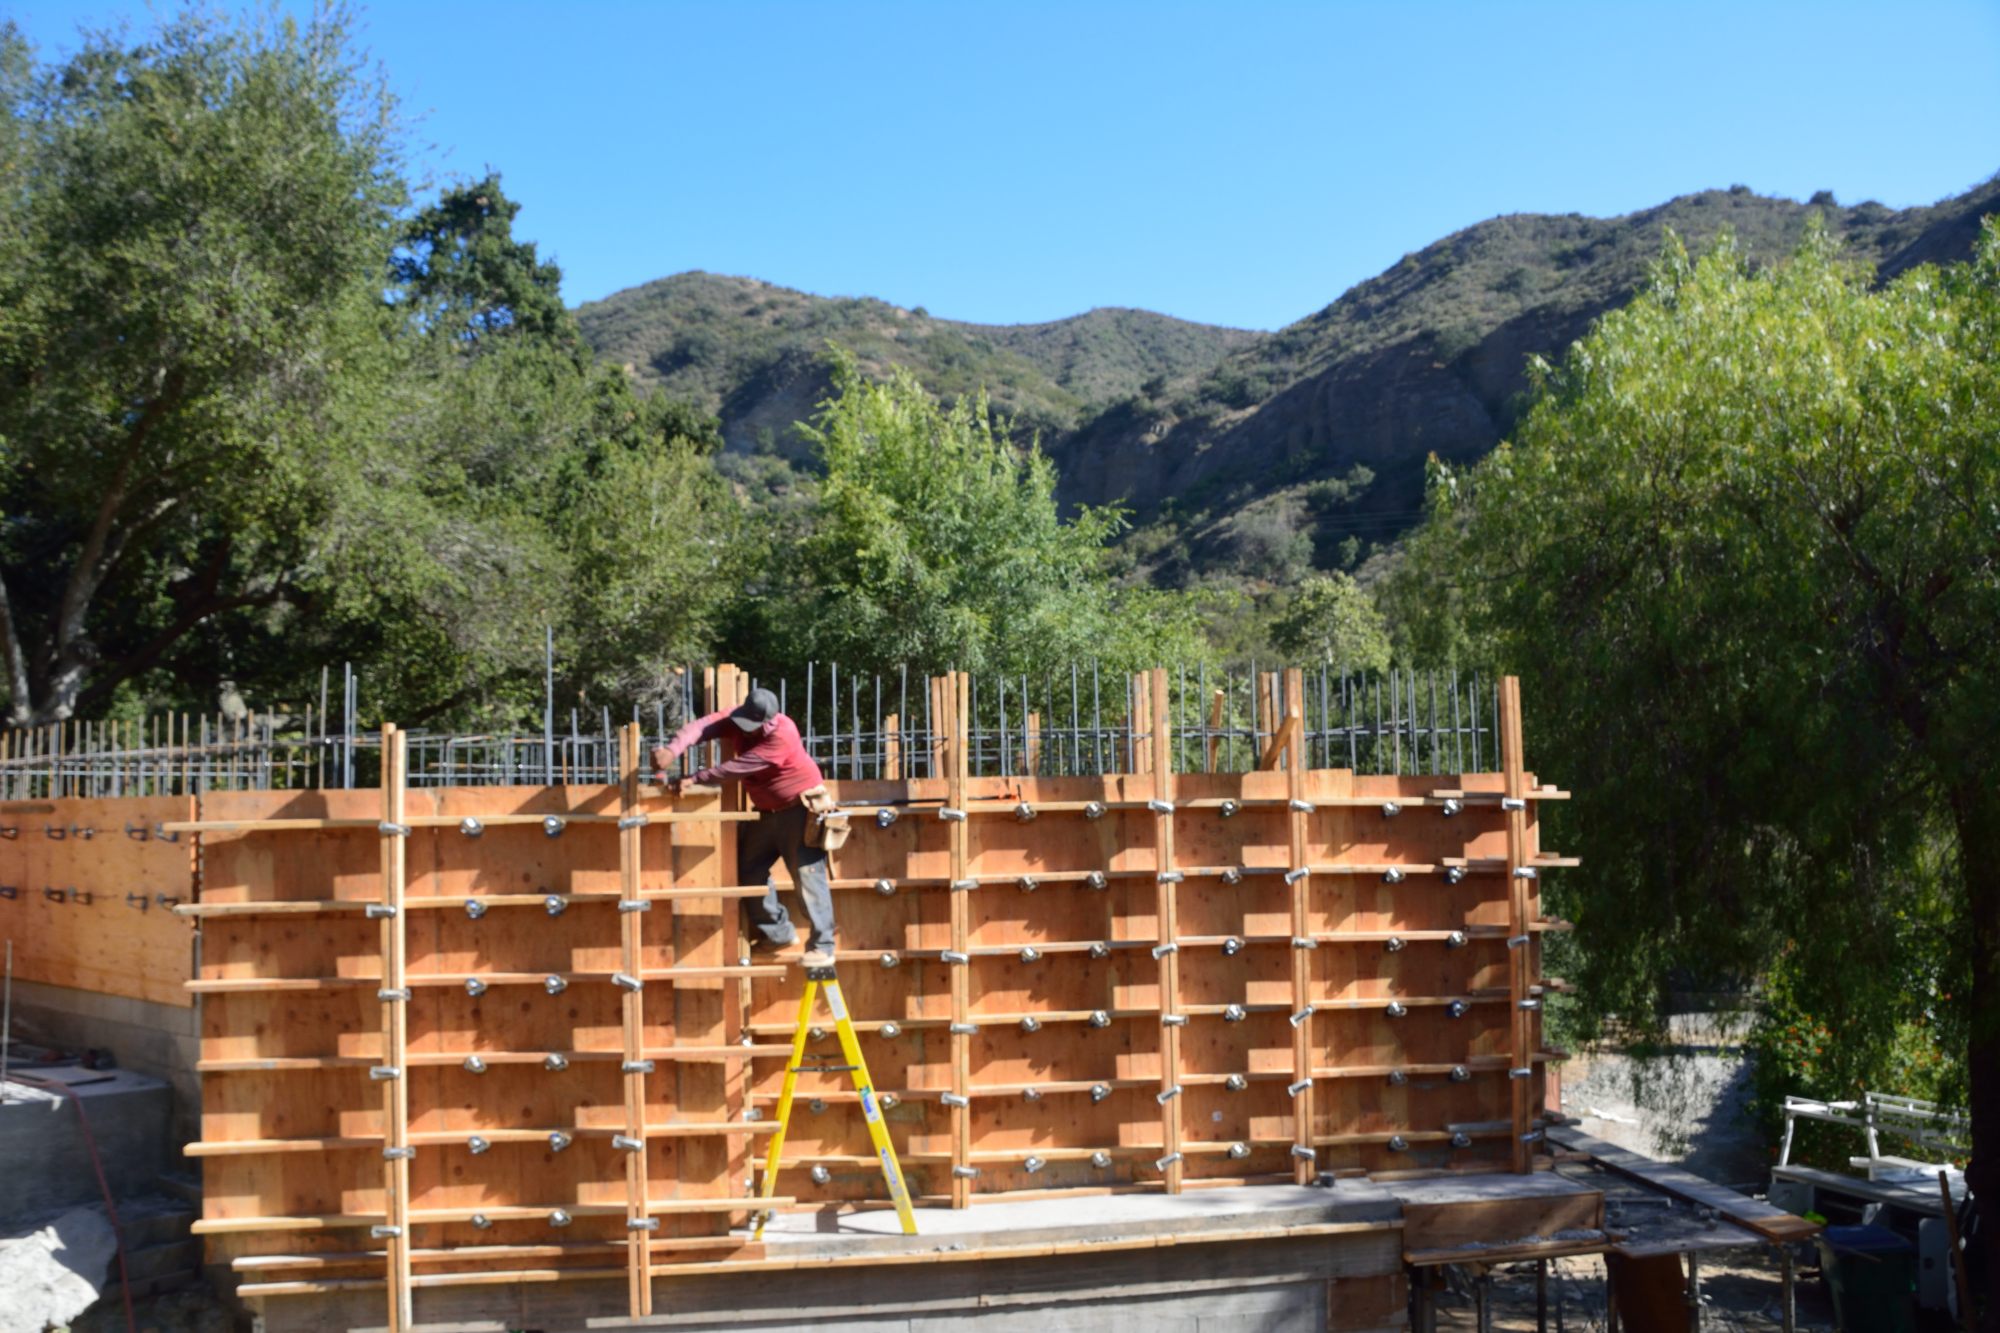
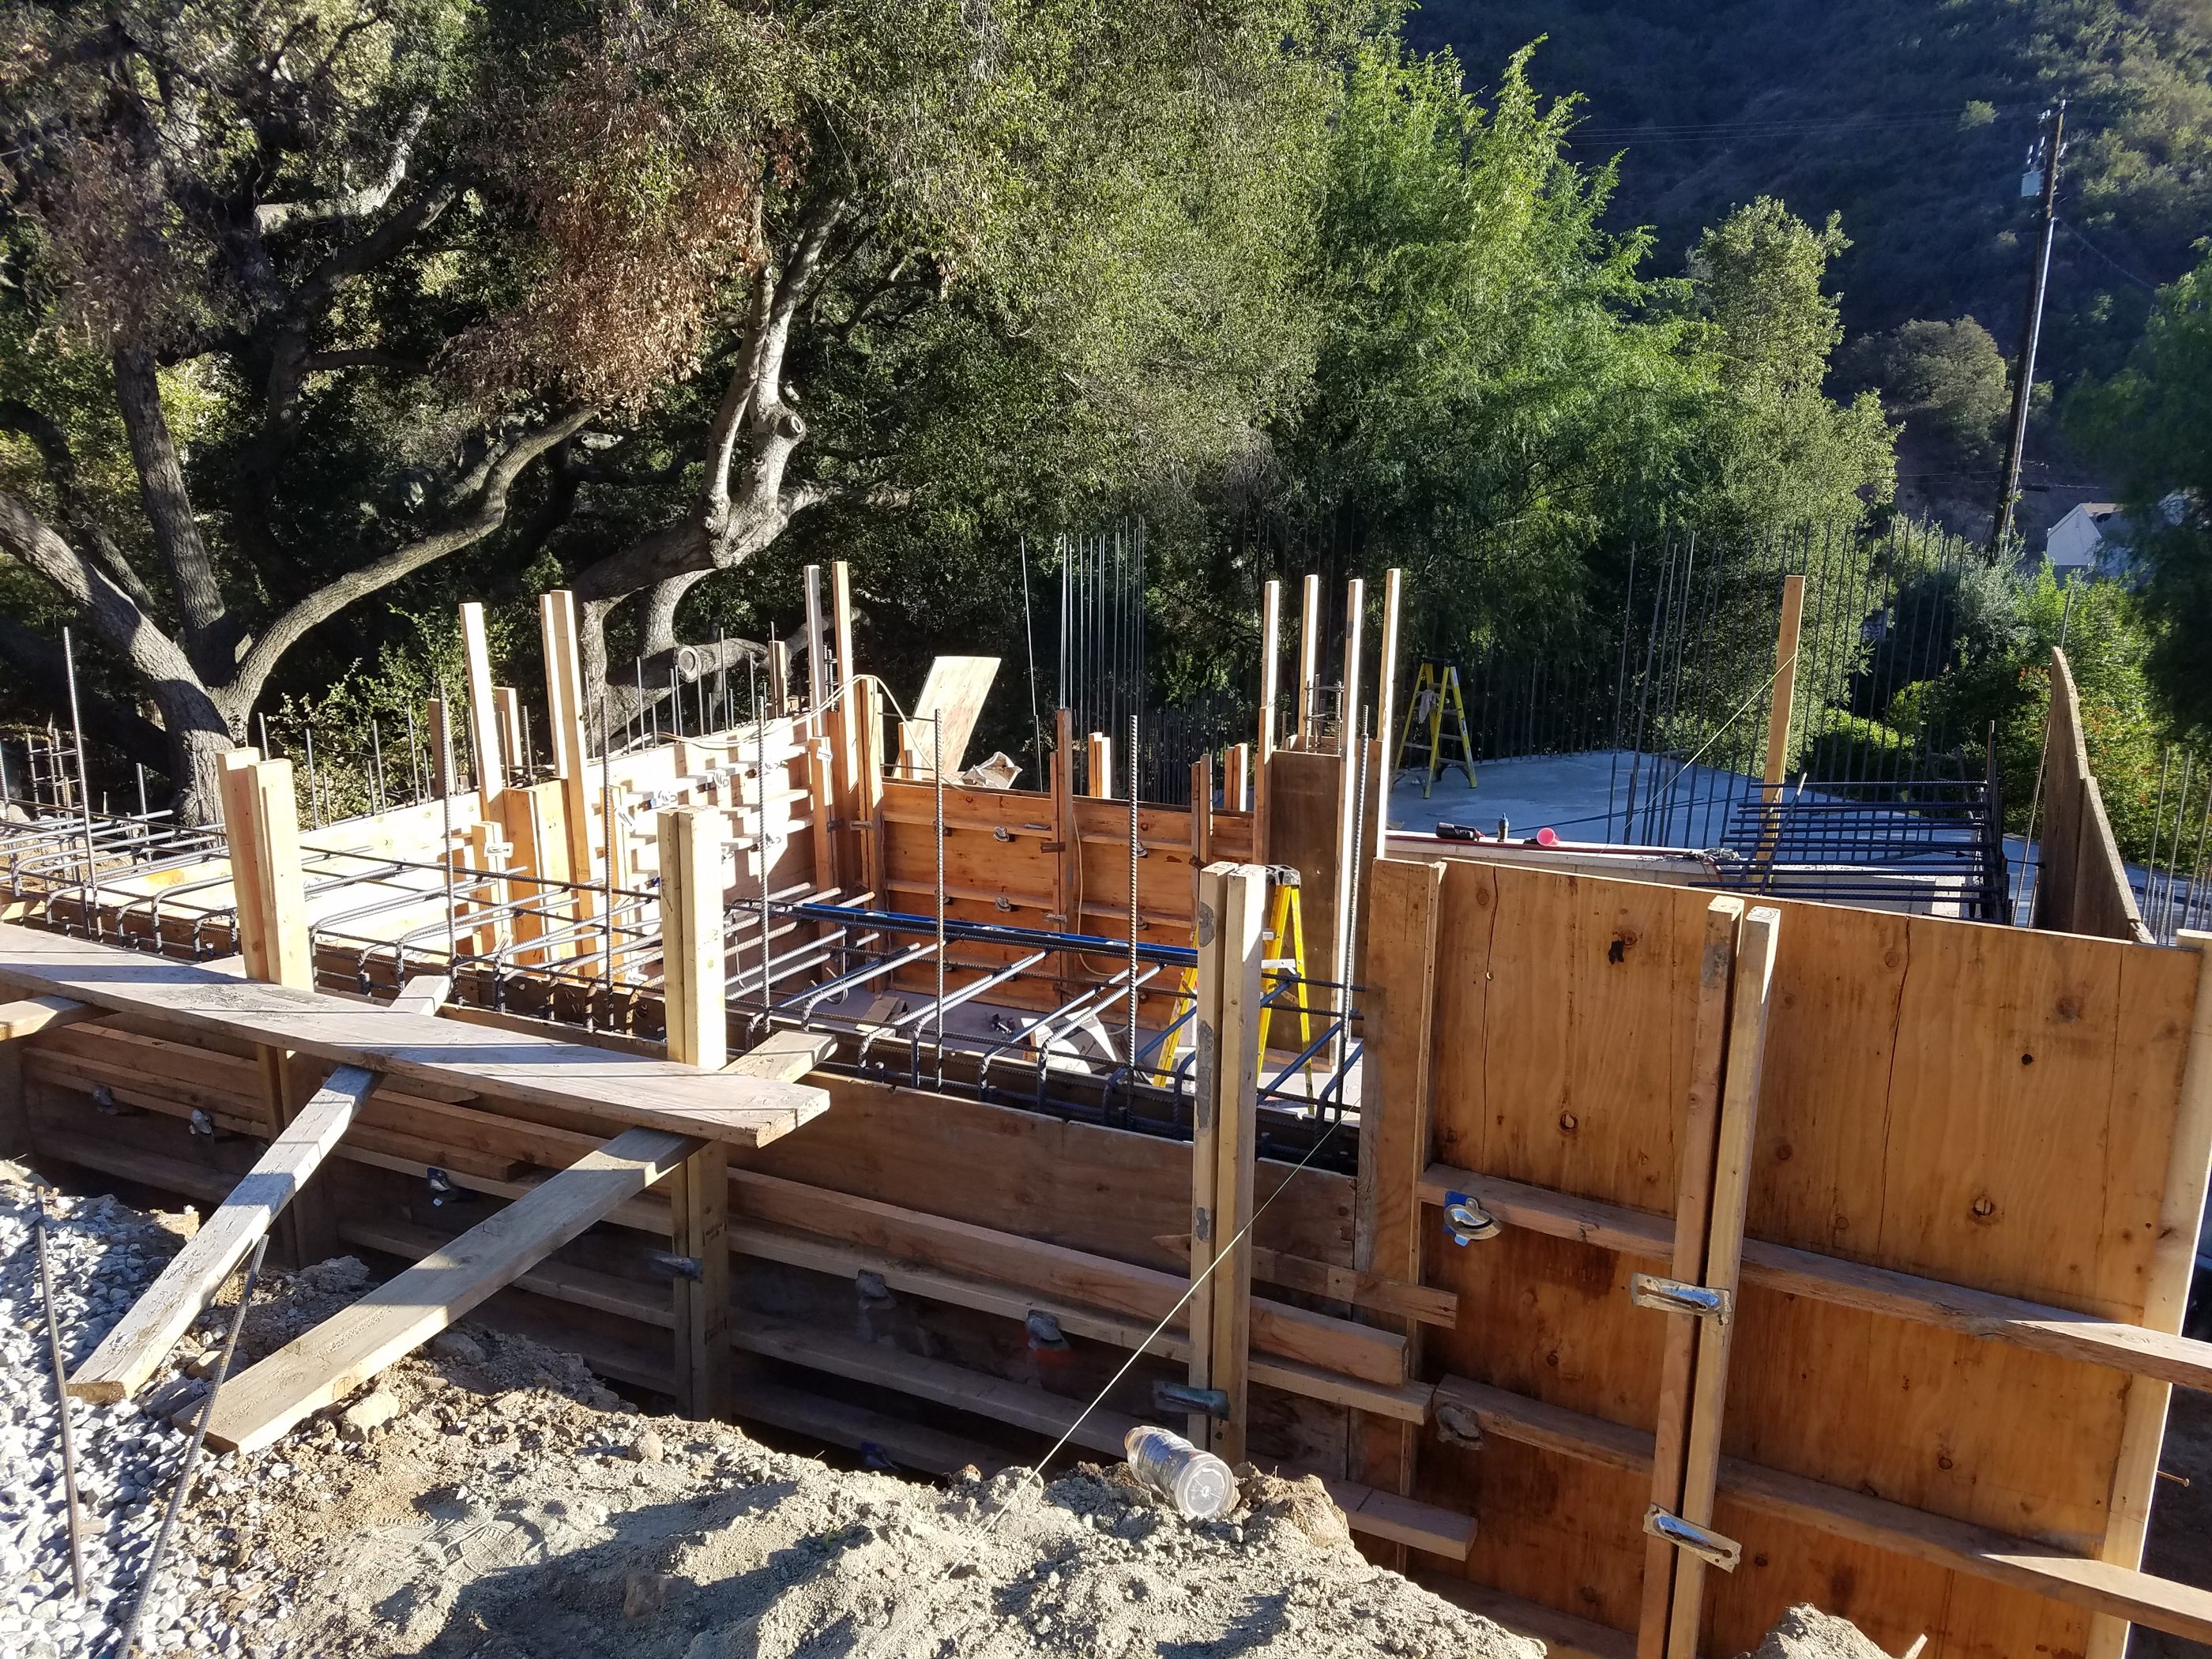
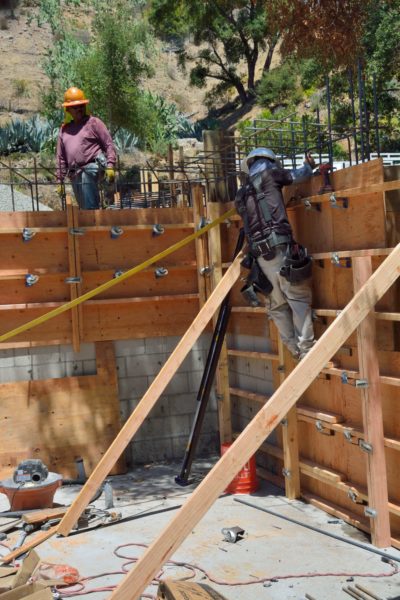
With these issues resolved, the major work of the day was to continue working on the forms for the apartment walls, as shown in Pictures 1 and 2 below. This work needs to be finished on Monday, so that they can have an inspection on Tuesday, and pour concrete next Wednesday.

Picture 1 – View of the work on the garage/apartment from below on the driveway.

Picture 2 – Mostly framed West and Middle walls of the apartment.
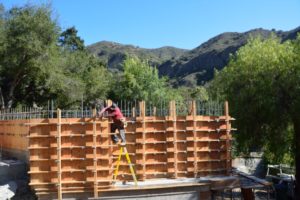
With the forms for the walls under the deck done, today they made good progress on the forms for the walls of the apartment, shown in Picture 1. However, the real excitement of the day is documented in Picture 2.
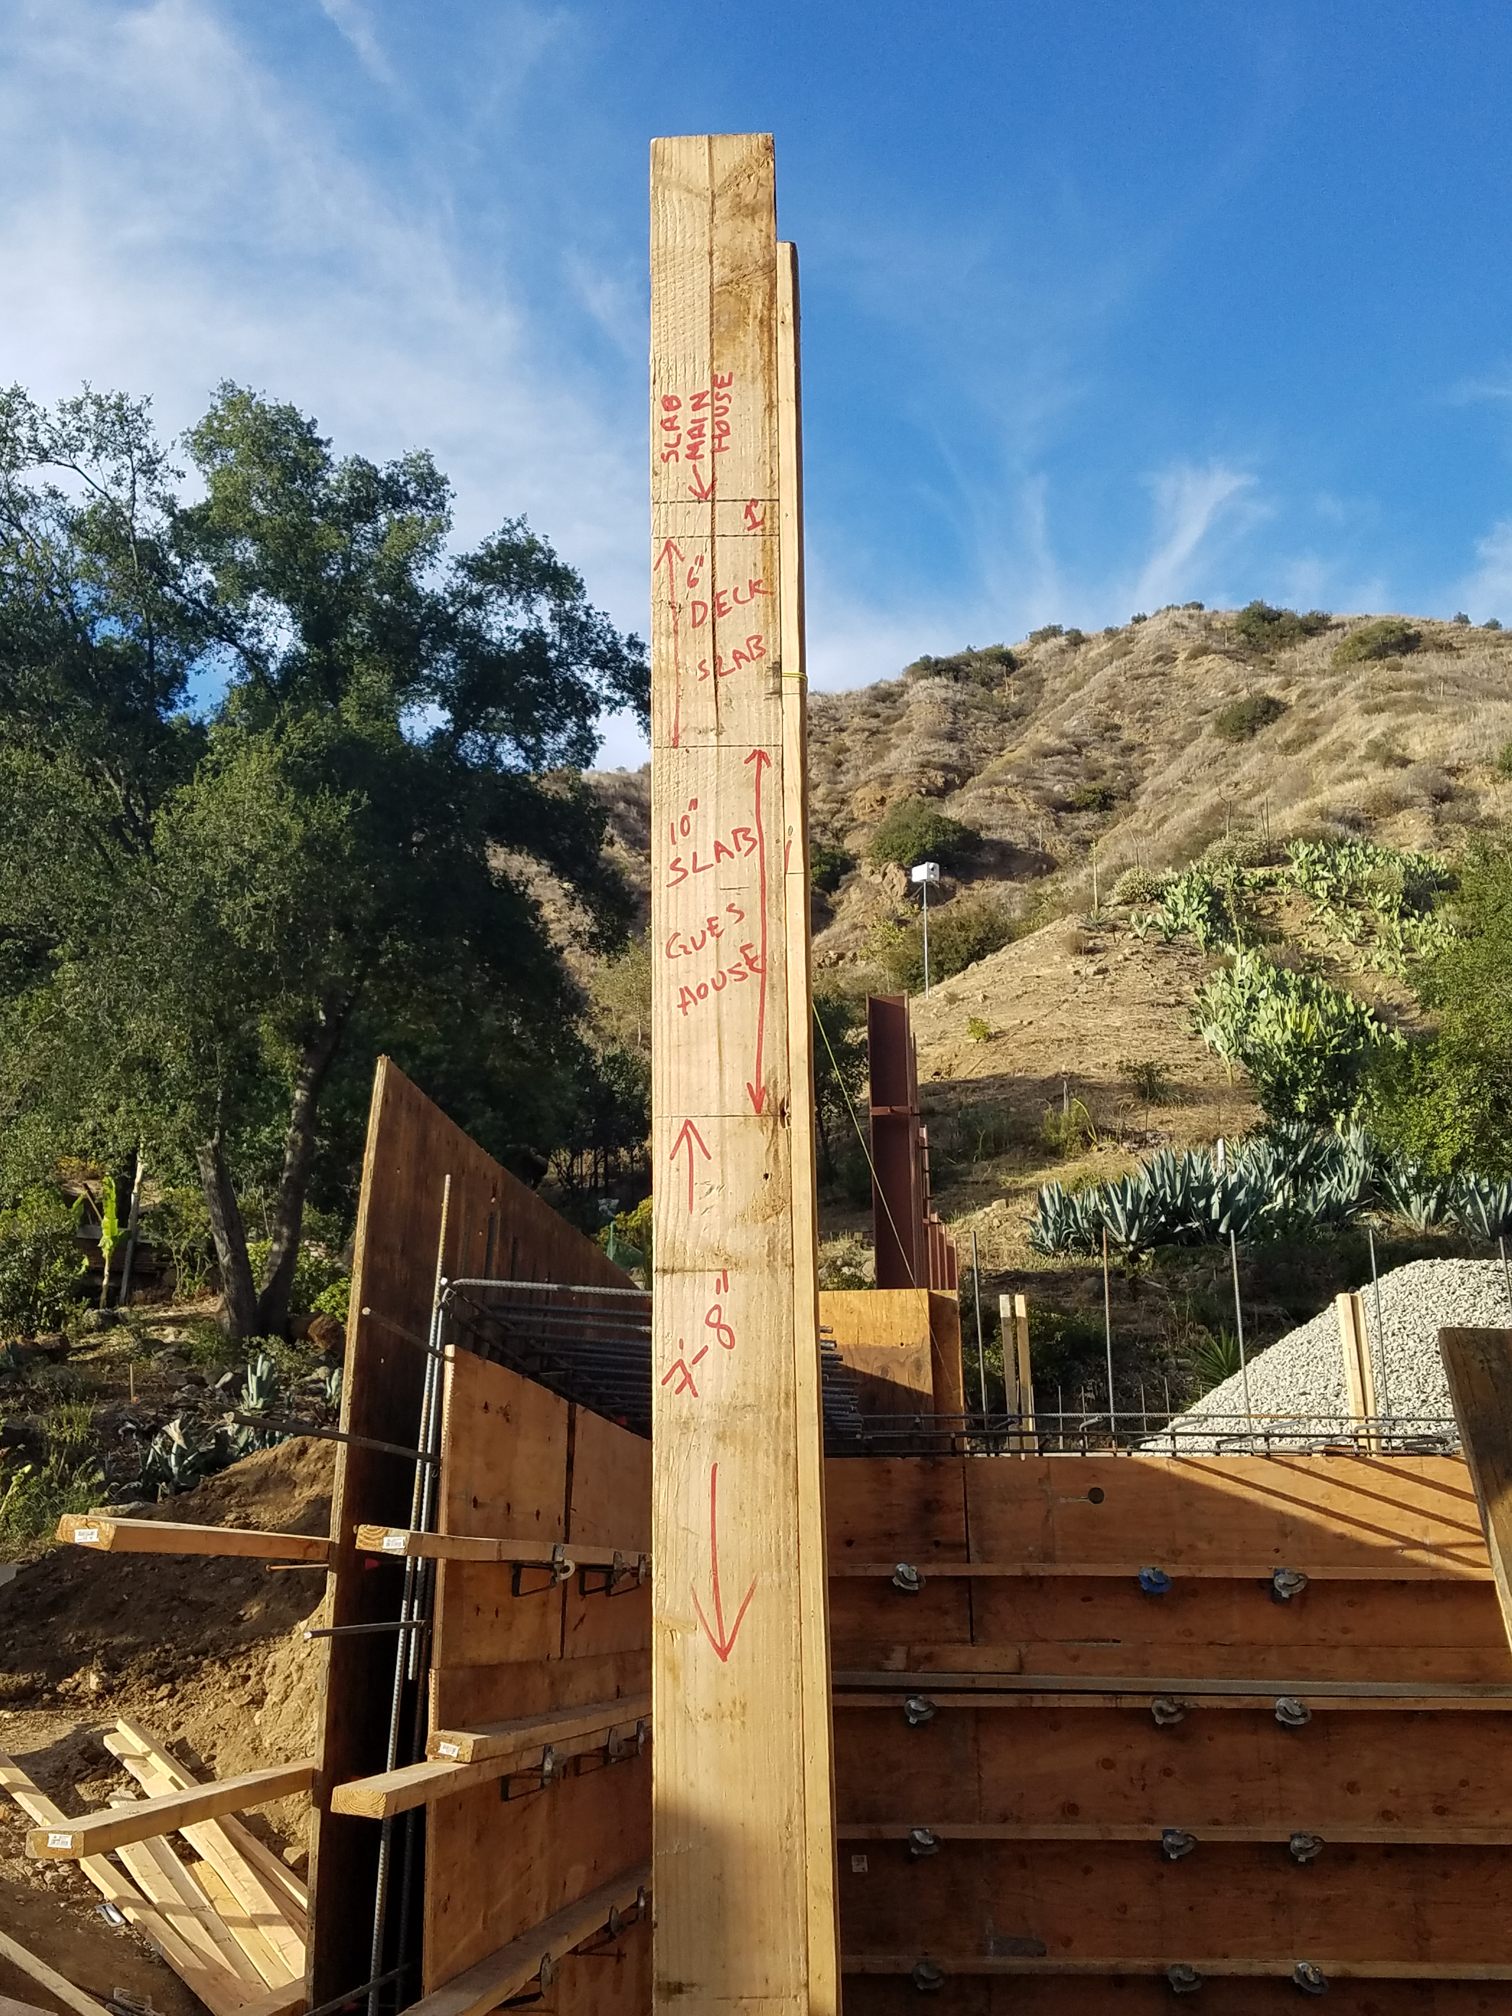
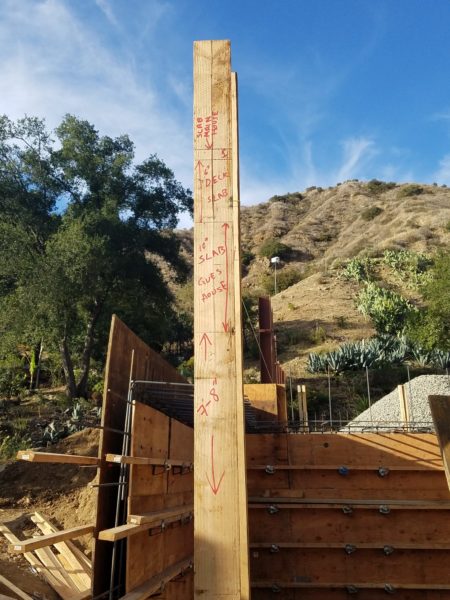
In the background of this photo, you can see some of the completed forms for the area under the deck. In the foreground is a 2×4 that our contractor marked up to illustrate a problem. Yesterday’s post mentioned how the level of the first floor of the house continues (with a step down of one inch) to the deck and that level was to be the same as the top of the 6″ deep green-roof planters that sit on the top of the apartment roof. The ceiling of the apartment, measured to the top of the slab that is the roof is meant to be 8′ above the floor.
The top red line of the 2×4 is marked “Slab Main House.” The next line is one inch below that, the step down to the top of the deck slab, which is shown to be 6″ thick. This slab sits on top of what is shown to be the 10″ slab of what is called here, the Guest House — i.e., the apartment — allowing room for the 6″ green roof modules on top of that roof slab. The problem is revealed below that, where it says that it will be 7′-8″ from the bottom roof slab to the top of the floor slab. We will lose some of the 8″ to any flooring in the apartment and more to the fact that we have decided that we need to add a dropped ceiling to allow for wiring and light fixtures — these could be embedded in the roof slab but we would prefer not to. Take away four to five inches and we are perilously close to the 7′-2″ minimum allowed by code (and, even if there were not a code, this is just too low).
It is not clear how/why this happened, but, fortunately, there is an easy solution: have the roof slab of the apartment be a continuation of that of the deck an then add the 6″ deep green roof modules on top of that. Nerve racking for a few minutes, but problem solved!

Picture 1
Picture 2
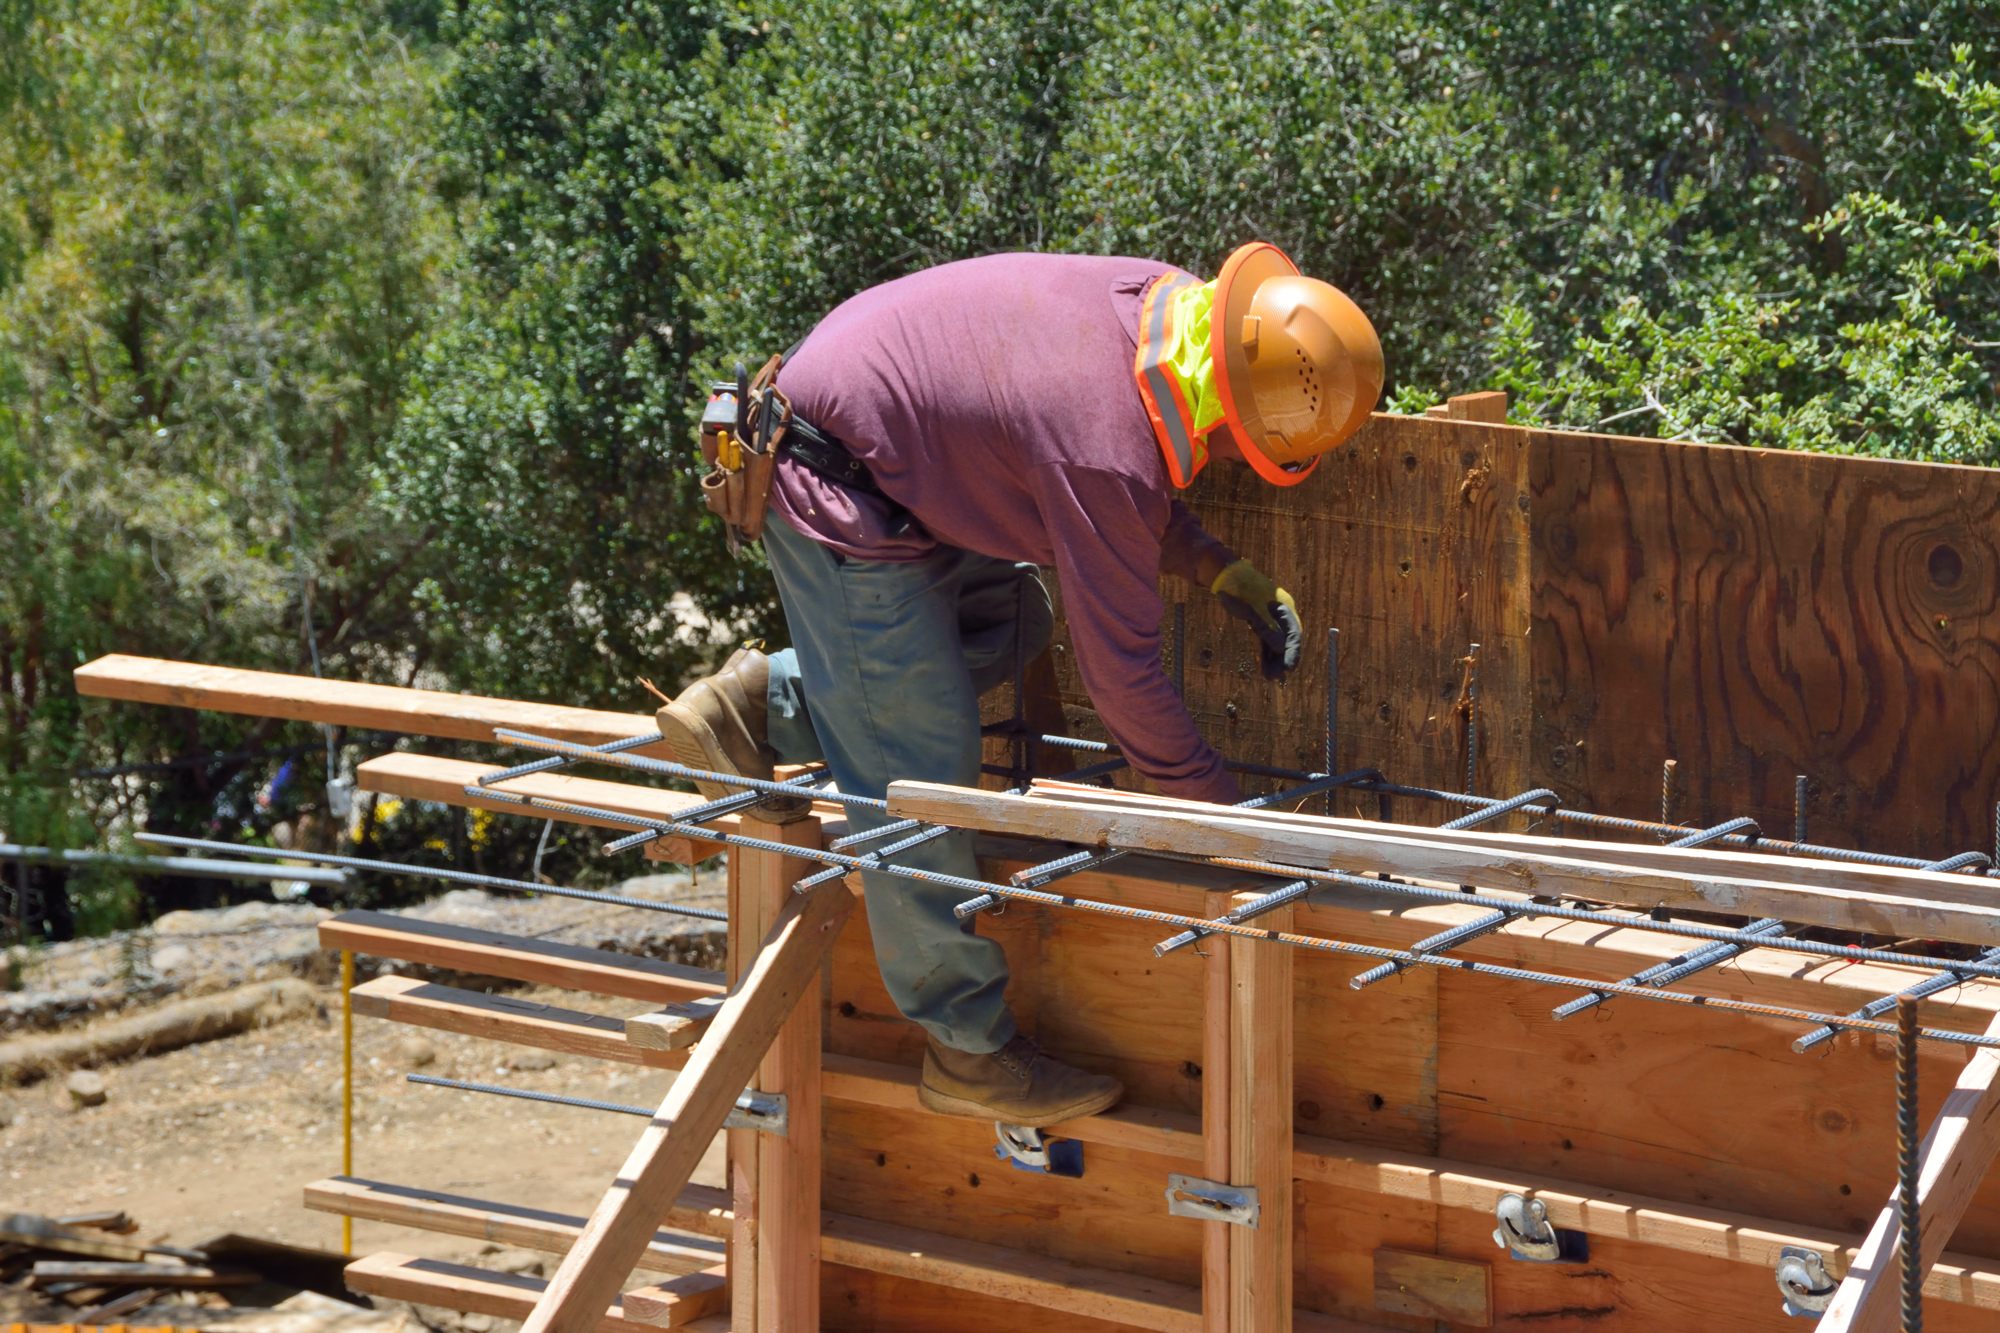
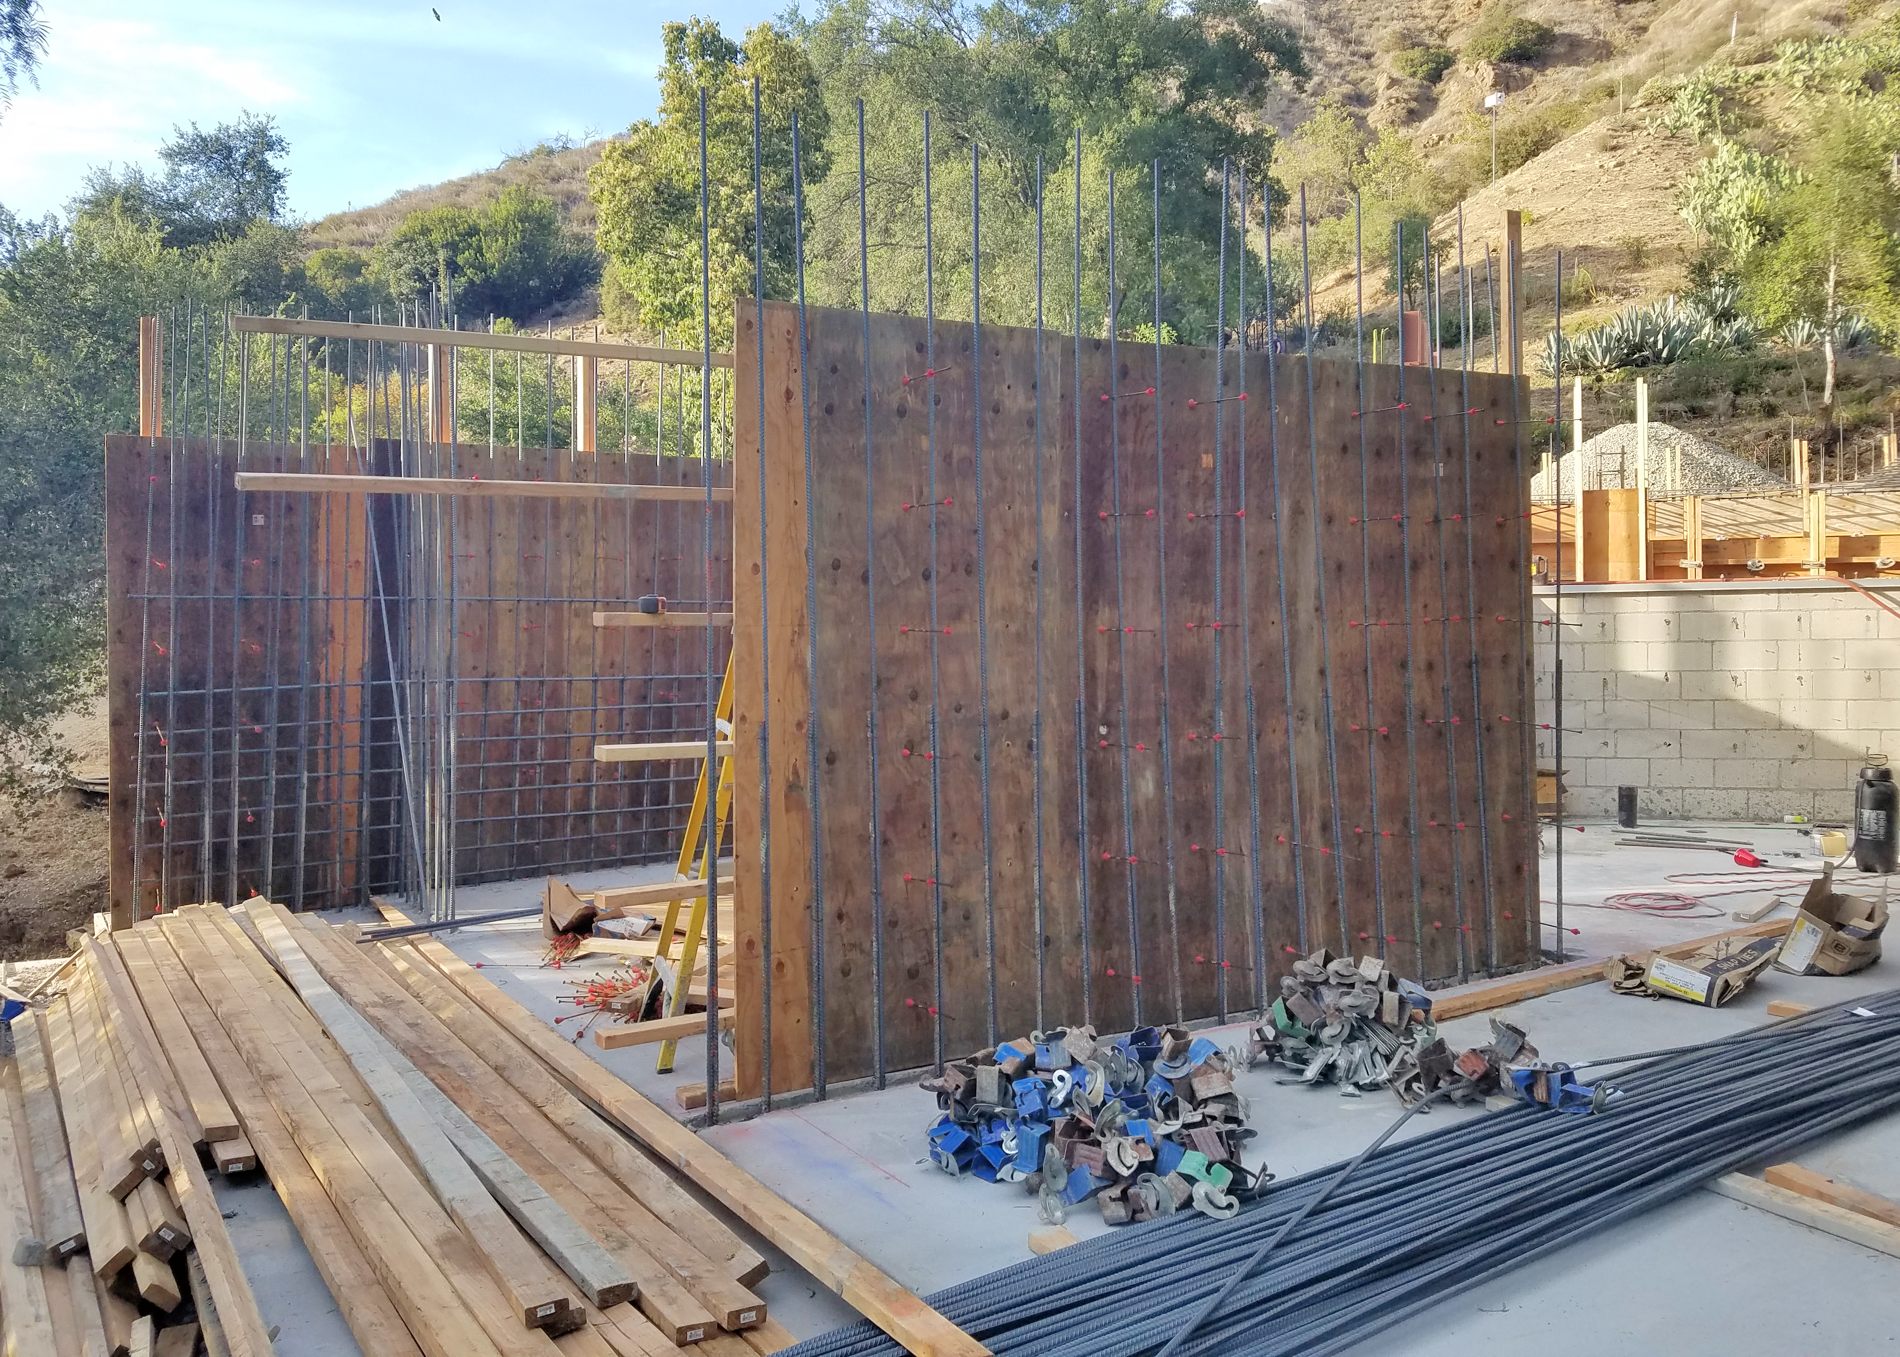
Today, they almost finished the framing for the walls supporting the deck and holding in the rainwater bag. You may be able to see some L-shaped rebar pieces extending horizontally into the interior space at the top of the forms. These will eventually be connected into the fabric of rebar that will give strength to the slab for the deck. The top surface of the deck will be the same height as the floor of the house and the top of the green roof that will be on top of the apartment above the garage.