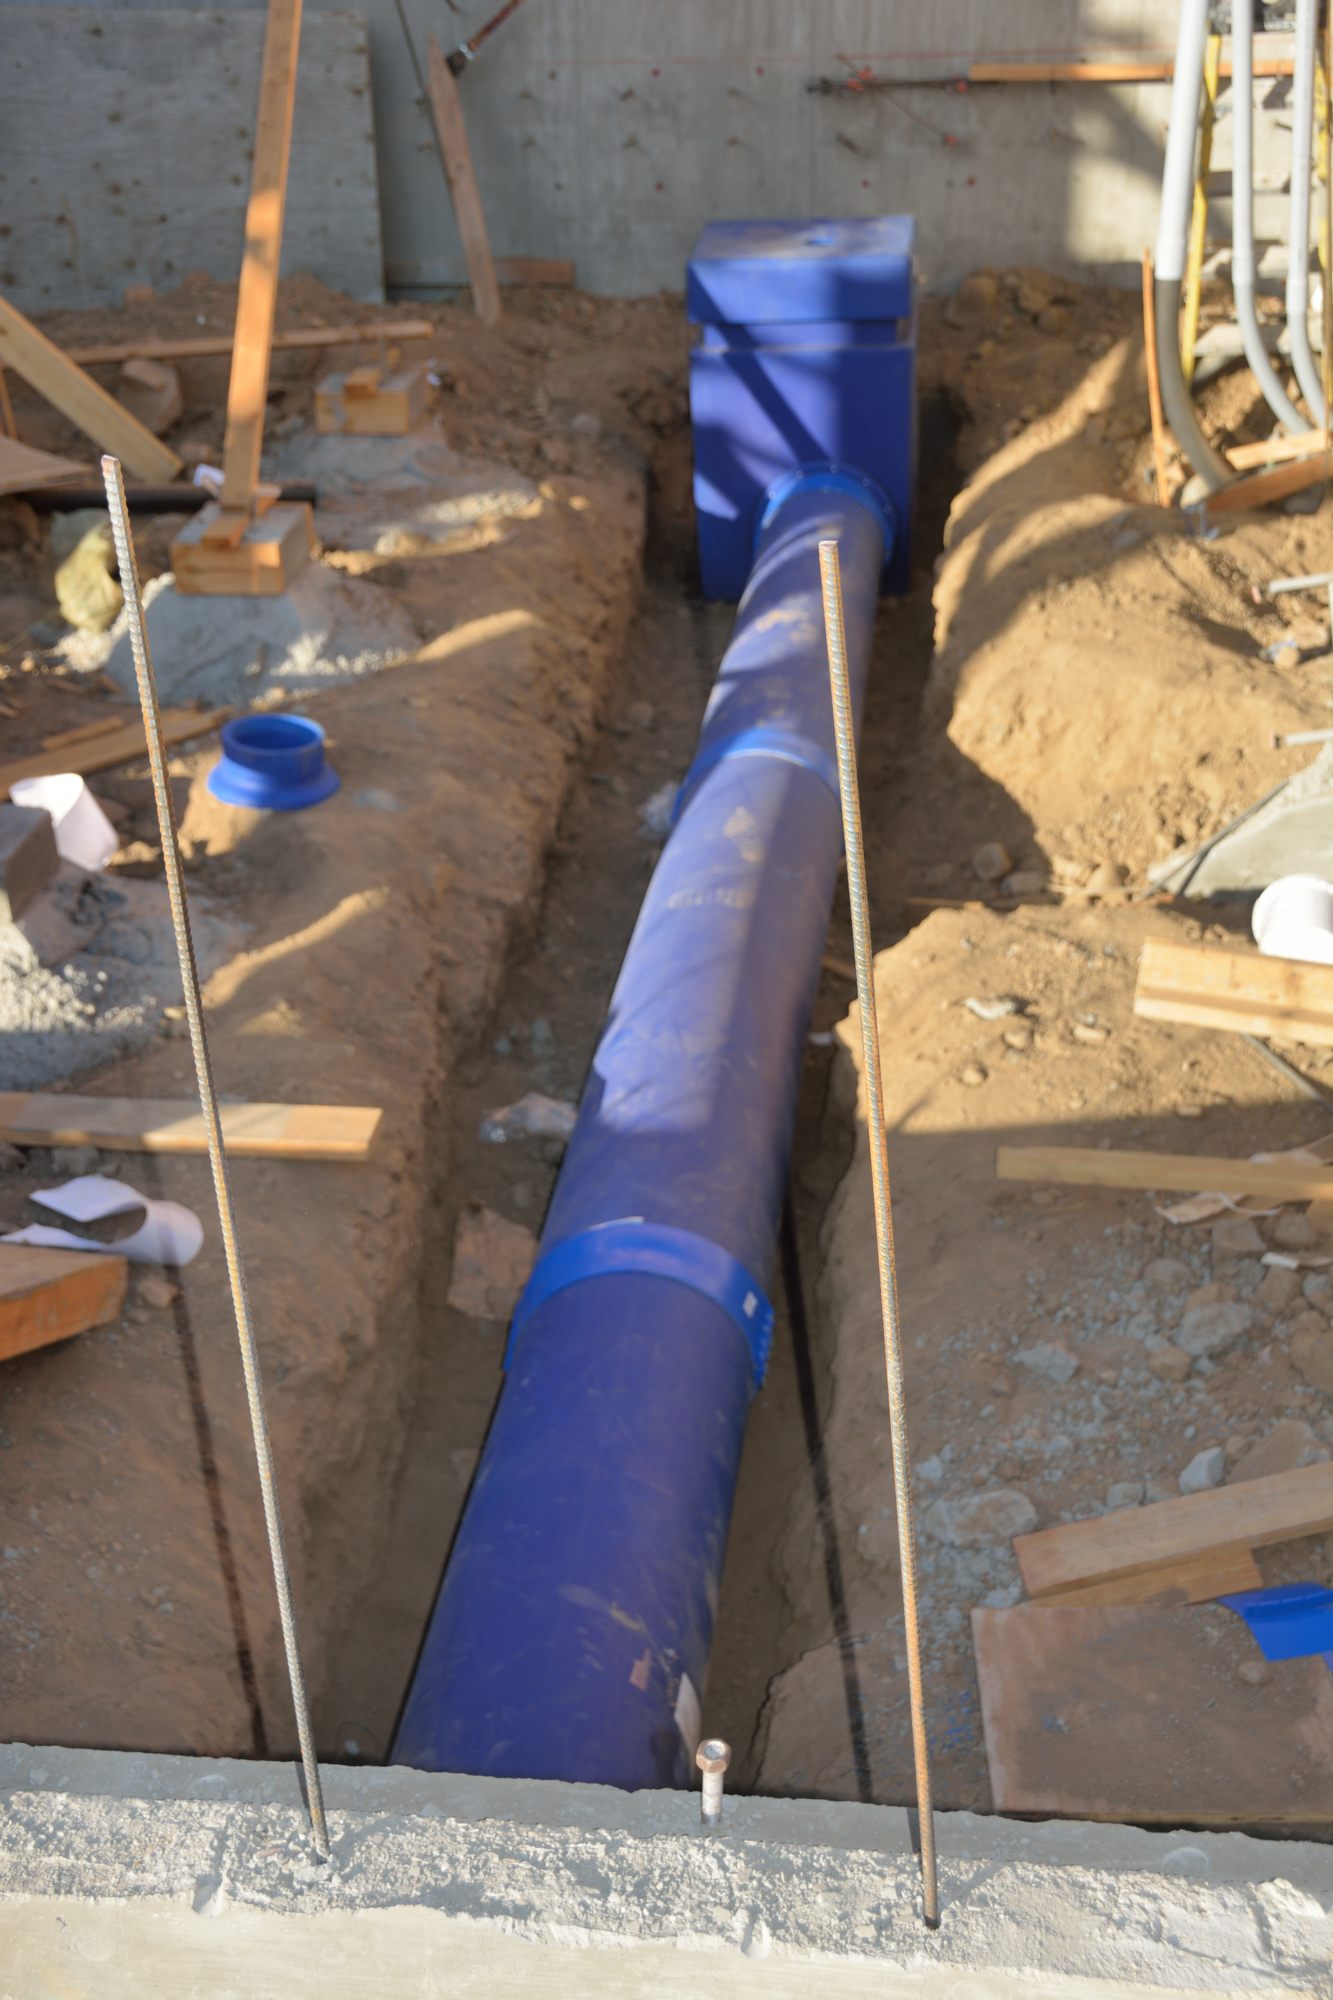
Since our last post they reworked the blue duct some and have installed the connectors for the floor vents that will be in the great room. Picture 1 shows one of the four of these assemblies. The box on the top of this assembly will extend higher than the floor and, I believe will eventually be removed.
Picture 1 – Connection from the blue duct to what will eventually be a register in the floor of the great room.
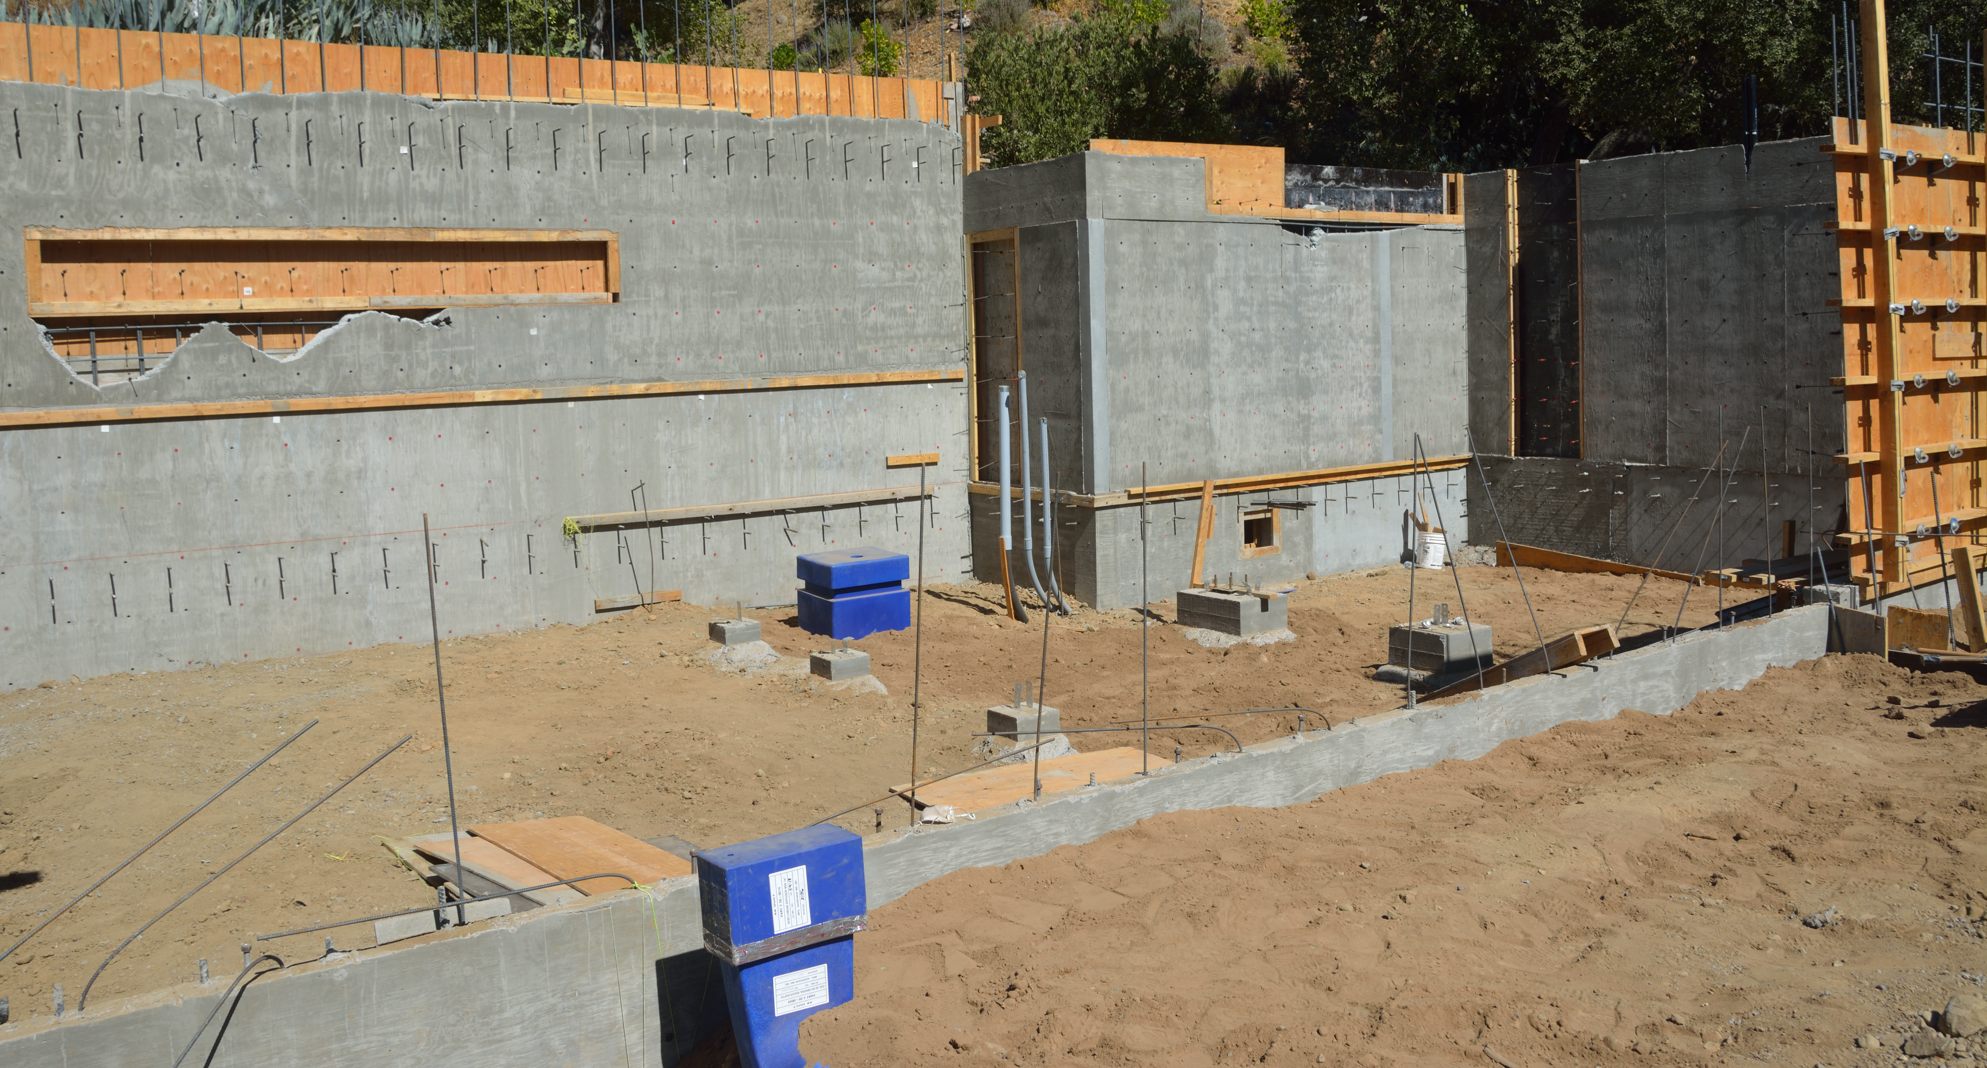
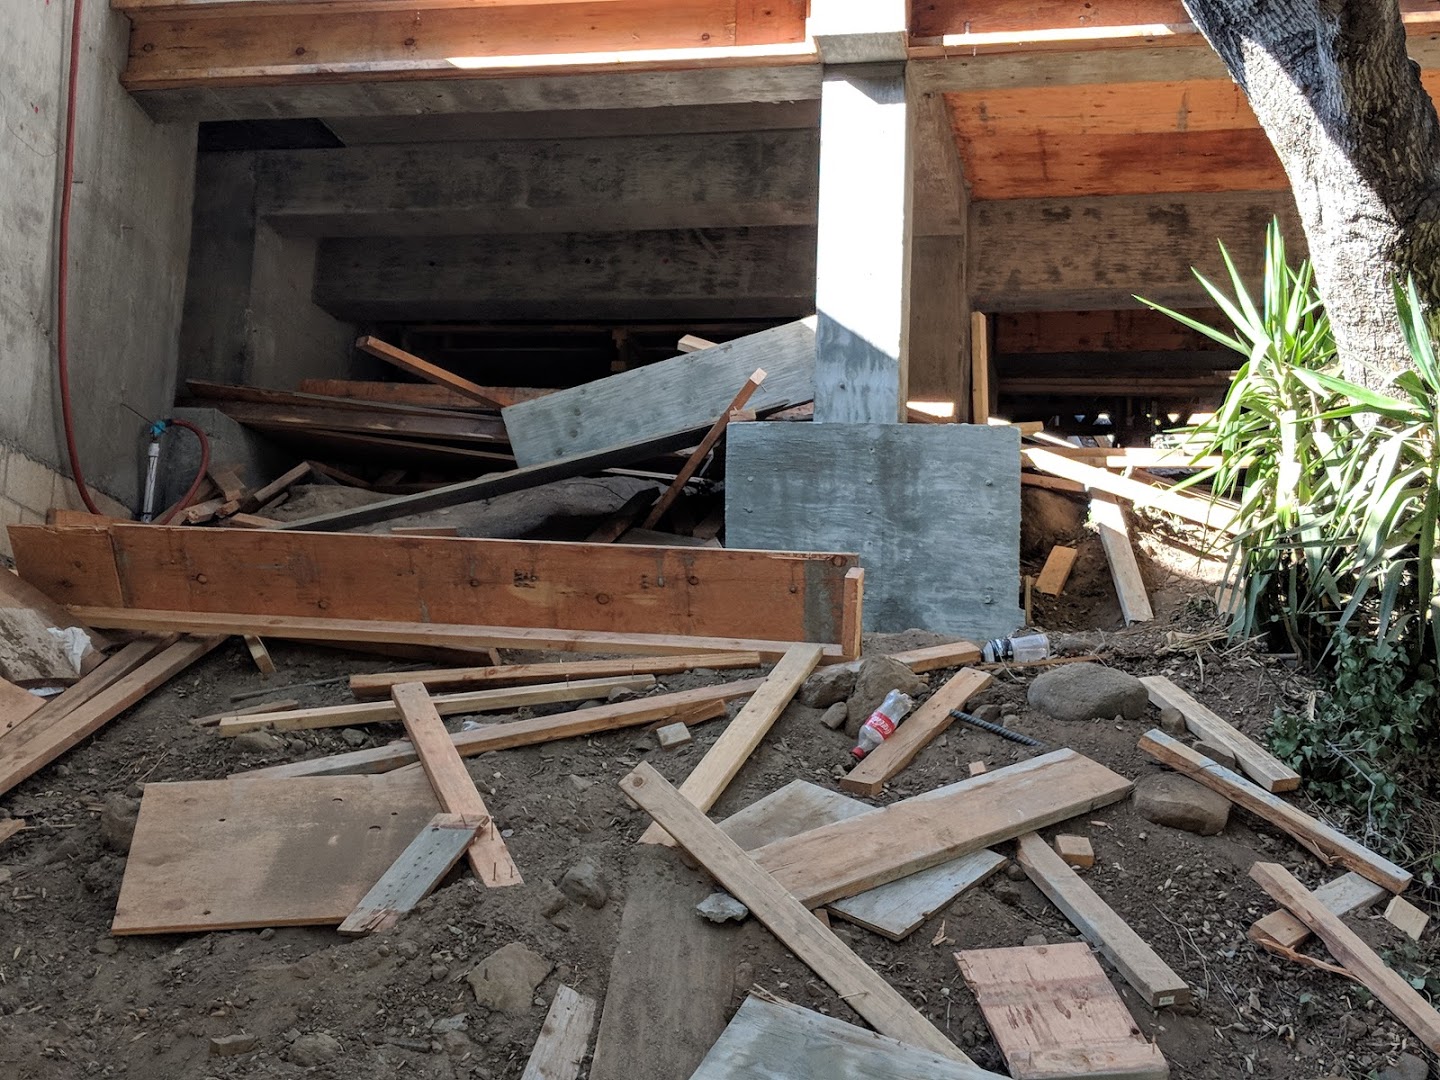
As Picture 2 shows, today they backfillled and compacted the around the outside on the foundation walls and the blue duct trenches in the crawl space and the slab. To do this, they had to first remove the forms from the inside of the walls and bracing supporting them.
In the entry for August 31st, the day that they were pouring these walls, I worried about whether they had been able to get the concrete into the parts of the walls under the blocking for the windows. On the left, you can see that for the long window in the laundry room this was definitely a problem. Harder to see is the area on the right, below the blocking for the high window that will be in our bedroom, where there was hardly any problem at all. Although these gaps are unfortunate, they do not pose serious structural problems, since they are below the window openings. The guys will, however, have to patch these places with concrete by hand.
Picture 2 – This shows part of the area that was backfilled in the crawl space area and under the slab.
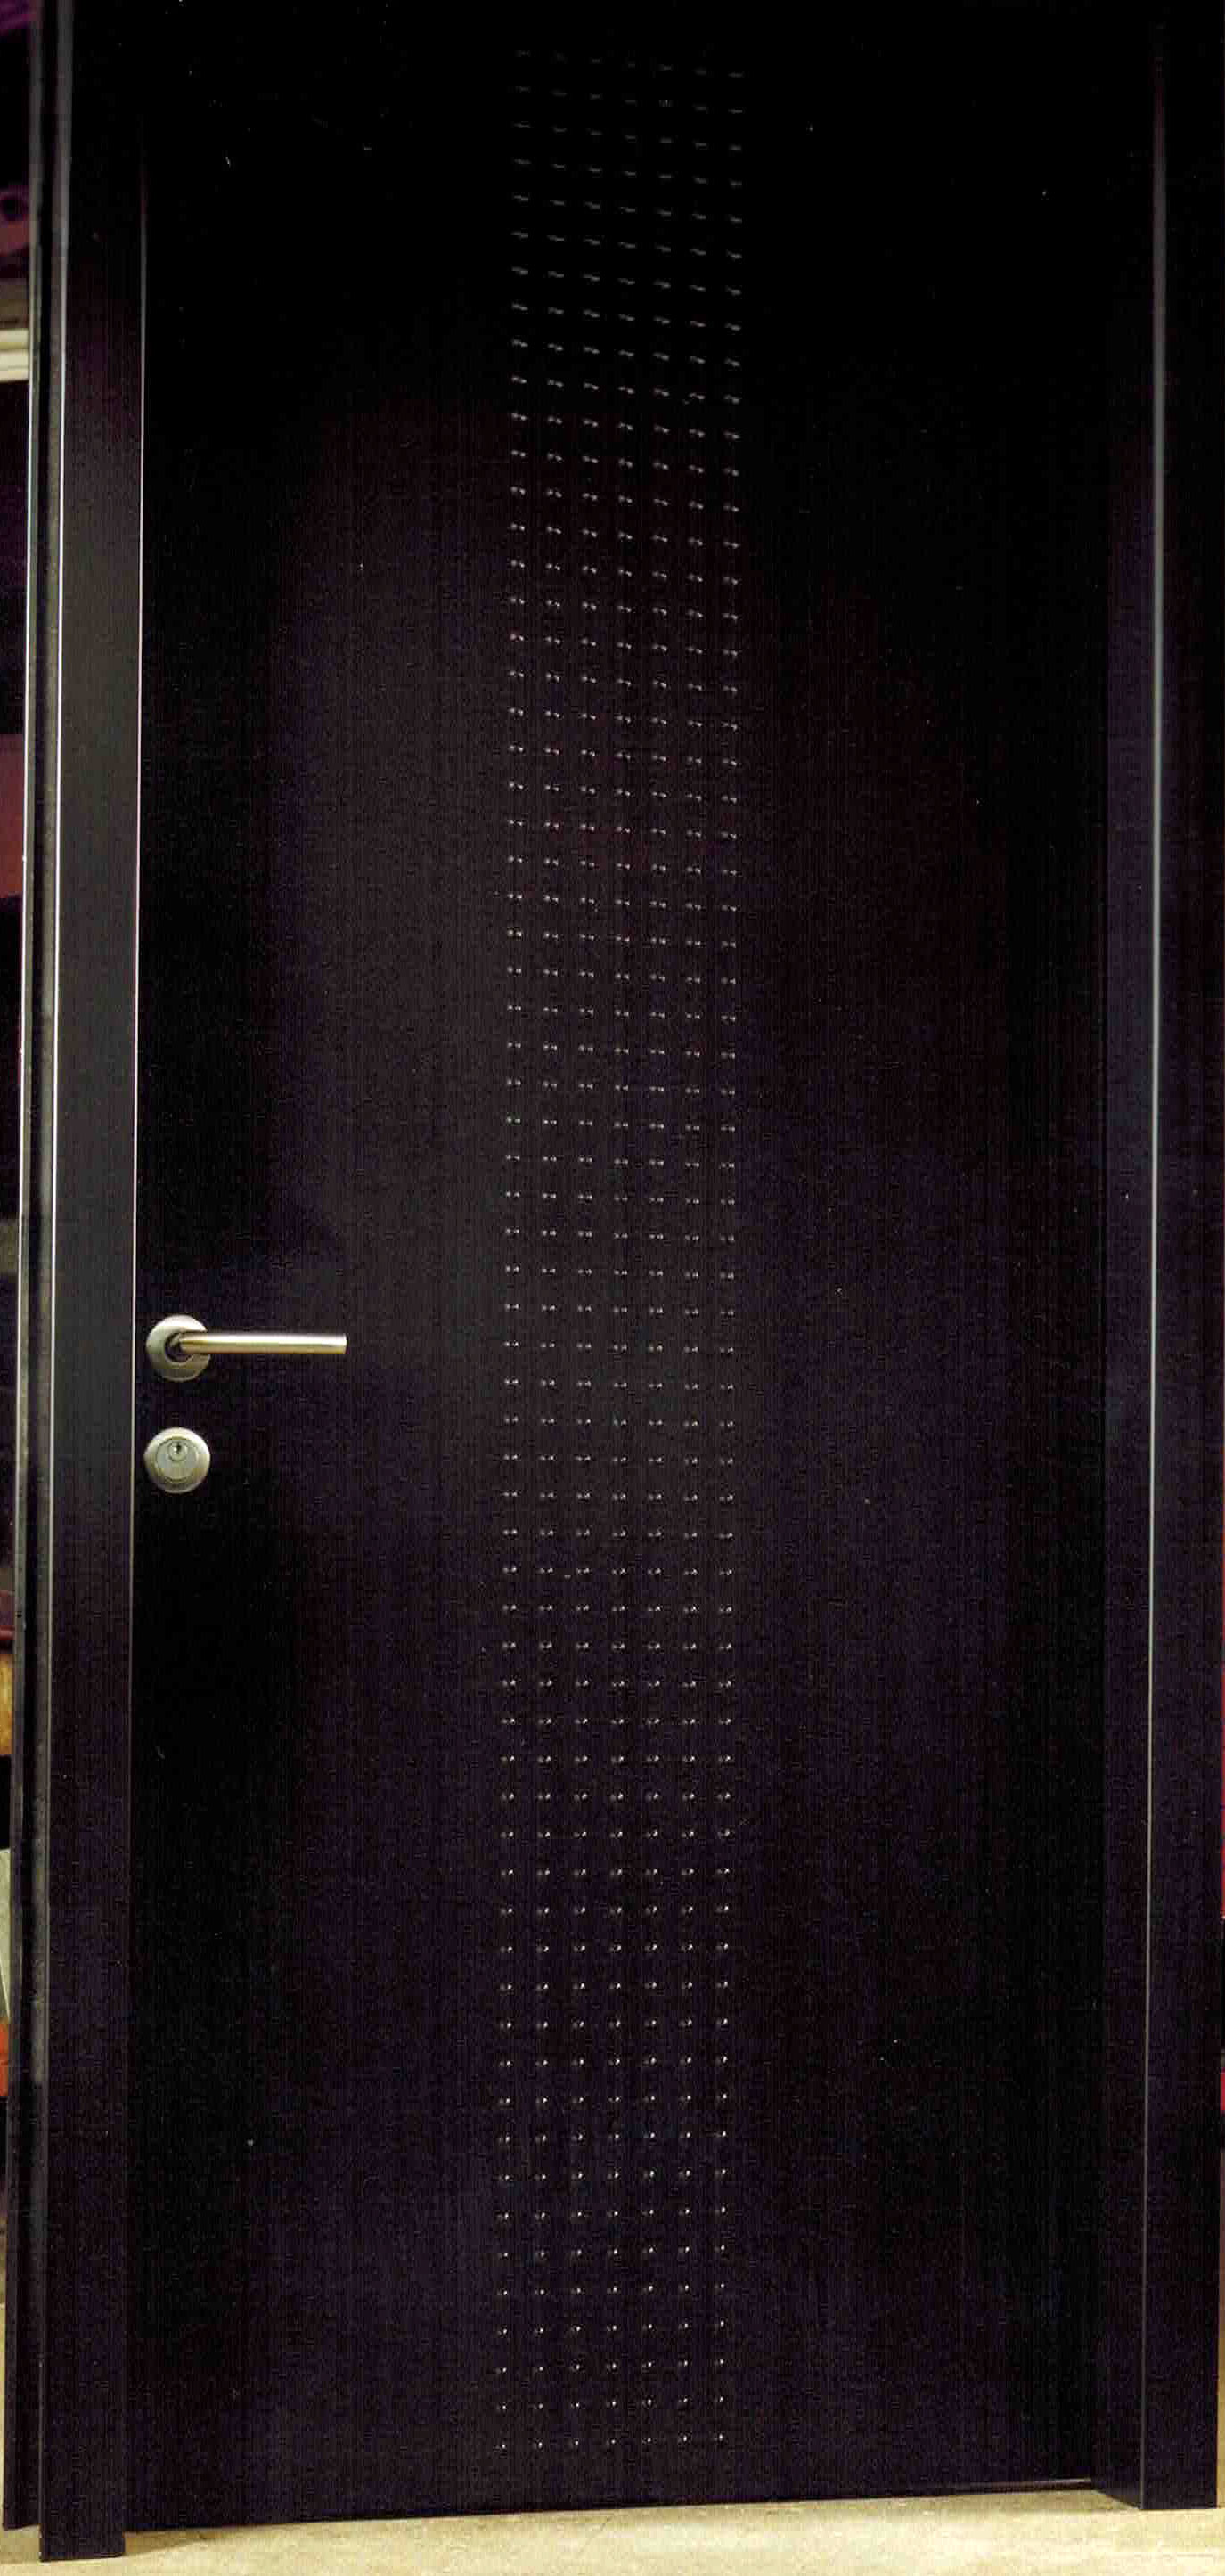
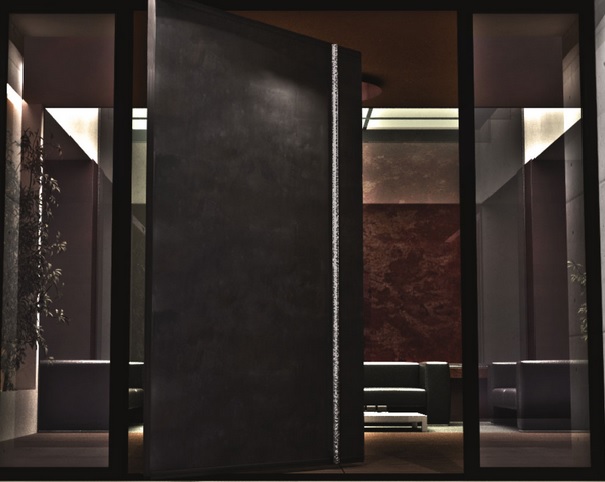
Last Friday, we went with the contractor to look at sliding doors and windows from a different manufacturer than that originally specified in the plans. We like these windows, which are arguably of better quality than the originals — the contractor is getting a good deal by combining our order with that of another house he is building. One issue, however, is that, although this manufacturer can supply the other doors we need, they do not sell the solid steel door that we want for the front door. The dealer who will be supplying the windows suggested another company called Neoporte. We liked one of their doors shown in Picture 3. Our architect is suggesting the door in Picture 4. Anyone want to comment?
They finished putting in the blue duct today. Oddly, although there were three extra lengths of duct, a number of big fittings, and other pieces, they found that they are short some adapters that they need to connect to the floor vents. Hopefully, these will come quicker than the first order, which took 6 weeks to arrive.
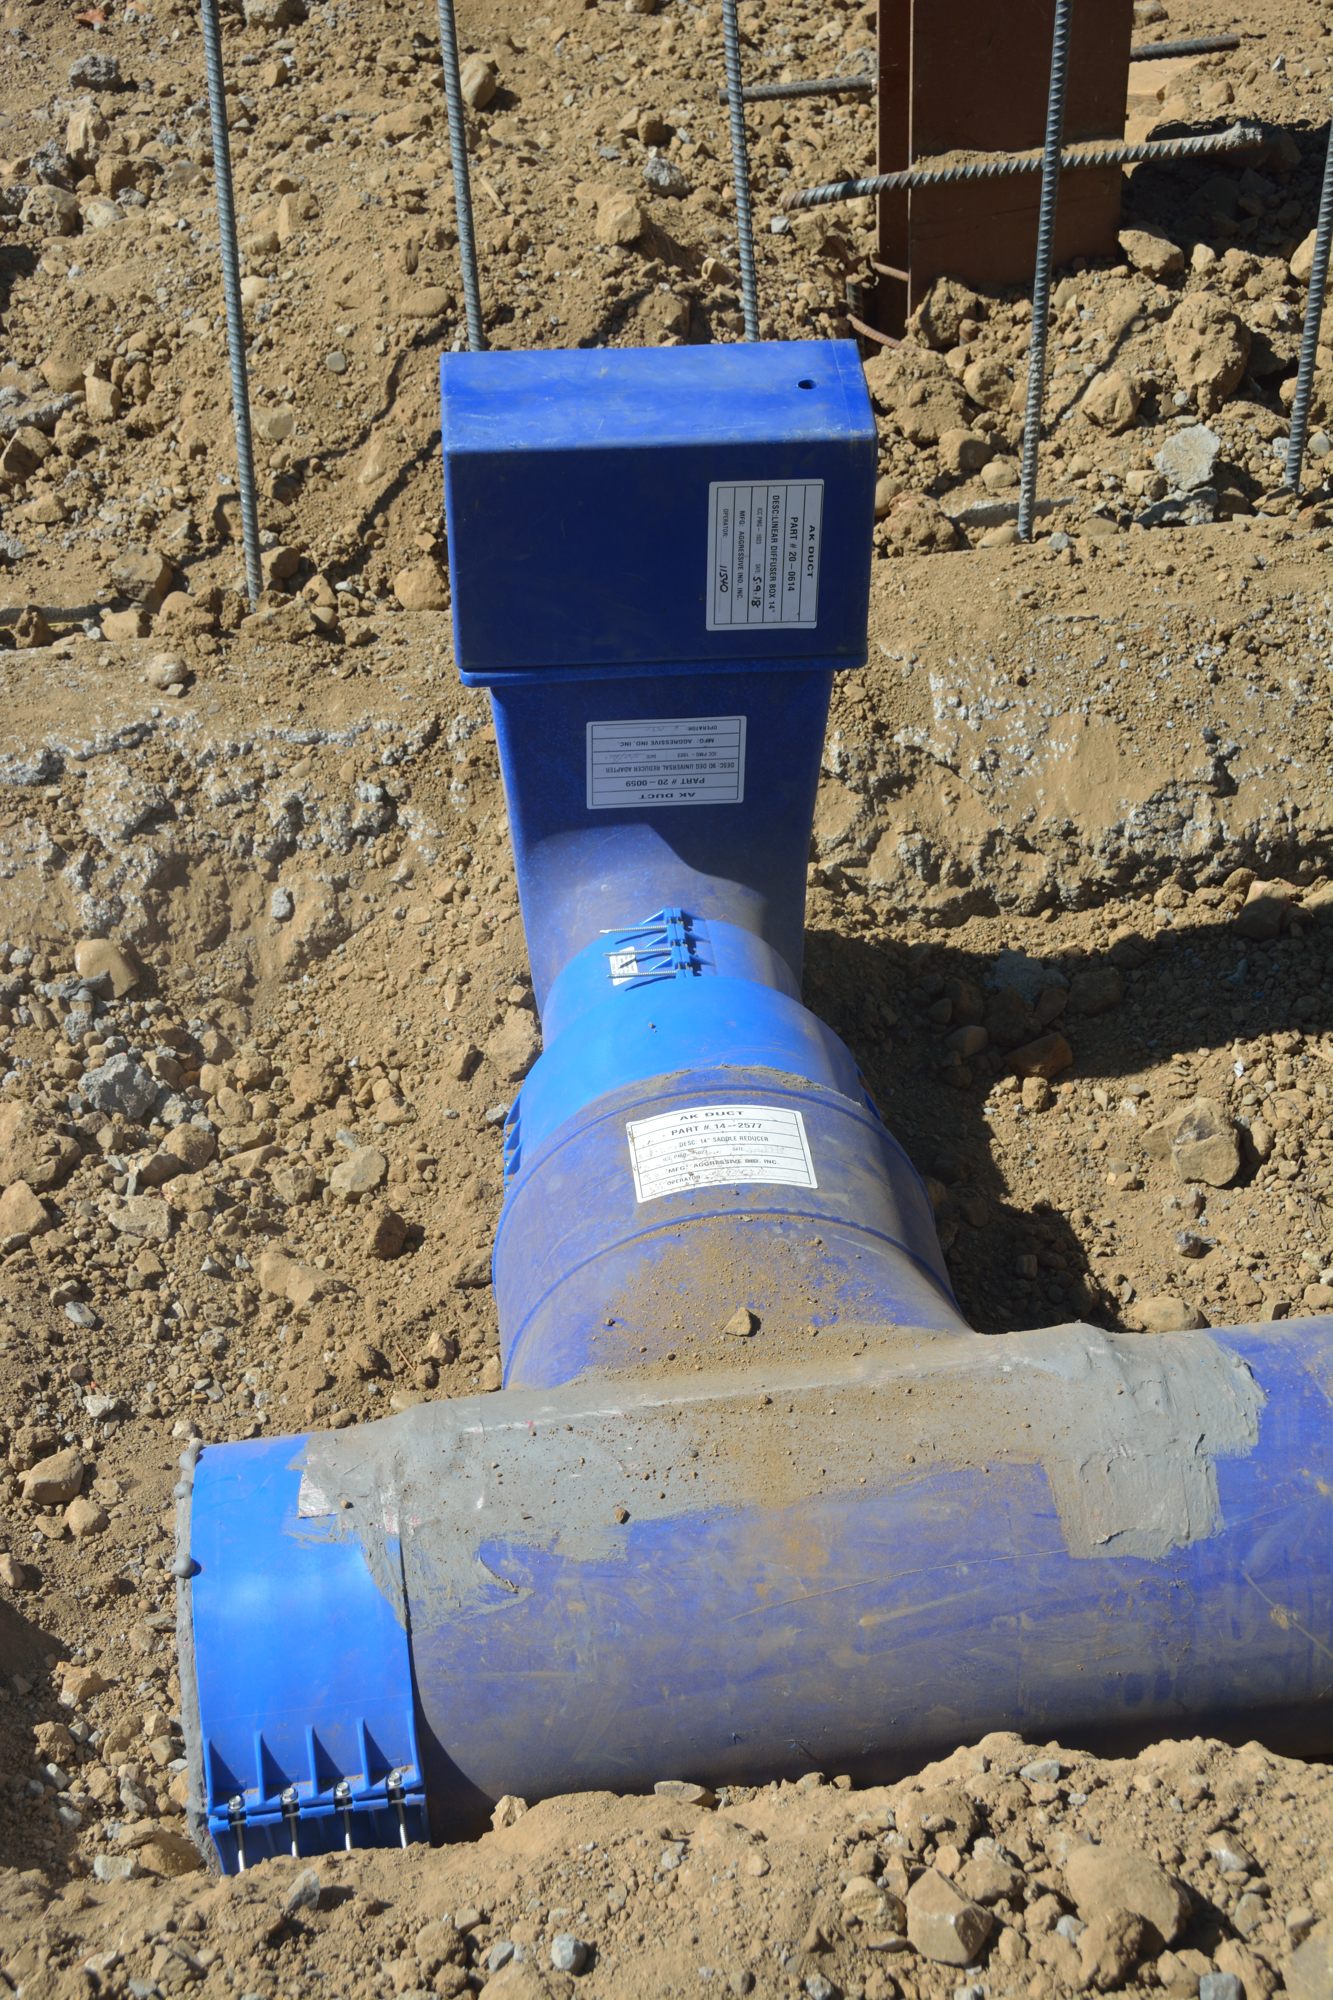
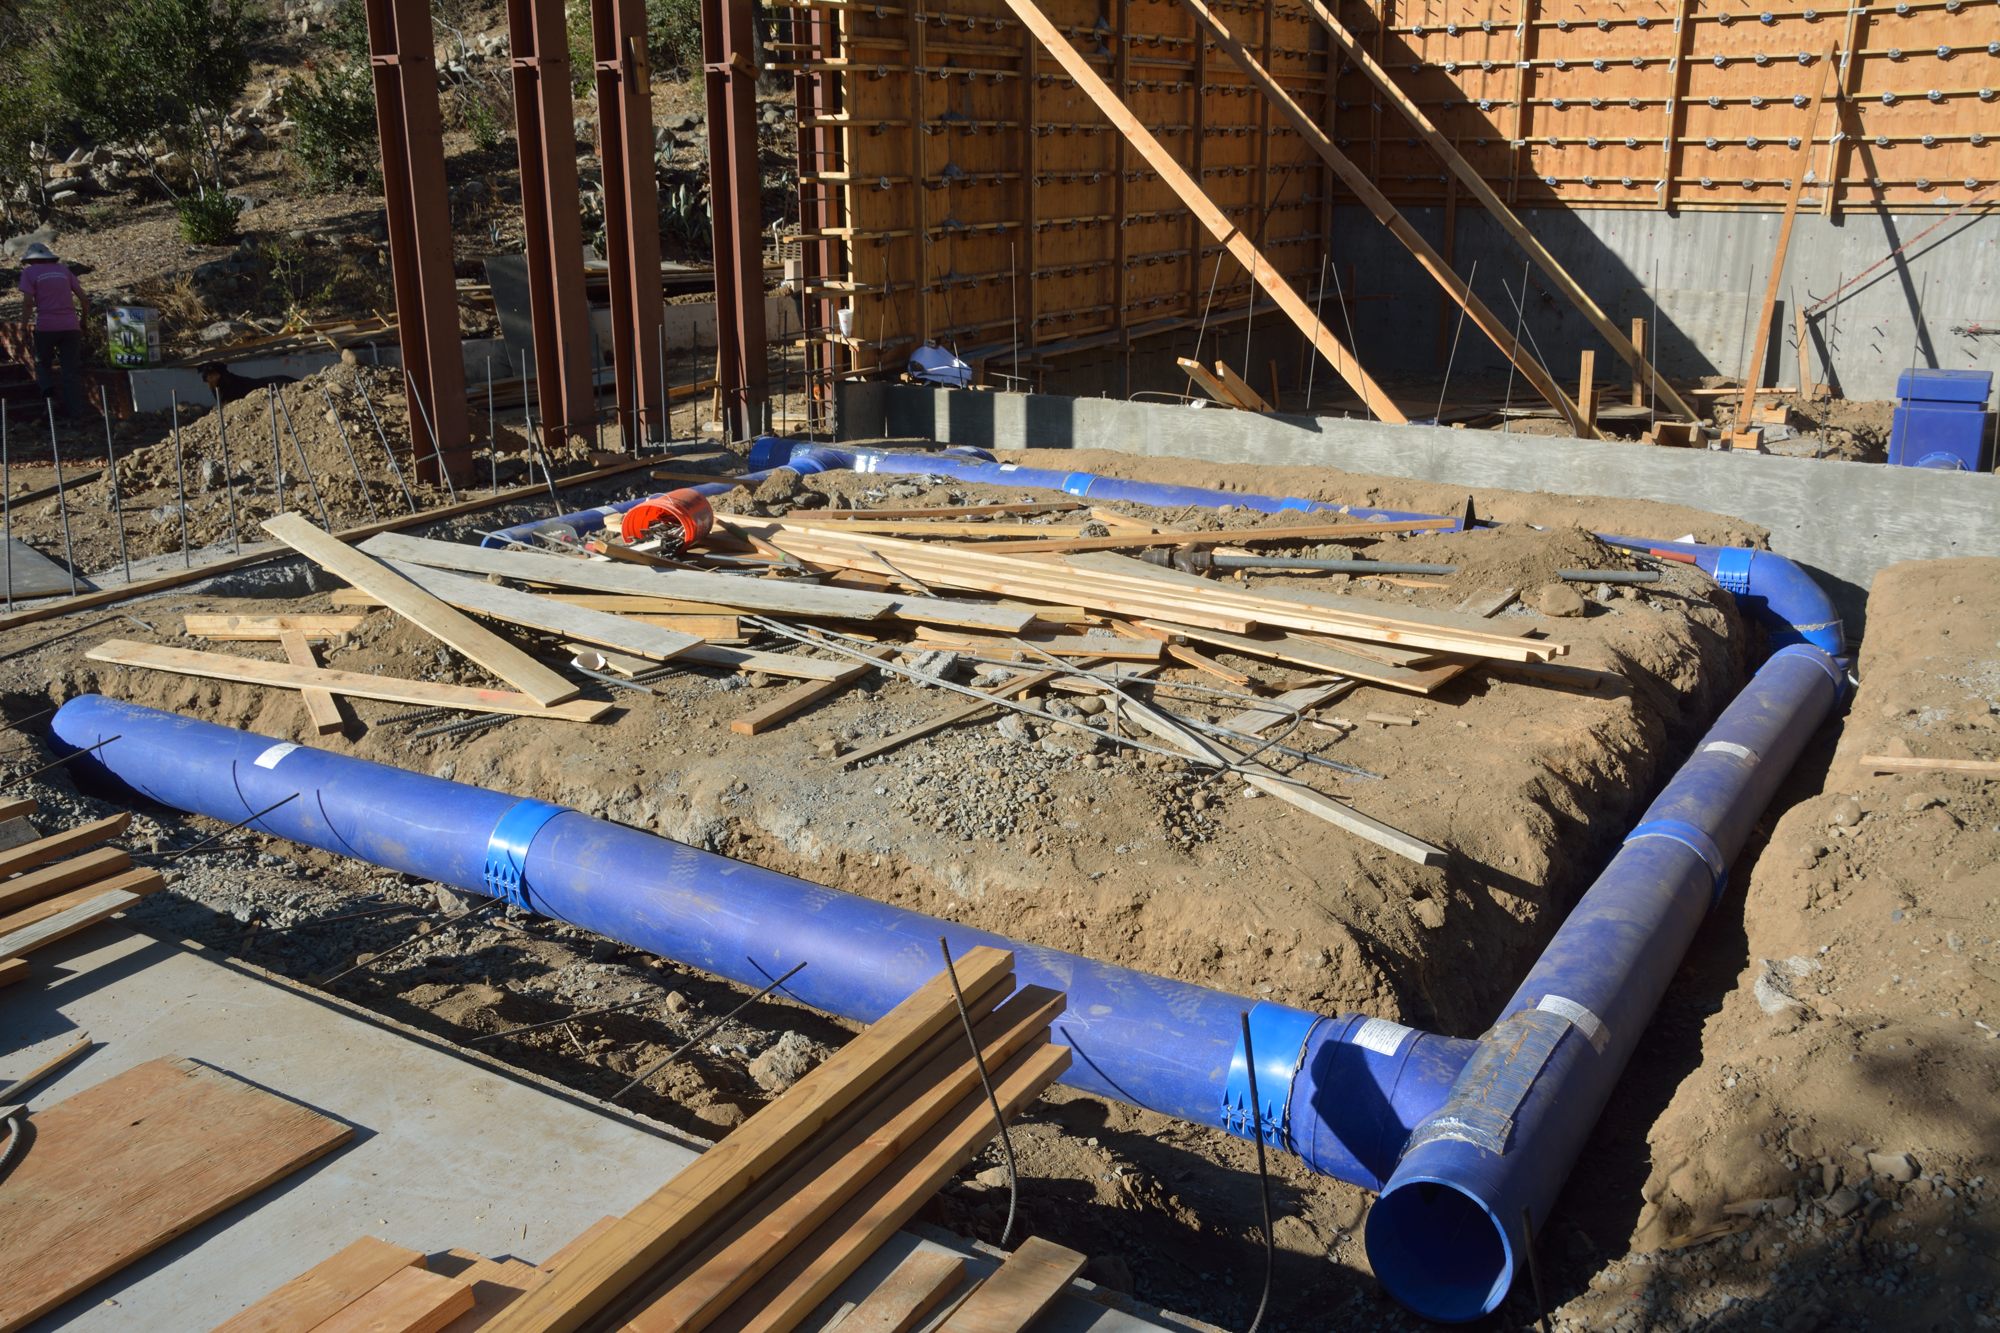
I see that this is the first post in September. That is because the contractor was away on a family vacation last week and so the work just started up again today with placement of the blue duct. Today they installed the trunk that will serve the great room (Picture 1). This runs from the plenum – the box shape at the top of the picture that will sit below one of the two air handlers – and continues under the stem wall dividing the back of the house from the great room.
Picture 1 – Trunk that will serve the great room.
Picture 2 shows how, after running under the stem wall, the trunk splits. The lower, still unconnected, half will be a run that will serve two vents near the south wall of the great room. The upper half, which is shown in Picture 3, will serve vents in the north and west walls of the great room.
Picture 2 – The duct for the great room divides into runs going in two directions.Picture 3 – This run, which is still being assembled, will supply vents in the north and west walls of the great room.
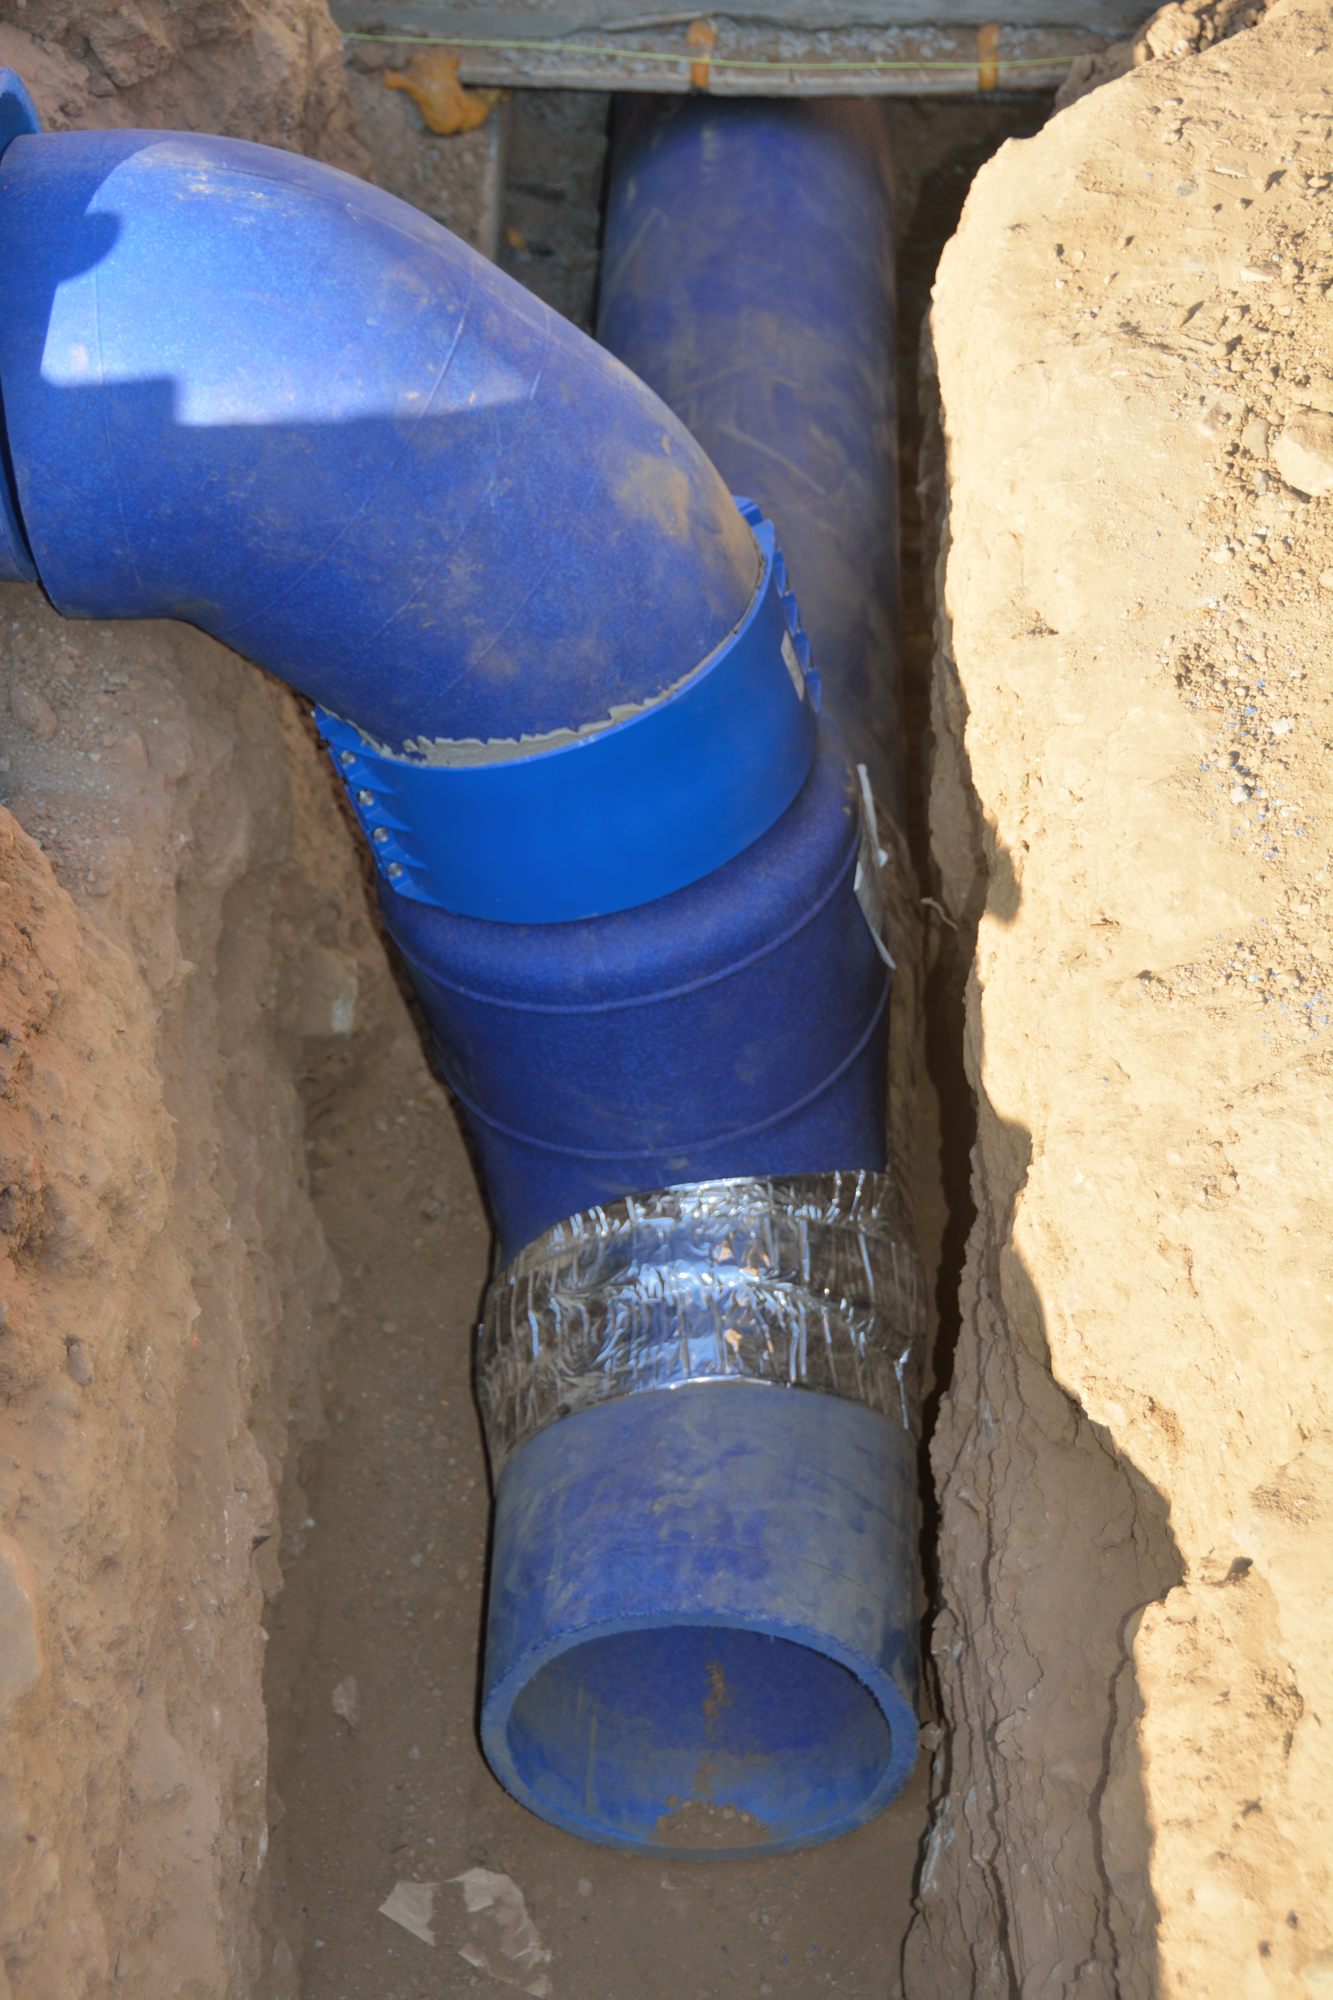
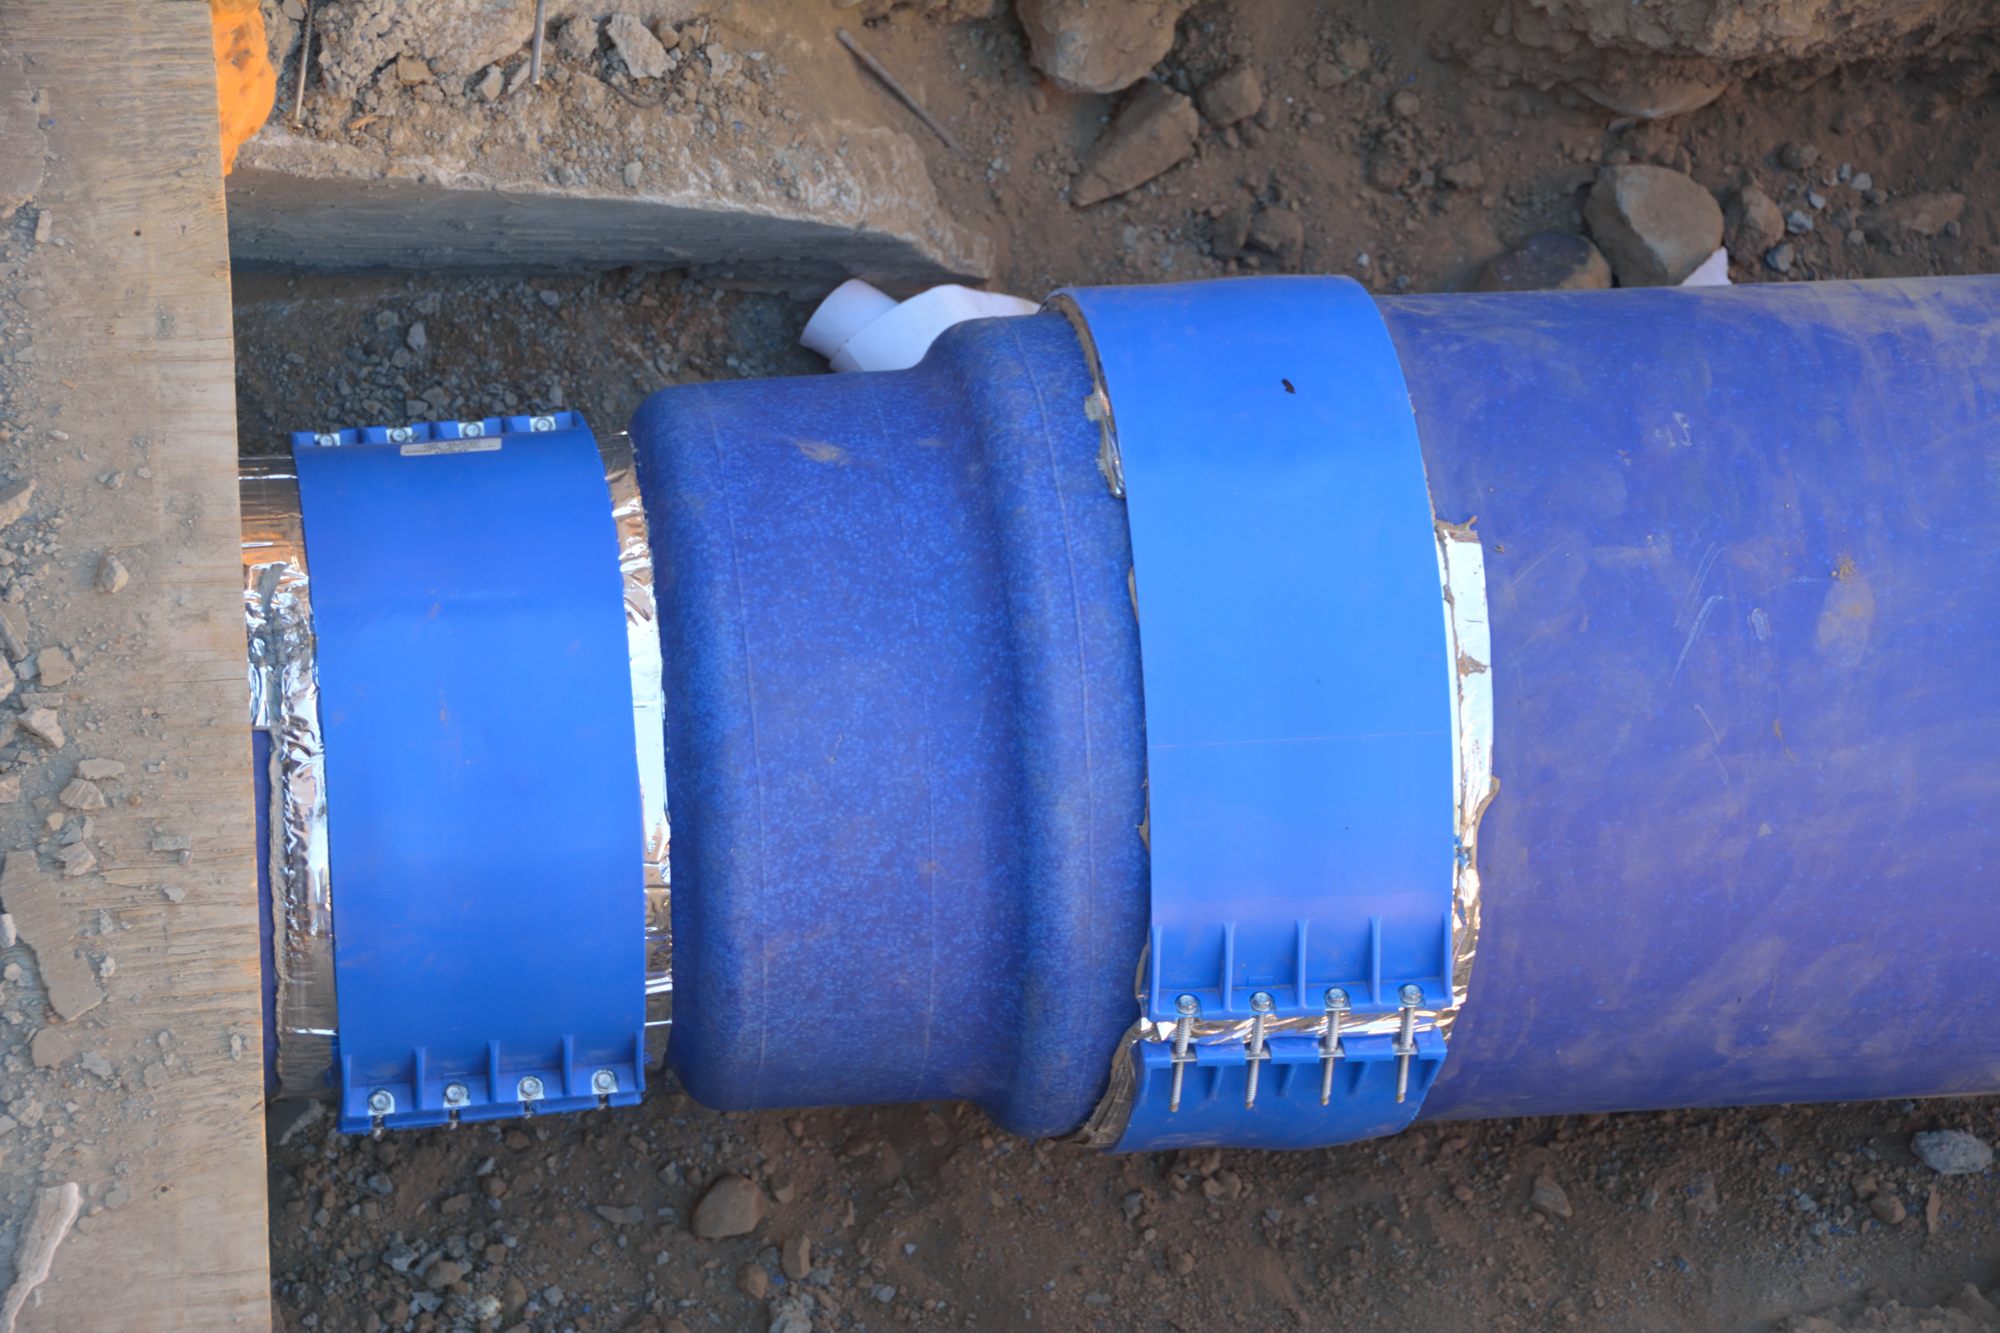
Picture 4 is a closeup of one of the joints where the size of the duct is reduced. One thing that makes blue duct work is that it is made of seamless, extruded material. But this makes the joints the weak links. In this photo, you can see that the connections are sealed by foil-faced material held in place by a special adhesive. The resulting joint is then reinforced and protected by the plastic sleeves that are tightened with a series of screws on the outside.
Tomorrow they hope to finish the ductwork so that it can be inspected on Thursday. Once it passes inspection, they will backfill the trenches with the ducts and also around the foundation. Then the rebar guys will come back to get the slab of the great room and the slab of the new part of the garage ready so that these can be poured next week.
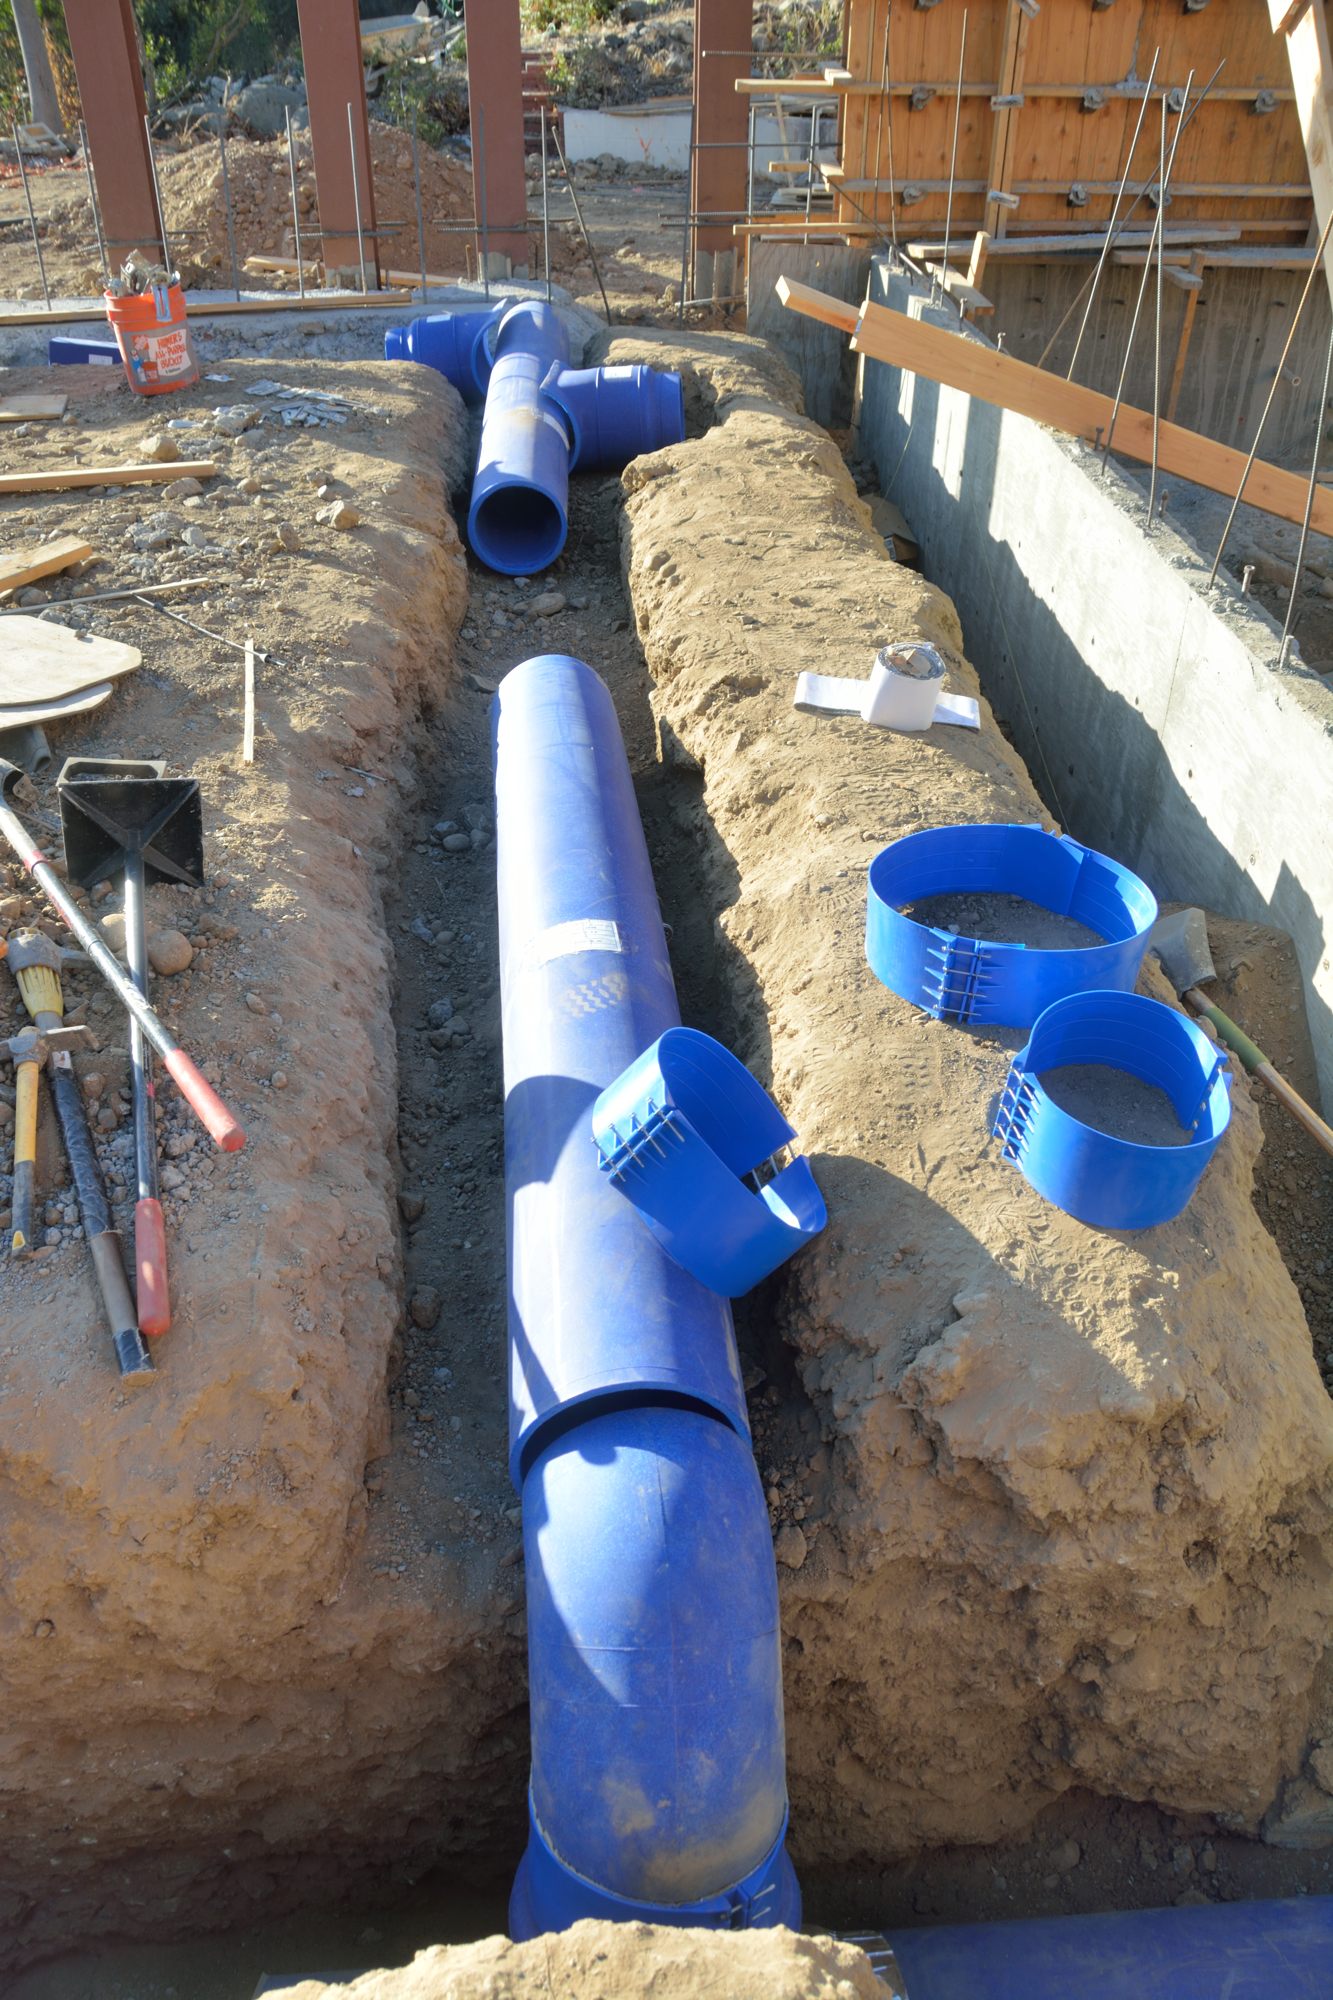
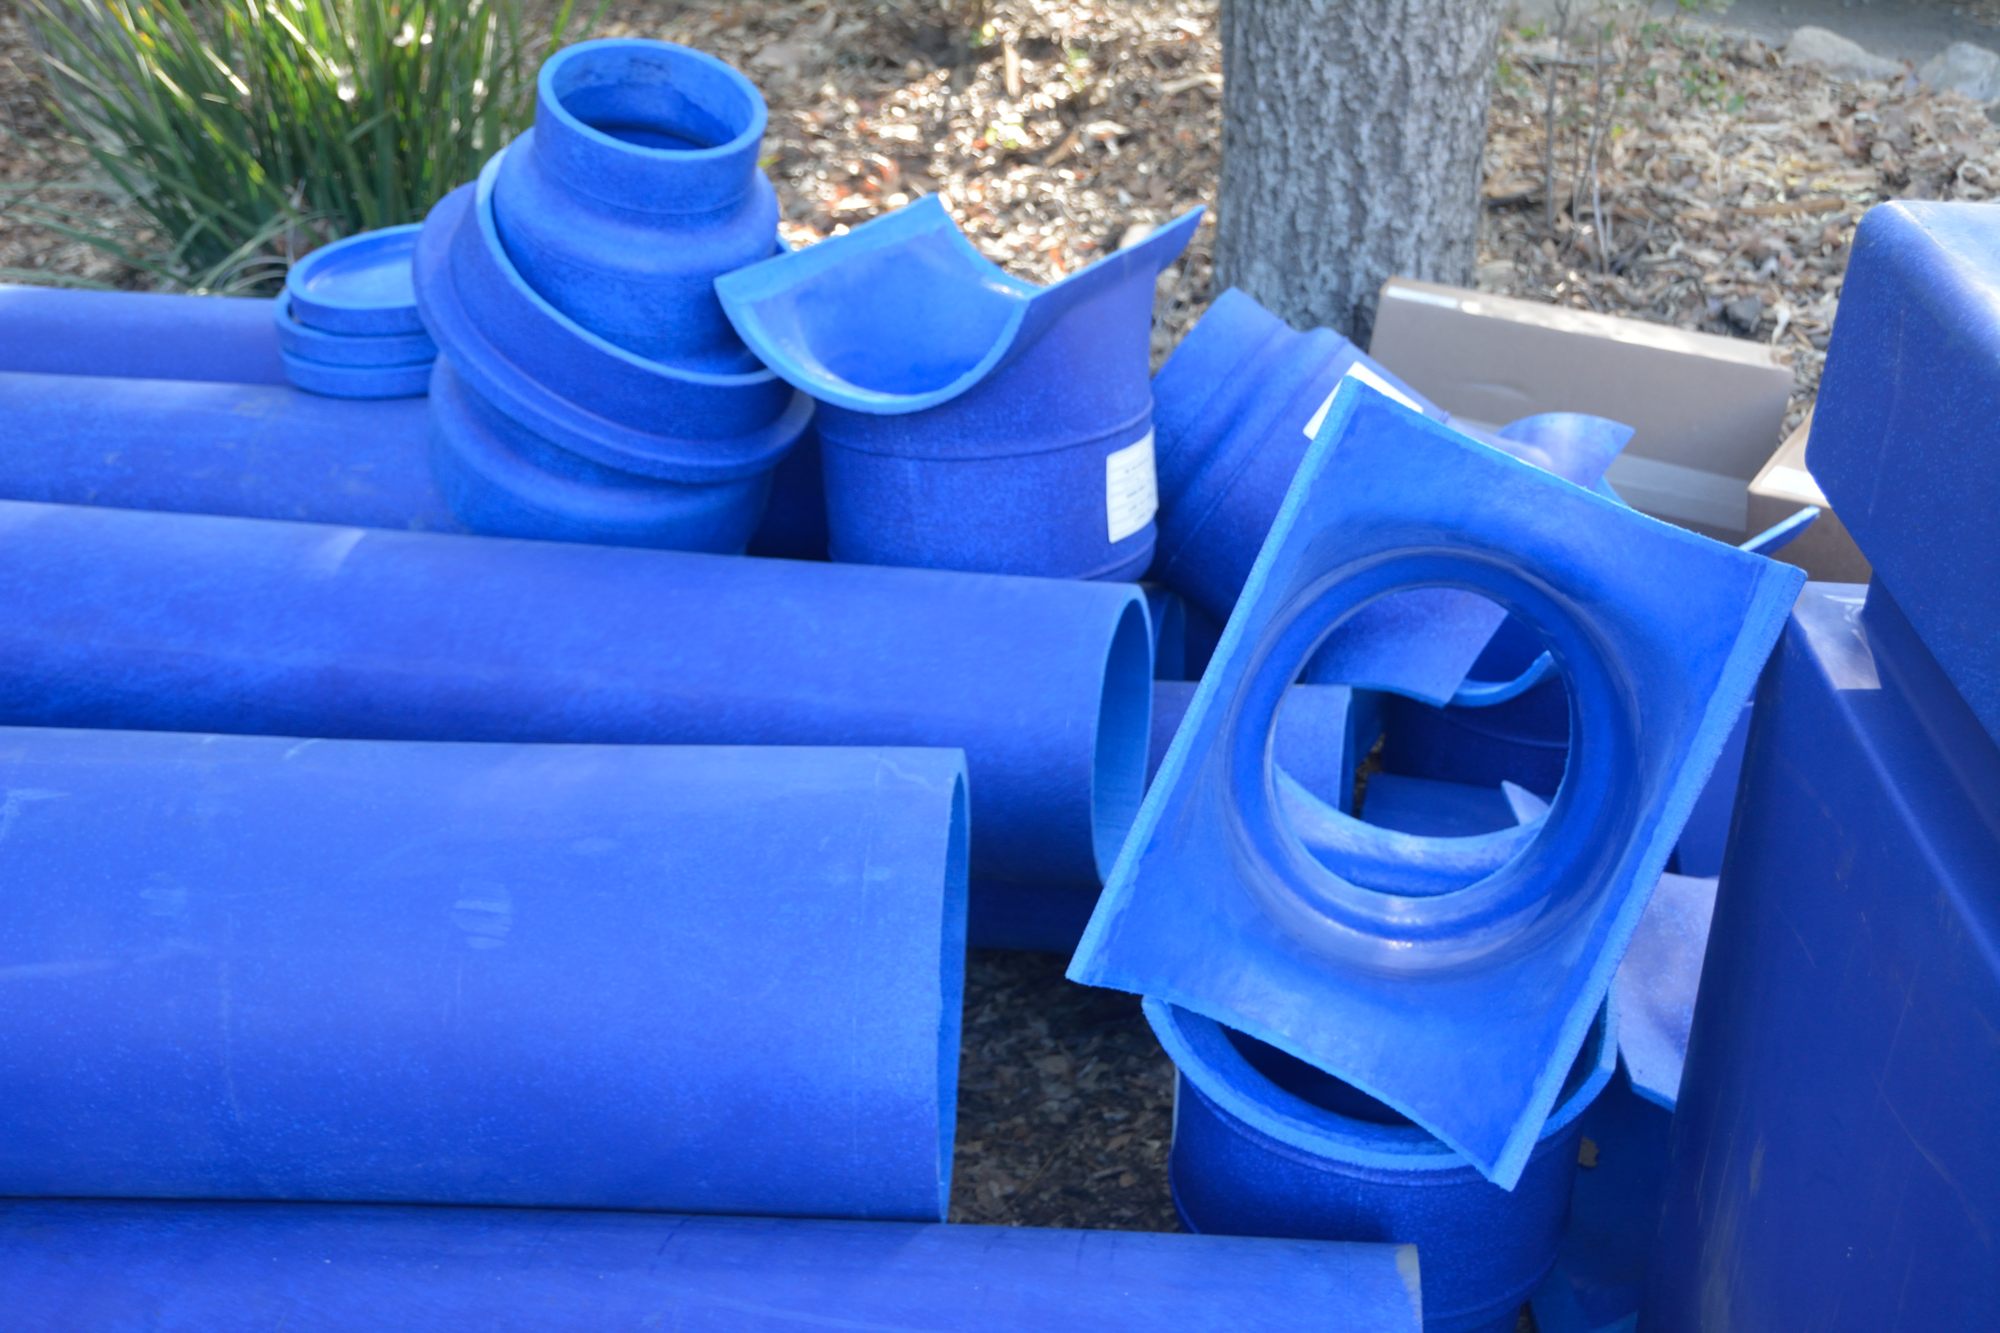
This was the day of the seventh (and possibly the penultimate) concrete pour. However, several other notable things happened today. The blue duct was delivered. As you can see in Picture 1, it lives up to its name! This is a special, extruded plastic duct, that can be buried or run under the slab without degrading or being affected by the pressure of the material on top of it .
Picture 1- Fittings and the ends of several lengths of blue duct.
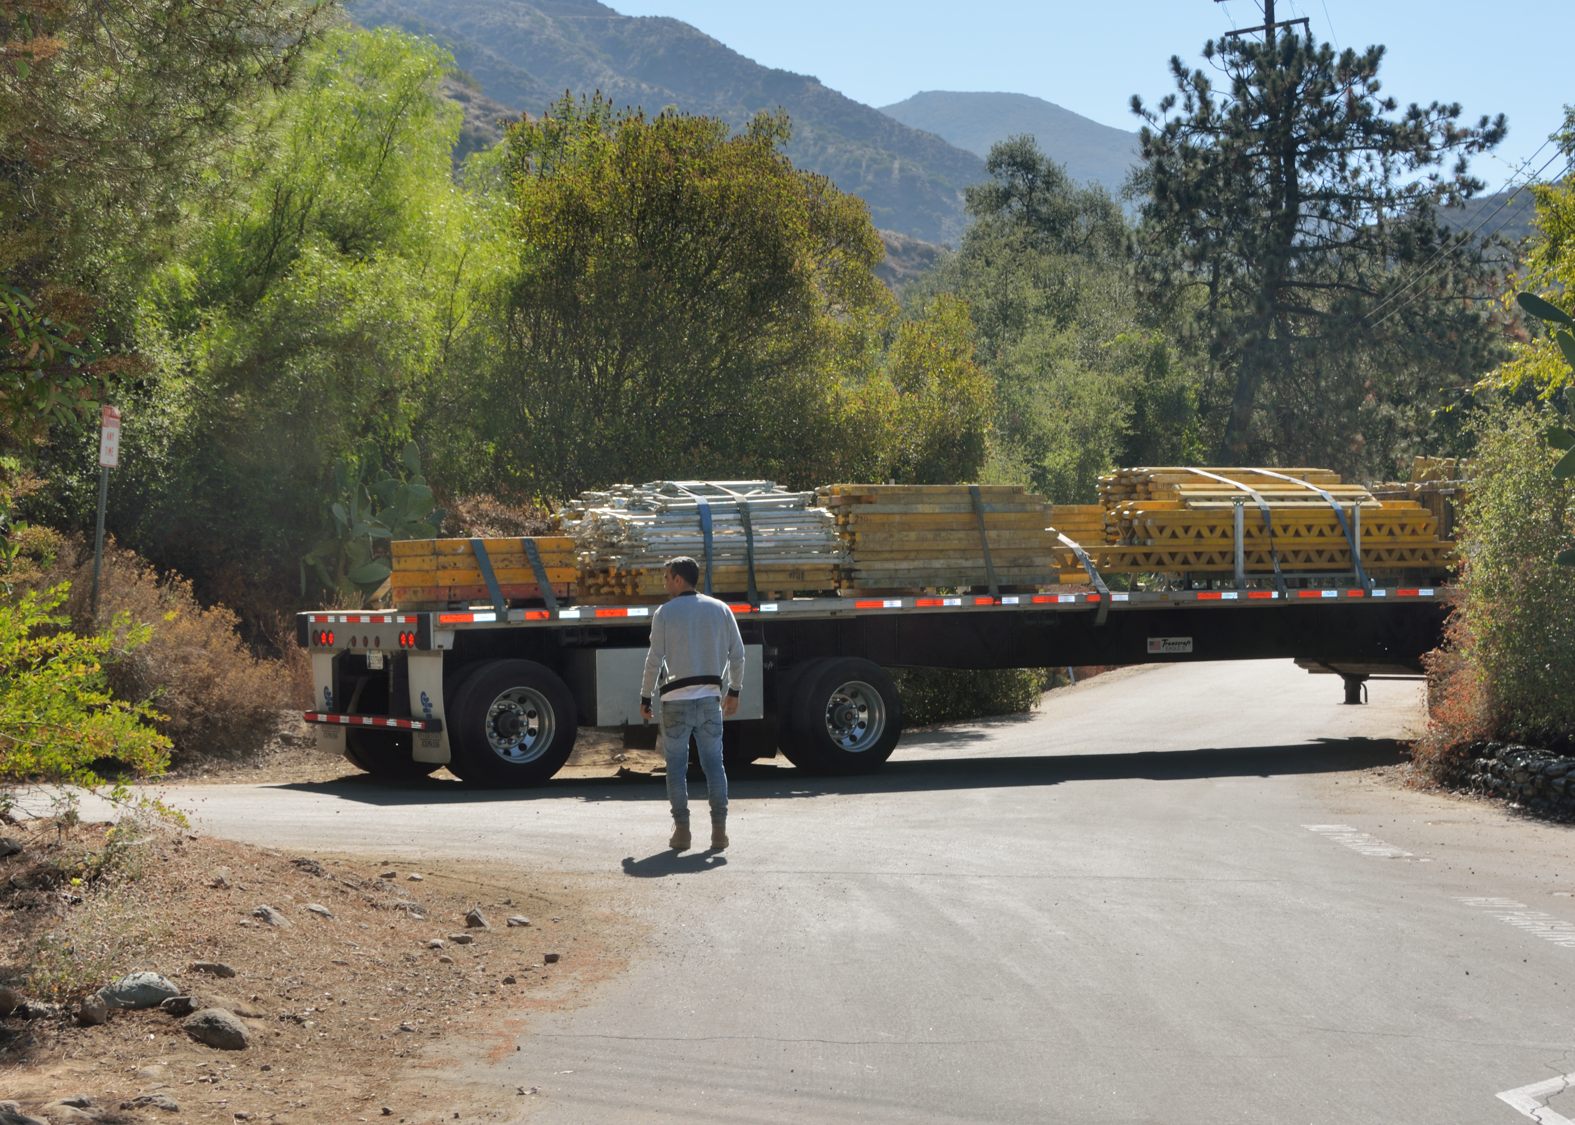
In addition, the scaffolding was all packed onto a long truck trailer (Picture 2). The amazing thing was watching this semi back down the road to the Tucker parking lot and then turn around (Picture 3).
Picture 2 – The scaffolding loaded onto trailer.Picture 3 – The semi trailer maneuvering to turn around as it left the canyon.
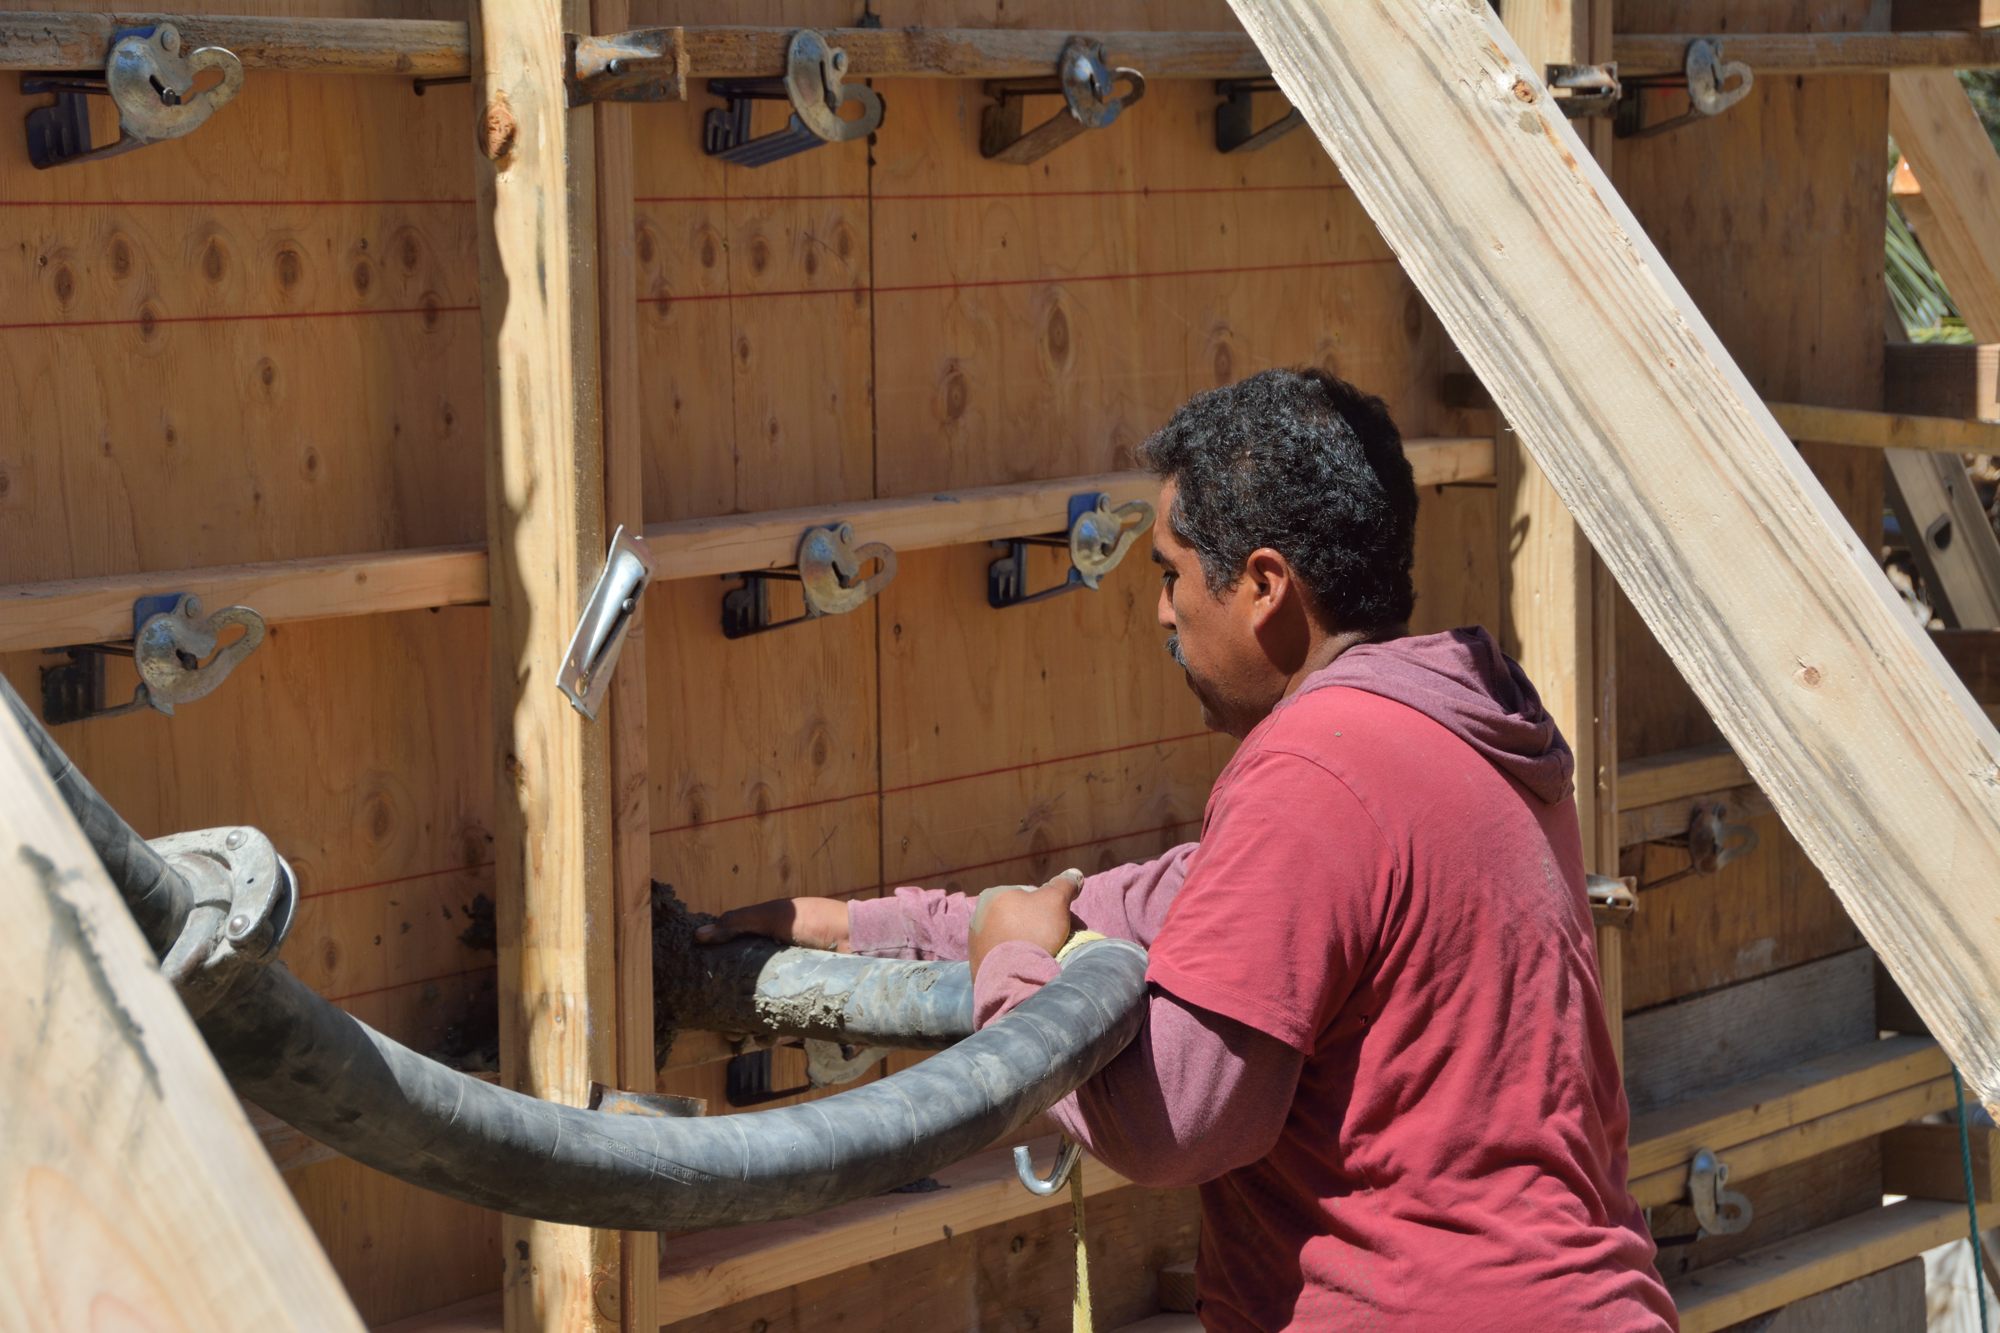
Much of the process of pouring the concrete was similar to that in previous pours (already we are so jaded!). In the last post, I discussed how the guys had to try to find all of the places the forms might leak before they started pouring. Picture 4 shows them working frantically to block an opening that they had missed.
Picture 4 – Frantically trying to plug a gap between the form and the stem wall below it by trying to screw on a piece of wood to cover the opening.
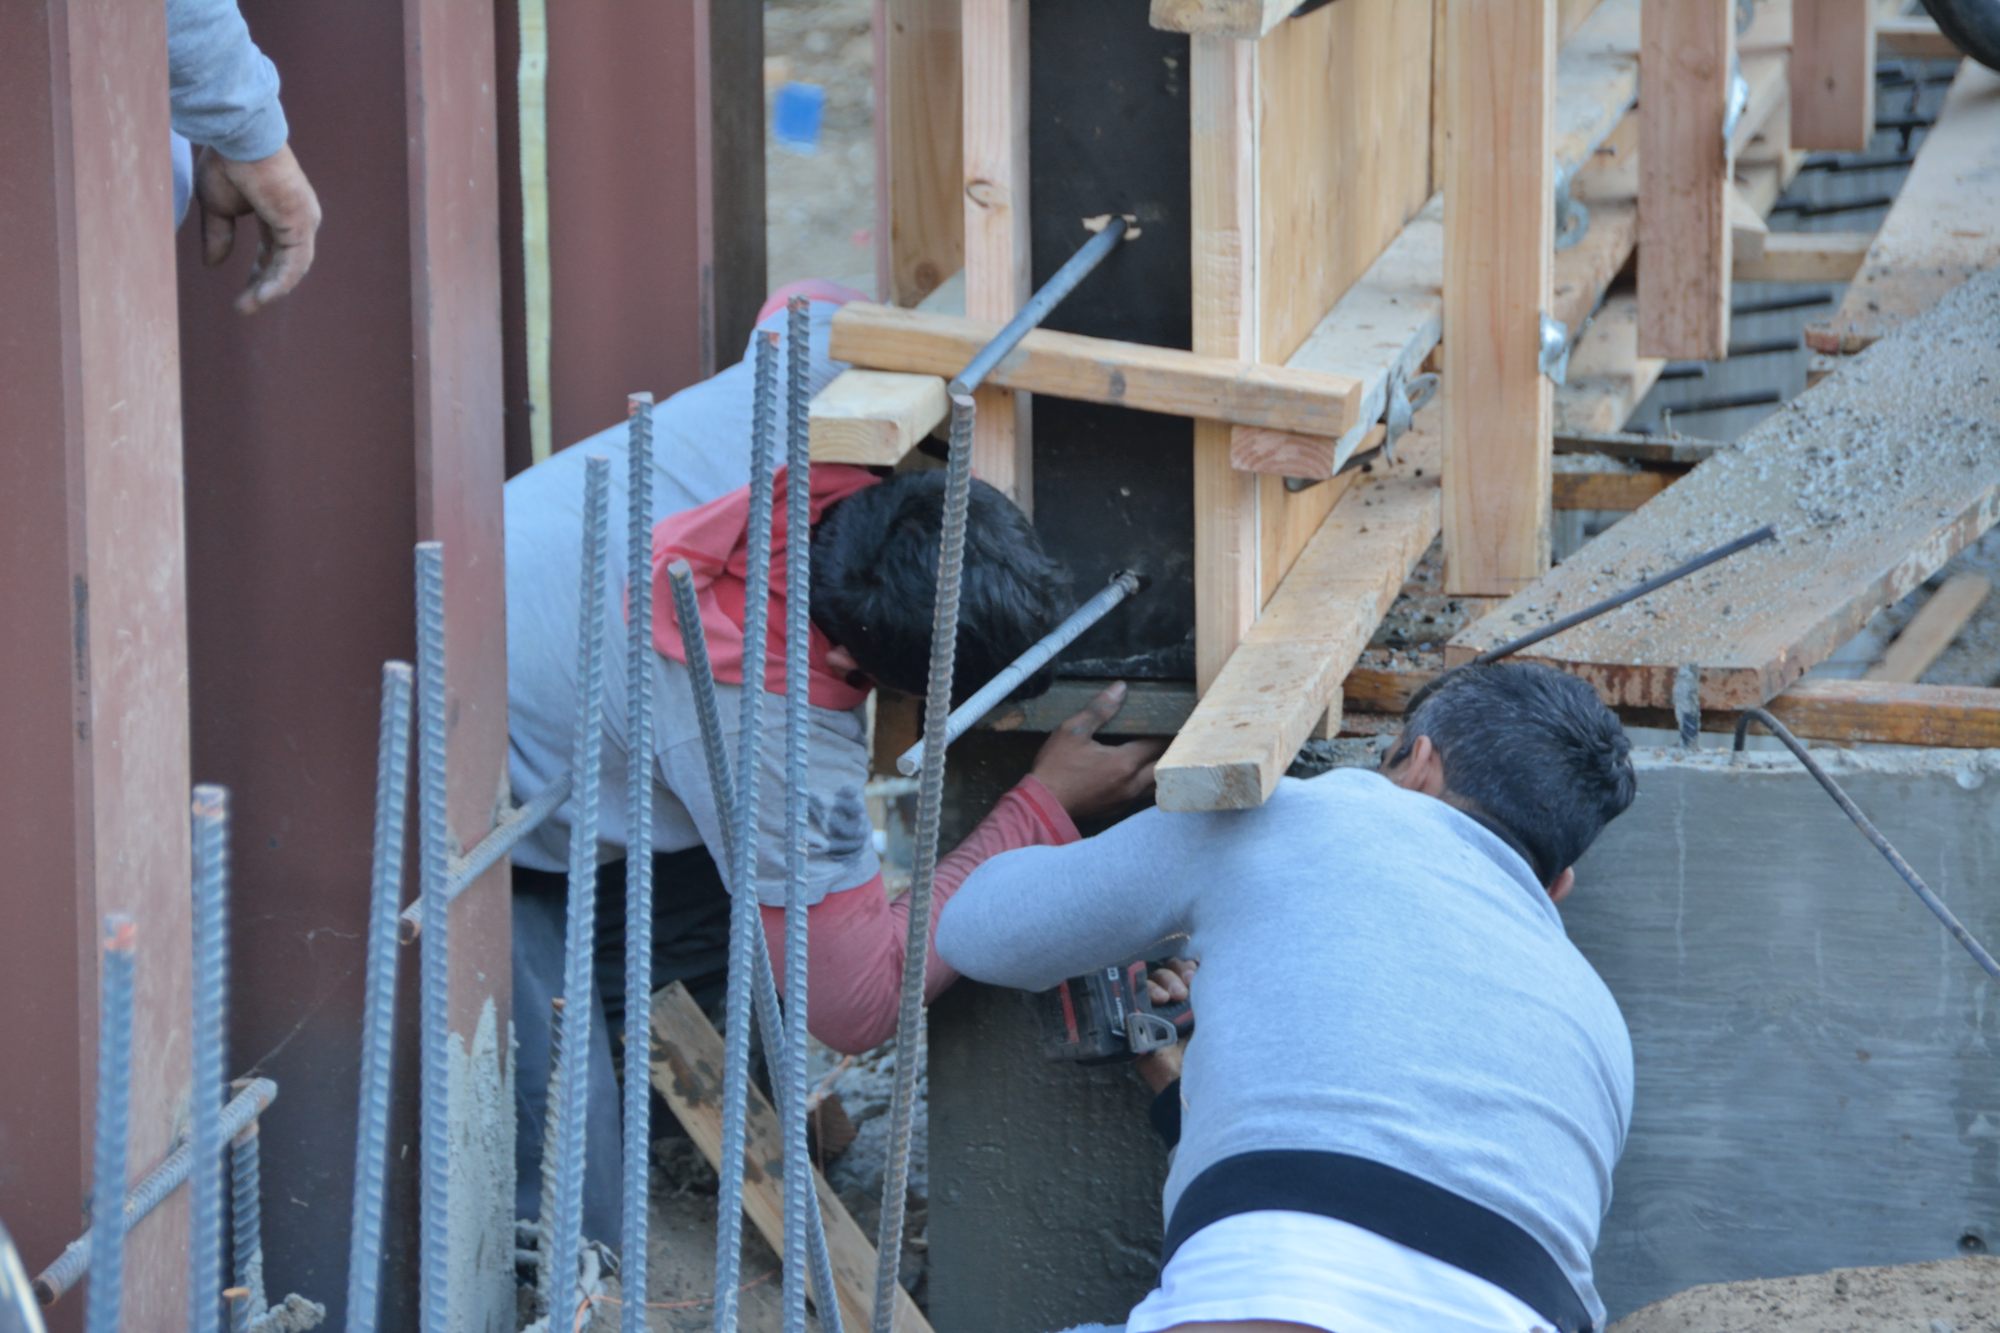
You may also remember from yesterday’s post that they put wood frames in the forms to block off openings for doors and windows. The windows, however, do not extend to the floor, so it is necessary to get the concrete into the forms below the blocked out area. How do they do that? It turns out not easily and possibly not well — they may have to come back after the forms are off and fill in some voids. Picture 5 shows one approach. Here Javi drilled a large hole in the plywood of a form just below the area where the window into the laundry room was blocked off. He is using the hose from the concrete pump to pump concrete into the space in the wall below the window.
Picture 5 – Javi injects concrete into a hole in the forms just below a blocked off window.
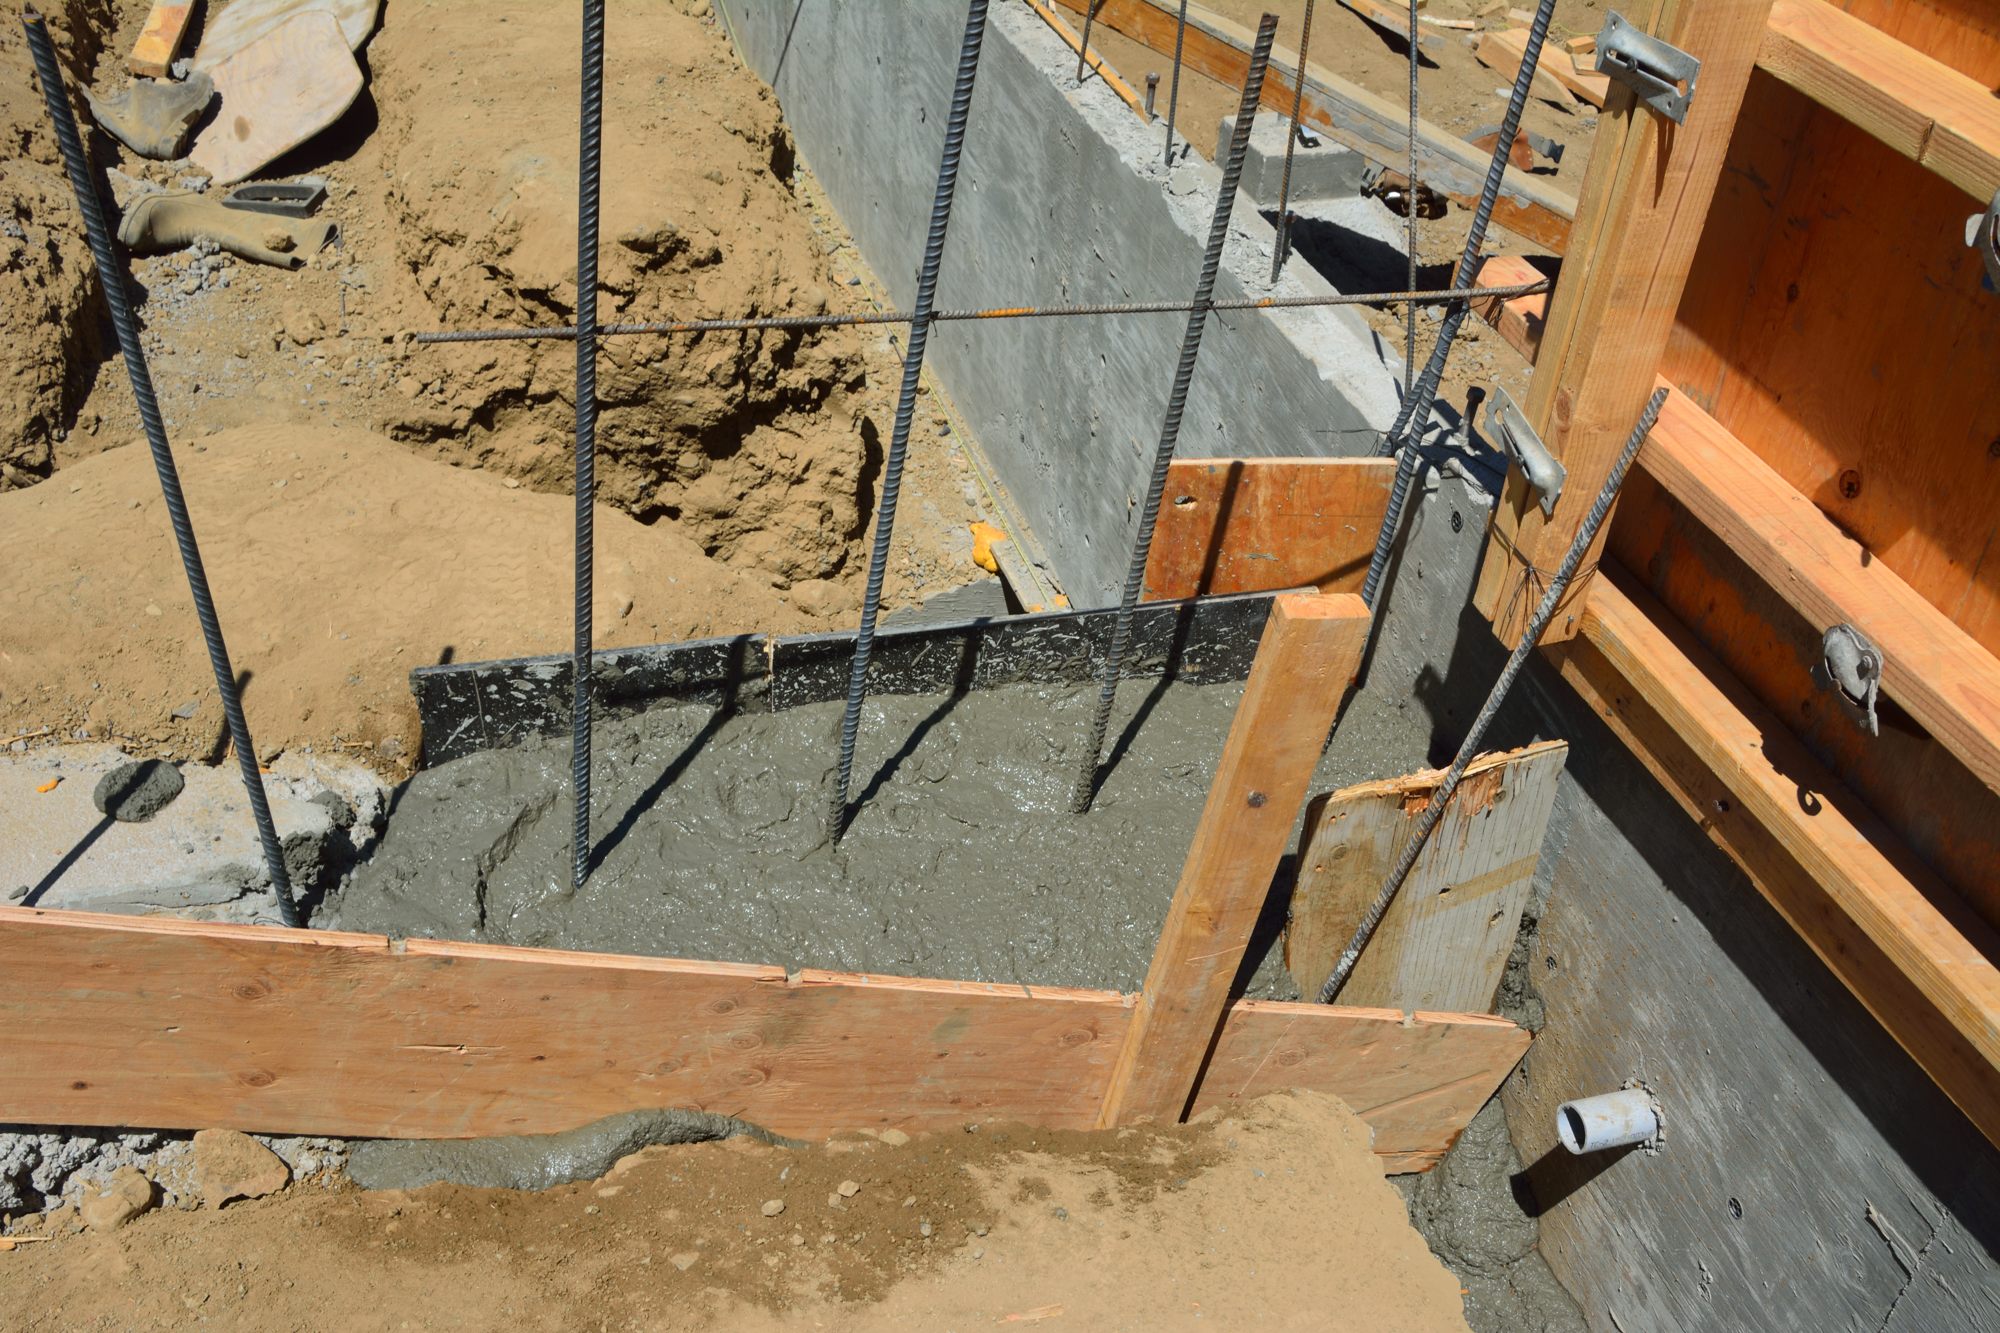
One of the last things I discussed yesterday was the preparation done to fill the gap between the foundation for the slab and the stem wall for the crawl space. Picture 6 shows one of these gaps filled with concrete. They only poured this one, however. They thought that the job today would need a third concrete truck. However, when the second truck finally ran out and they had done everything but the last connection, they decided to call it a day. They will need to buy and mix bags of concrete to fill the second gap later, since it must be done before they can do the walls that go above it.
Picture 6 – Concrete poured in one of the gaps between the foundation for the slab and the stem wall for the crawl space.
It is not clear to us whether there will be any work next week. Our contractor and his family are away on a family vacation for a week.
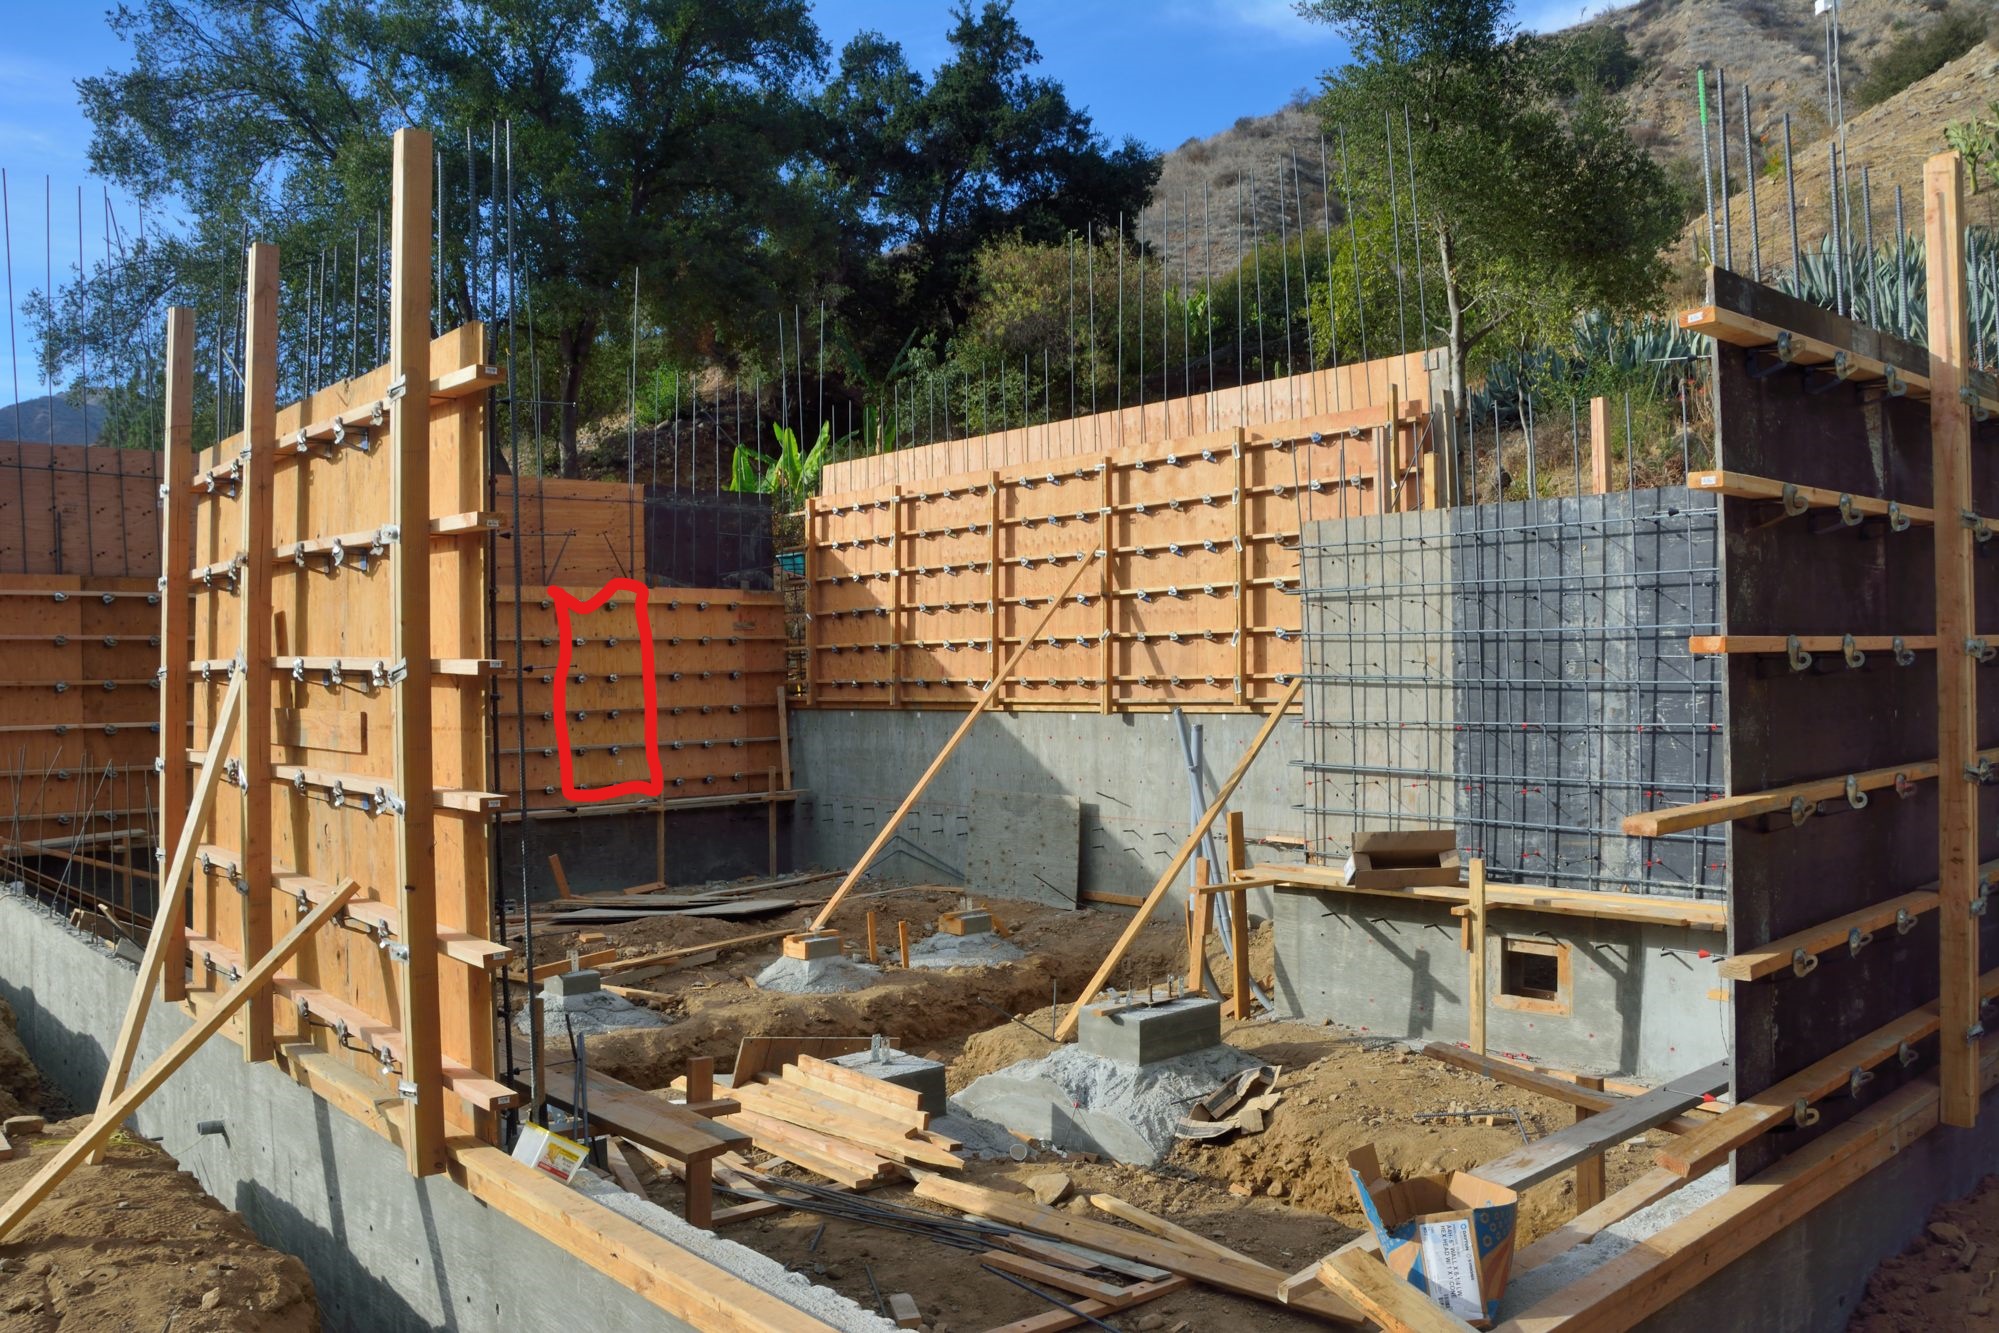
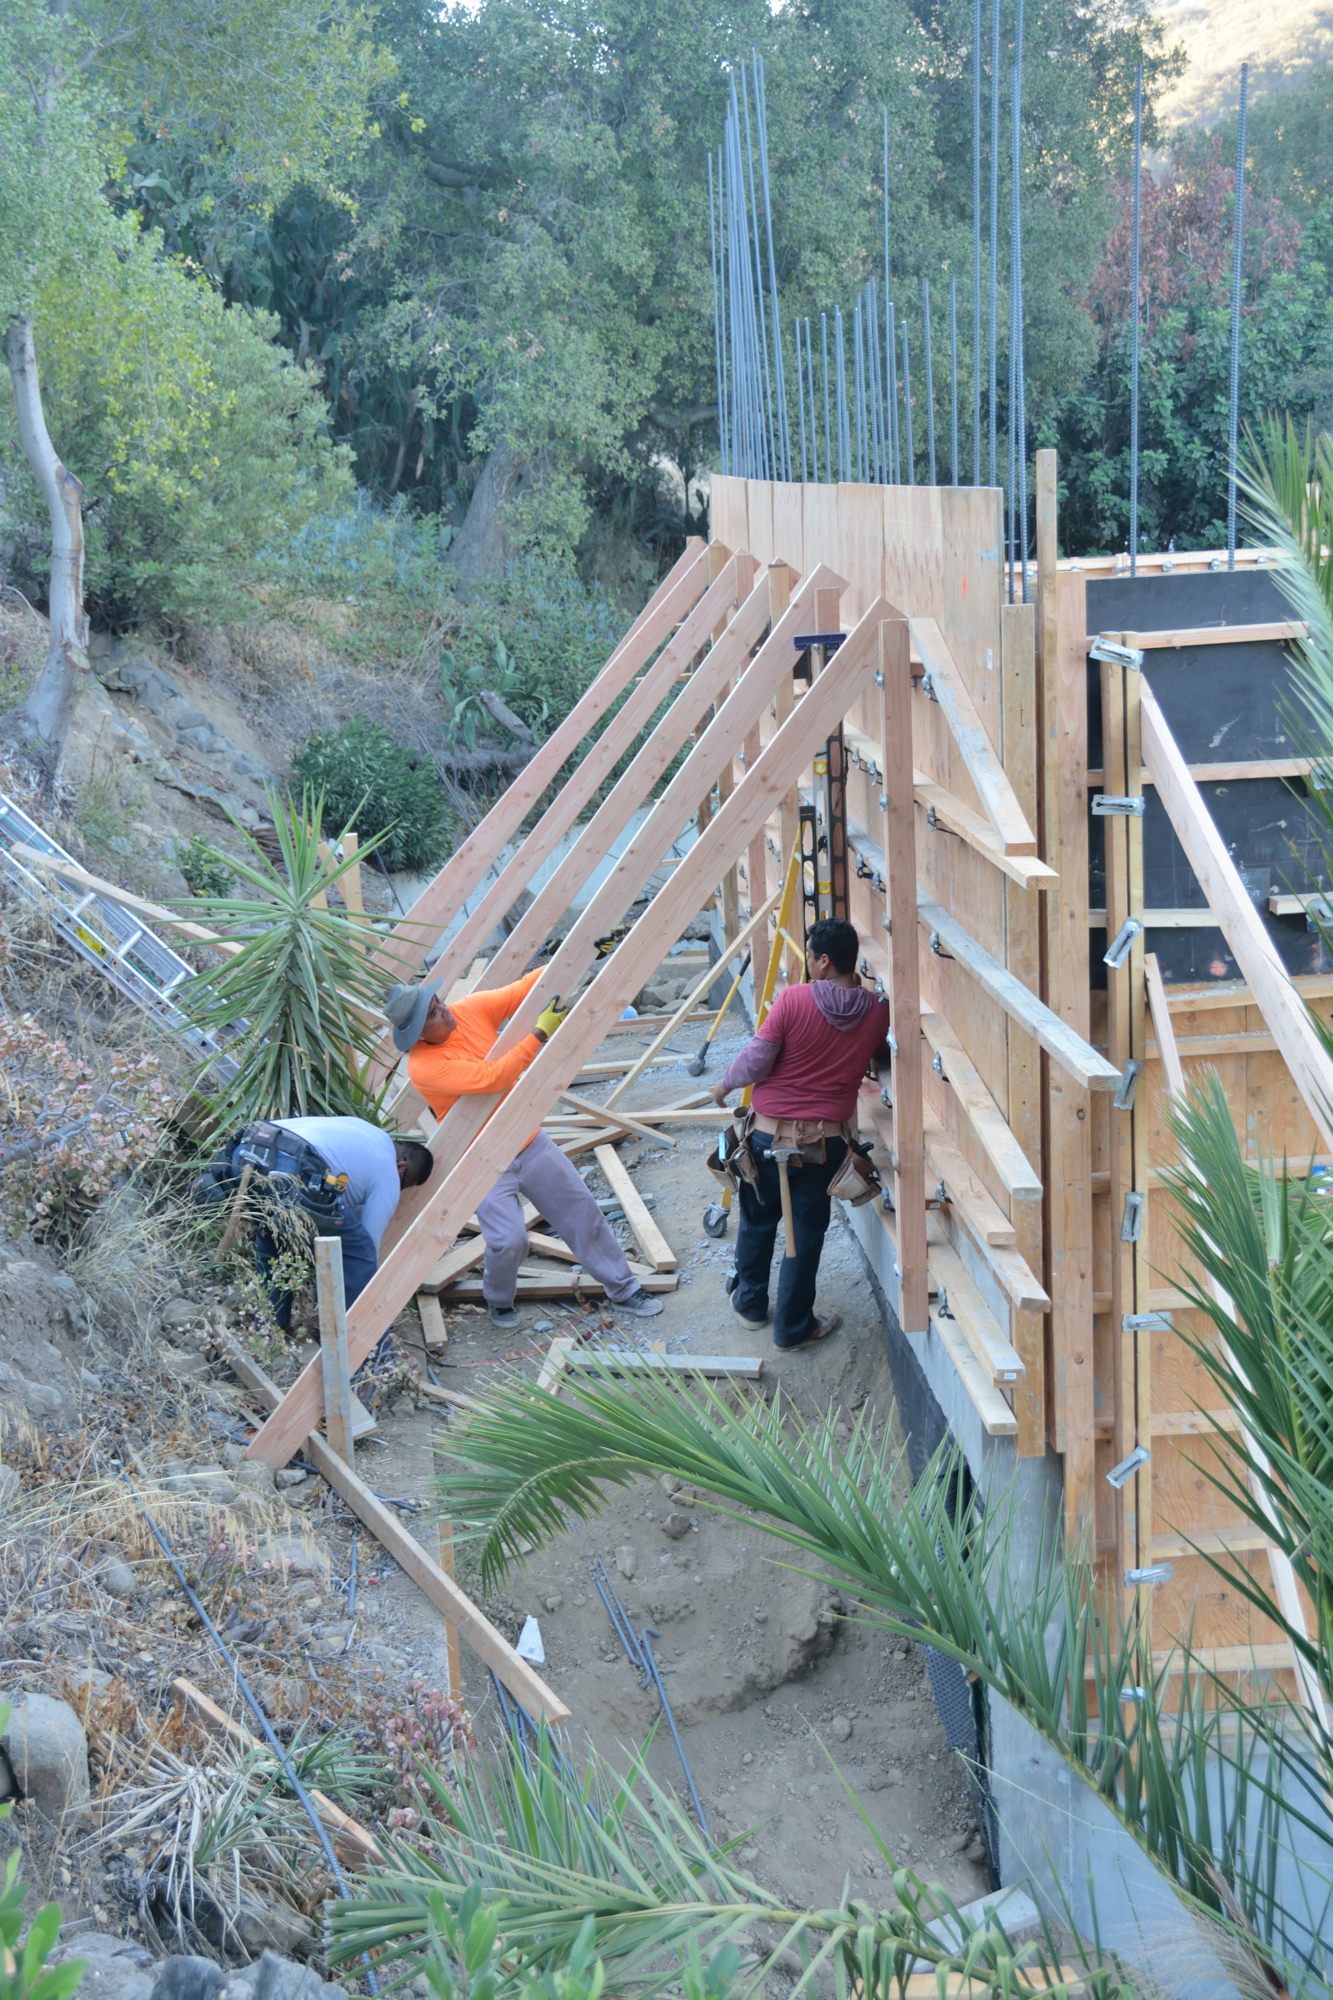
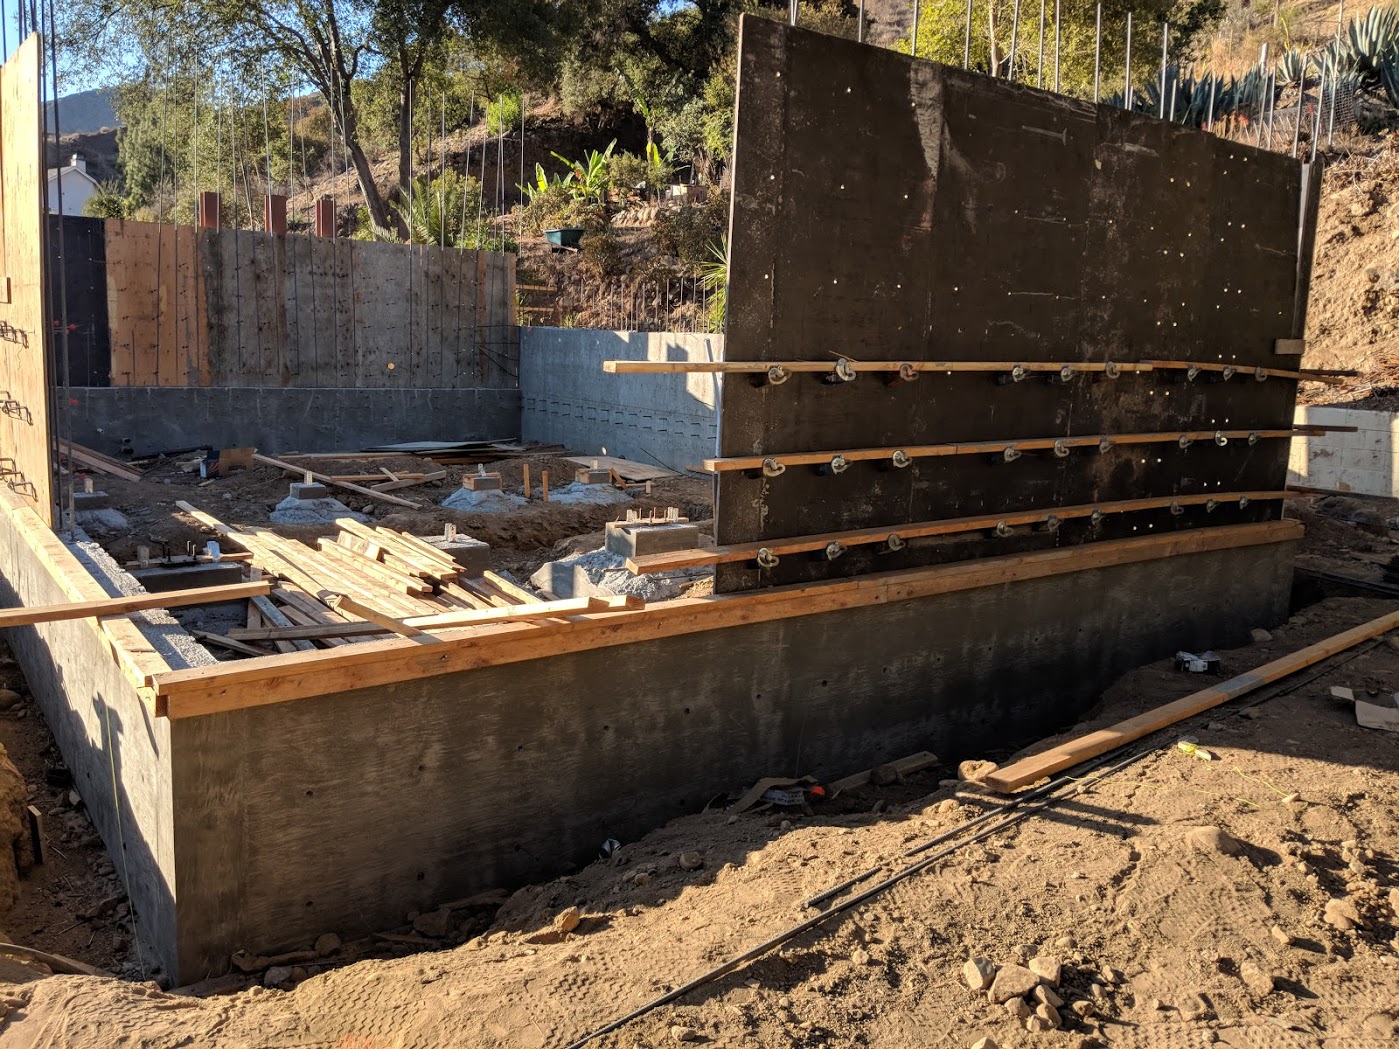
This week they have been finishing the rebar and putting up the forms for the first floor walls at the back part of the house, the part that will eventually be two stories. They will pour these walls Friday morning. Next week, the framers will come in and build the floor of the second floor, which then can serve as interior scaffolding while they do the rebar and forms for the second floor. They are waiting to do the walls for the great room, the front part of the house, until the duct that has to go under the slab in that part of the house is delivered.
This process of placing the rebar and building the forms is, in some ways, more complicated and time consuming that simply building the walls of wood. Because of this, the progress day-to-day has been incremental and so we thought that, rather than post pictures each day that do not show much change, we would gather them up and put them together so that the process is more apparent.
Picture 1 shows the west wall of the house with some of the rebar and the plywood forms on the outside in place. The is the outside wall of the kitchen. The laundry room will be along the north wall at the back. You can see in the west wall where they have blocked out the window into the kitchen and the door to the outside. You can also see that this side of the house will be over a generous crawl space. The temporary scaffolding built along the bottom of the wall is at roughly the level of the first floor; everything below will be in the crawl space.
Picture 1 – West wall with a window in the kitchen and door to the outside blocked out.
In Picture 2, you can see the same west wall in a larger context. This picture was taken from a location in front of the east side of the house. This shows that, a day later, they have finished the rebar and added the plywood forms on the inside of the west wall. The red outline shows approximately where the door was blocked out in Picture 1.
Picture 2 – Lower layer of rebar has been completed and the inner plywood forms have been attached to the west wall. The red outline shows approximately where the blocked out door was in Picture 1.
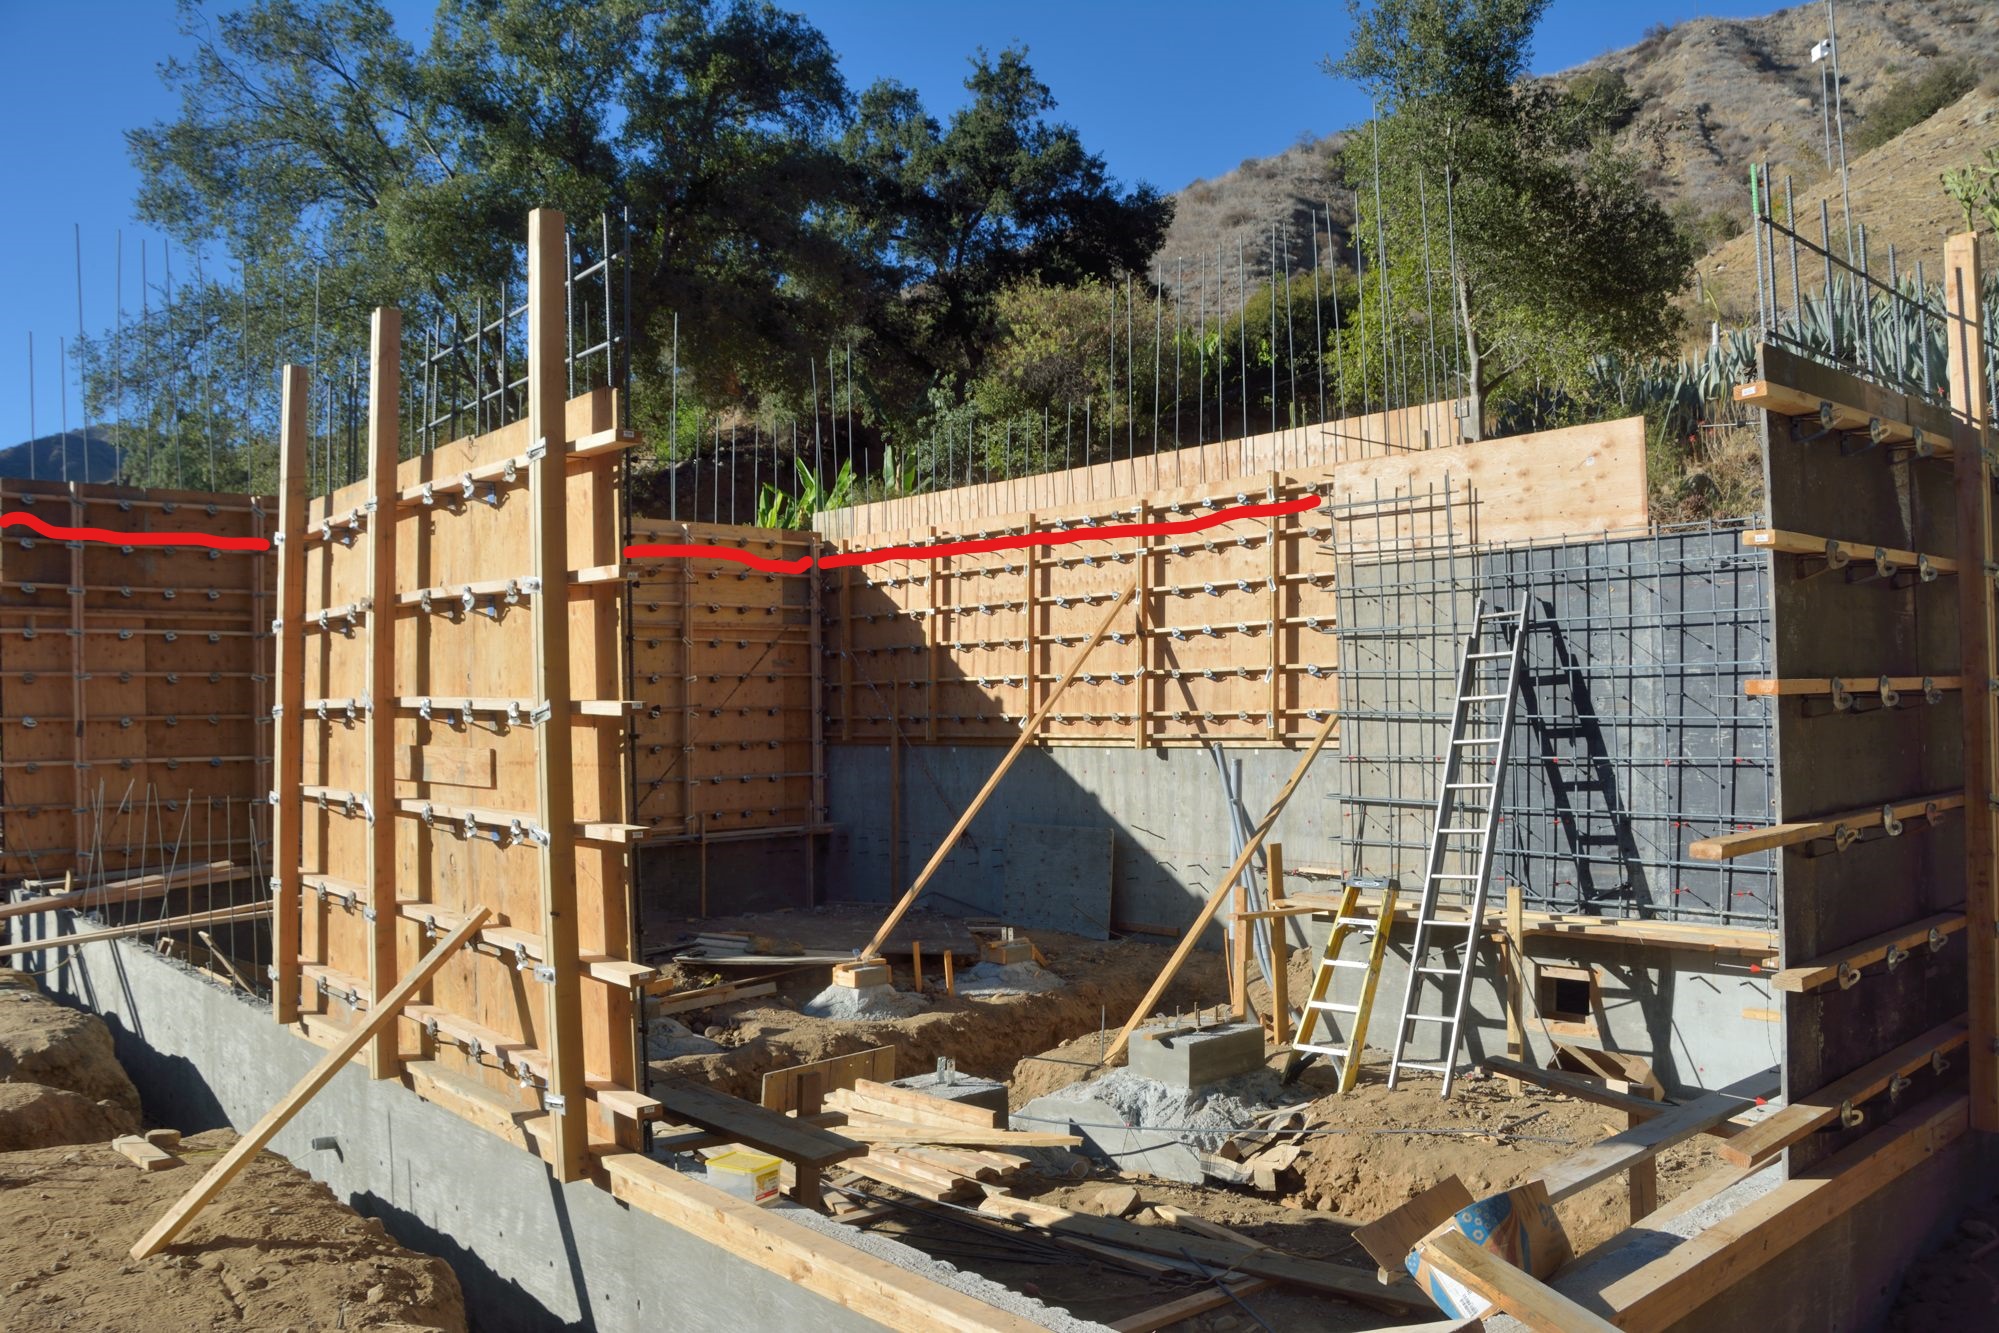
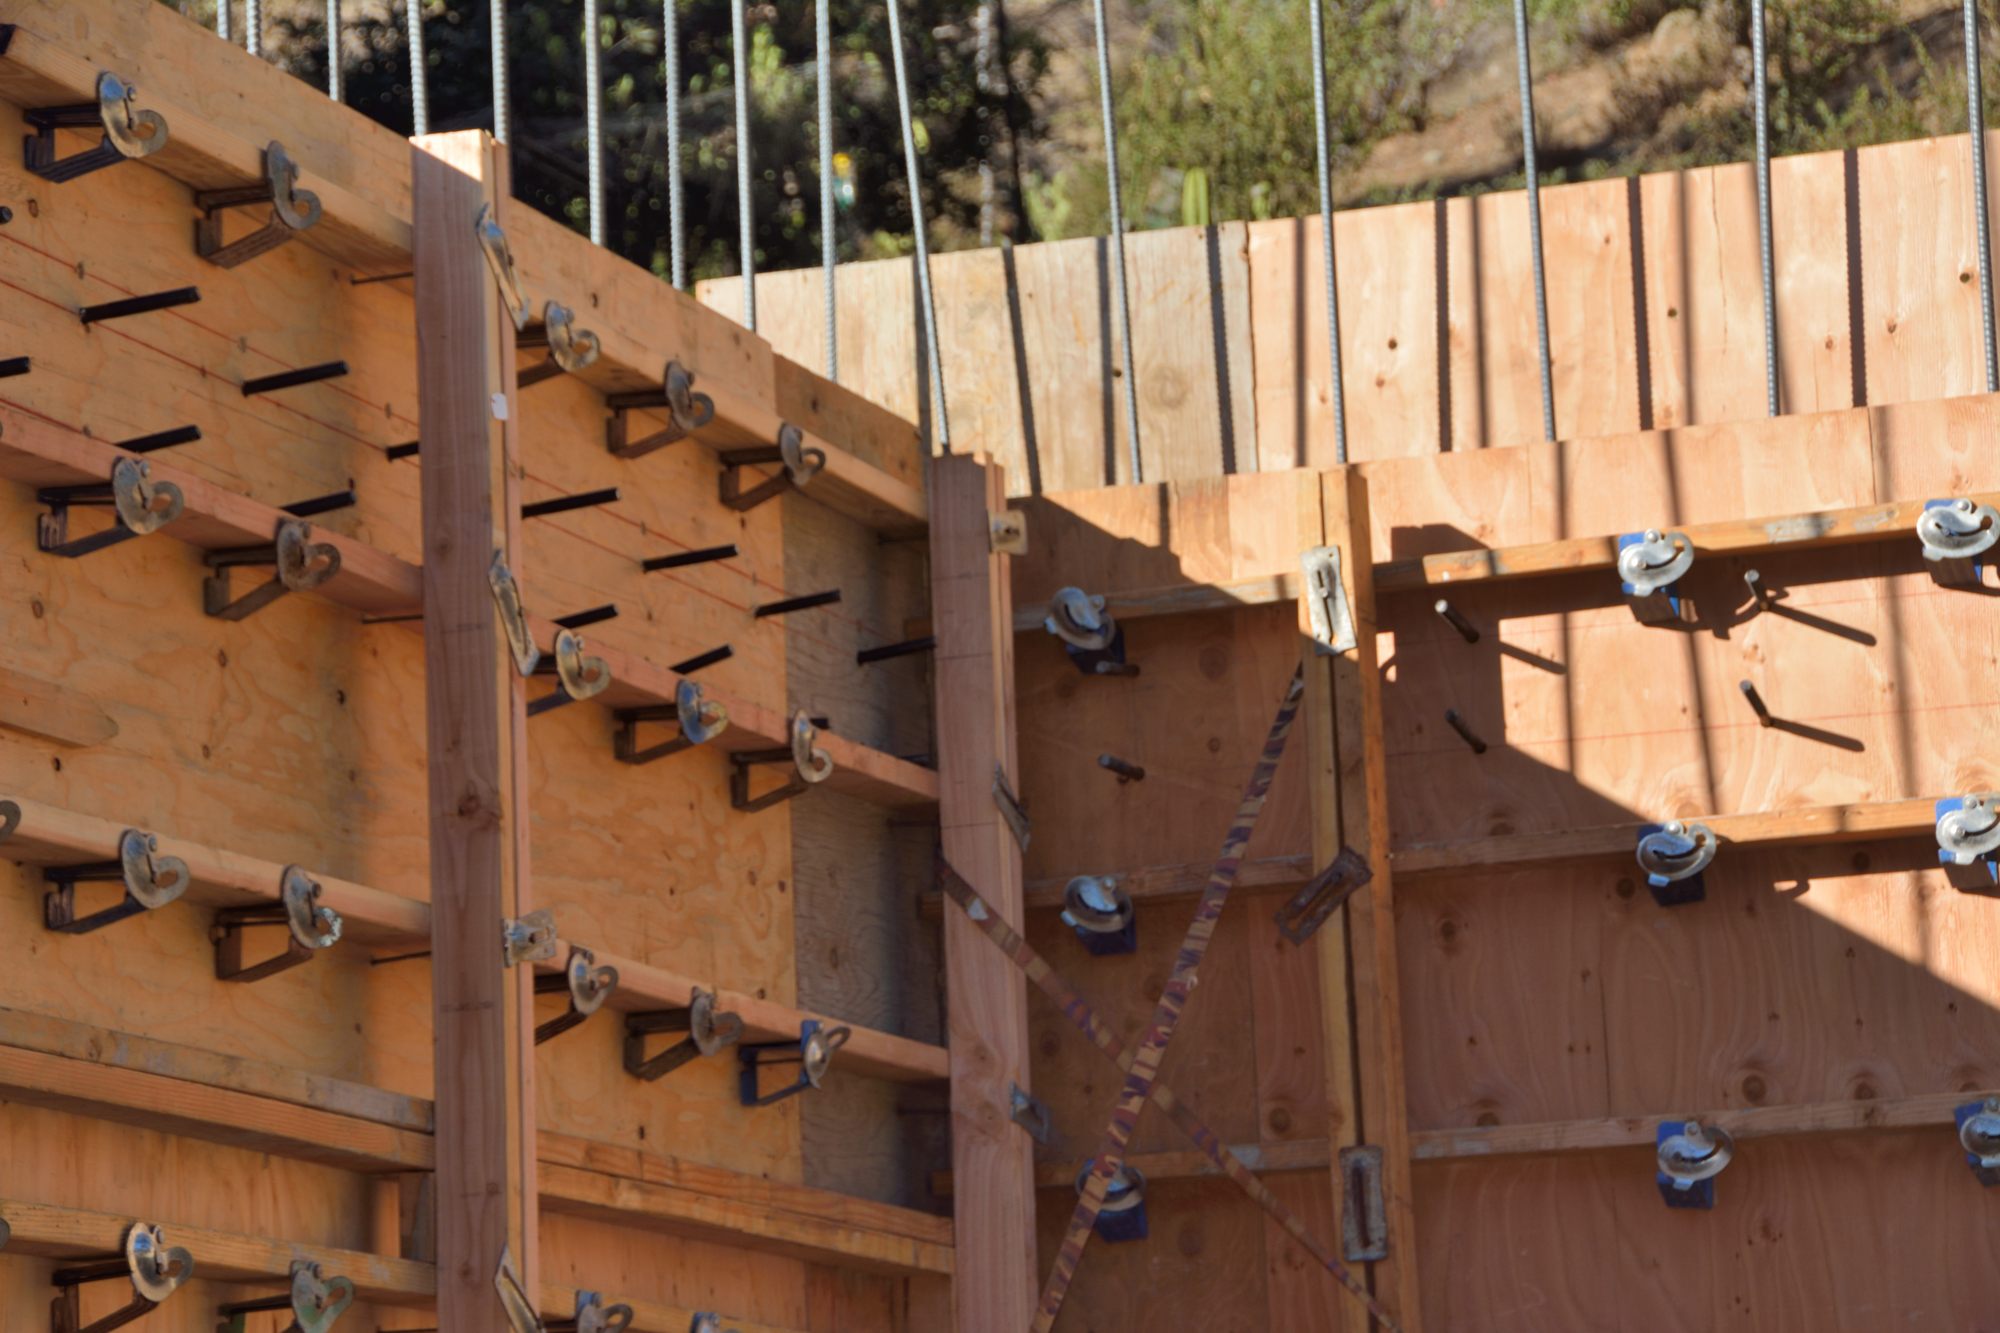
The first floor ceilings are 10 feet high and the framing to create the floor above adds roughly another foot, so the walls that they are pouring will be eleven feet high — this is close to the maximum vertical height that they are allowed to of at one time. Picture 3 shows the west wall with the interior plywood forms added to the full height. The red line on the west and north walls shows where the framing for the second floor will be attached. Picture 4 is a close up of the bolts that will be used to attach the second floor framing.
Picture 3 – Upper layer of forms are complete on the west wall. The red line in this picture marks where the framing that forms the first floor ceiling and the floor of the second floor will be attached. (See Picture 4).Picture 4 – Bolts through the plywood will be embedded in the concrete. These will hold a wooden ledger to which the framing that will be the ceiling of the first floor and the floor of the second floor will be attached.
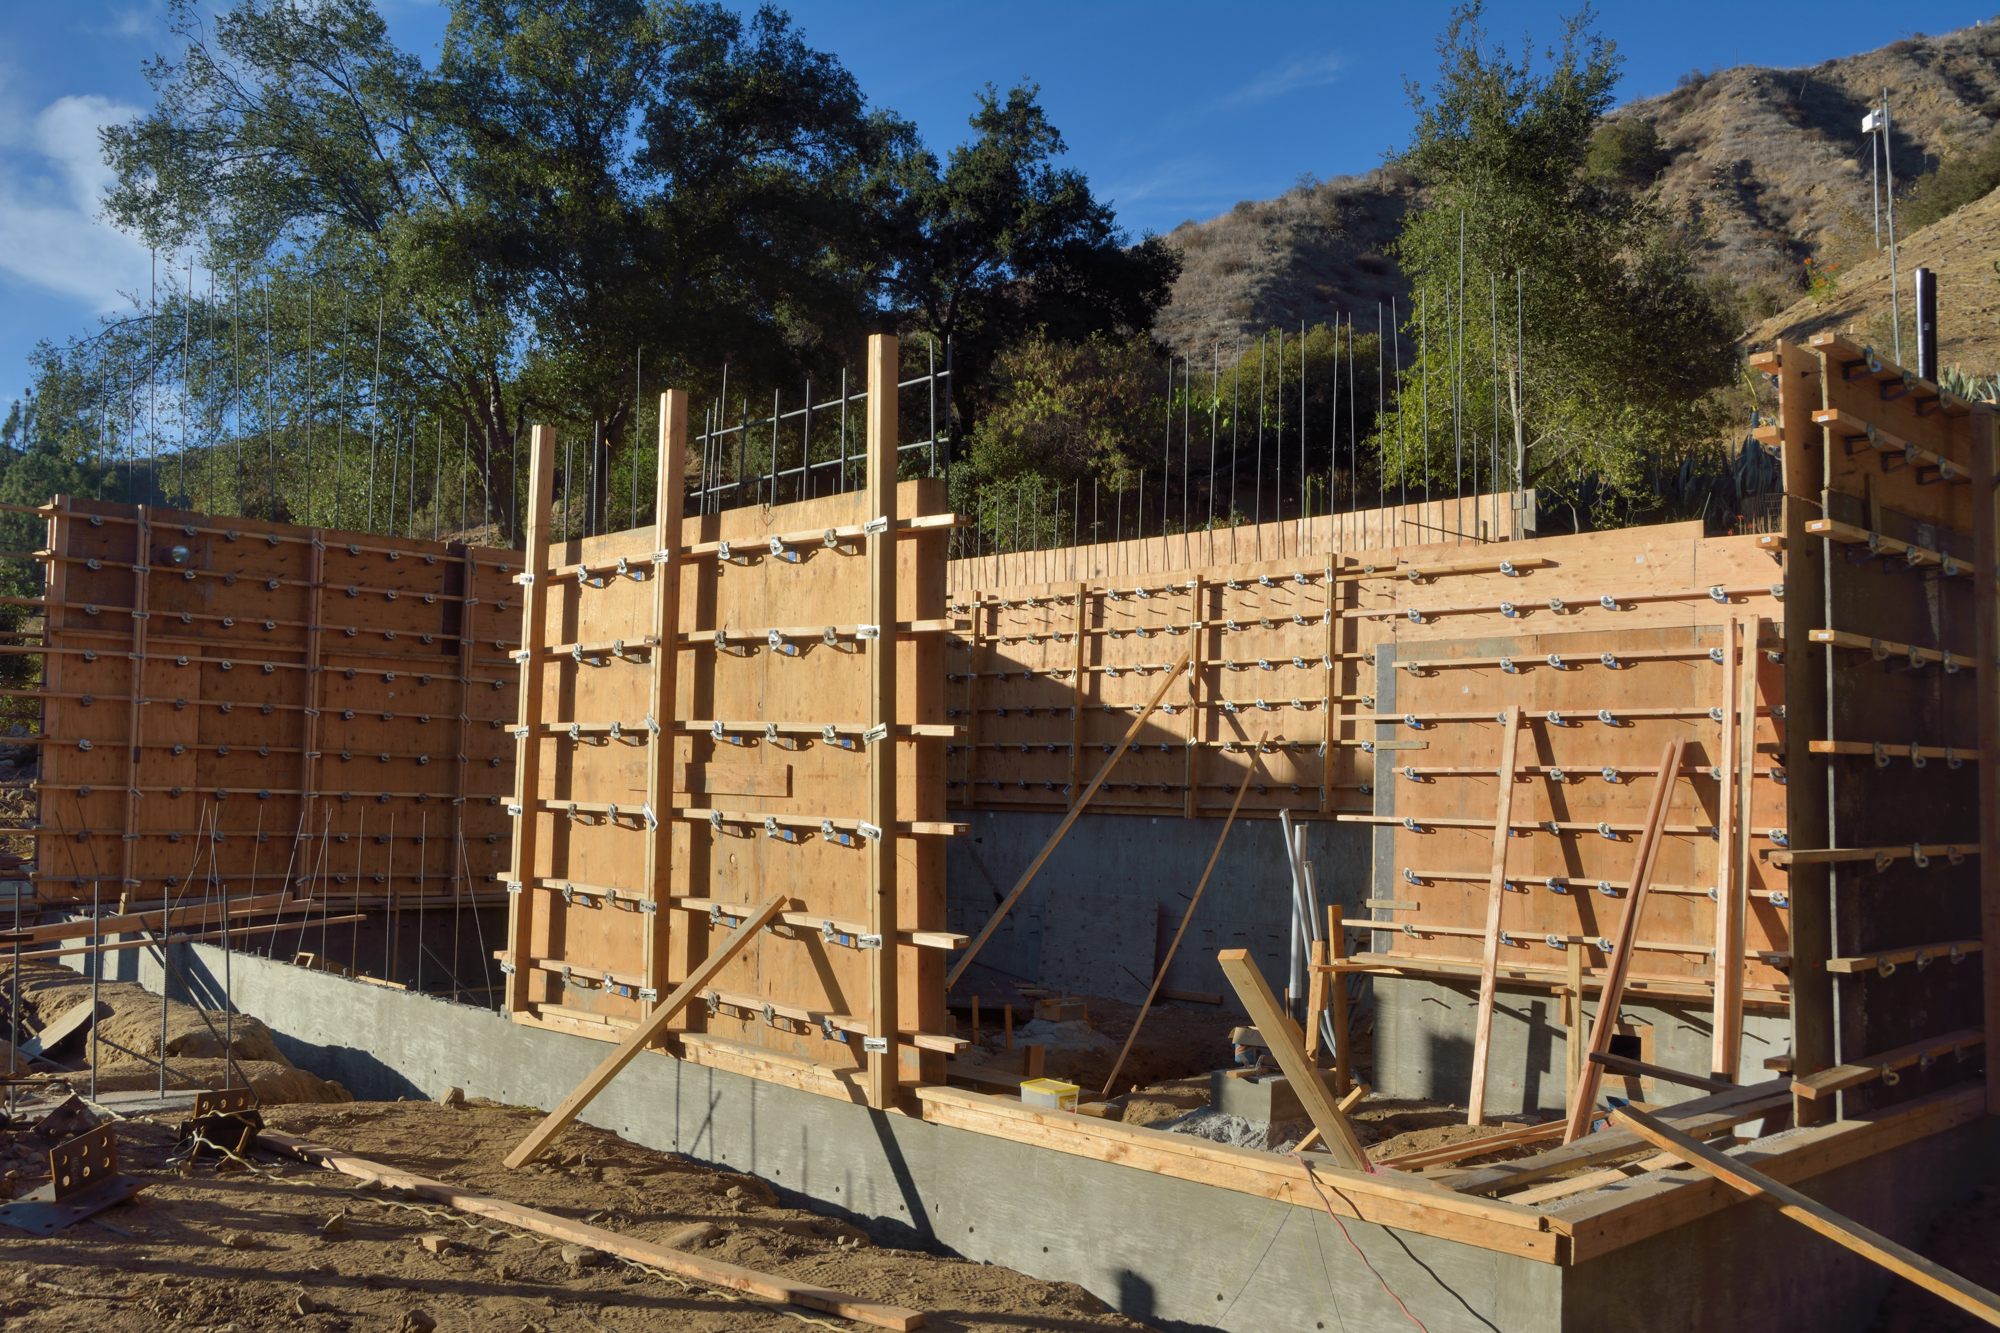
Picture 5 shows the last stage of this process. Here they have finished the rebar and the plywood forms for the north wall of the master bedroom. Even though this and the wall on the east and south sides of the bedroom are only single story walls, they plan to pour them this time round.
Picture 5 – The rebar and forms are now complete on the north wall of the master bedroom.
You might think that once the forms are up, they are ready to pour. The truth is, however, that there is still a lot to be done. Most importantly the walls need to be plumbed, adjusted so that they are truly vertical. You can see some bracing in the previous pictures; however in Picture 6 they have gotten serious about it. (So much lumber just to hold the concrete in place!) In addition, they have to go round and try to find all of the joints between pieces of concrete and other places that may not be attached firmly. When they miss one of these, during the pour, concrete will force its way out — there is a lot of pressure created by a 10 foot high stack of concrete — and the pouring process will have to be halted while workers rush around to close the gap and support it.
Picture 6 – Bracing on the outside of the north wall to plumb it. Javi, in the purple shirt, is holding a very long, accurate level, while the man in the orange shirt pulls the bracing board to get this section of the wall plumb, and the third guy, in the white screws the bracing board into a wooden anchor that has already been driven into the ground.
As part of this pour, they also need to connect the stem wall for the part of the house over the crawl space, to the foundation of the part of the house that will be on a slab. Picture 7 shows the gap. This was created because they poured the foundation around the slab at the same time that they poured the foundation around the crawl space and the vertical position of the two foundations differed by several feet. In Picture 8, they have epoxied rebar into holes drilled in the stem wall of the crawl space and attached it to the rebar of the foundation for the slab.
Picture 7 – Gap between the foundation for the slab and the stem wall of the part of the house over the crawl space.
Picture 8 – Here they have drilled into the concrete of the stem wall and epoxied in rebar, that has been connected to the rebar in the foundation for the slab.
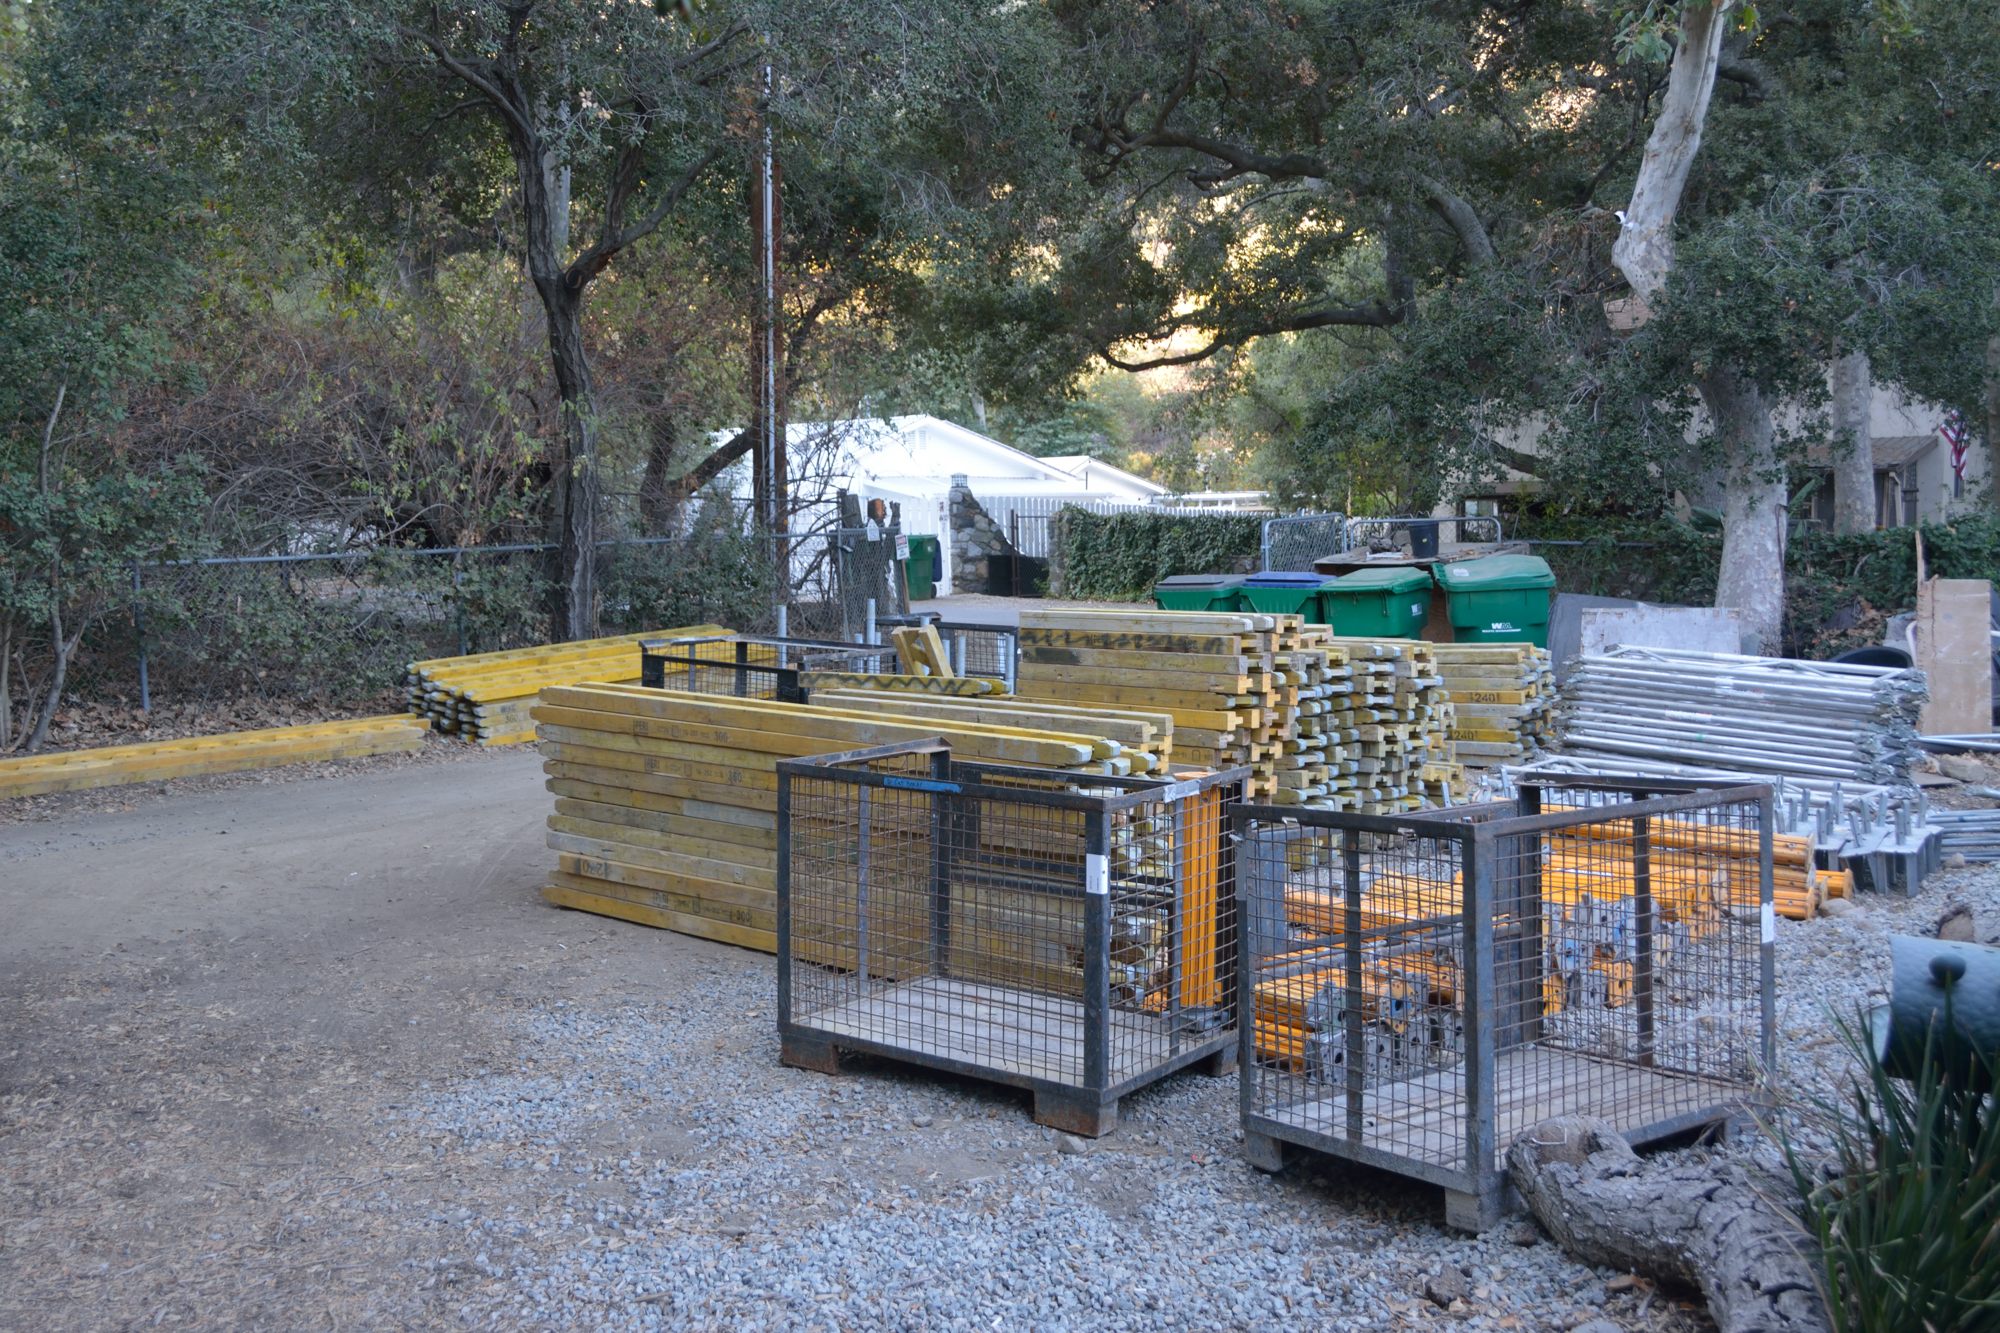
Picture 9 – Scaffolding used to build the deck all stacked up and ready to be returned.
Completely unrelated to all of this work, they have been gathering all of the scaffolding used to build the deck to get it ready to send back to the company it was rented from. Picture 9 shows quite a collection. It was exciting when all of this scaffolding arrived and they put it up; it is even more exciting to see it ready to go!
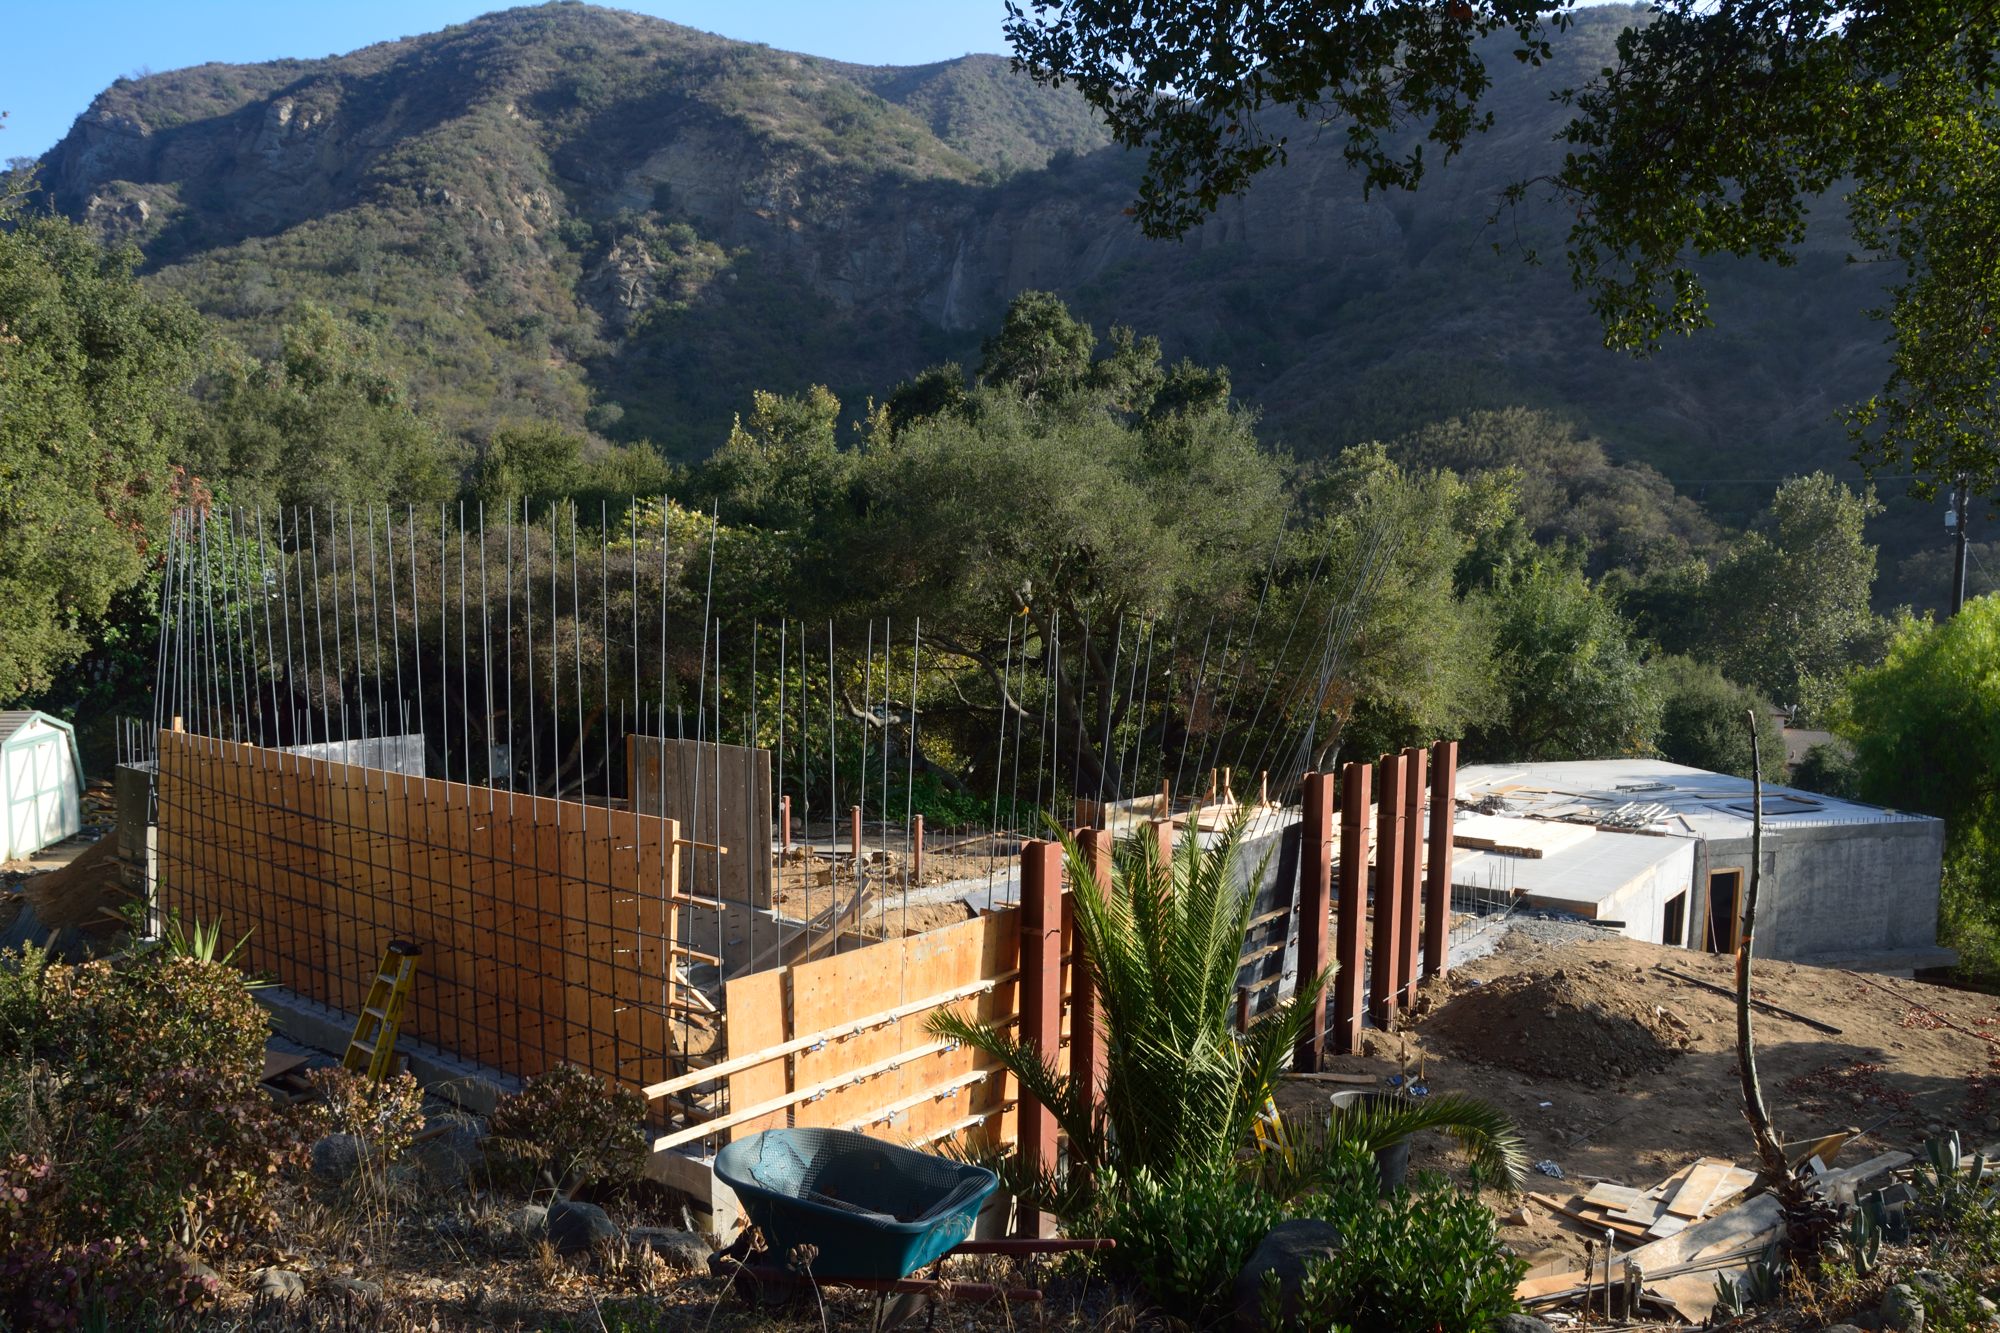
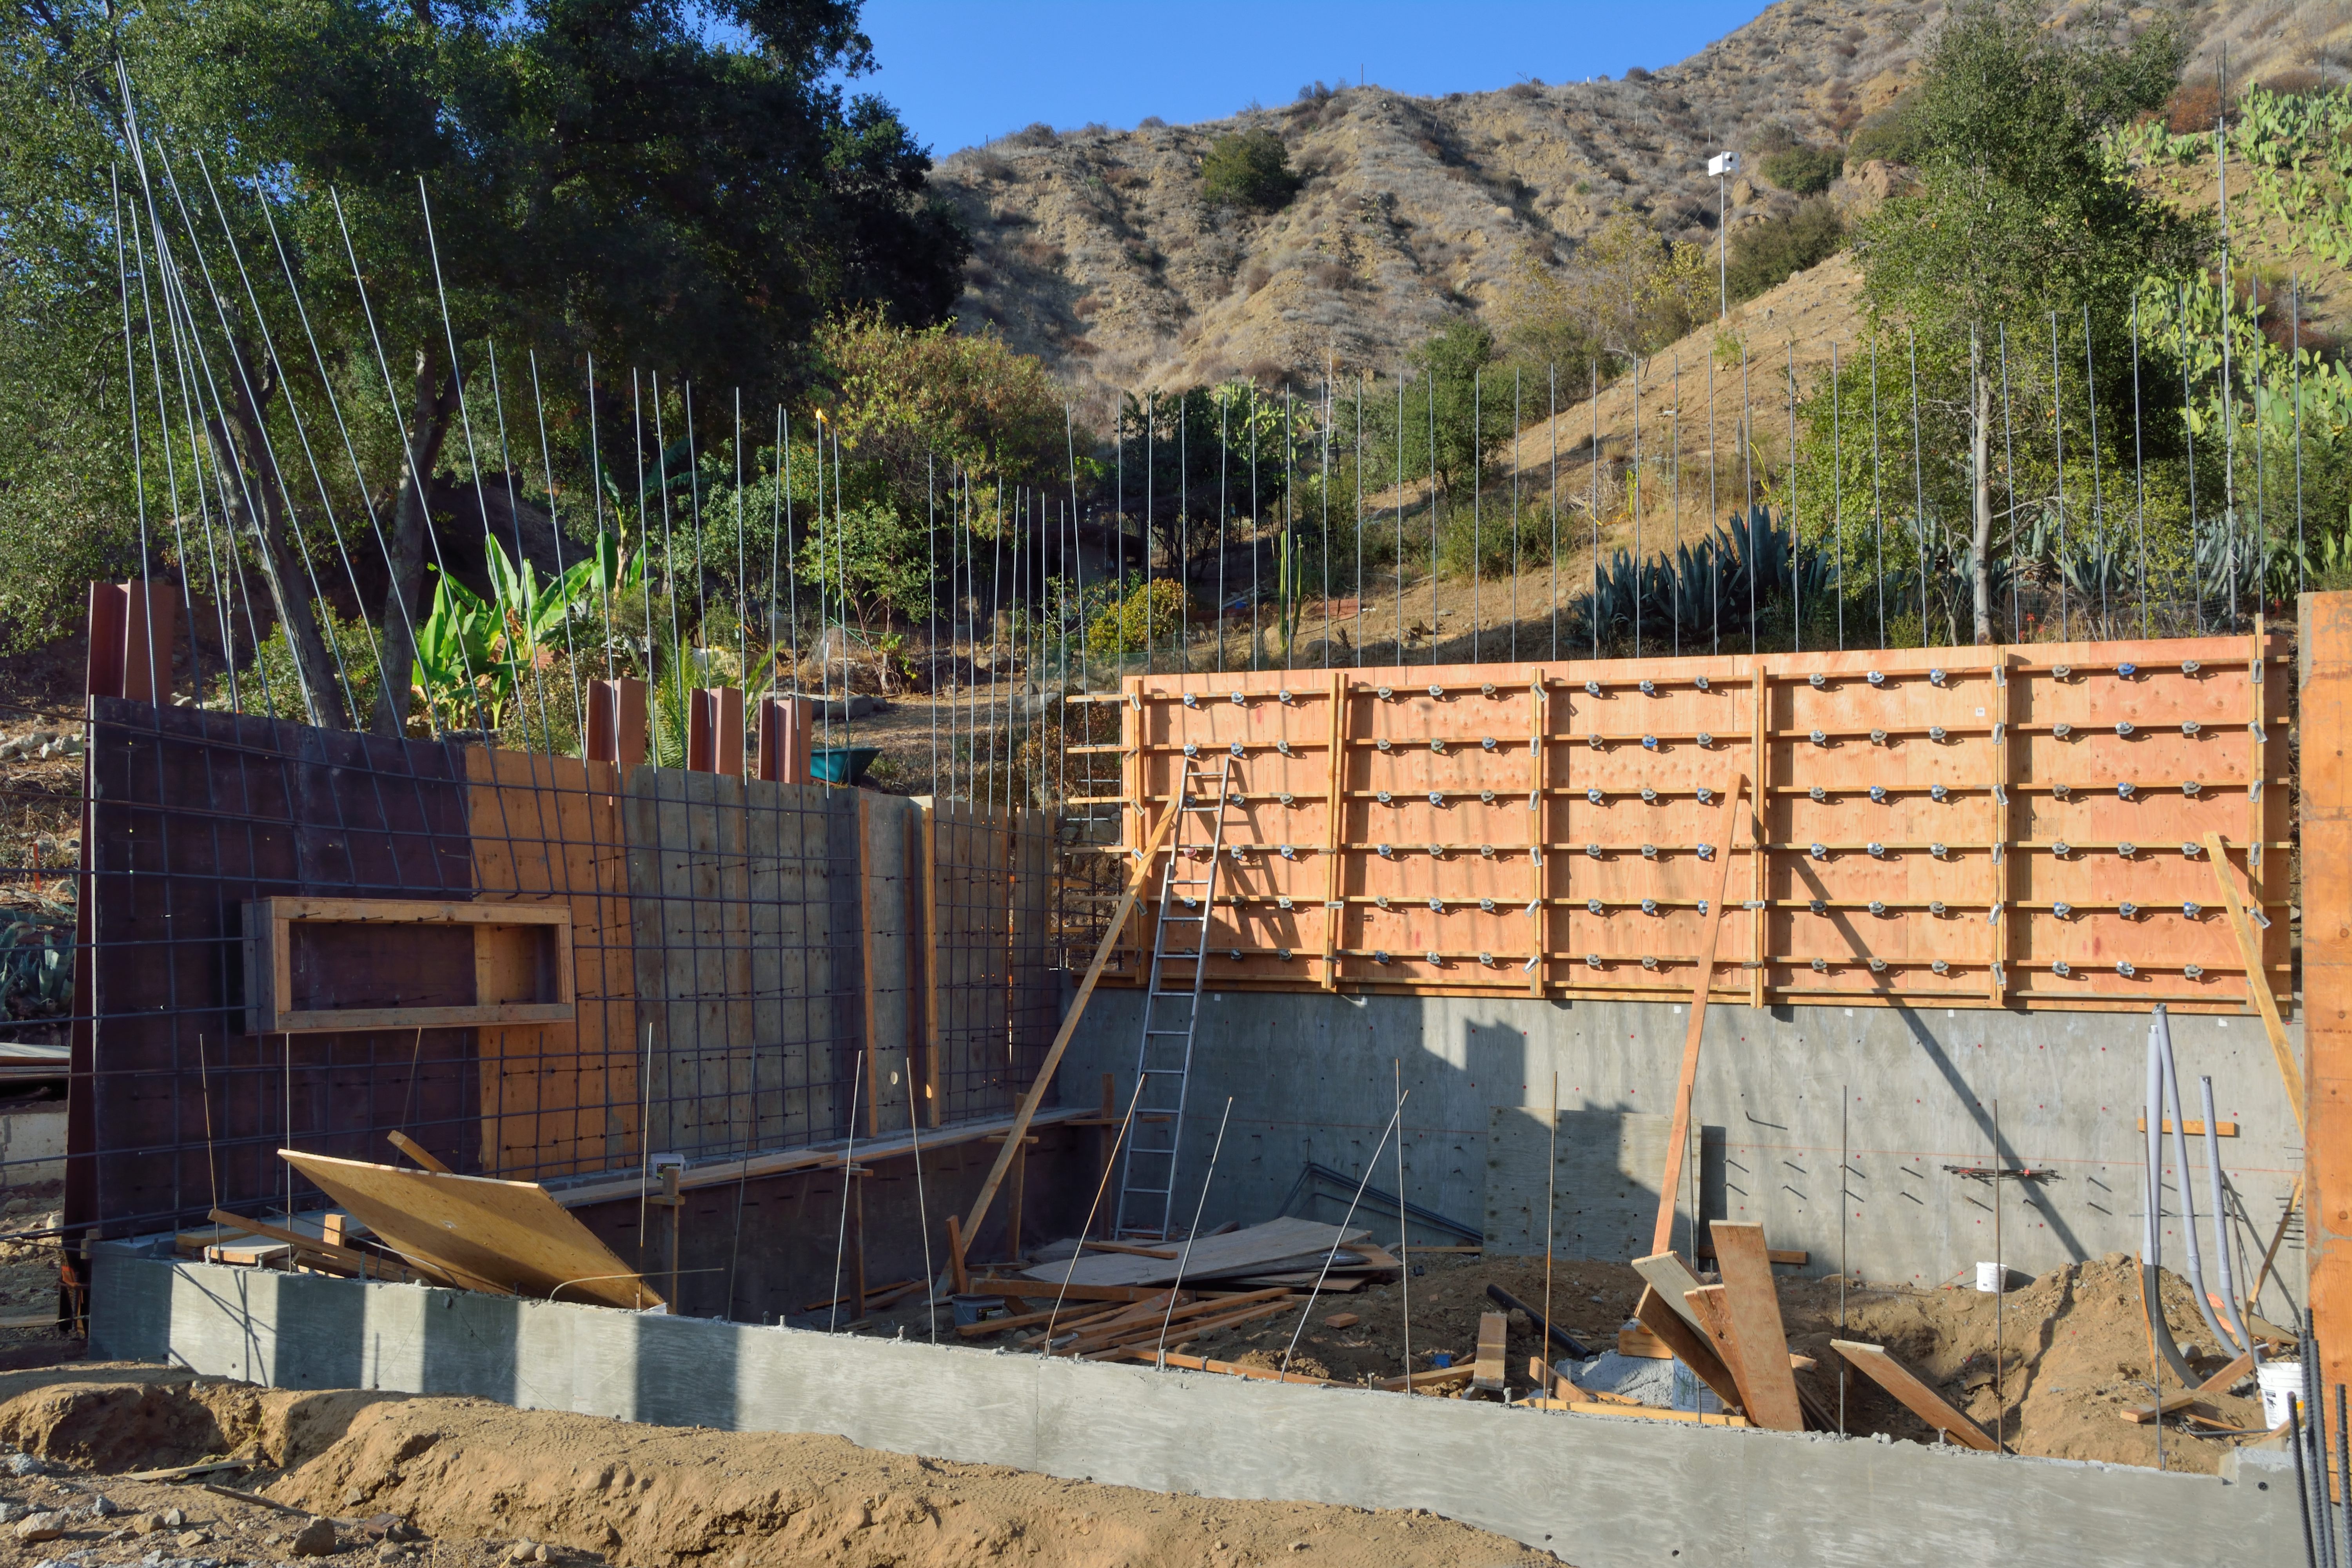
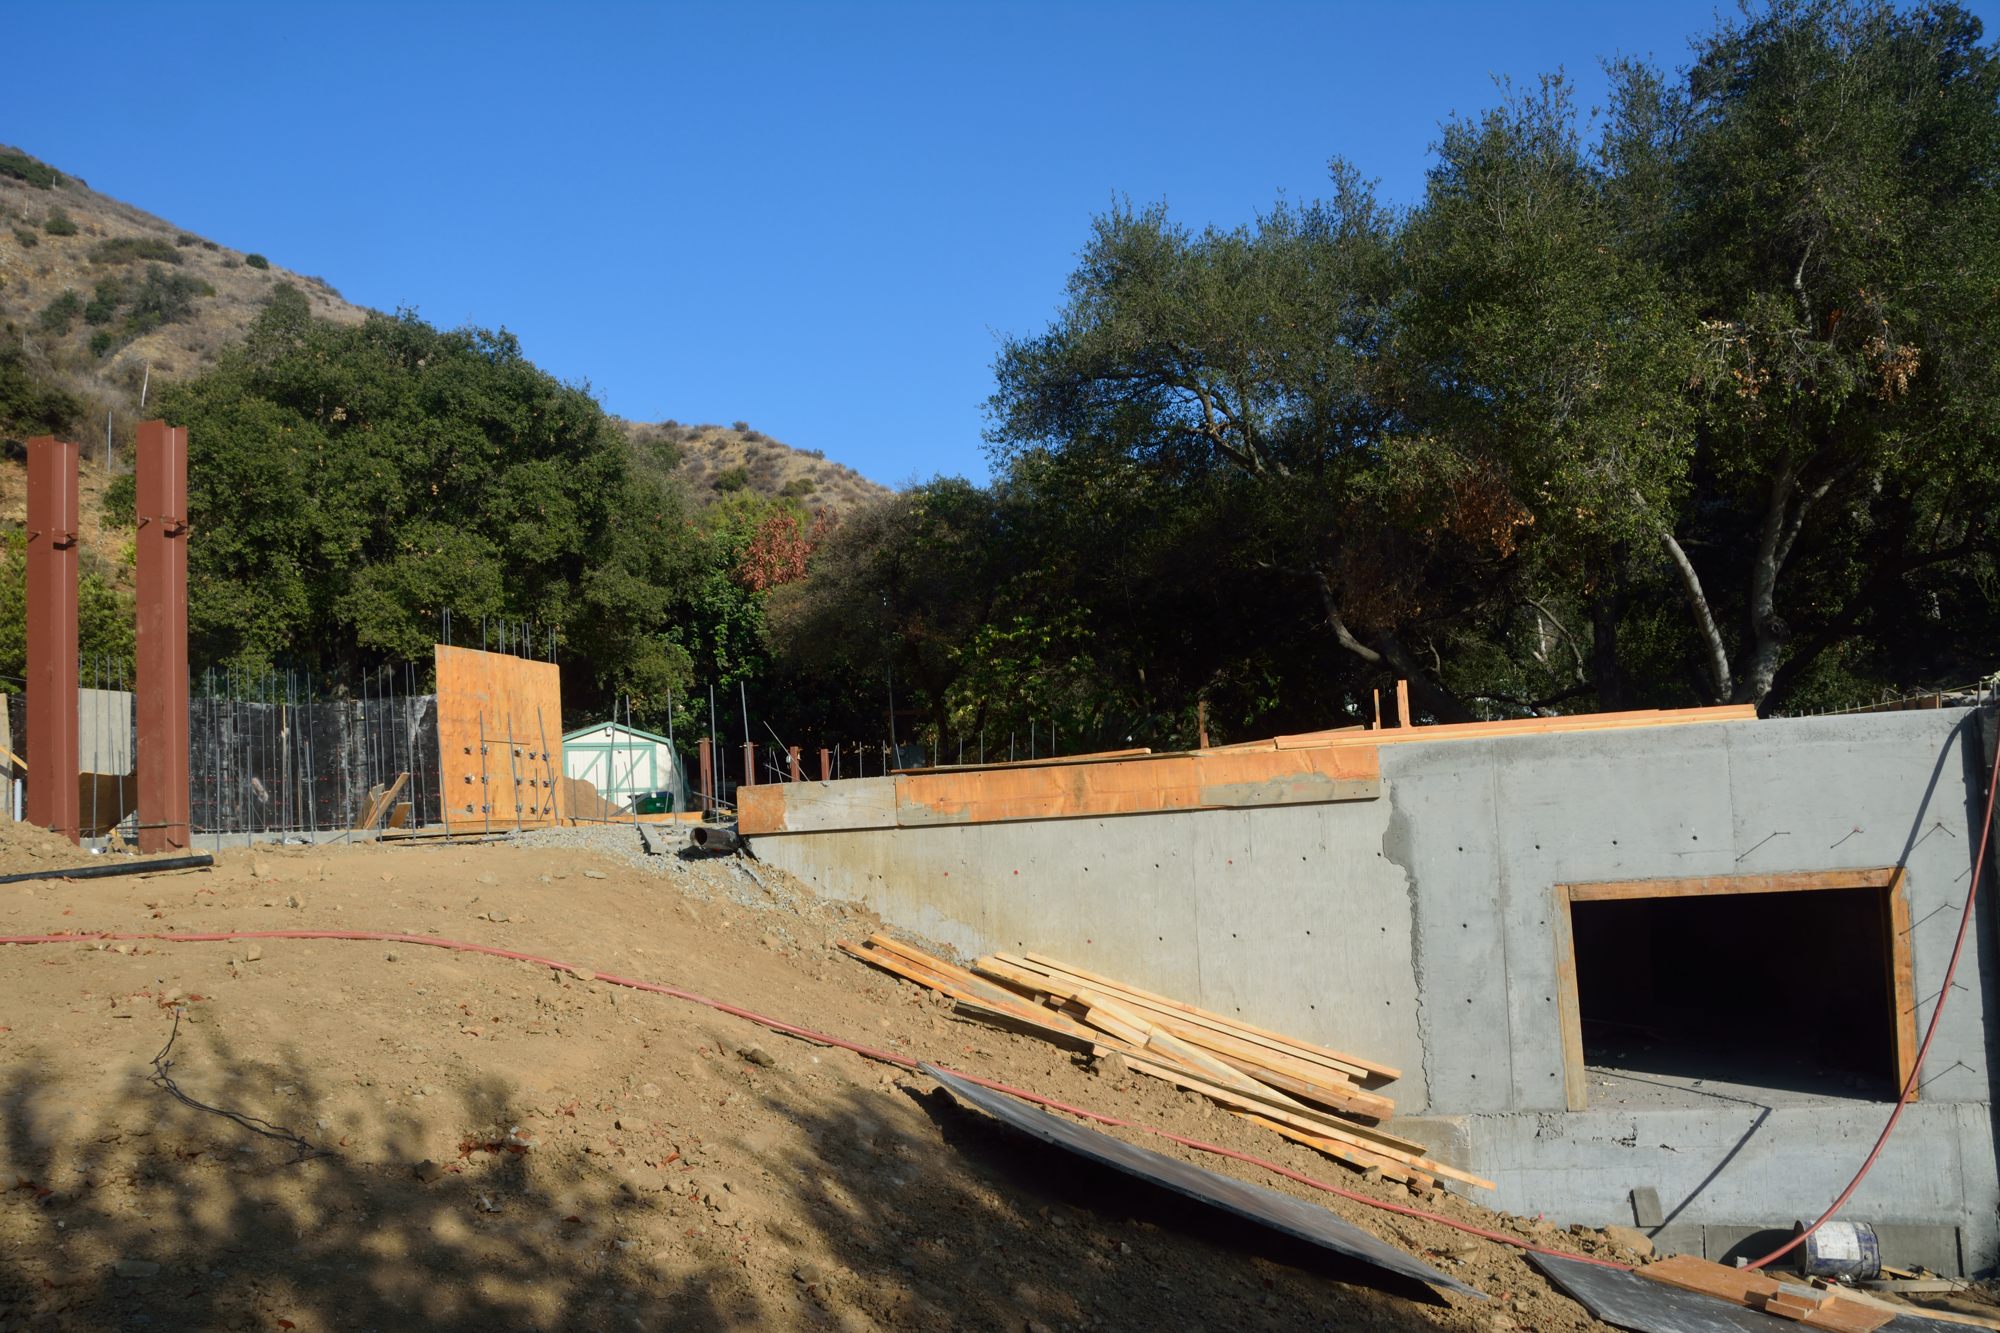
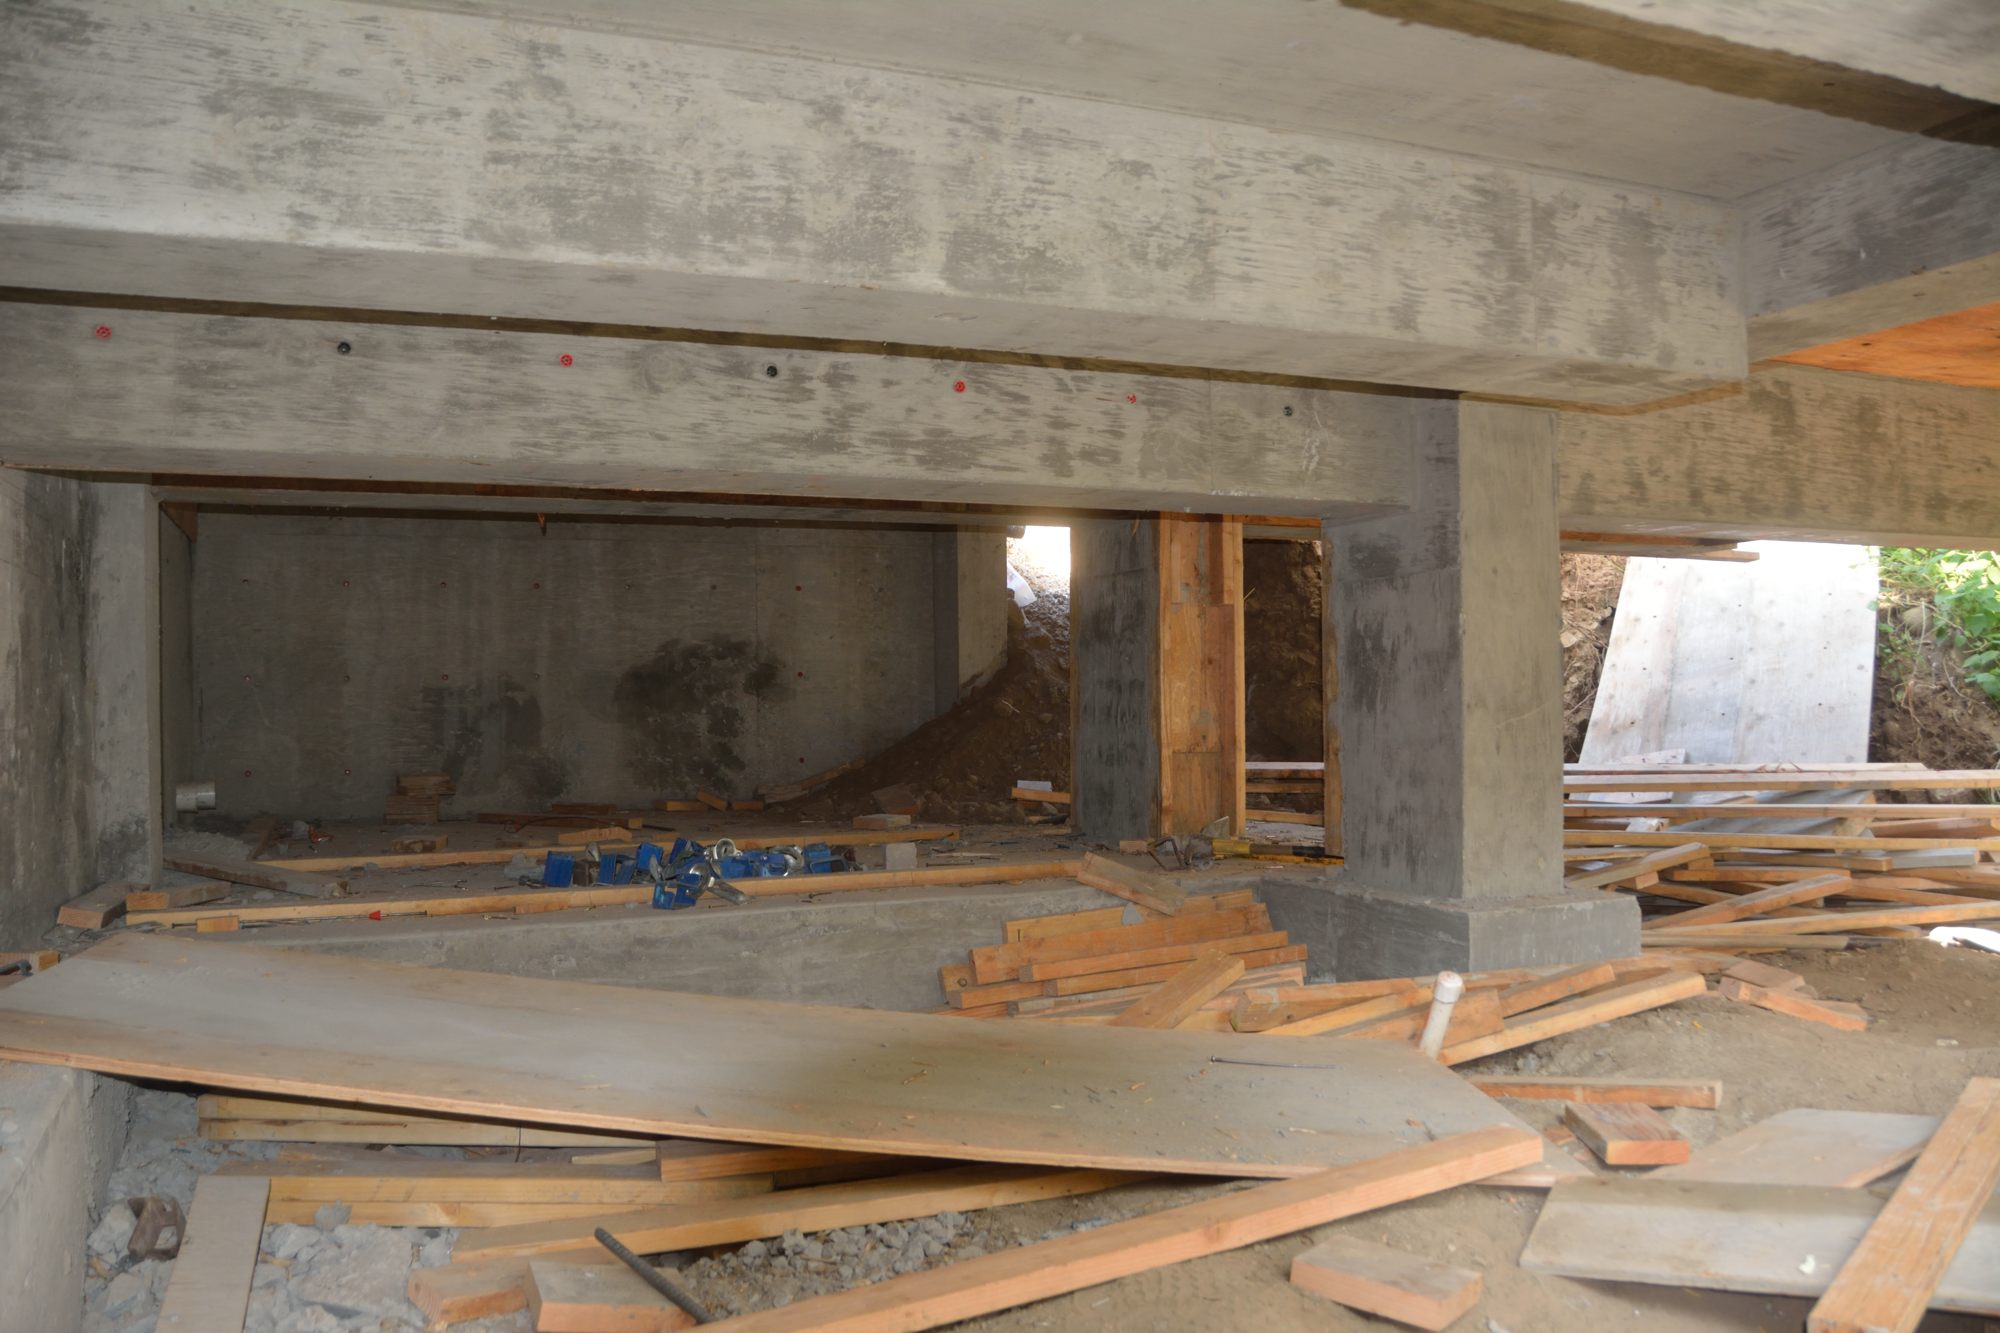
The steel guys were there today. They almost finished putting up the second side of the form for the back wall of the house above the retaining wall. They also have framed in the back door that leads outside from the kitchen. There are two more house walls that need a second layer of plywood to frame them in before they can pour the concrete. Ted says there are also some gaps in the foundation where the great room on slab joins the back part of the house over a crawlspace that need to be framed before the pour as well.
Yesterday a full crew worked on the forms for the walls on the parts of the house that will be two stories. Today, a smaller crew was back for the morning to finish removing the scaffolding from under the deck.
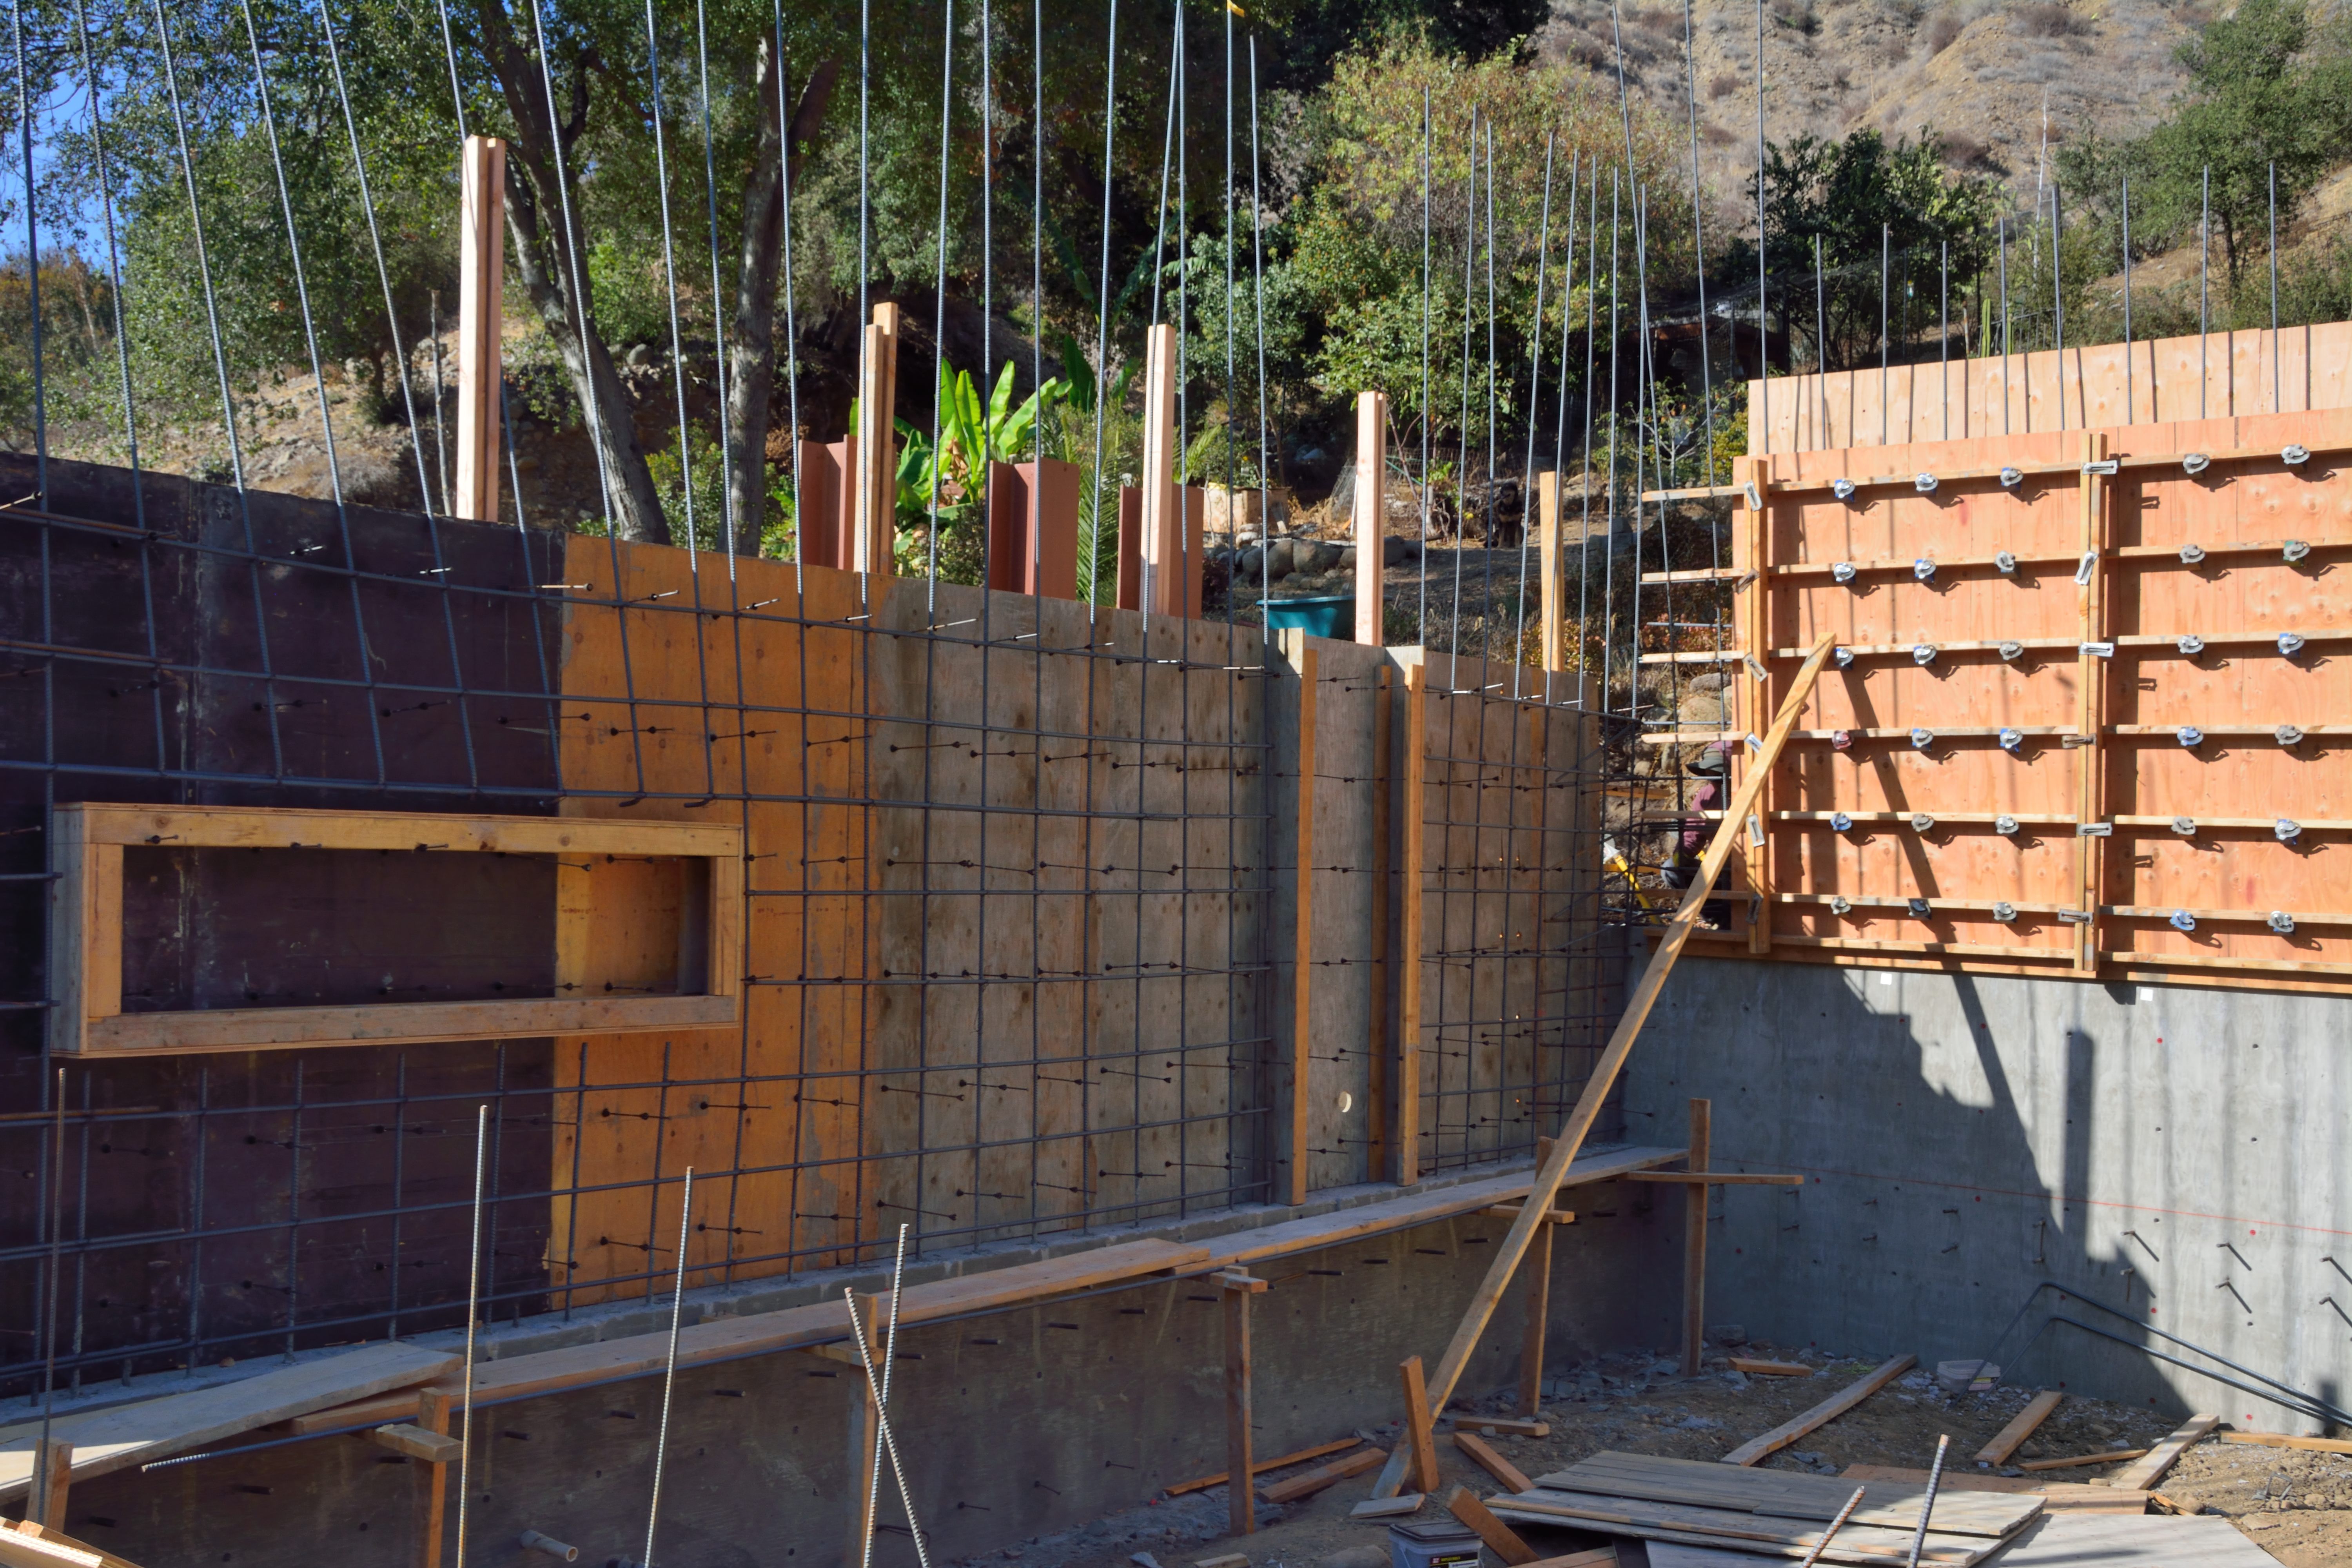
Pictures 1 and 2 show forms and rebar for the two-story walls on the north and west side of the house. There is rebar waving in the air, because they can only pour 8 -10 vertical feet of wall at one time, but they want to run the rebar continuously from the first to the second floors. These walls enclose the space that, on the first floor, will include the kitchen, pantry, laundry room, guest and master bathrooms, dressing room, and the utility room. In Picture 2, you can see where they have blocked out a space in the west wall for a window into the kitchen.
Picture 1 – West and North walls of the house from the backyard above.Picture 2 – West and north walls from the great room slab.
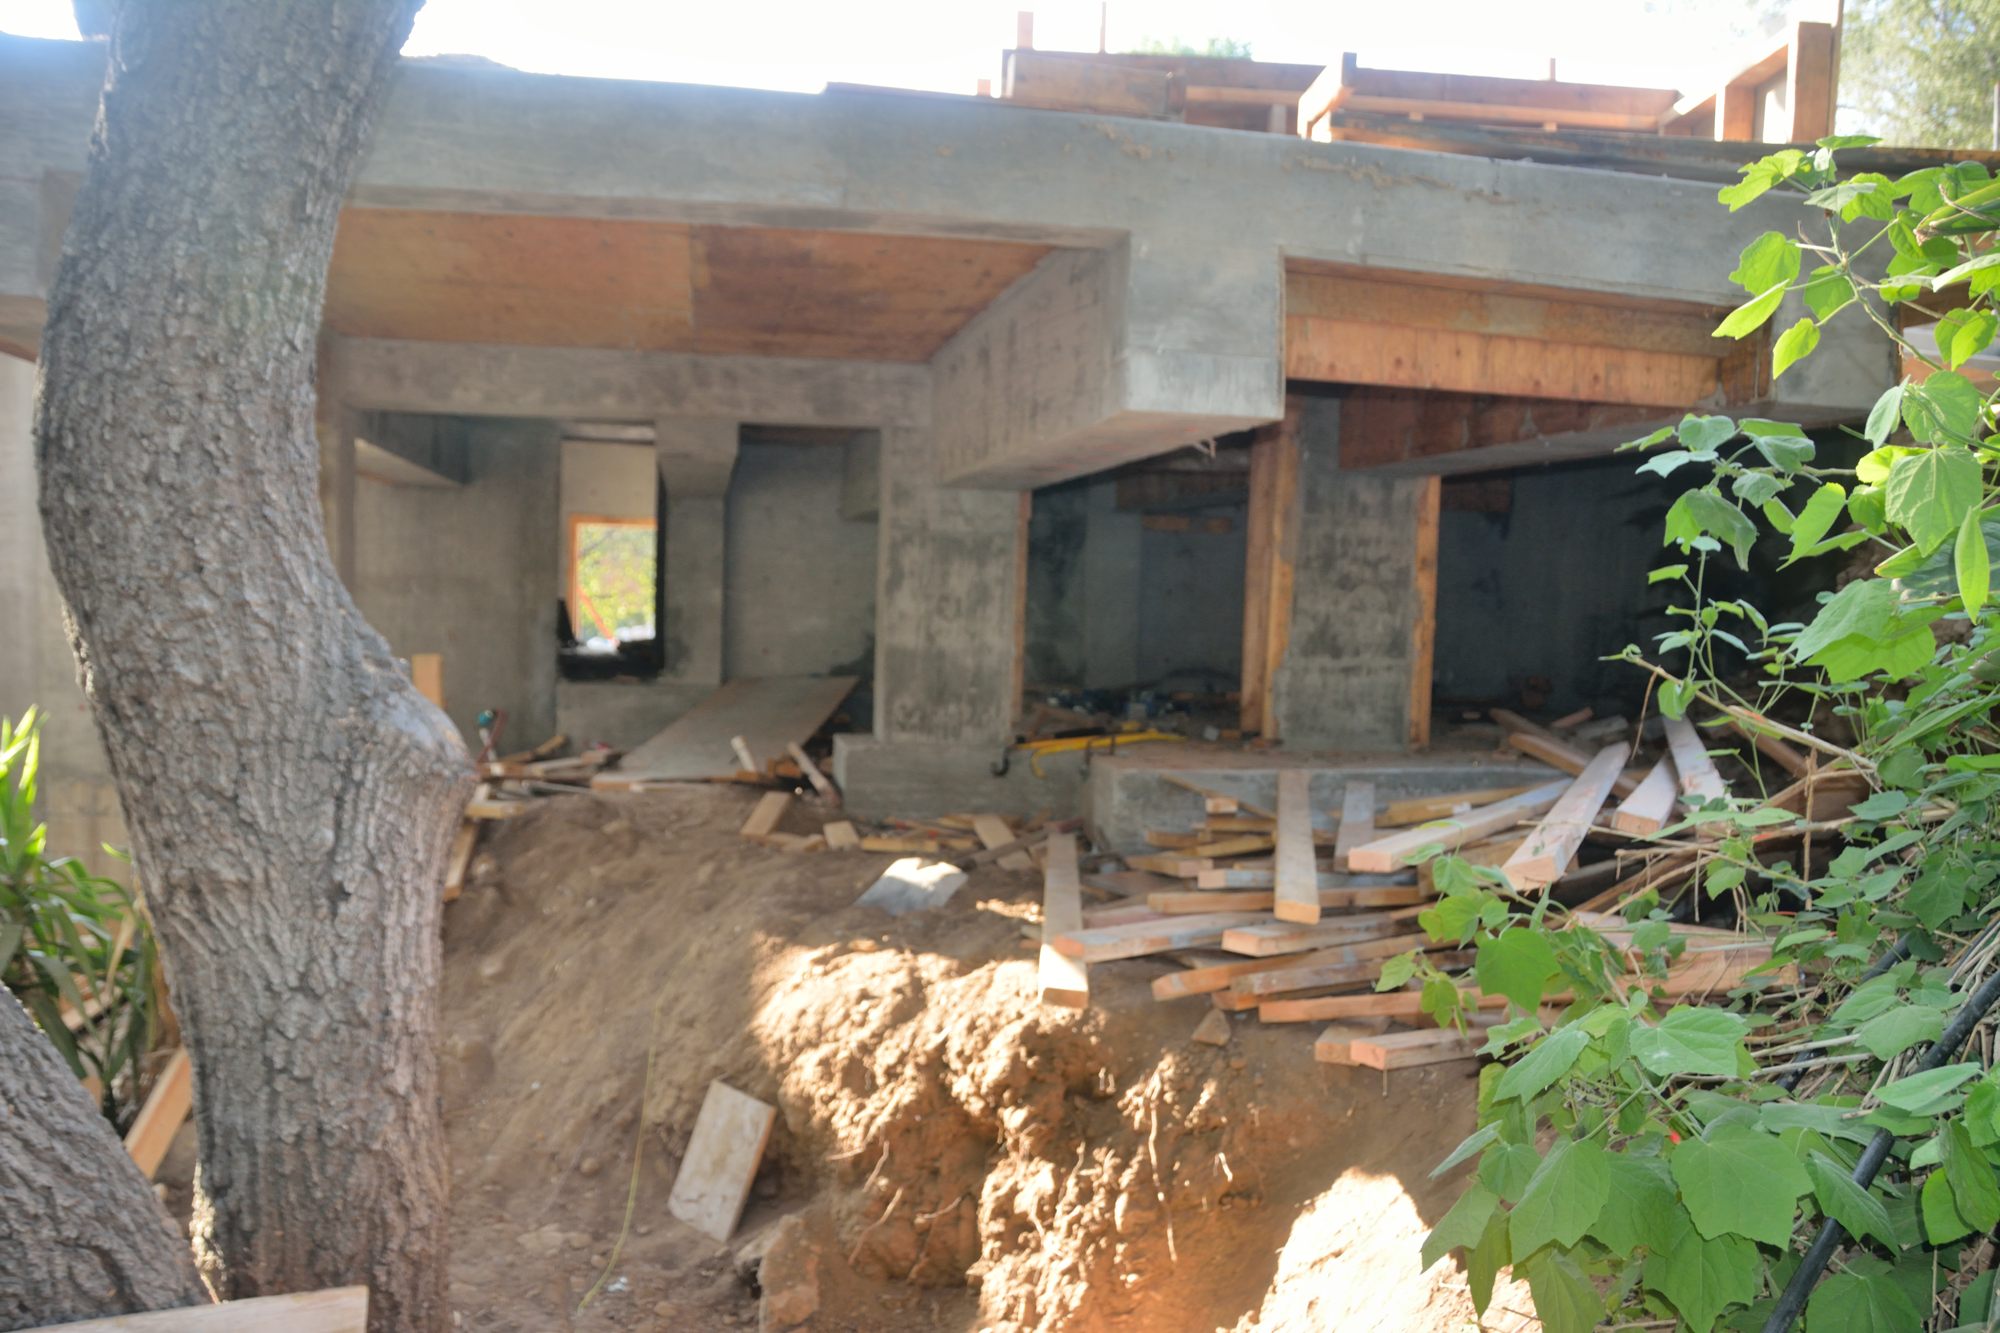
Pictures 3 and 4 show the openings to the under-deck area, through what will be an access door from the stairway on the west and simply an opening from the terrace gardens on the east. Picture 5 shows where the water storage bladder will go under the west side of the deck. Picture 6 shows the area under the east side of the deck, with steps down to the lower level. In this picture you can see the large concrete beams that support the cantilevered parts of the lower deck.
Picture 3 – Access to the under deck area from what will be an access door from the stairway that will run up by the garage and the west side of the deck.Picture 4 – Opening to the area under the deck from the terrace beds east of the garage and deck. Just to the left of the middle you can see through to the opening shown in Picture 3.Picture 5 – Area where the water storage bladder will go viewed from the access hole below the west side of the deck.Picture 6 – Area under the east side of the deck.
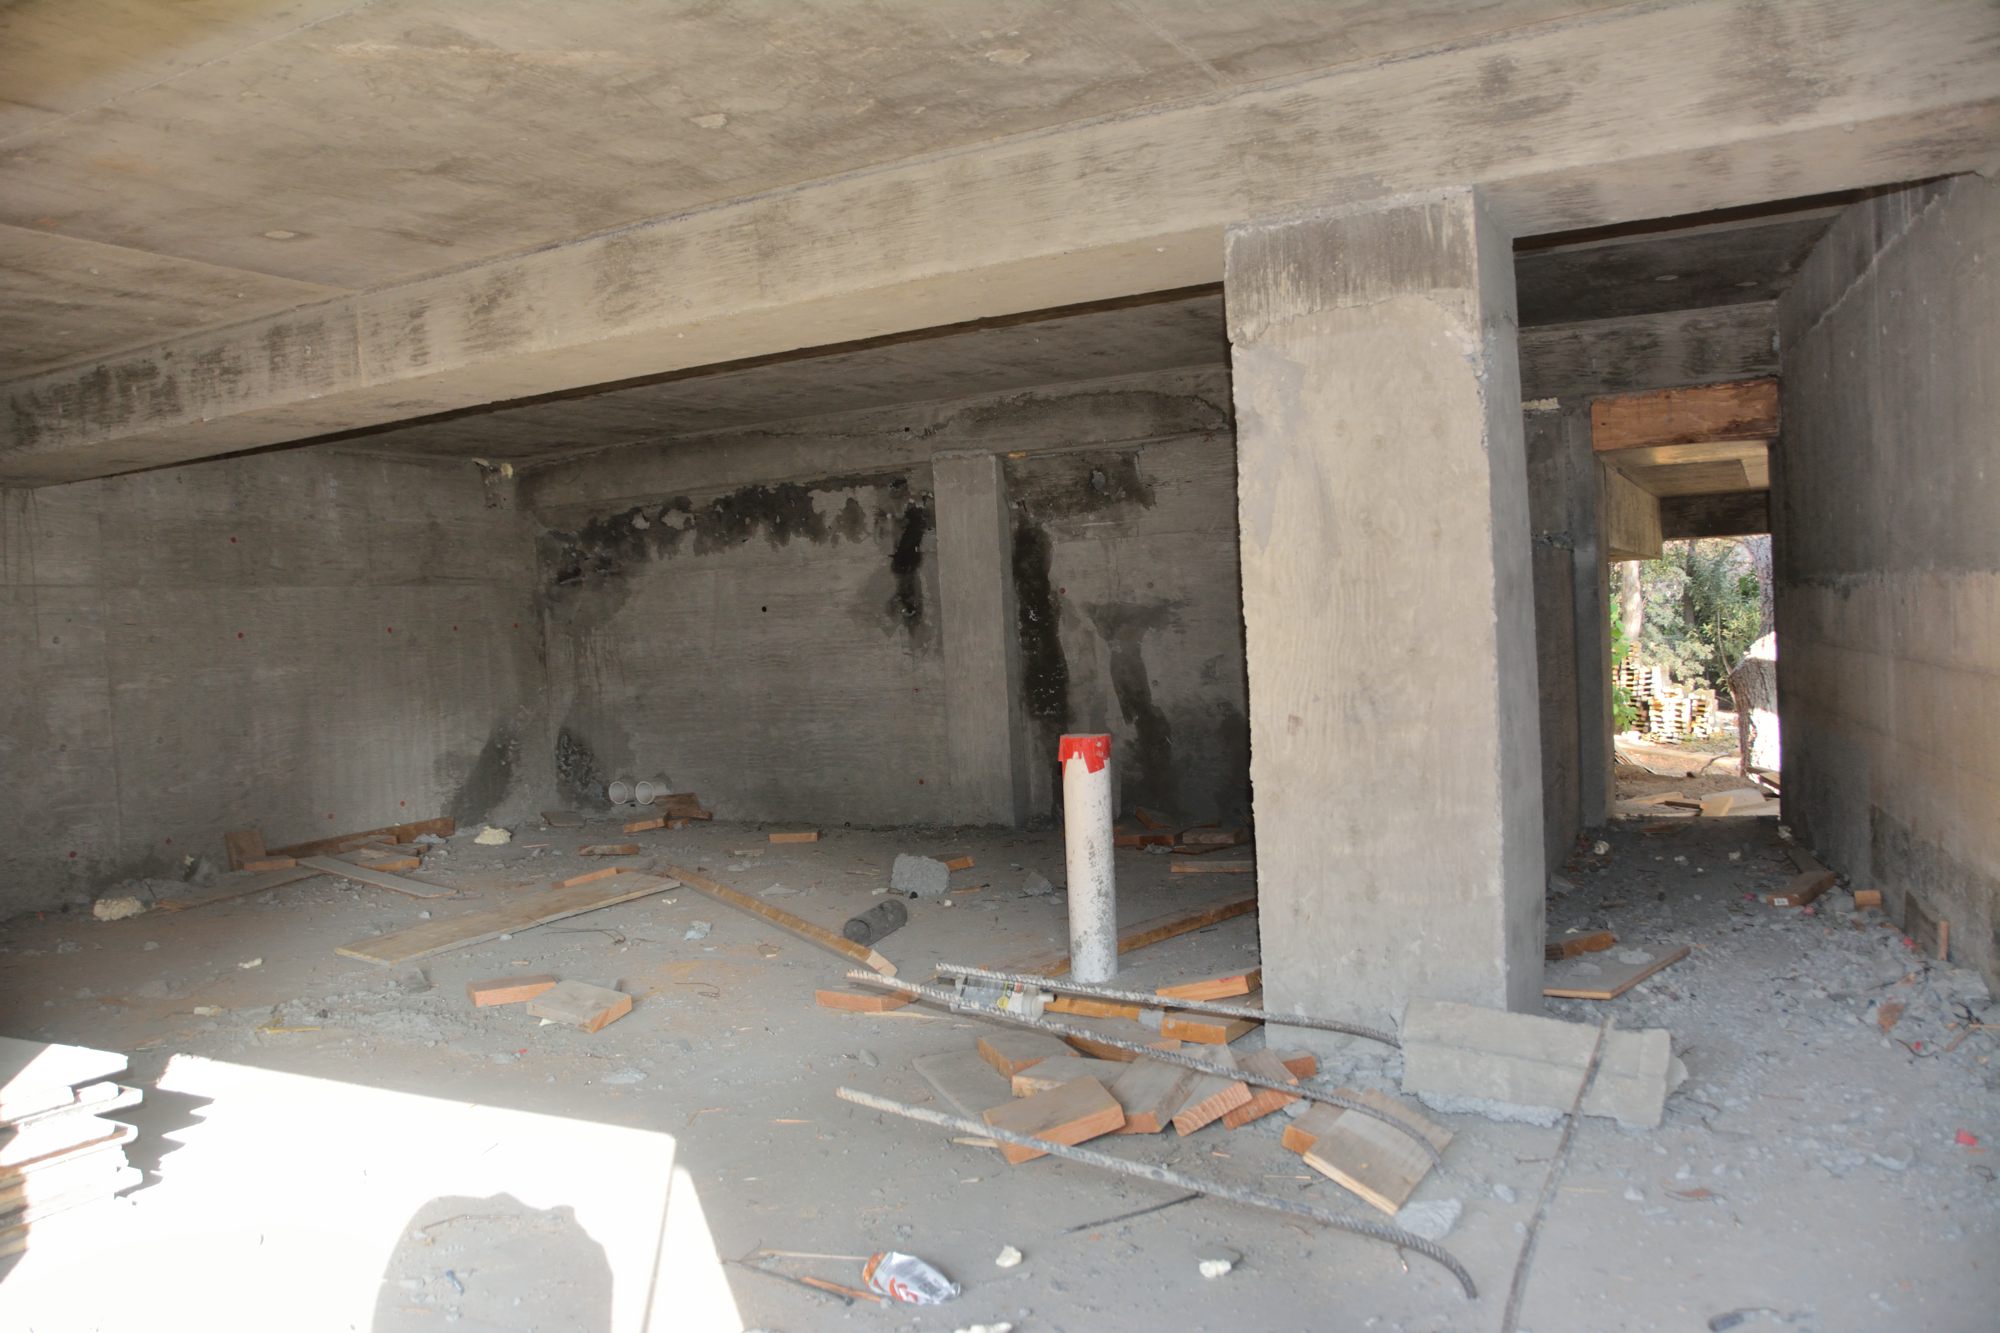
The steel guys did show up today, but they didn’t work on the house framing. Instead, they started removing the scaffolding from under the lower deck, which is cantilevered. They kept the scaffolding supporting it for almost a month to give the concrete time to really dry. The scaffolding was screwed together, and it is a real pain to take apart. Michael, our ex-contractor neighbor, told me he thought it would take them 3 days to get it all apart. I’m not sure if that includes removing the scaffolding around where the water bag goes or not. This is a photo of the front of the underside of the lower deck.
After the first work on the house walls, the workers went off to work elsewhere. They are scheduled to come back on Thursday to finish the plywood surrounds for the walls prior to a concrete pour on next Monday.
The workers didn’t come yesterday, but they came today and started building the framing for the part of the house with a crawl space under it. Apparently, they will be slowing down work while they wait for the blue duct to arrive. They don’t want to pour the walls until the blue ducting is in place.
The Holy Fire is 64% contained and there is no evidence (ash or smoke) in Modjeska. The fire was allegedly started by a crazy guy who has had run-ins with his neighbors for years.
I am including a photo of a sunflower tree, which sprouted in Ted’s flower bed in the front yard. We have two kinds of sunflowers around the yard, seeded by the birds dropping seeds from the bird feeder. Most of the sunflowers are very tall and have one enormous flower at the top. The few of them like this don’t usually bloom well because they need more water than they get outside of an irrigated bed.