Gentle readers, in your concern you have been inquiring: “Why no blog entries for almost a month?” Here are some possible answers
(a) The big one happened and SoCal finally fell into the ocean.
(b) It has rained for most of 30 days and 30 nights.
(c) The work on the house has mostly been behind the scenes.
(d) Ted has been busy, Nina has been sick, and we have hardly been to Modjeska much less had time to write about it.
If your answer was anything other than (a), you’re are partially correct — sorry Texans and New Yorkers you can’t gloat about that yet.
We have had an unusually wet/cold February and this has definitely slowed progress. However, two other factors may, in the long run, prove to have been more important limiting factors. Although, with the walls up and the roofs on, much of the rough electrical, plumbing, and HVAC work can move forward, a lot of the most time consuming work requires the house to be closed in, that is for the windows and doors to be in place. However, the windows and doors need to be ordered and they take about 8 weeks to be manufactured and shipped (this is down from the 12-16 weeks for the custom anodized finish that we originally wanted!) and they could not be ordered until the exact sizes of the openings could be measured — i.e., not until after all the walls and roofs were in place. However, somehow it took almost 6 weeks to finalize the door and window order even after all the openings were done. (The January 14th post talks about our first meeting with Angie, the Fleetwood representative who was working to get all of the specifications correct. Ted or Nina have met with her three more times and there have been numerous emails, but the order finally went in late last week!) It is true that the doors and windows are a large, expensive part of the overall house, and, if what we receive is wrong, it will take another 8 weeks to fix it, but this does seem excessive. And while this has been dragging on there has not been much incentive to press to get the rough work done, since it can all be finished in several more weeks.
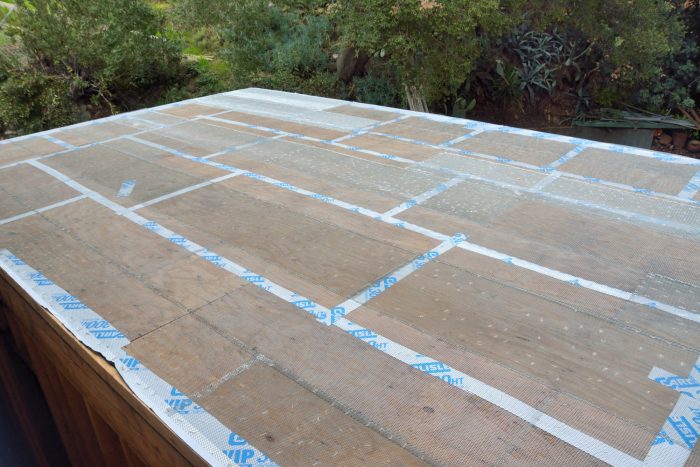
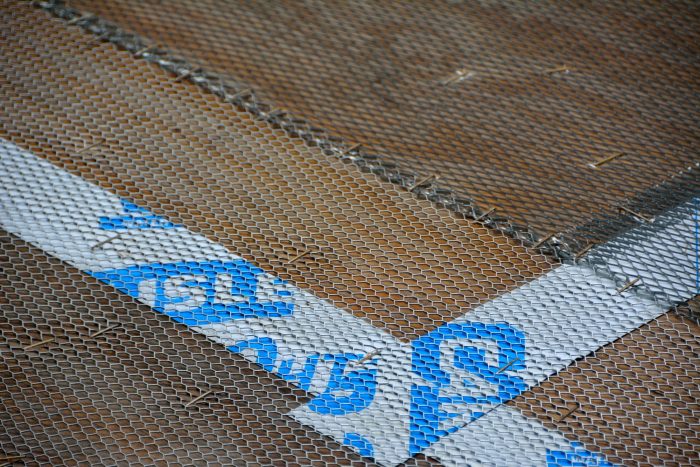
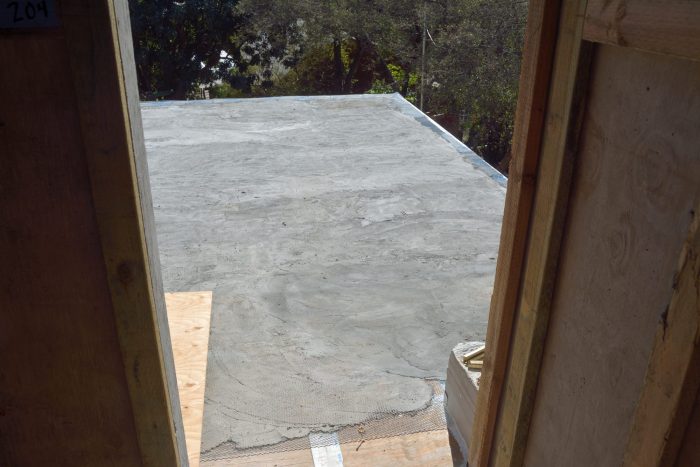
This is not to say that nothing has happened on the house. There has, for example been some more work on the roofs, mostly so that they can begin functioning like roofs rather than sieves. Pictures 1 and 2 show the metal lathe that was applied to the east roof during the first week in February. Picture 3 shows this metal lathe covered with the first coat of a lightweight cement that will help to waterproof it.
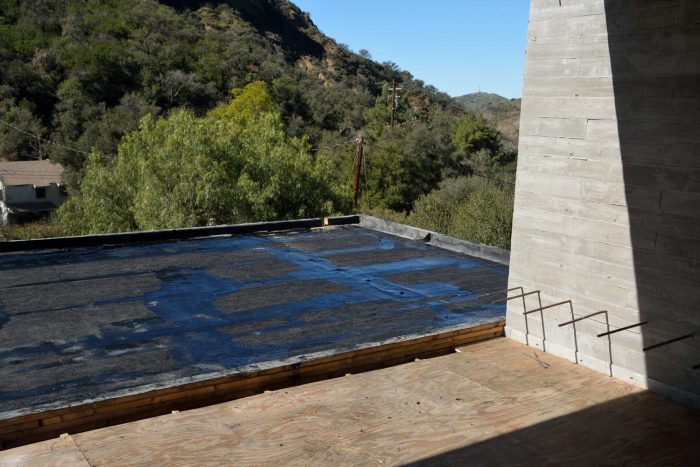
Picture 4 shows the south roof of the house. This will eventually be covered with a “green roof” — a system with growing plants. We are not quite sure why, but hot-mopped tar was used for the first layer of this waterproofing.
Unfortunately, the roofing work has now stopped waiting for clarity about whether the insulation for the walls will be on the outside of the concrete walls, under the stucco, as we planned, or on the inside of the concrete walls under the drywall. However, this is another long story that we will save until we know — I hope soon — whether it ends well or not.
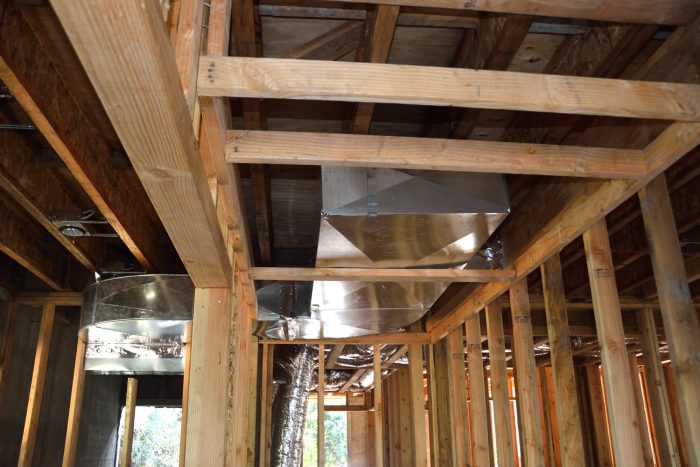
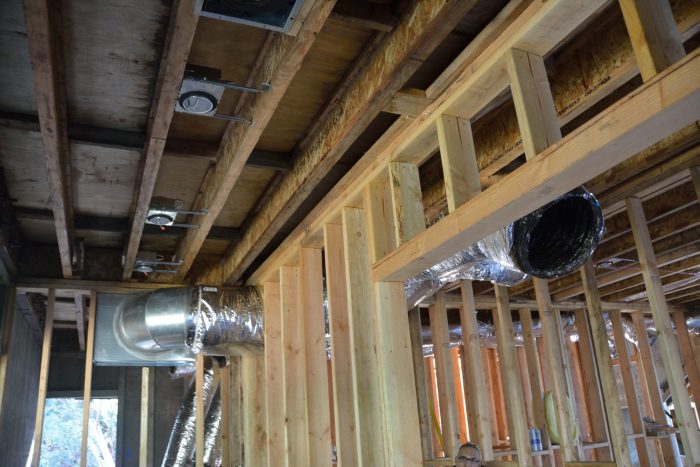
The HVAC installers also came back and replaced the return air duct for the first floor with the rigid metal duct work shown in Picture 5. Picture 6, duplicated from the February 7th blog, shows the large, round duct that this replaces. With this new duct, the dropped ceiling in the laundry room will not have to come down to the level of the window.
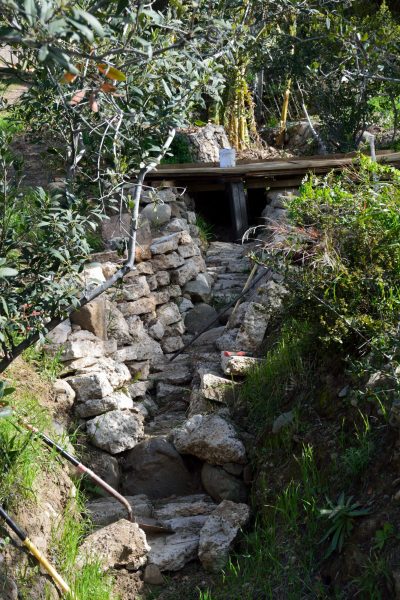
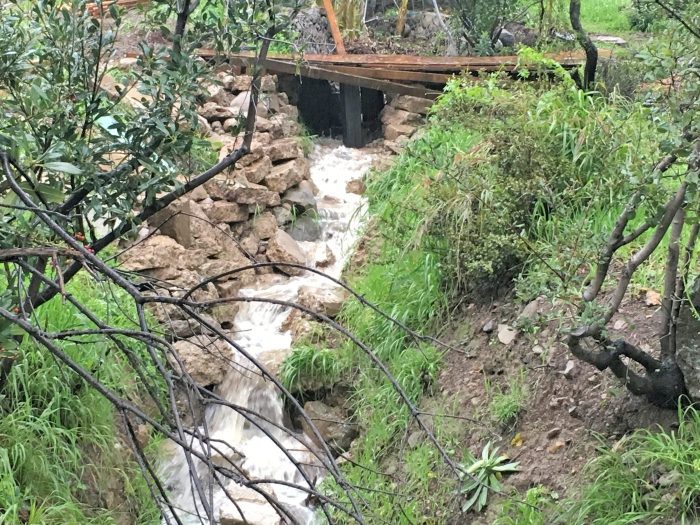
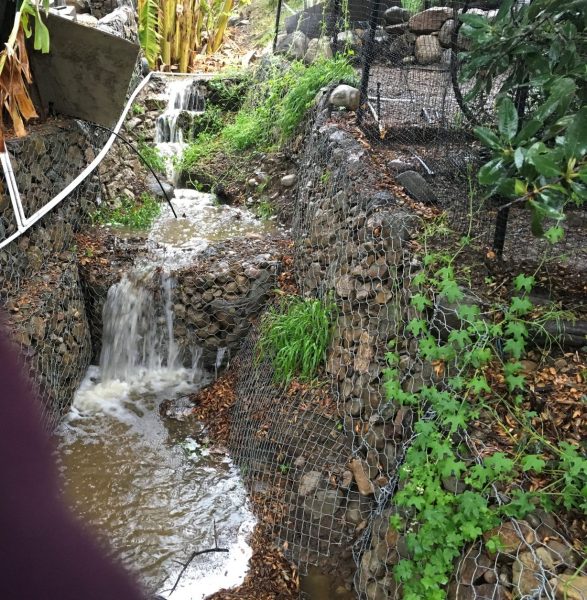
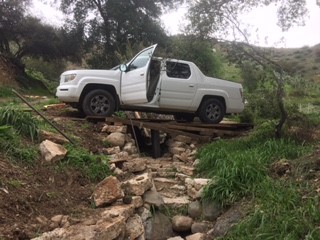
Even if not all that much has been done on the house, Pete has been working on the yard. Last year, when the old house was being demolished, Pete convinced us to save much of the concrete from the foundation for landscaping projects. He has been hard at work on one of these — hardening the sides and bottom of the gully below the bridge at the chicken coop. This part of the gully is less steep and deep than the gully higher up, so it really didn’t need the full gabion treatment. Picture 6 shows the beginning on this project. Picture 7 is the same area, largely complete. In this photo you can see a new, temporary bridge the Pete constructed so that we can drive materials and small earth moving equipment to the backyard, which is to be regraded.
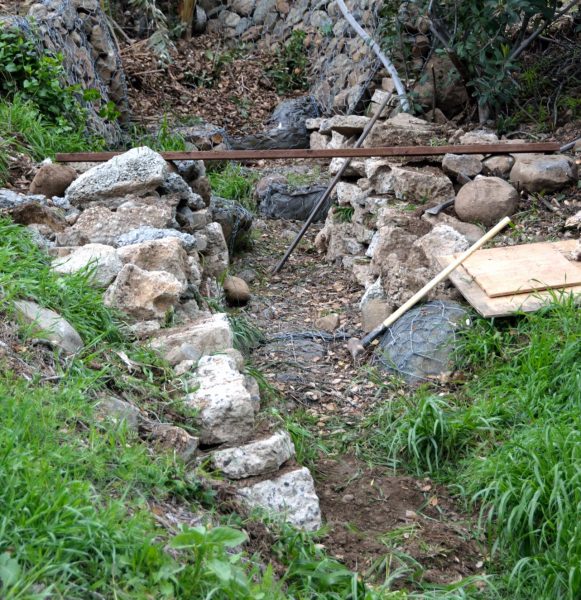
During the construction (before Picture 7 was taken), we had a period of particularly heavy rain. Pete took Picture 8 of the water in the newly channelized gully. This is the most water we have seen in this part of the gully since we put in the gabions. What is nice about the broken concrete construction is that it protects the bottom and sides of the gully from erosion, while the uneven surfaces, created by the stacked concrete, creates turbulence that slows the water down, and the joints between the
Picture 10 shows a test of the new bridge that Pete conducted. (I think we were glad not to have known about this test until it turned out to be successful.)
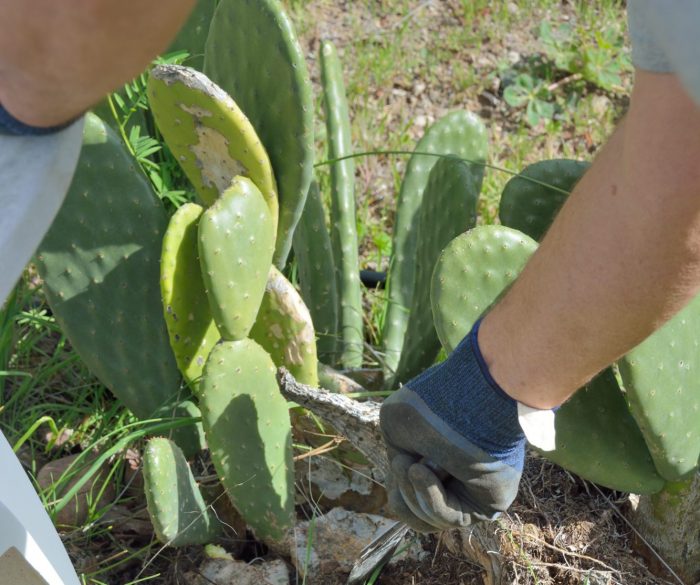
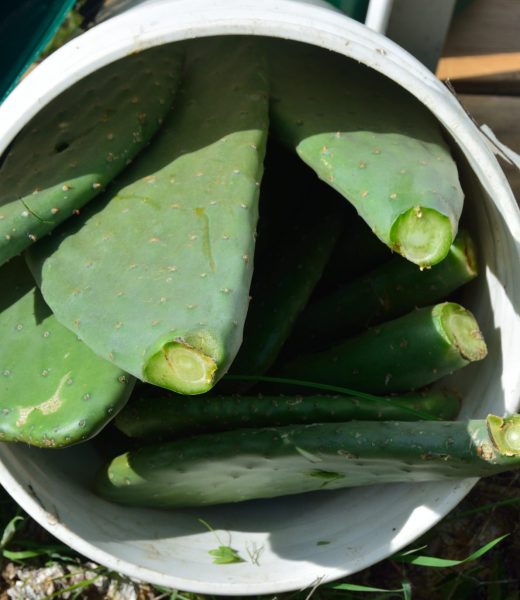
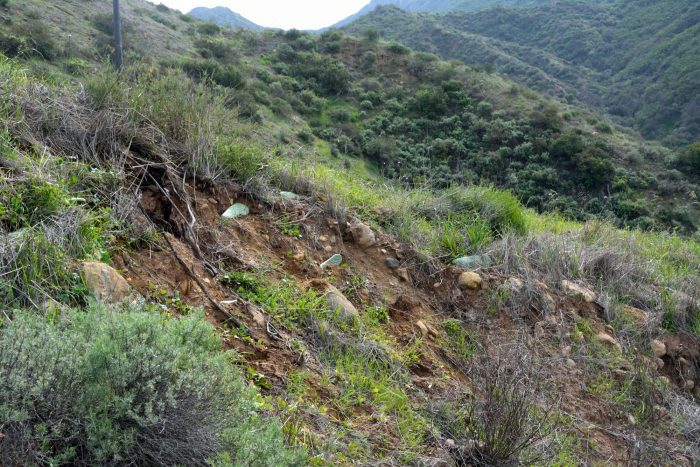
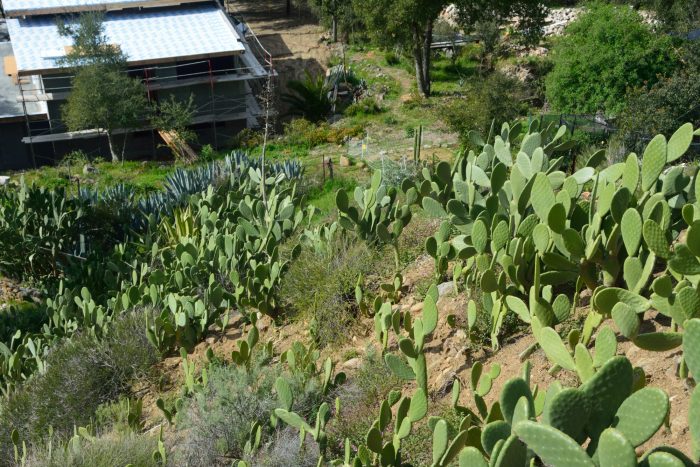
Pete and Ted also spent a large chunk of a day planting cactus on a part of the hillside above the house that is subject to heavy erosion. Cactus is great for this because it creates a dense network of stabilizing roots that hold the loose soil in place, while actually helping to slow wildfires both because their pads hold water and do not burn well and because grasses do not grow where cactus is established. We were interested, when we began exploring our Modjeska property, to discover that we had a wonderfully spineless variety of what would otherwise be what we would have called prickly pear cactus. These, it turns out were almost certainly the result of a project by the great plant hybridizer Luther Burbank. Between 1907 and 1925, Burbank introduced more that 60 varieties of spineless cacti. These were developed mostly from hybrids of varieties of the Indian fig (Opuntia ficus-indica) and the Mexican prickly pear (Opuntia tuna), and were offered in two main types: the fruiting varieties, grown for their variously colored and flavored prickly pears, and the forage varieties, grown for their edible pads (properly called thalli), which could be fed raw to livestock or cooked for human consumption.
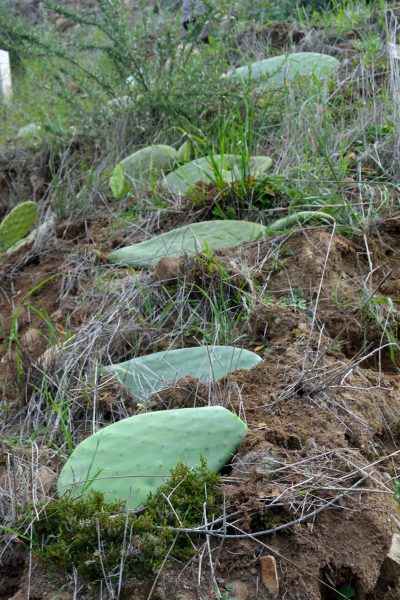
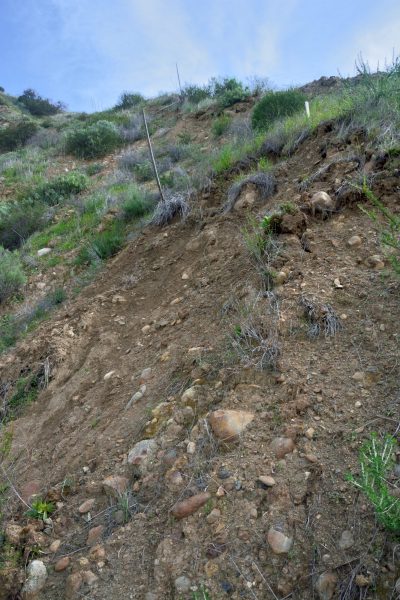
Picture 11 shows one of several areas that we worked on. This is an area where a section of the top foot of soil let go and slid down the hill in the recent rains. The topsoil in this upper part of our property is quite loose, held in place only by the roots of
The following pictures show some of the process of planting these cacti.