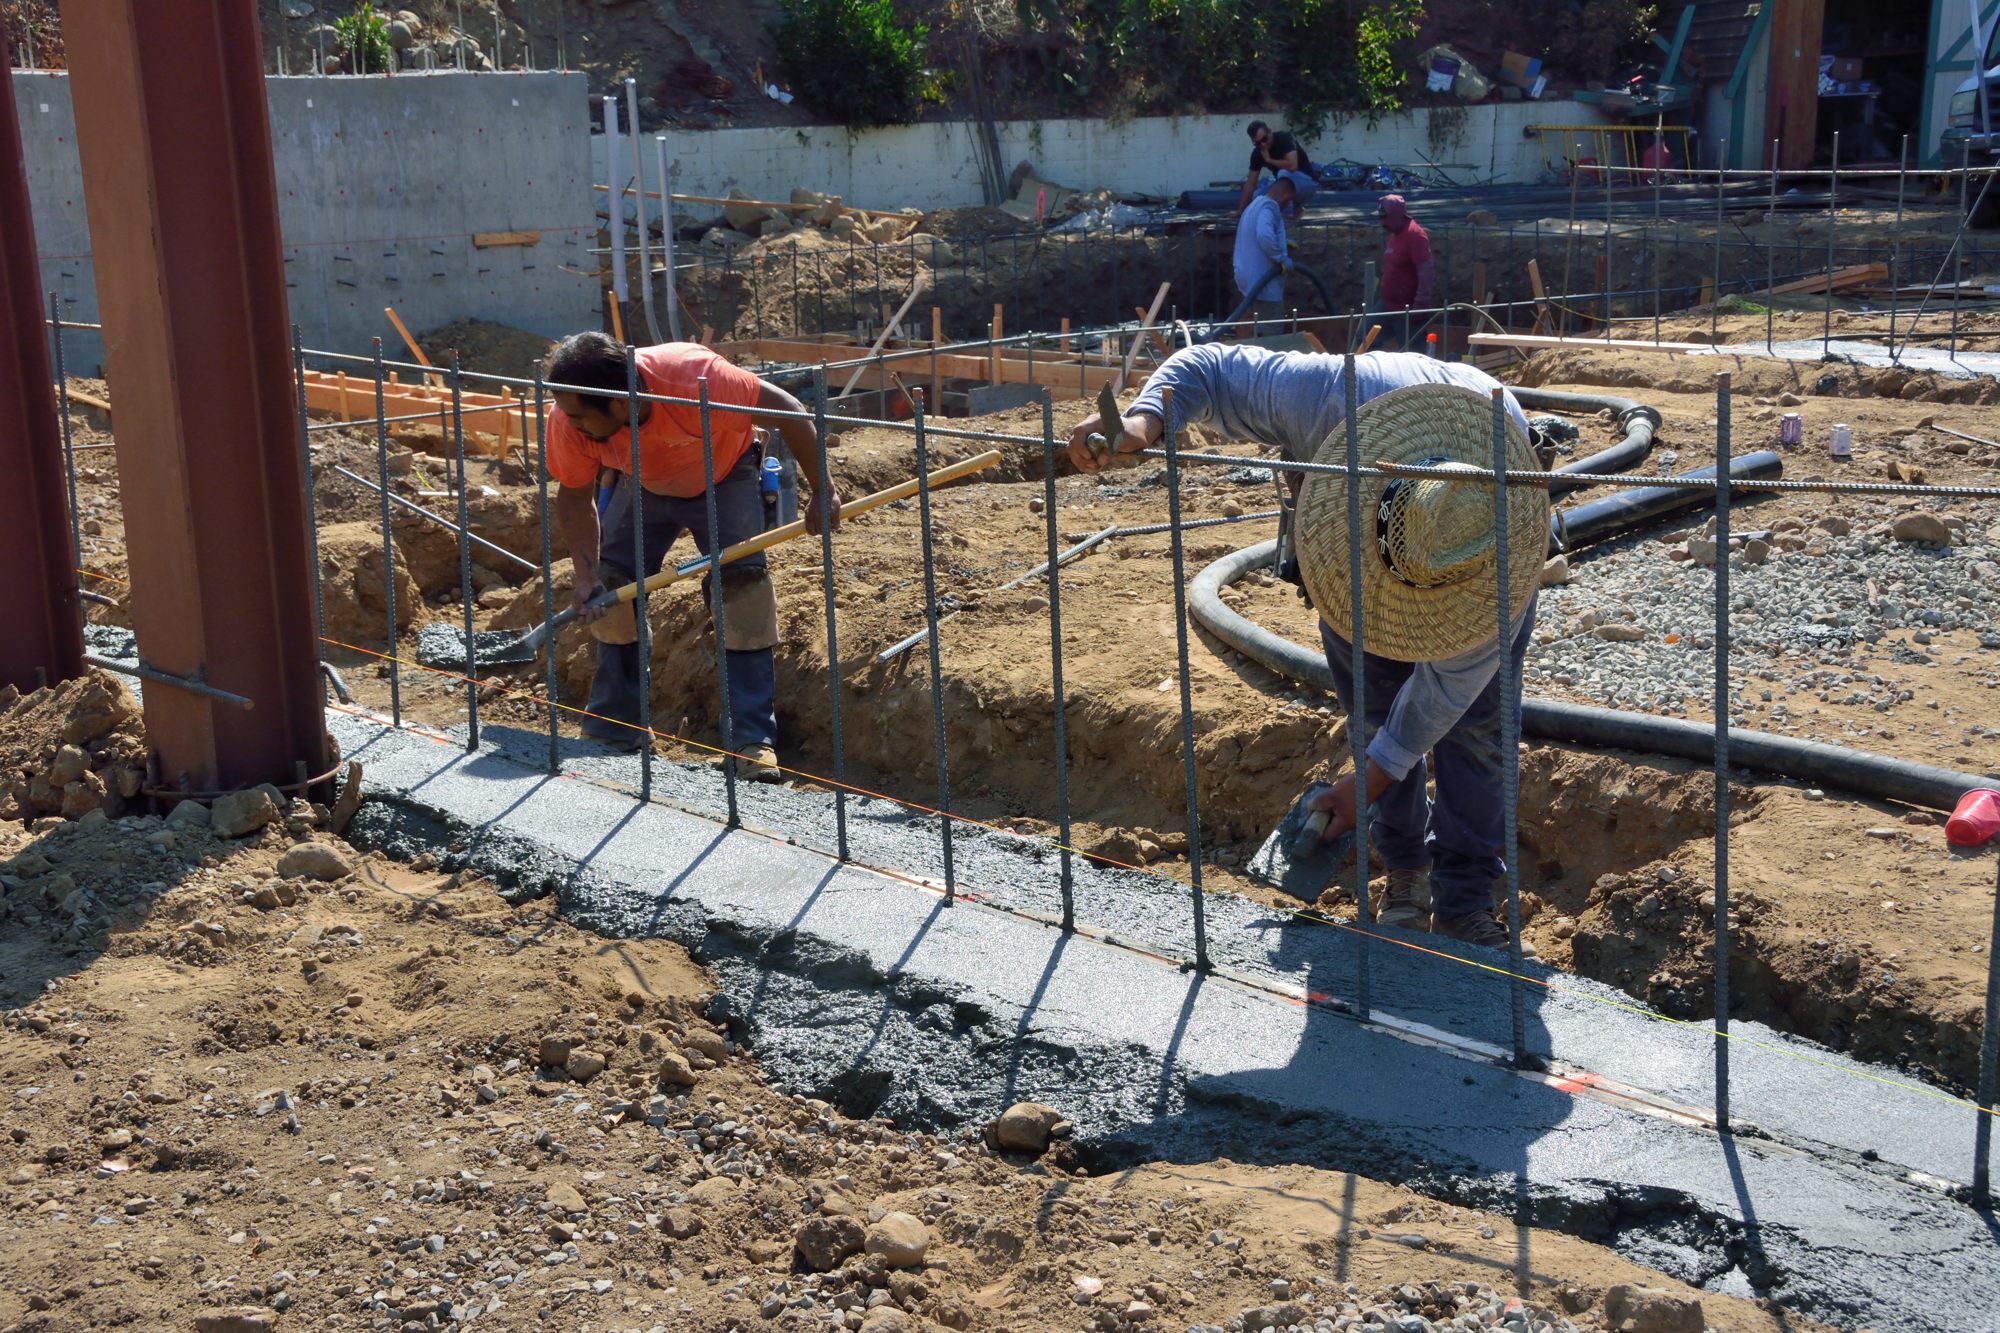
There are a lot of pictures in today’s post because a number of interesting things happened on both Friday and Saturday. The big pour on Friday was similar in some ways to the previous 4, but also, because they were working on the deck and house, different in interesting ways. Taylor is here from Australia, on the way to Haywood’s wedding next weekend, so she got up early to view the events personally. Picture 1, shows her supervising. Pictures 2, 3 and 4 have become more familiar scenes for us. Picture 2 shows the rough smoothing of the new concrete on the lower deck. Picture 3, shows the pump operator manhandling the heavy tube spewing out the pumped concrete so that it fills the grade beam. Picture 4, shows the missing section of the slab below the deck being filled.
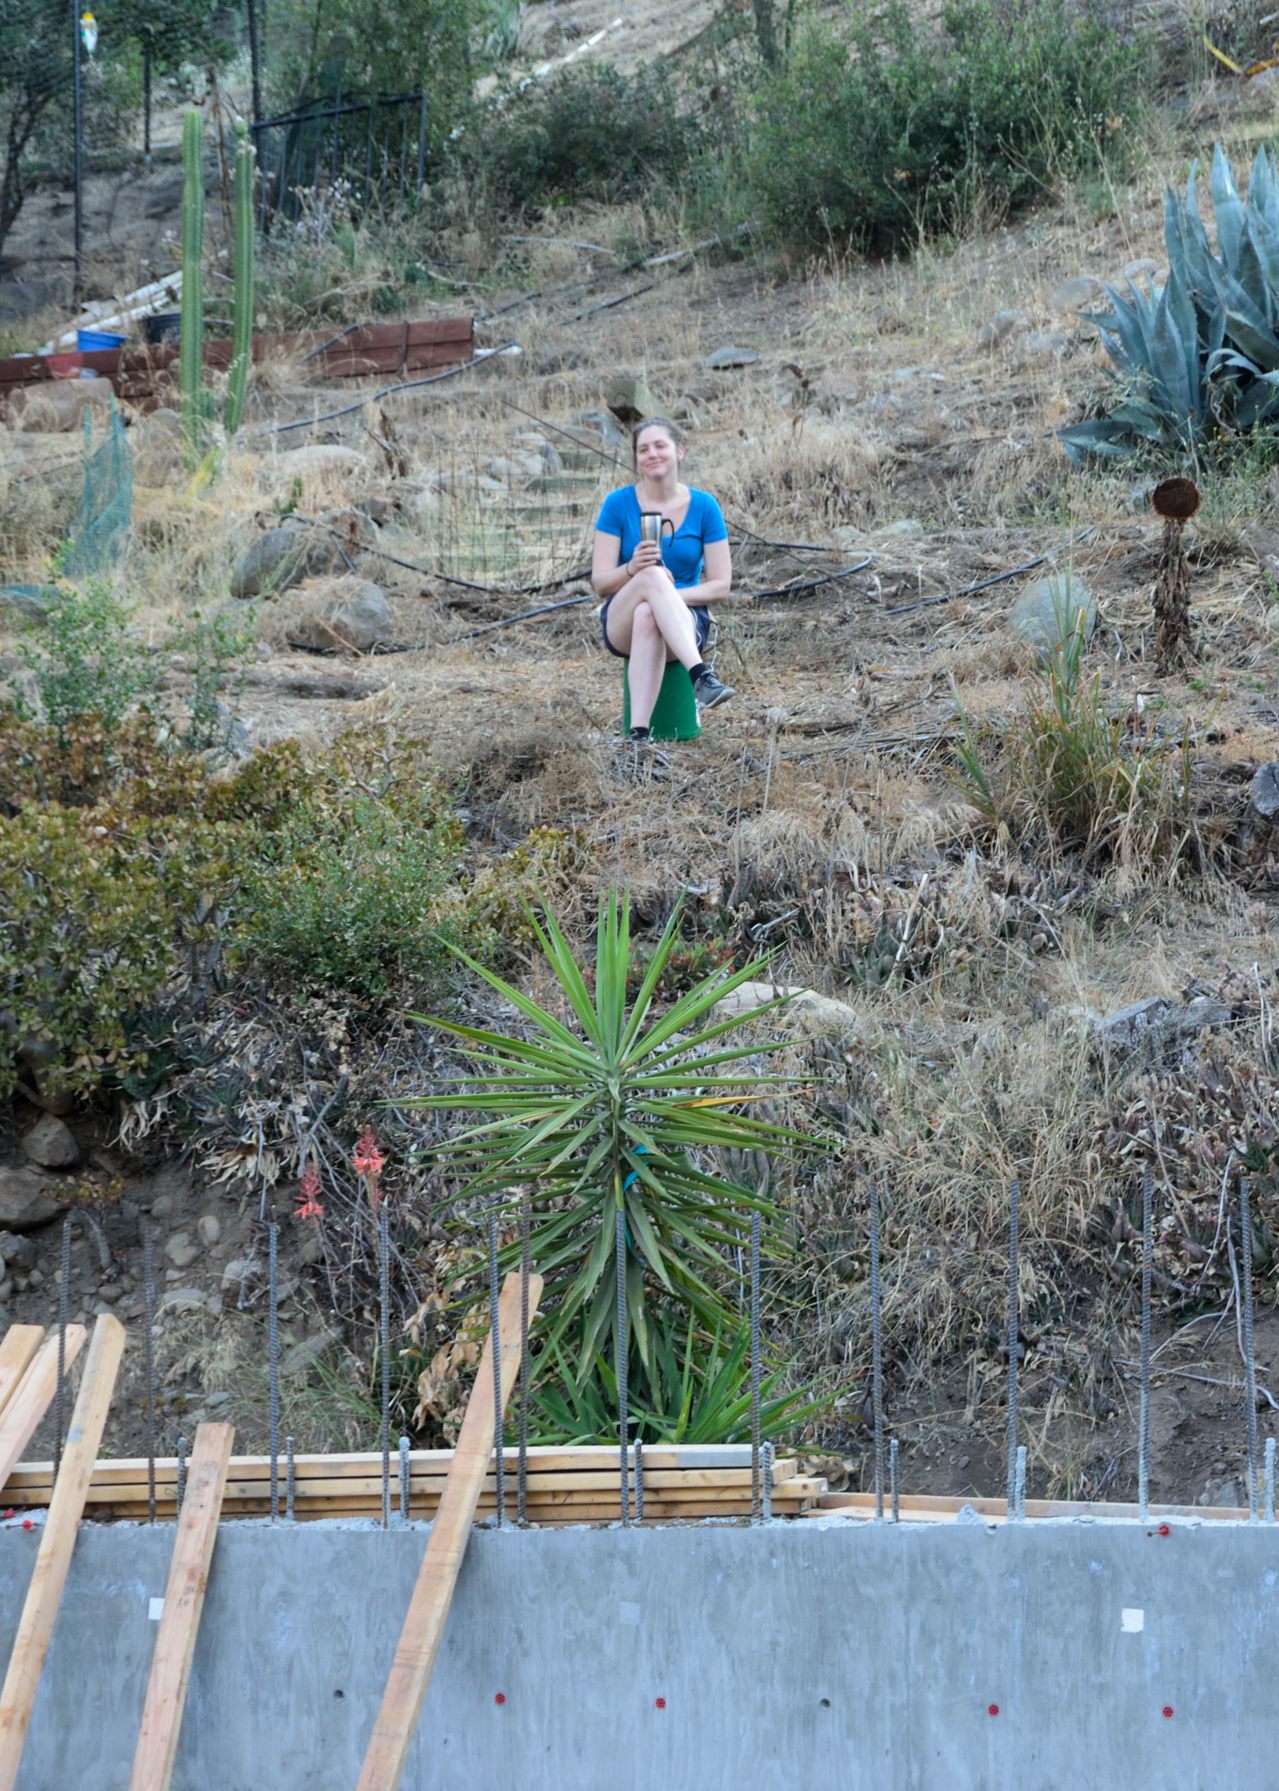
Picture 1 – Taylor supervising the pour from a vantage point on the hillside behind/above the house.
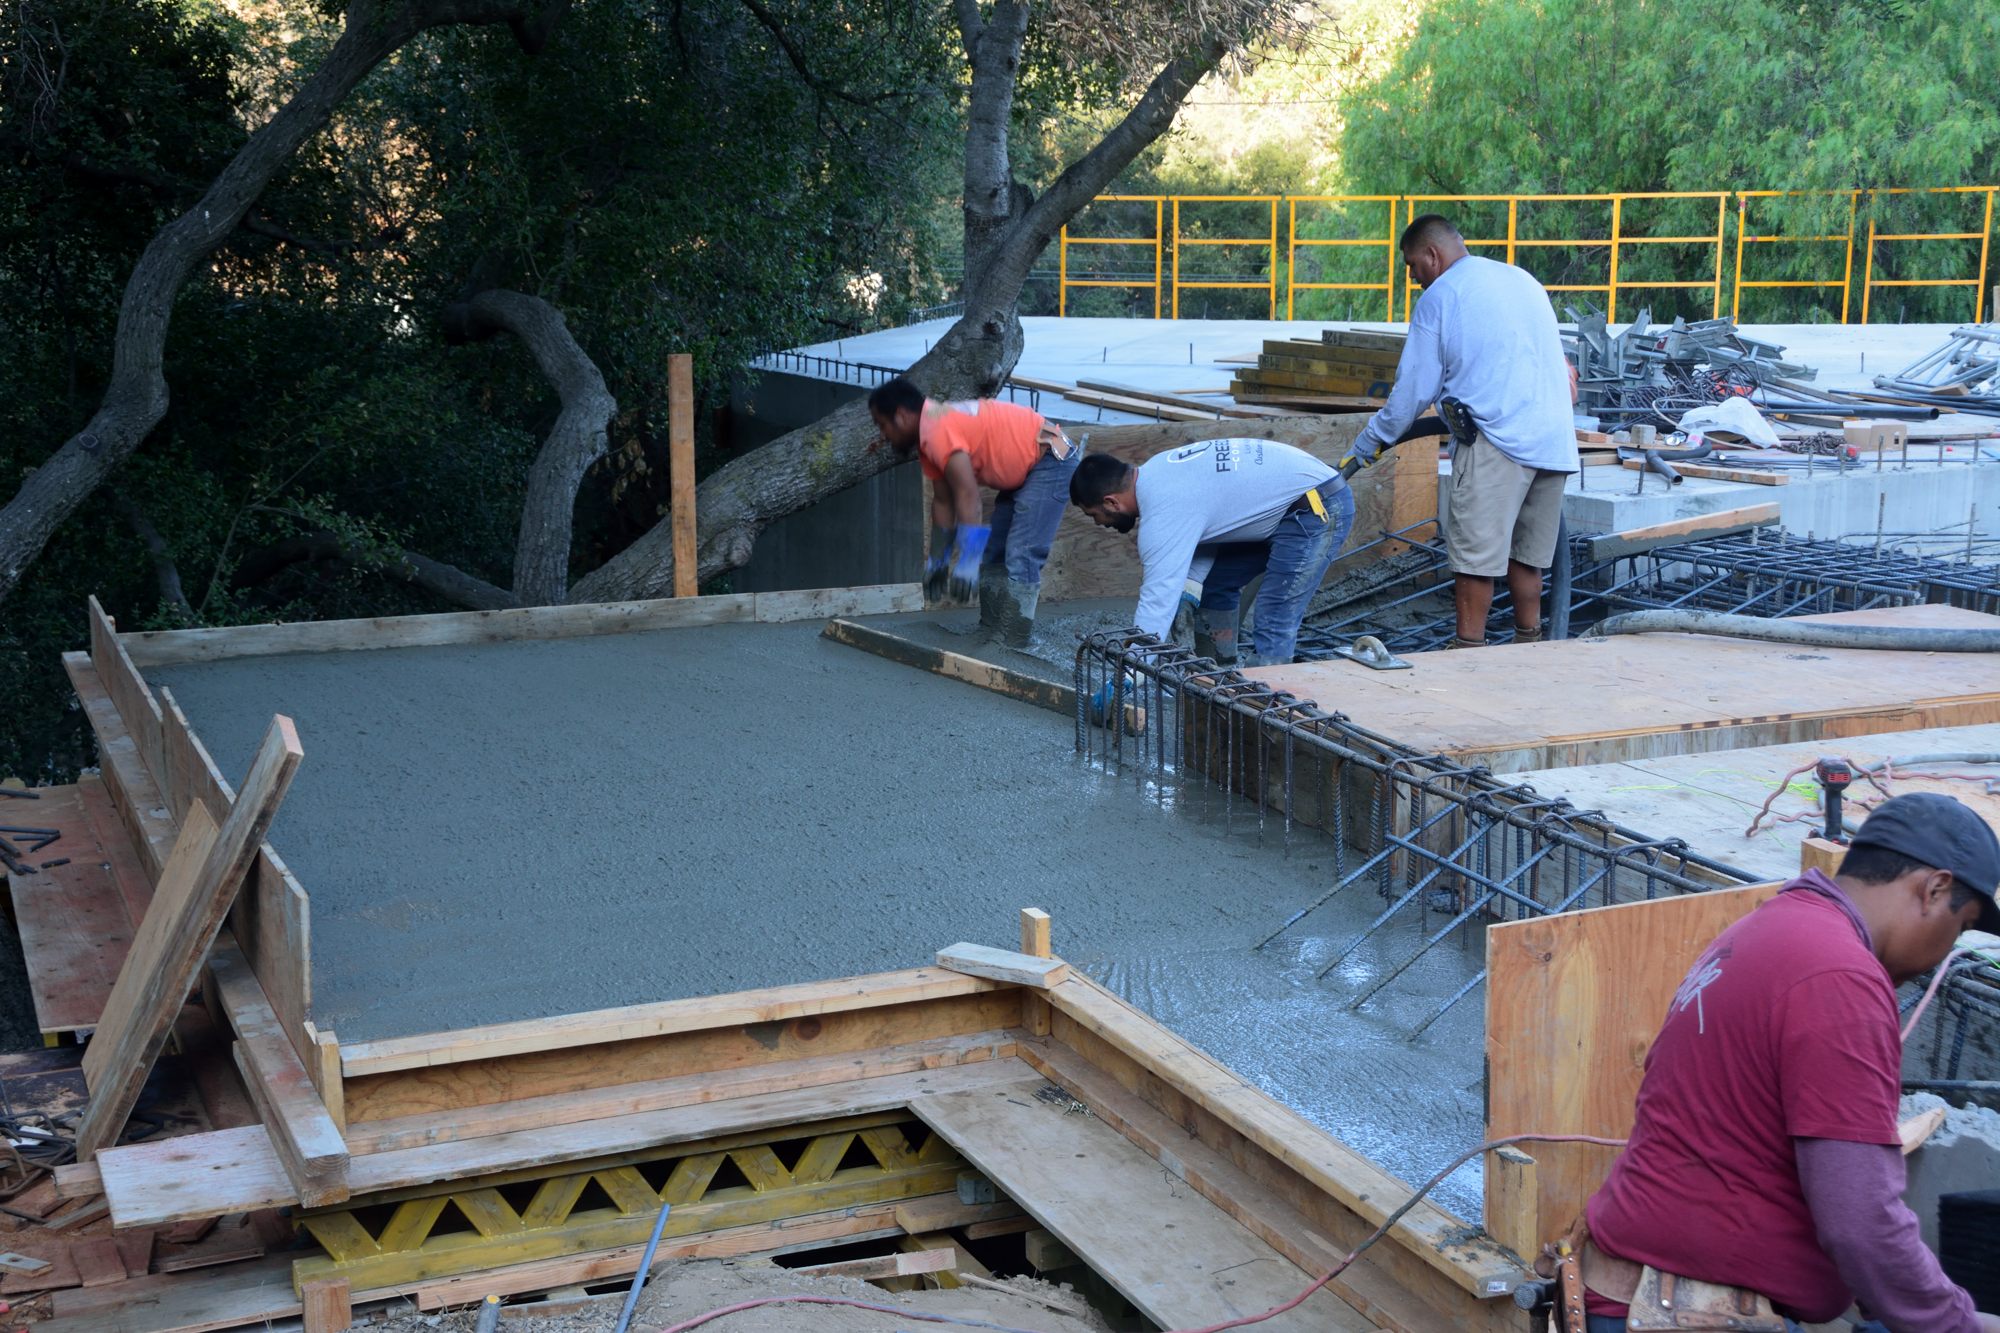
Picture 2 – Smoothing the concrete on the lower deck.
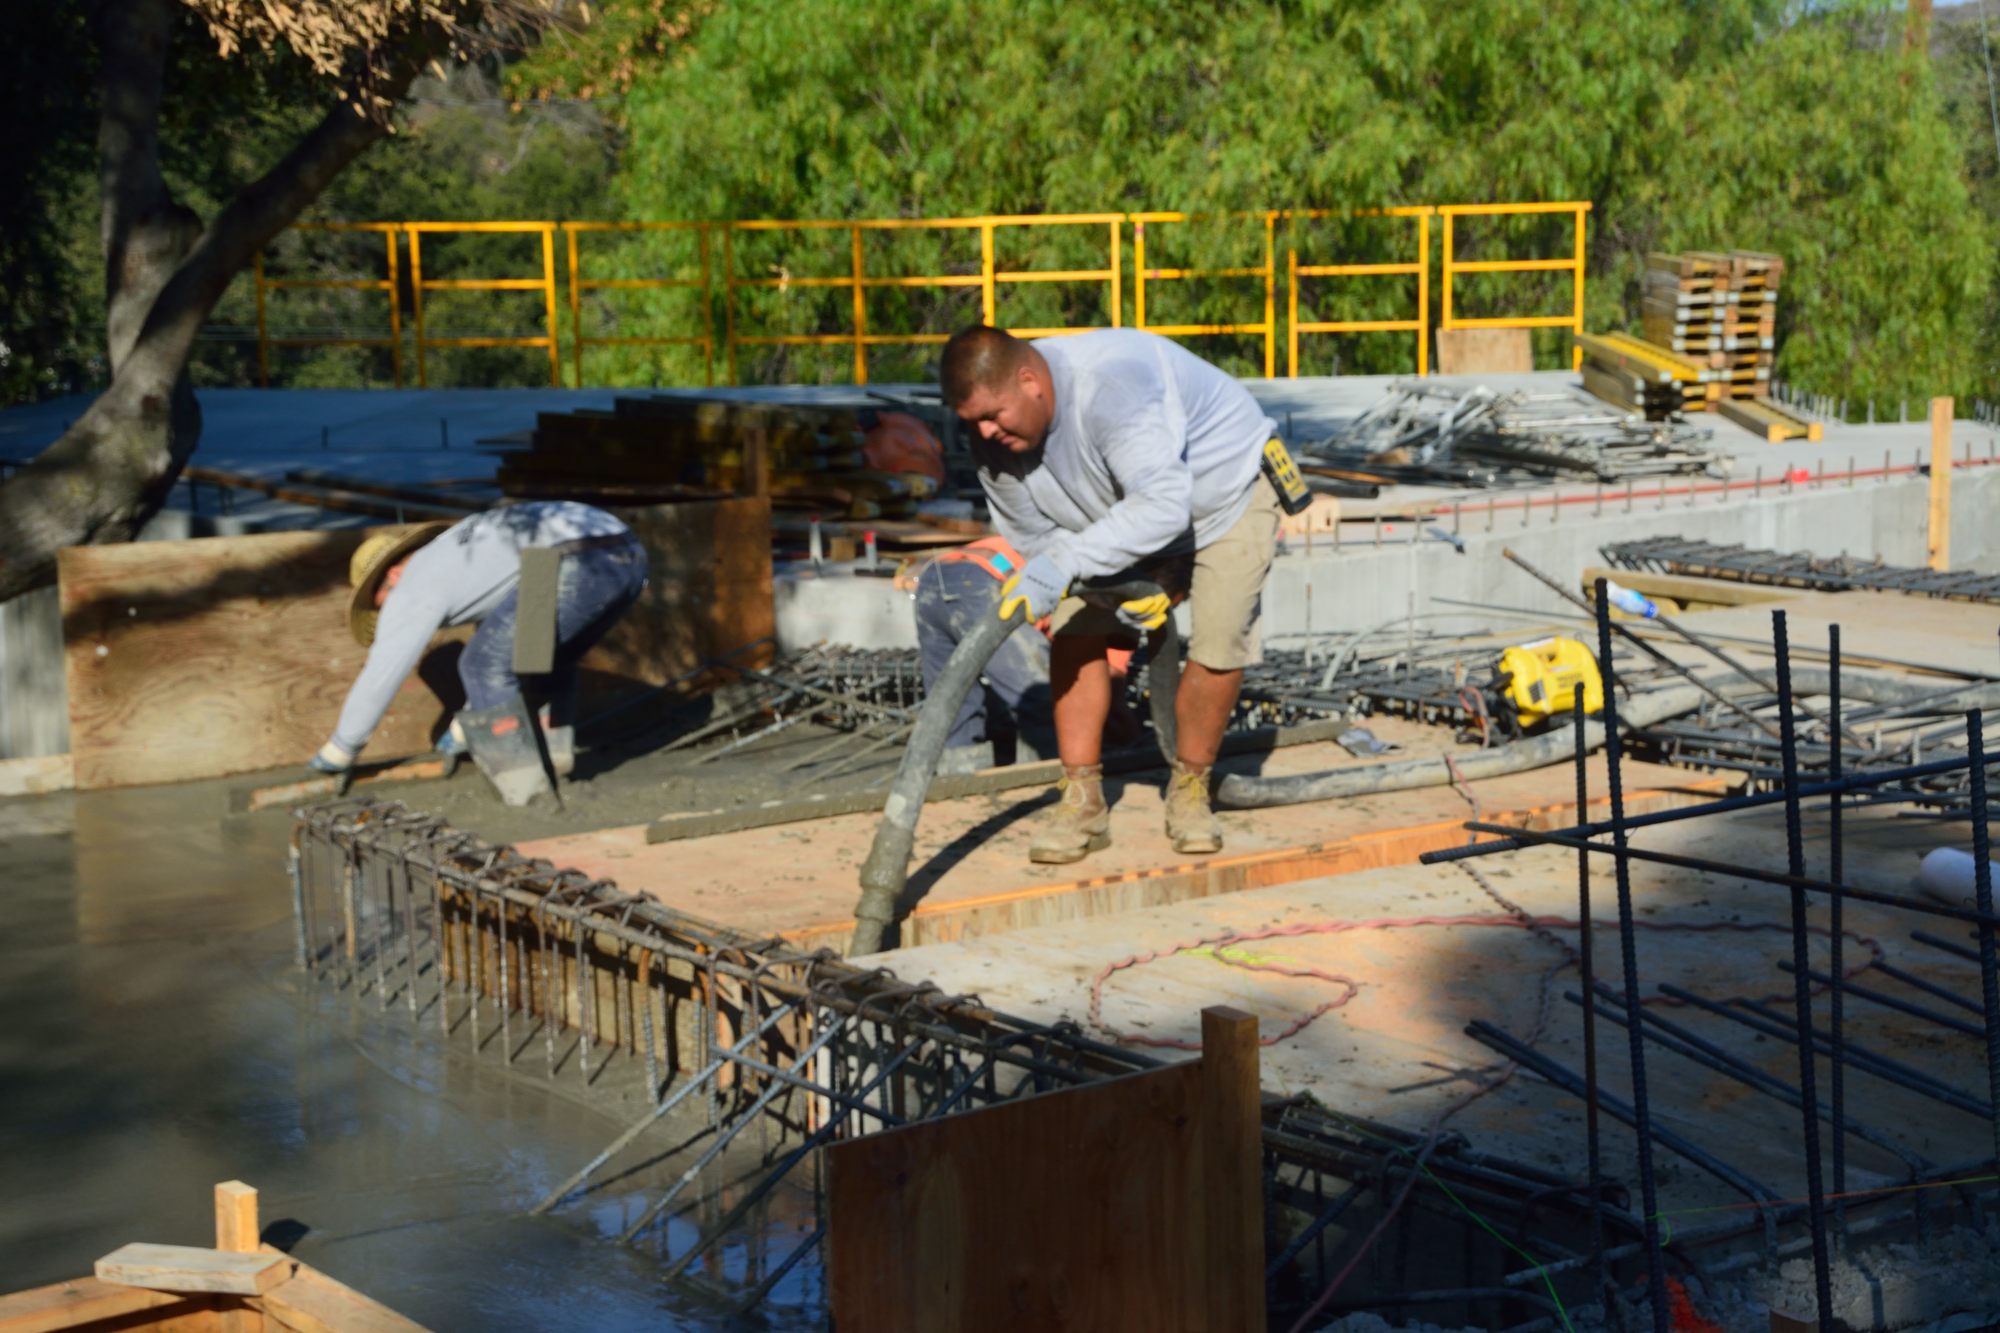
Picture 3 – The pump truck operator man-handling (literally) the tube carrying the concrete so that it fills one of the grade beams on the deck.
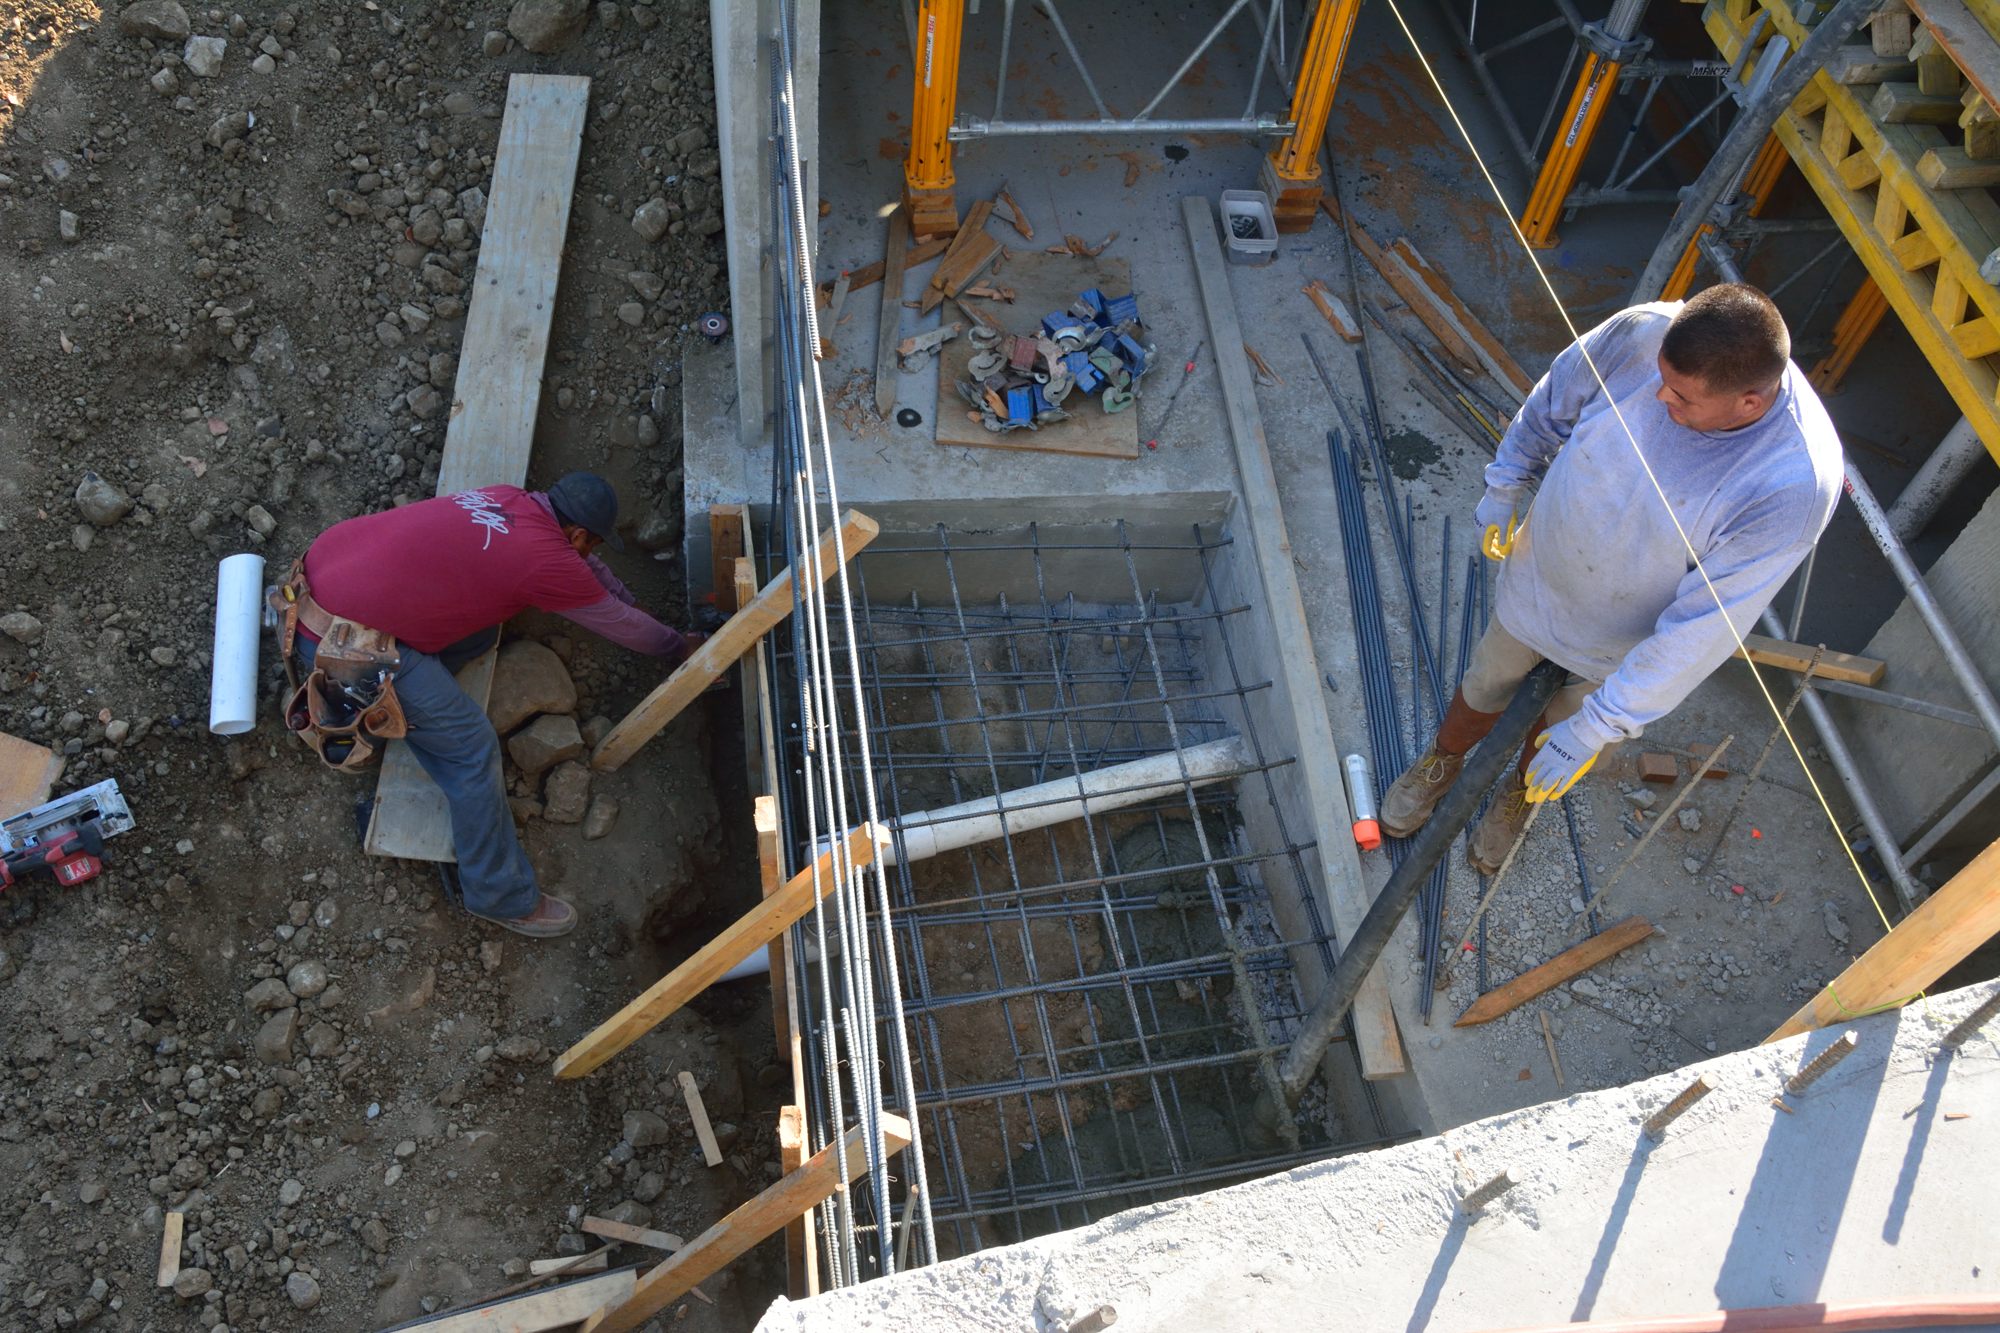
Picture 4 – Filling the void in the slab below the deck.
For this pour there were several places where they used a technique we had not seen before that let them avoid building extensive forms by using a little extra concrete in the foundation. Pictures 5 and 6 show one example of this. Because one of the buried ducts will run close to the foundation for which they have already excavated the trench, the dirt that would have formed one side of the foundation was missing. However, they poured the lower two-thirds of the concrete, waited half an hour for it to harden somewhat, and then poured additional concrete on top. In Picture 5, they are shoveling the concrete from the second pour that has spread out too far back into the area of the foundation. Picture 6 shows the finished result.
Picture 5 – Heaping up concrete, that was poured on top of partially hardened concrete, to make a foundation wall where dirt is missing on one side of the foundation.
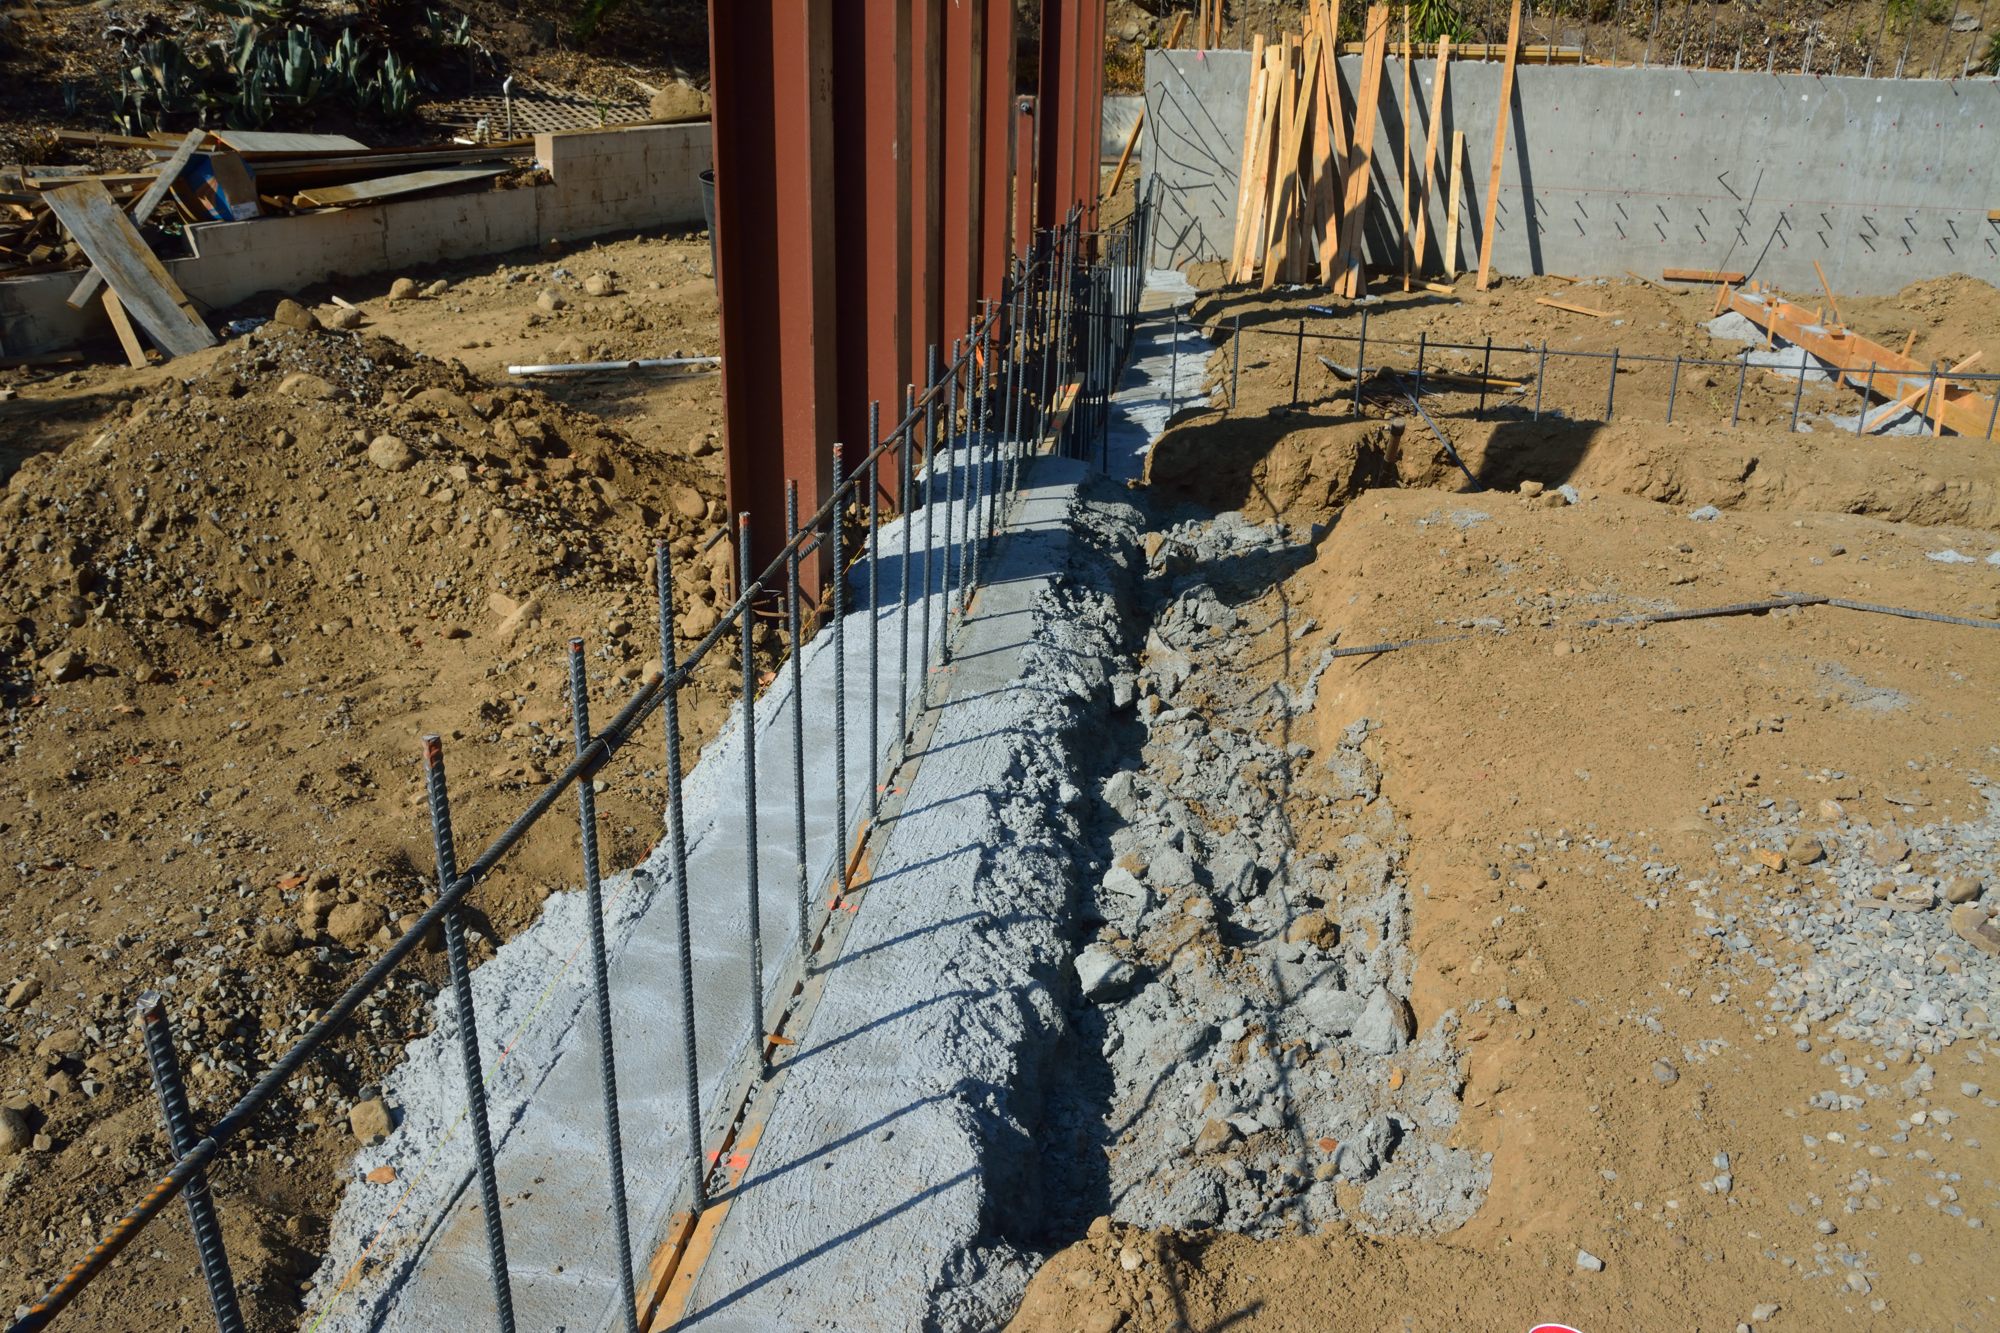
Picture 6 – The finished foundation wall. Note the missing dirt, which would have formed one side of this foundation wall, on the right.
Picture 7 and 8 show a similar process being applied to the pad that will support one of the steel, vertical posts in the center of the house. Picture 8 shows the result. The bottom half of the pad was first poured and allowed to partially harden. The second pour, 30 minutes later, filled in the form, but also spread out somewhat below it.
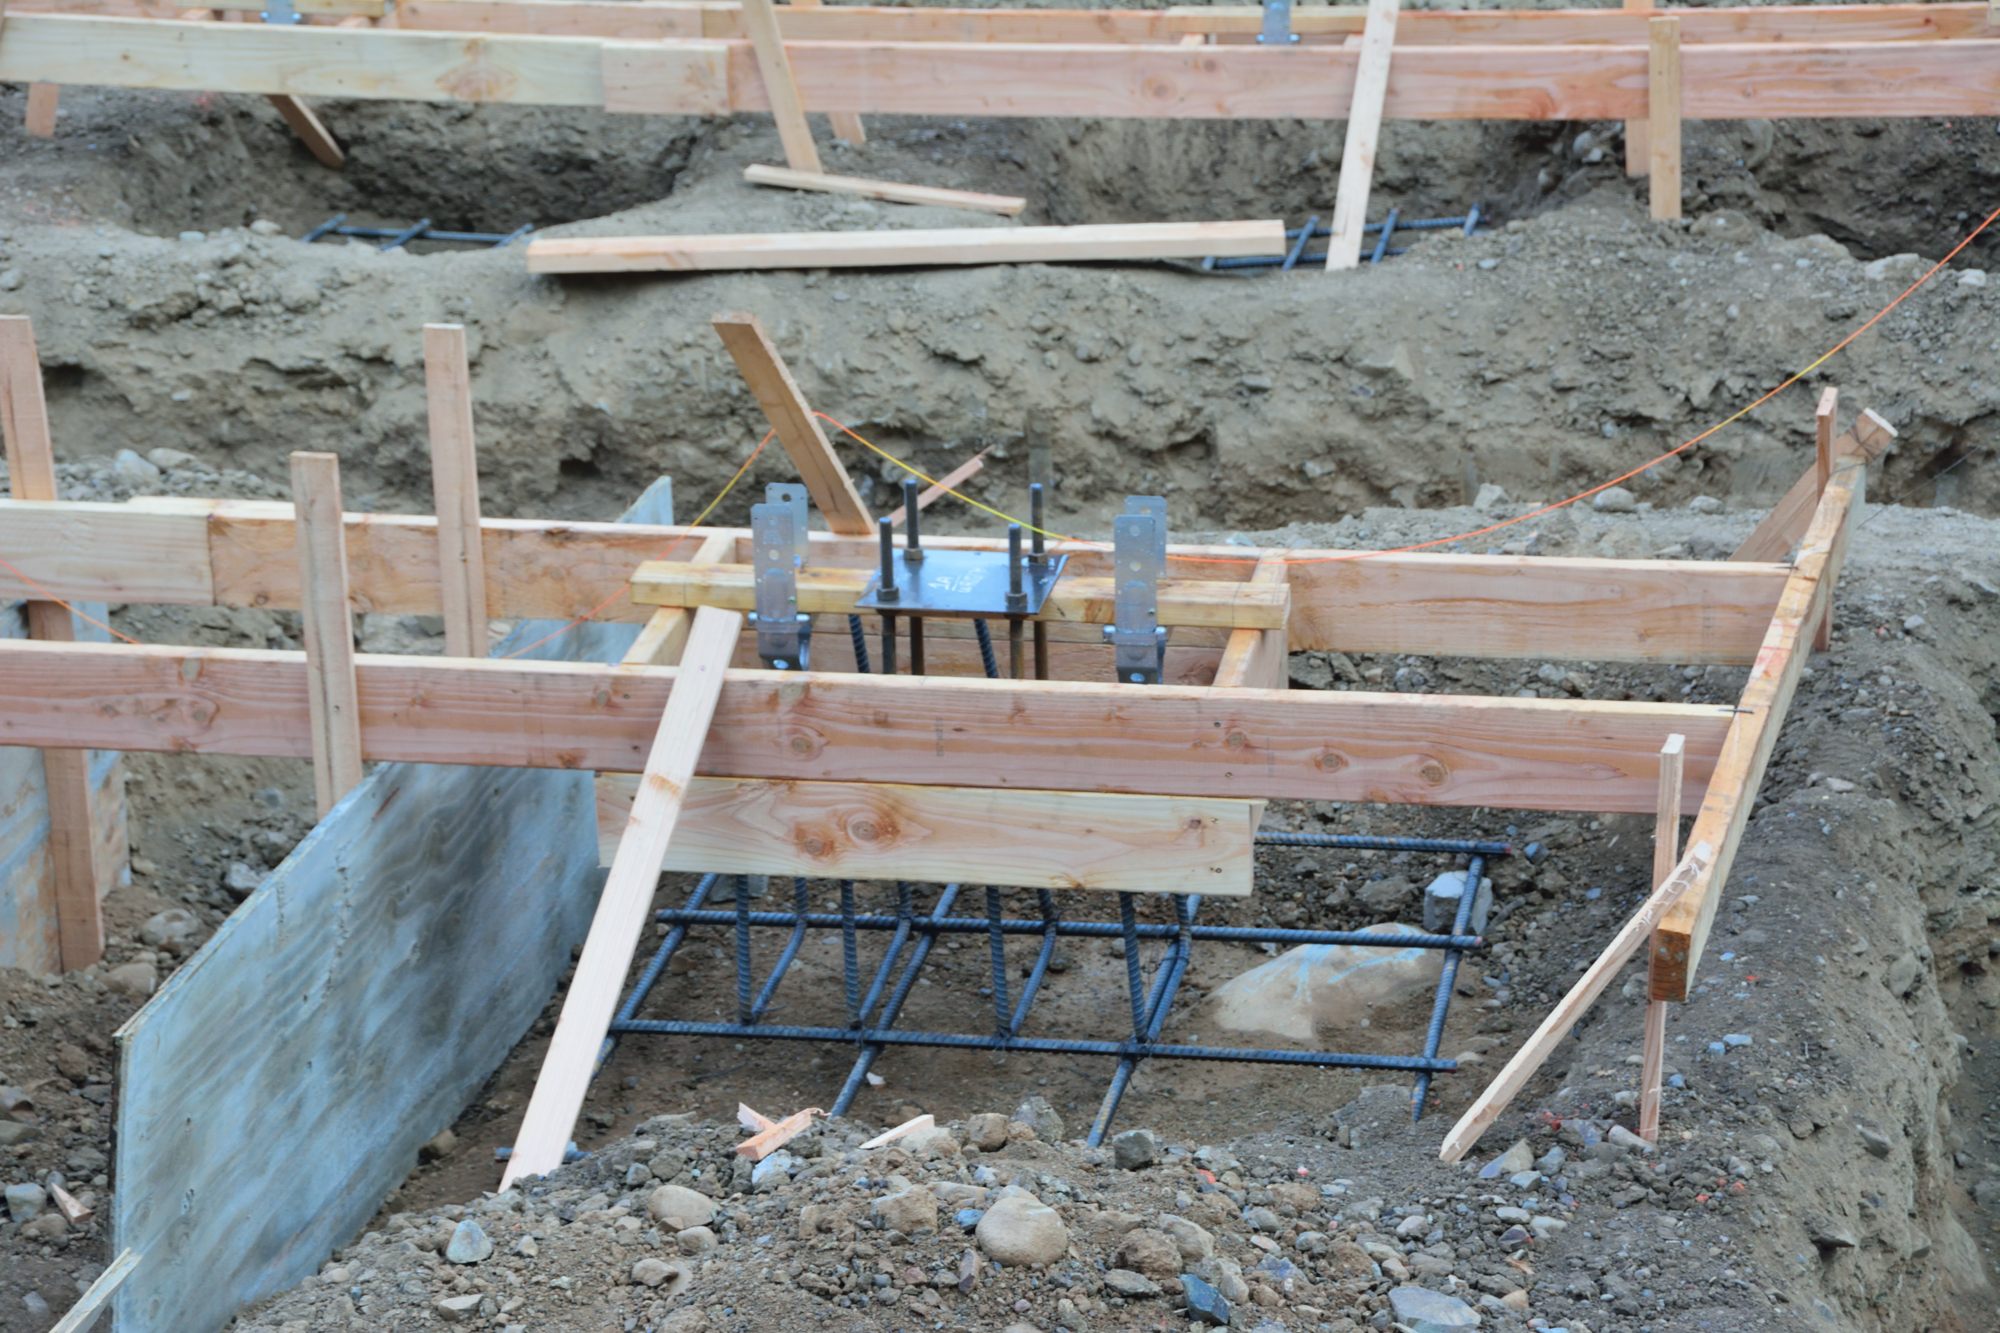
Picture 7 – Pad for a steel post. Note how they have only used forms on the top of the pad.
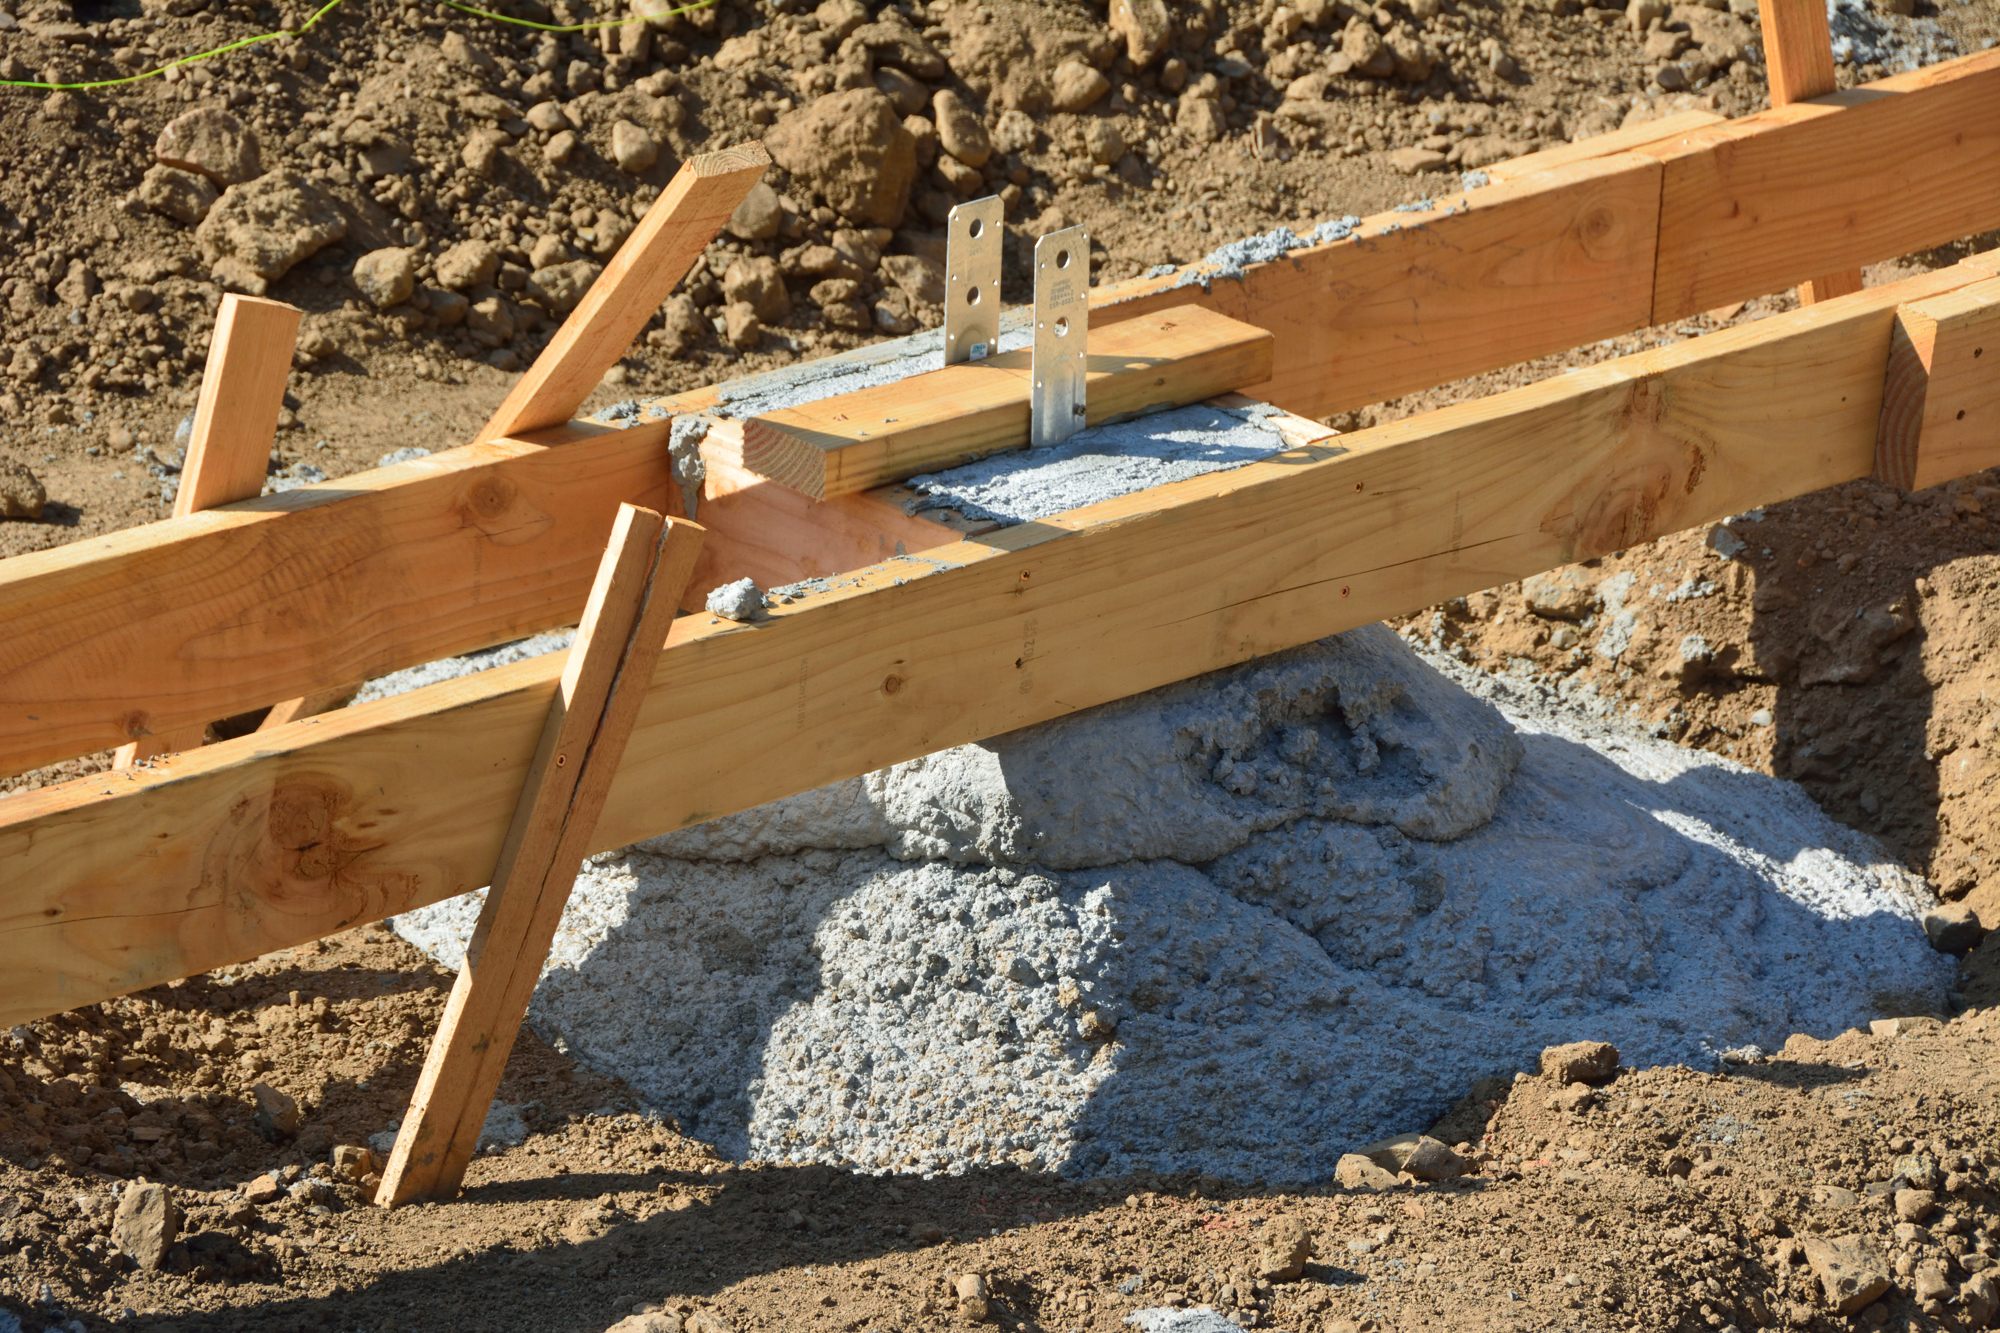
Picture 8 – the finished pad to support a steel post.
Picture 9 is a view of all of the new concrete from above, in the backyard. With the foundations in place, this view gives a much better sense of the scope and layout of the house, deck, and garage apartment.

Picture 9 — the house site from above.
The crew surprised us by coming back on Saturday to clear out the scaffolding from the garage and the garage apartment. In picture 10 you can see the front of the garage and the windows of the apartment above it, much more clearly. Picture 11 shows the space that will be the living room. Straight ahead is a wonderful, large window with a tree0filled view looking out over the orchard. To the right is the glass wall that will open onto a small deck and provide another great view.
Picture 12 is the space that will be the bedroom with its large, floor-to-ceiling window looking out onto a pepper tree on the driveway.
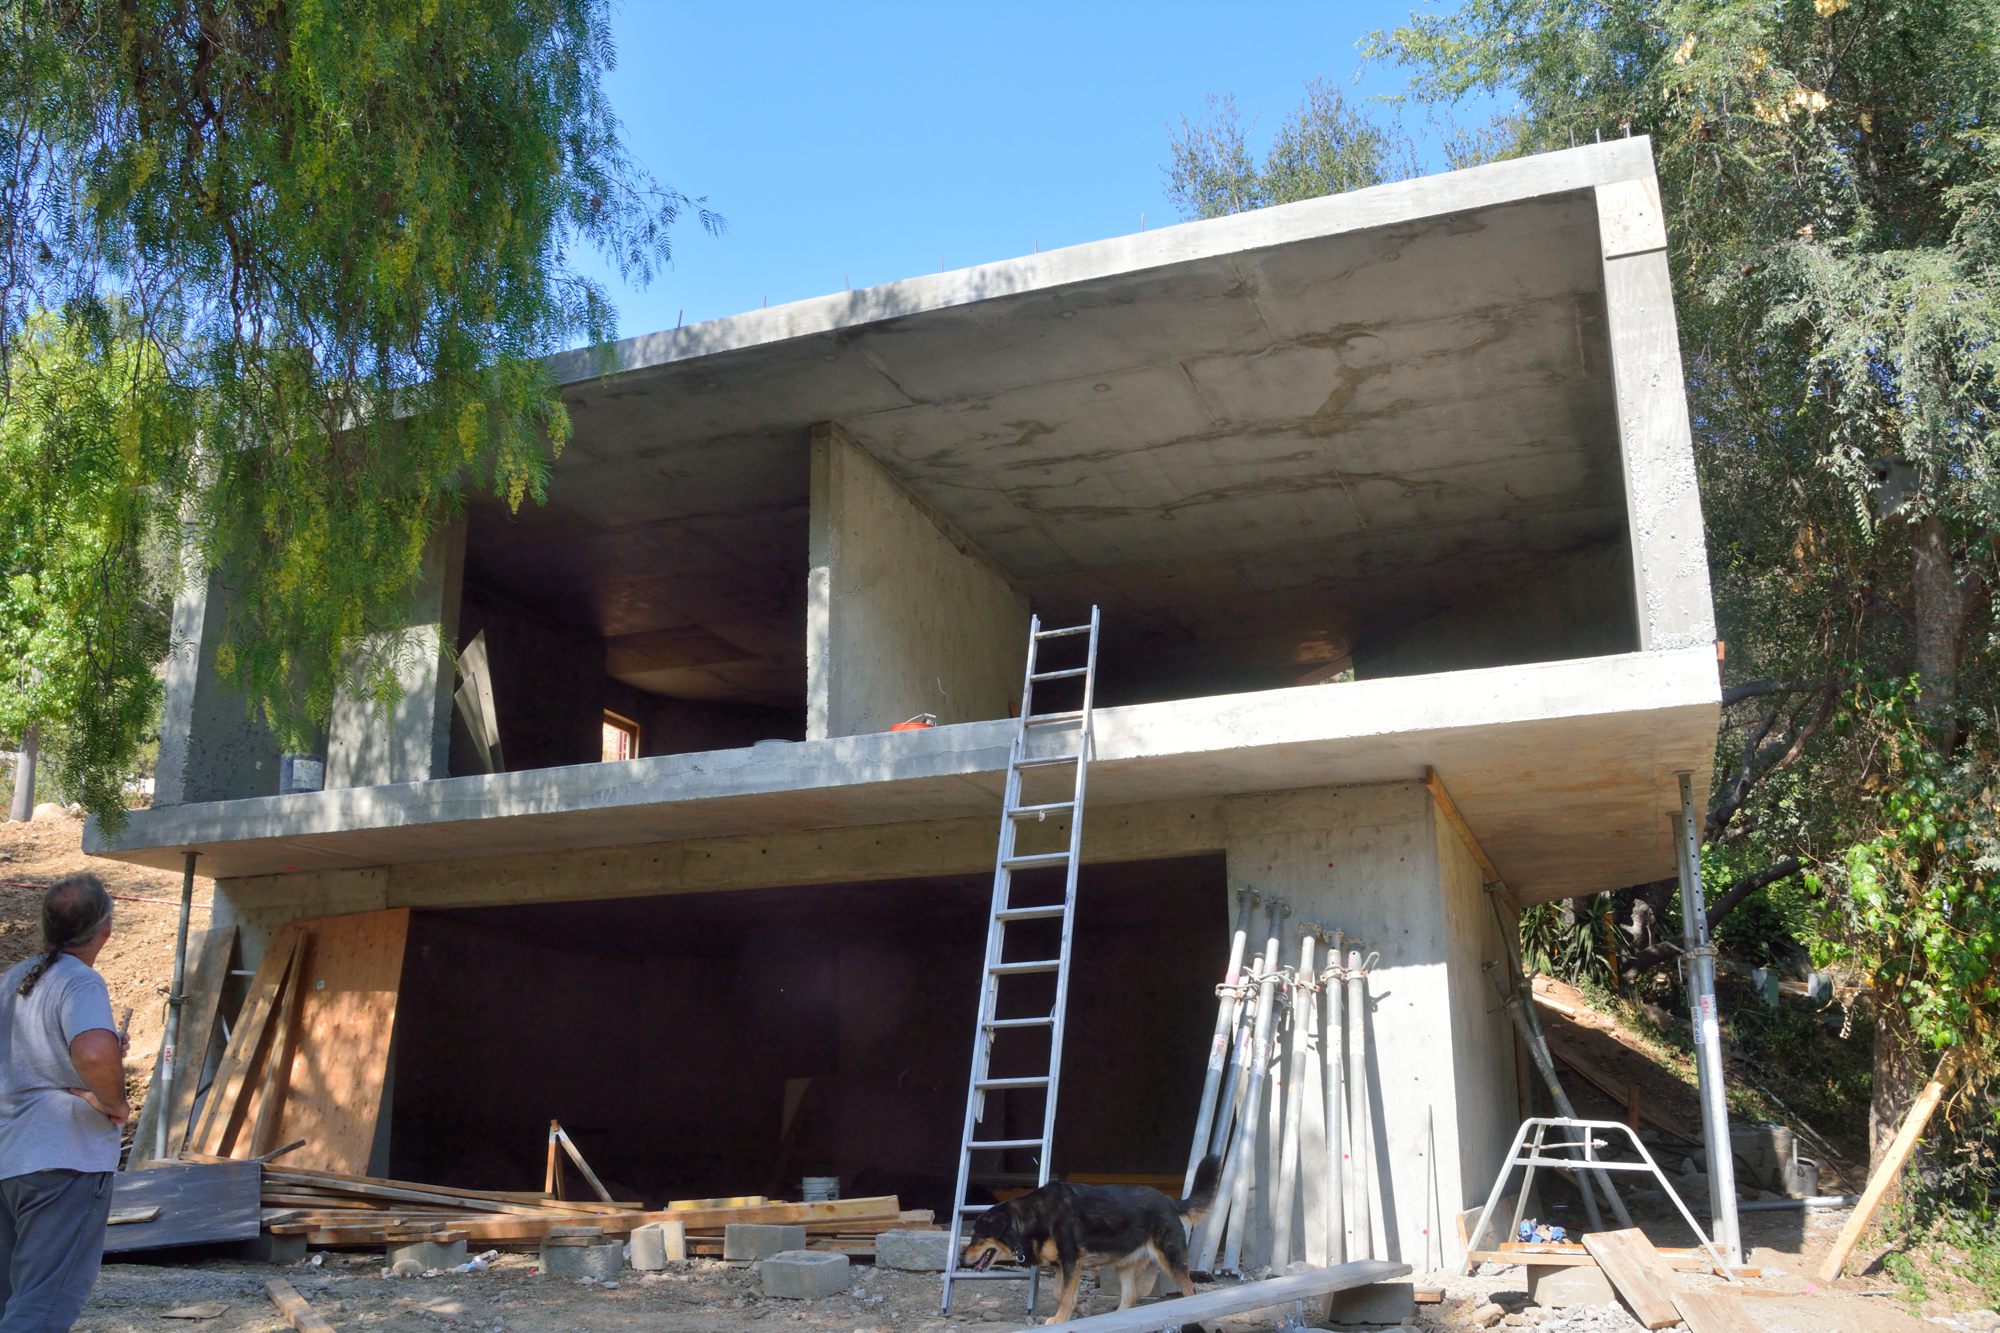
Picture 10 – Front of the garage/apartment without the scaffolding.
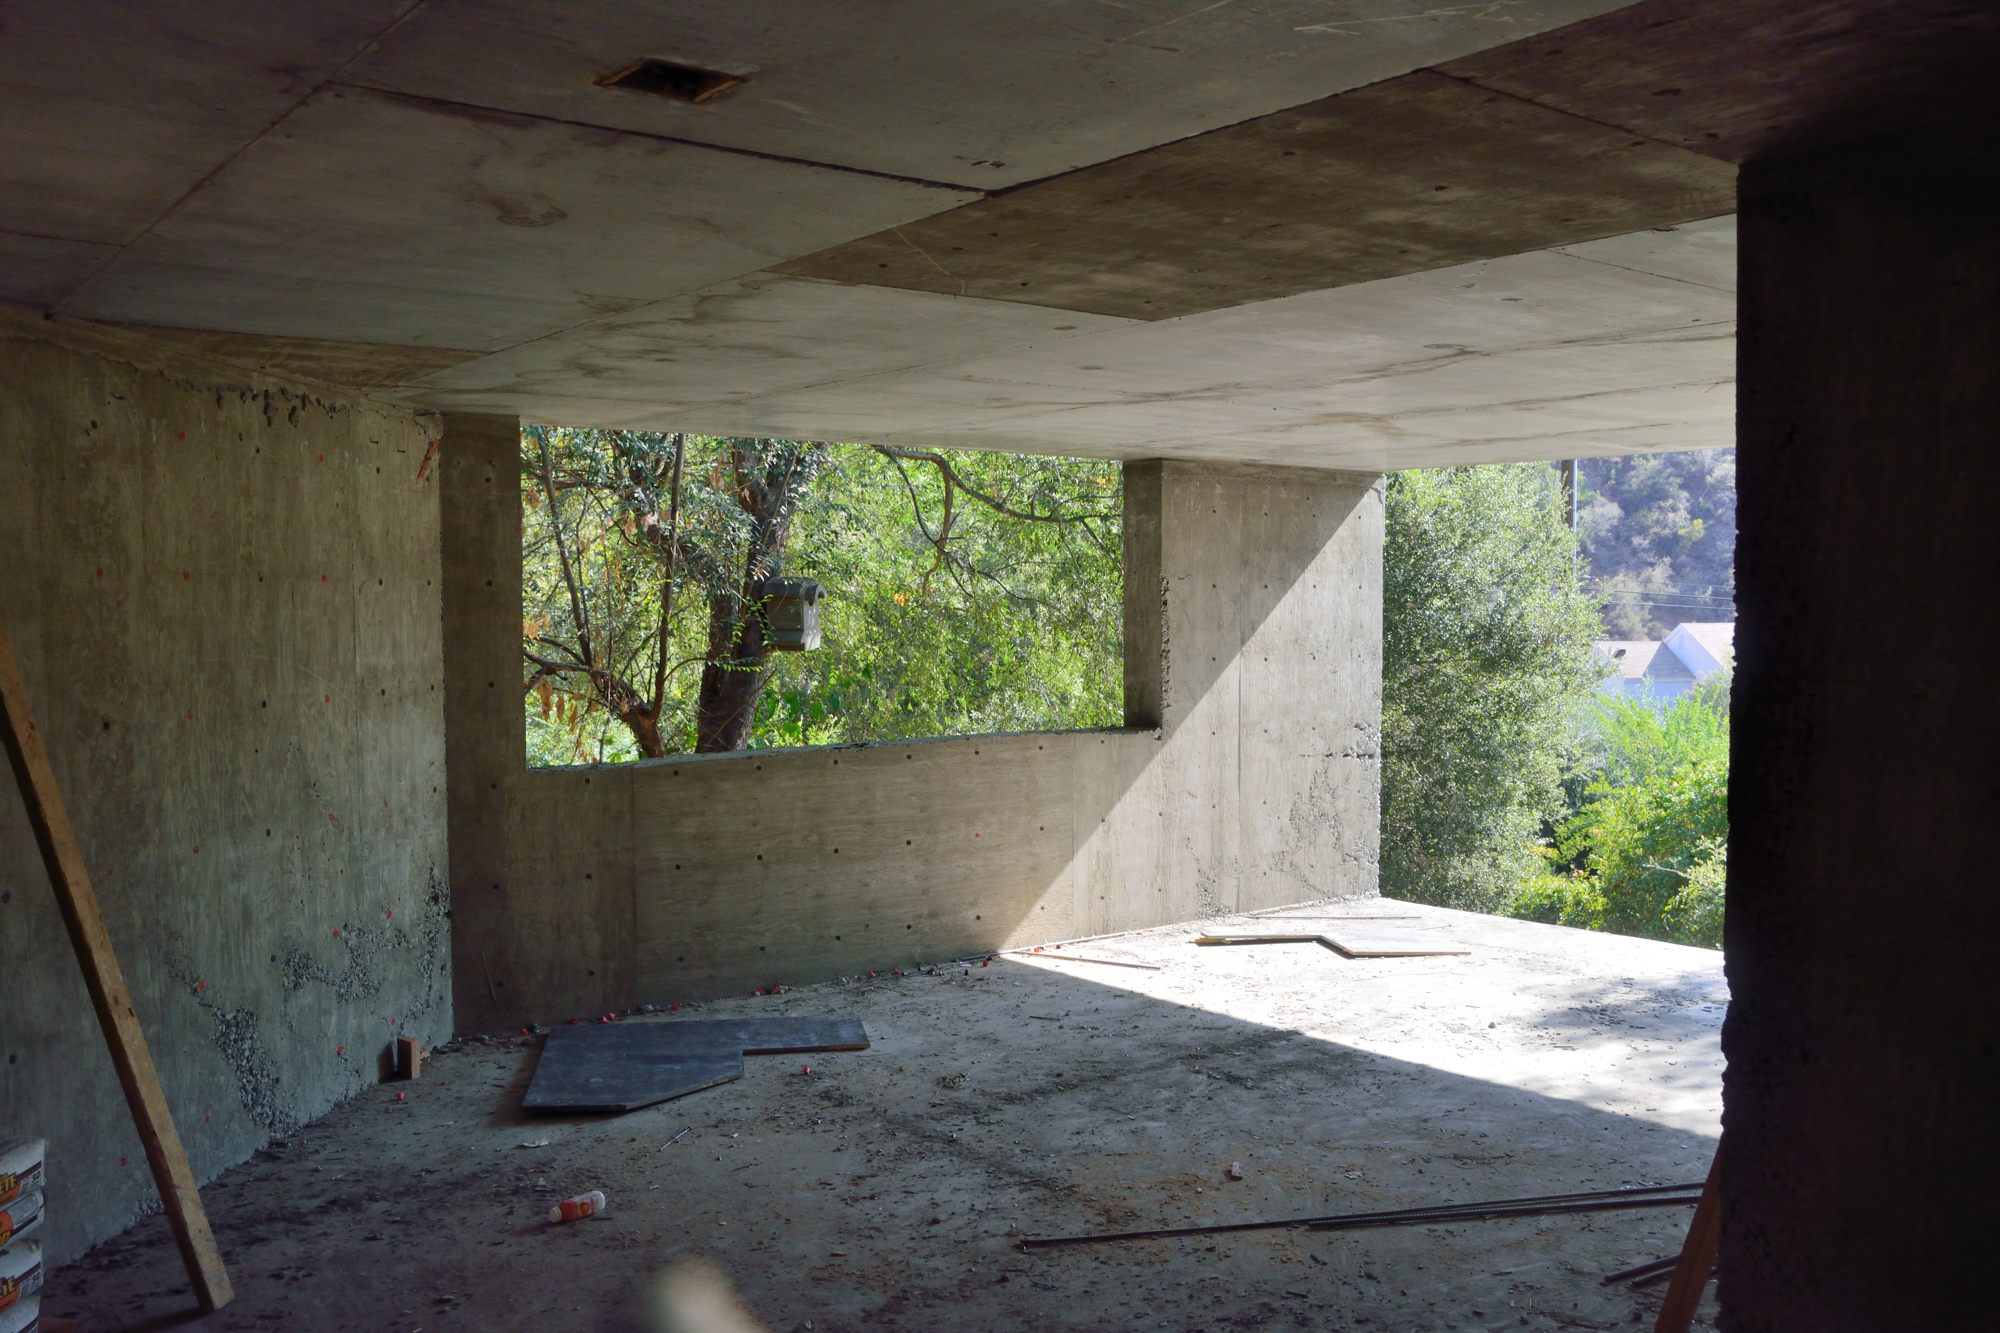
Picture 11- Apartment living room.
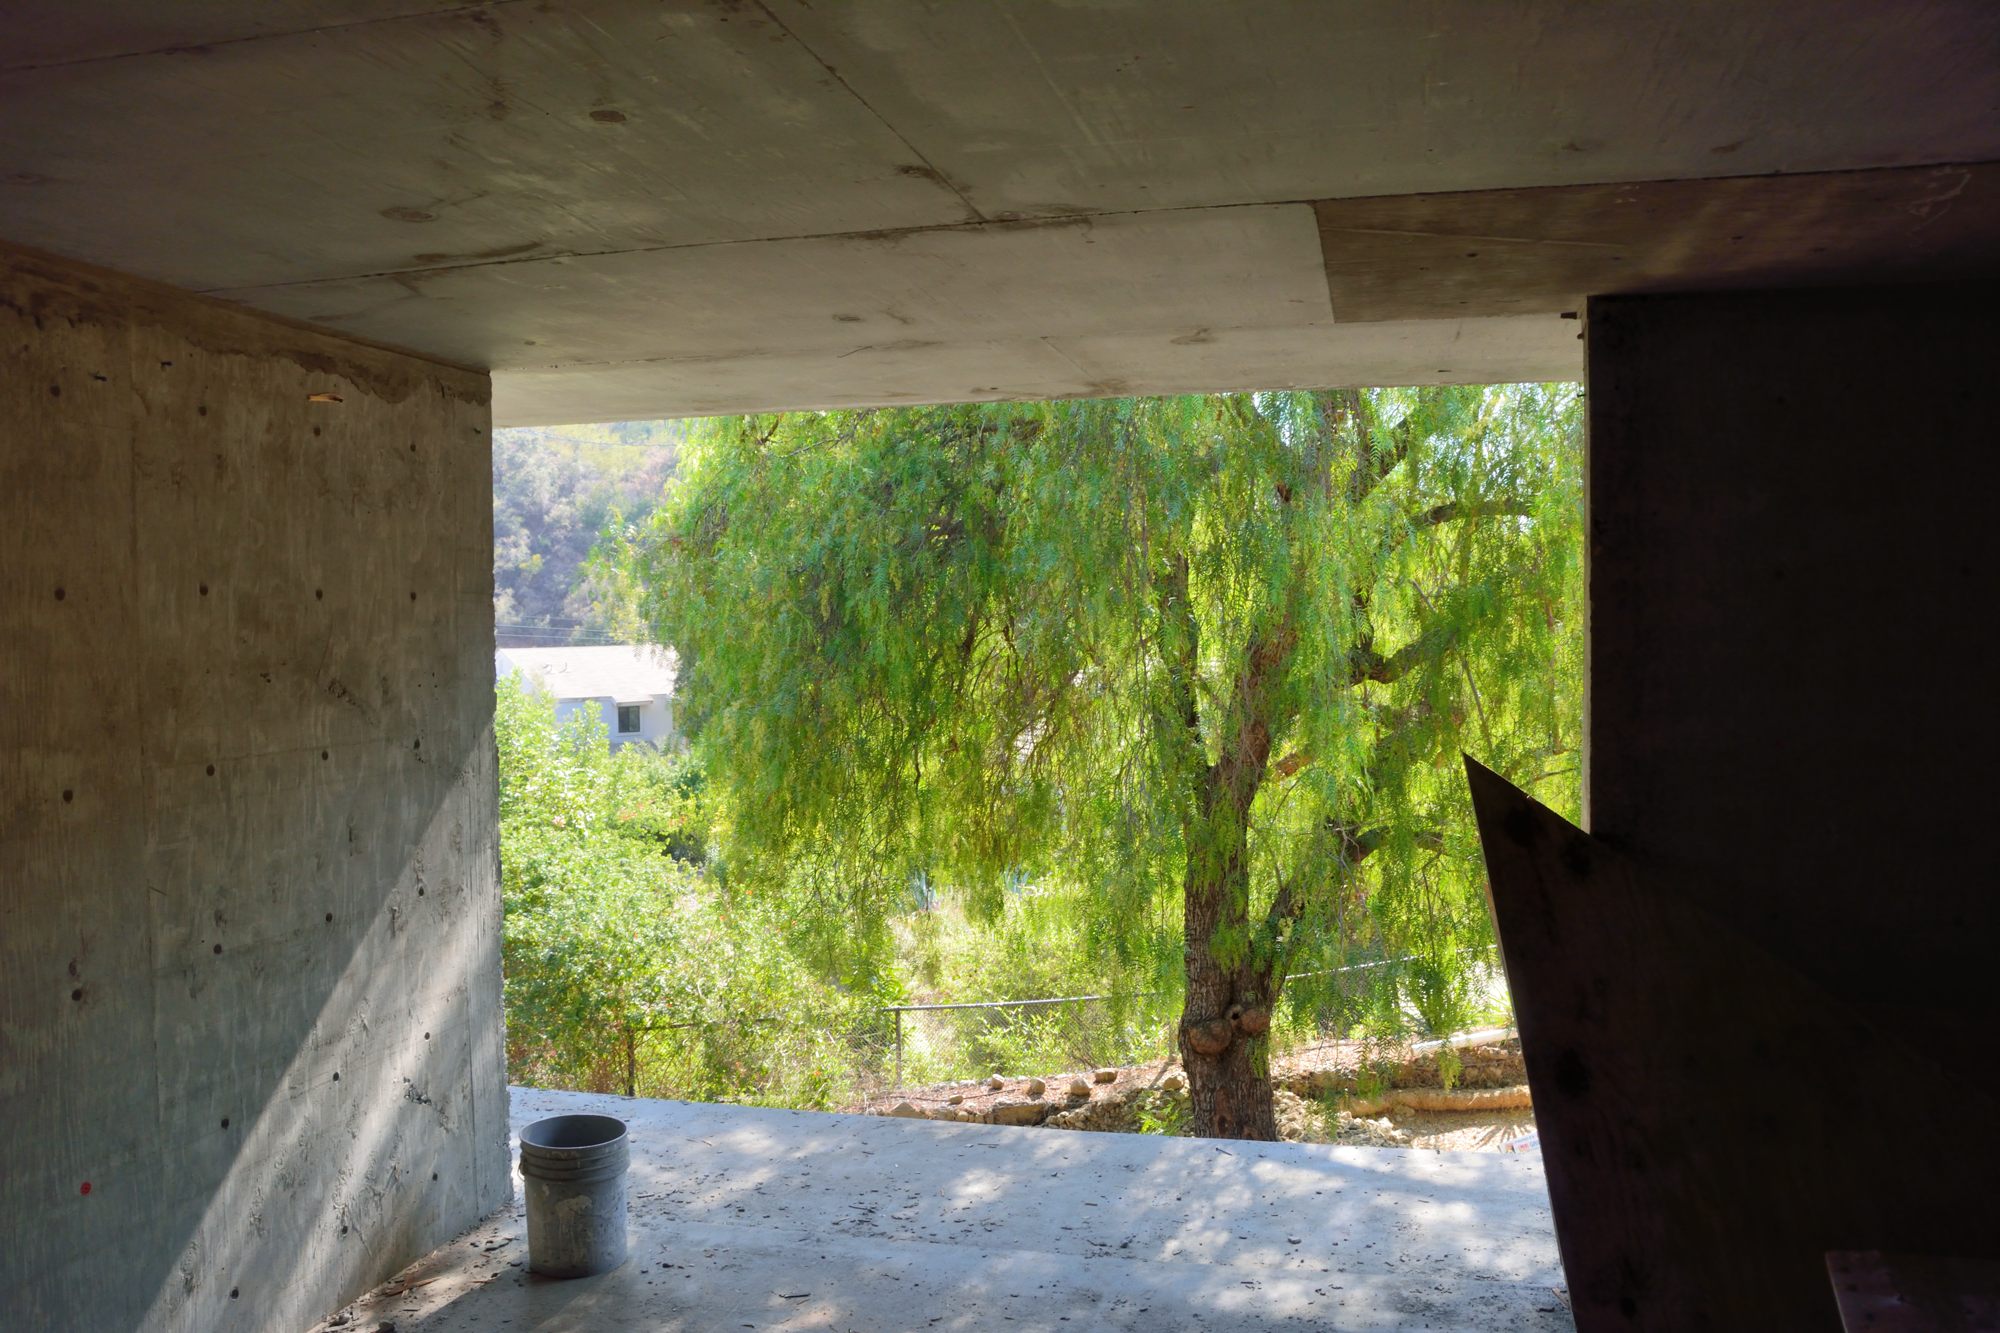
Picture 12 – View from the apartment bedroom.