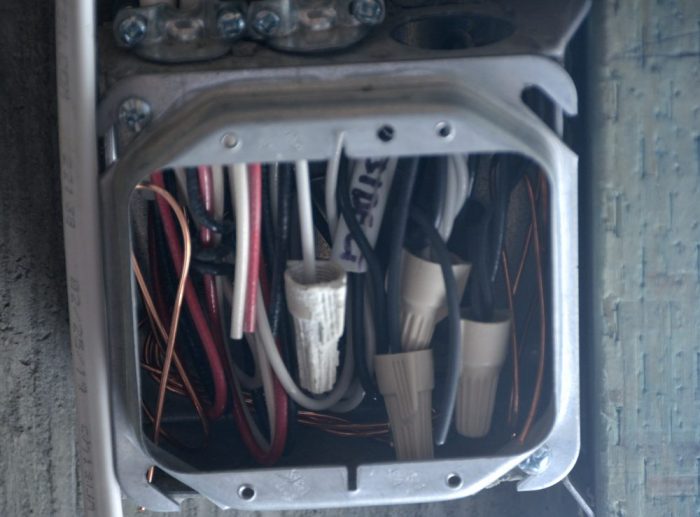
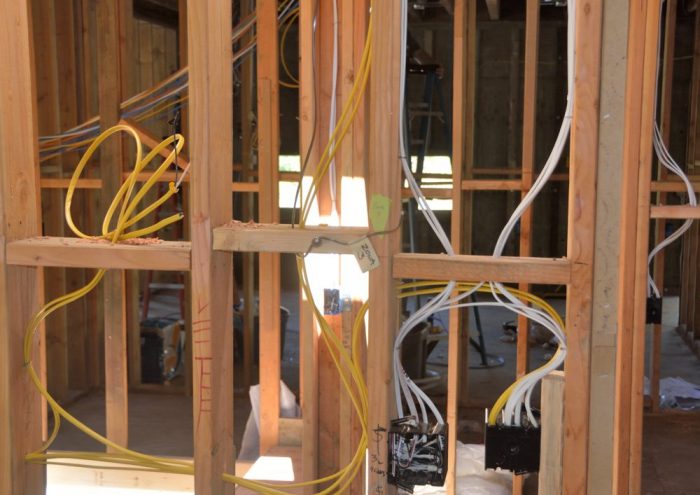
With the delivery date of the windows and doors approaching, there has been some increased urgency to finish the work on the rough plumbing, wiring, and HVAC that can be done in a structure without doors and windows. Picture 1 shows how the electricians have made progress connecting the wiring into the utility boxes. Having done some electrical wiring himself, Ted looks at boxes like those in Picture 2 and just shudders. Because this is on one of the outside concrete walls, the box is only 1.5″ deep not the usual 3″. With all of these wires (and their associated wire nuts) it is hard to see how the actual switches can be shoehorned into this box! I guess that is why we have pros on the job.
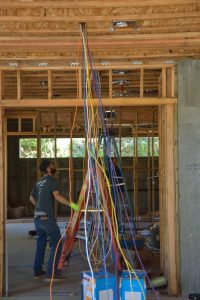
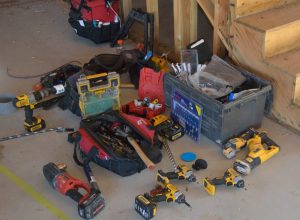
A separate crew does the low-voltage wiring that will be used for the Internet, speakers, TV, and panels to control these things as well as some of the lights. Picture 3 shows them pulling a spaghetti like mass of these wires that are just for the great room. Picture 4 shows the plethora of tools that they use — this doesn’t include the ones they were using at the time.

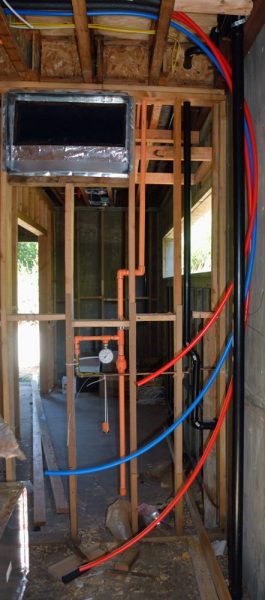
Picture 5 shows the supply (red and blue) and waste lines for the two sinks in the master bathroom. The supply lines are made of PEX, which we have not used before in a house. However, PEX (or crosslinked polyethylene) has several advantages for water supply piping over metal pipe (copper, iron) or rigid plastic pipe (PVC, CPVC, ABS) systems. It is flexible, resistant to scale and chlorine, doesn’t corrode or develop pinholes, is faster to install than metal or rigid plastic, and has fewer connections and fittings. It can also be color coded. Notice however, where the pipes come out of the wall into what will be the under-counter cabinet, they are changed to copper.
Picture 6 shows the piping entering the utility room where there will be a filter system as well as the water heater. The supply from the street will eventually also be run into this space. Because all the domestic water must goes through the filter that will be here, these PEX pipes are much larger. Notice also the gauge and shutoff for the interior, fire-sprinkler system in the wall at the back.
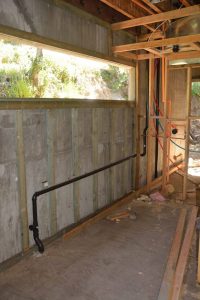
Probably the biggest challenge that the plumbers faced was finding ways to connect and route the vent pipes required for all of the drain lines. Picture 7 shows one example of these contortions for the clothes washer drain in the laundry room. The drain itself can simply go straight down into the crawl space below the floor, but the vent had to be run across the wall under the window until it reached a place where it could run up to join other vents going to the roof.
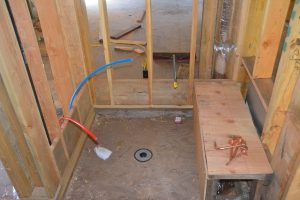
Pictures 8 and 9 show the shower and tub in the upstairs guest bath.

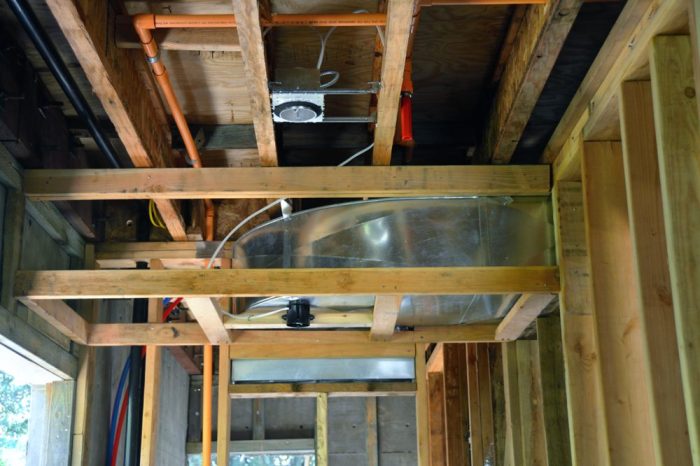
The framers seem to return every several days to rearrange or add framing. This probably reflects the status of this as a “custom” house, where much of the detailed design is getting done as the house is built. Of course one of the big challenges is that, originally, we were not going to have duct work for vents, because the heating and cooling was to have been done by hydronic panels in the ceiling using water (running through PEX piping) rather than forced air.
Picture 10 shows the soffit that the framers constructed to enclose the return air vent in the ceiling of the laundry room. Picture 11 shows another soffit that was needed in the upstairs TV/storage room to accommodate the supply duct.
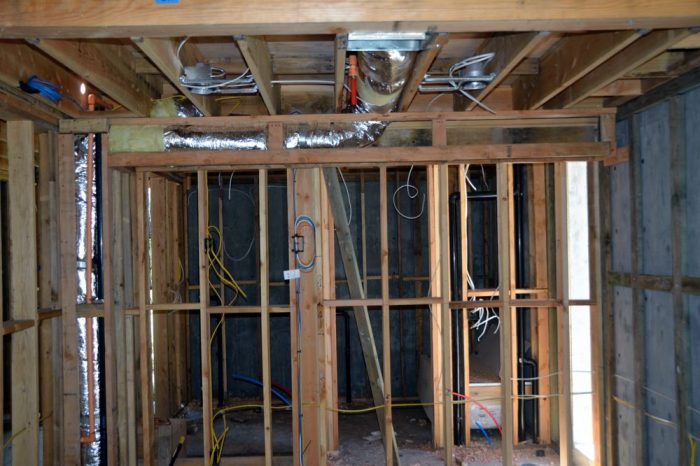
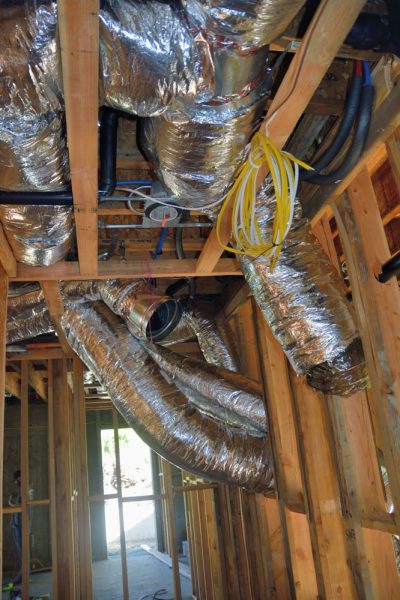
Picture 12 shows that, even with the newly dropped ceiling in our master closet, it is not quite clear where all the ducts that need to get to the utility room are going to fit.
Last but not least, there is finally starting to be progress on the retaining wall that needs to go at the back of the house and the debris-diversion wall that is needed in the backyard above the house. After Ted had been urging the start of this work all fall, they were ready to start work in January when the rains started in what would be one of our wettest winters in a long time. Now, however, they need to get this work done before they can put in the scaffolding that needs to go up before the installation of the windows and doors, so there is a new urgency.
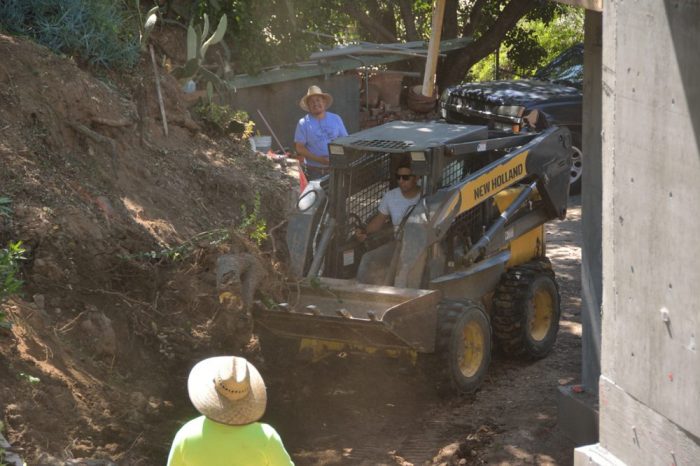
Picture 13, shows Bruce, the surveyor, laying out the line for the debris wall. Ted would love to be able to use his fancy surveying equipment for a day or two. Using GPS it allows one person to do things that it used to take at least 2 people much longer to do. Picture 14 shows the earth mover clearing the area for the retaining wall behind the house.